Power BI Tutorial - Sharing Power BI Work
Posted by Superadmin on August 21 2020 08:36:54
Sharing Power BI Work
This Power Bi tutorial section covers the sharing of Work. I means, sharing reports, Dashboards, apps, Workspaces etc.
- Share a Dashboard
- Share a Report
- Sharing Workspace
- Publish App
- View Published App
- Edit App
Share Power BI Dashboard
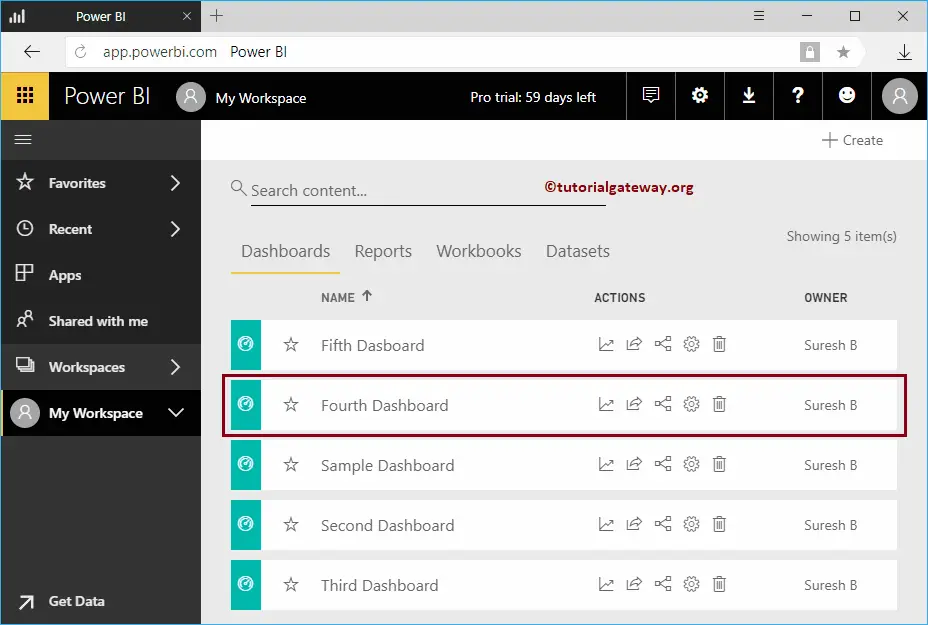
Let me show you the step by step approach to share Power BI dashboard across your organization with a practical example. Before we start sharing the Power BI dashboard, let me show you the existing dashboards in my Power BI workspace.
To view them, please click on the Power BI My Workspace, and then go to the dashboards tab. As you can see from the screenshot below, currently there are five dashboards in my workspace.
In this example, we share the Fourth Dashboard. Let me click on the dashboard to see the visuals on it.
How to Share Power BI Dashboard
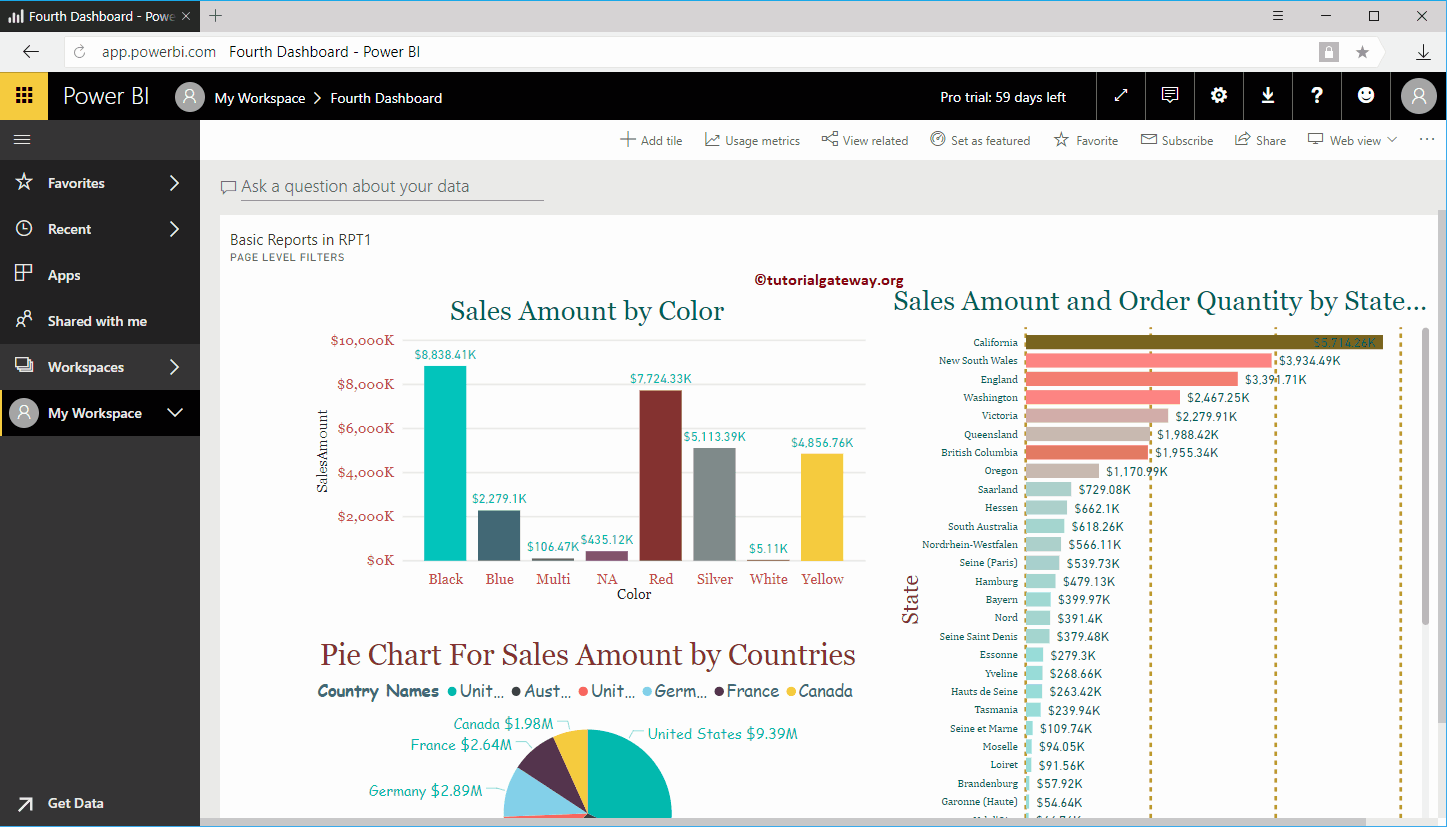
From the below My workspace screenshot, you can see the visuals available on this dashboard.
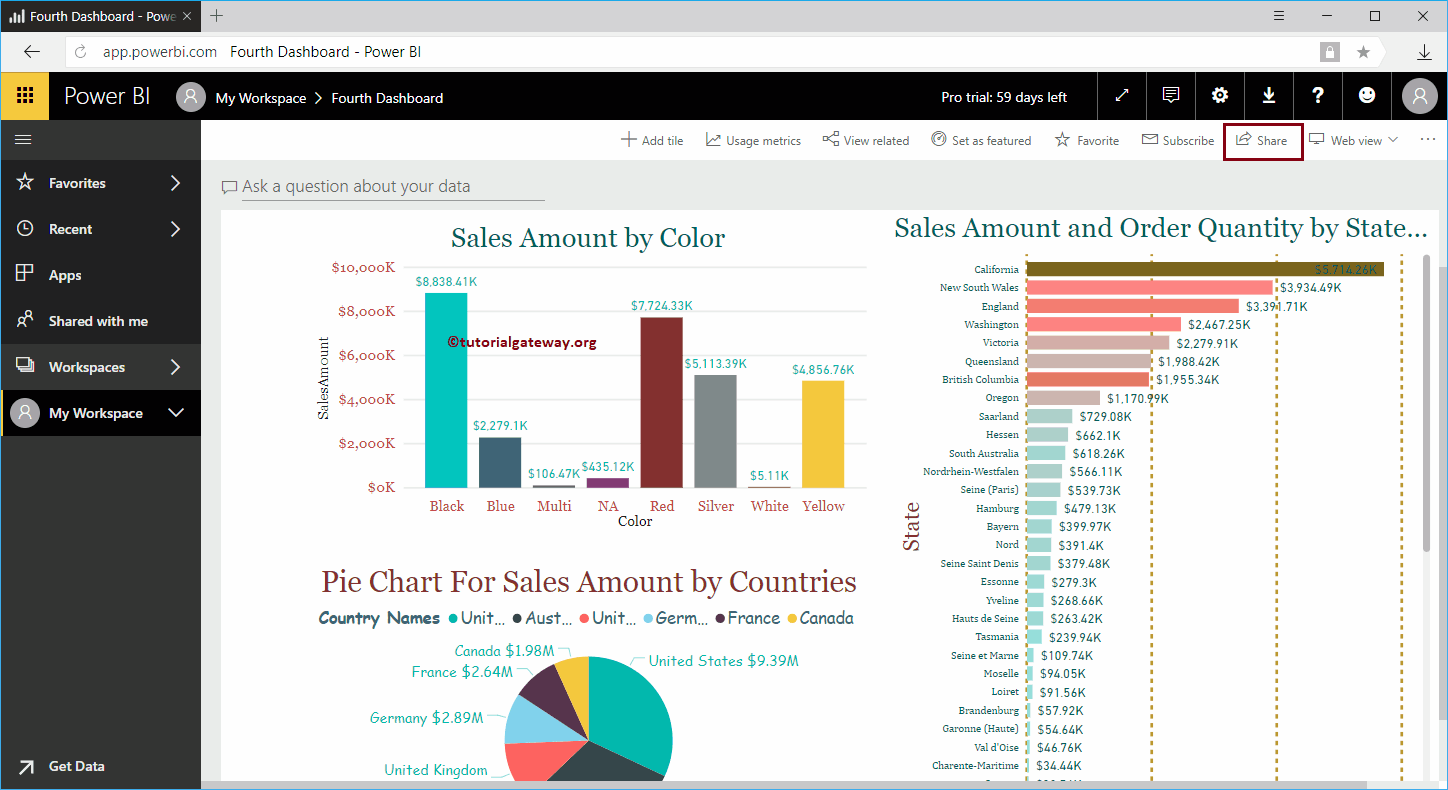
In order to share this Power BI dashboard, click on the Share button on the top right side, as we showed below.
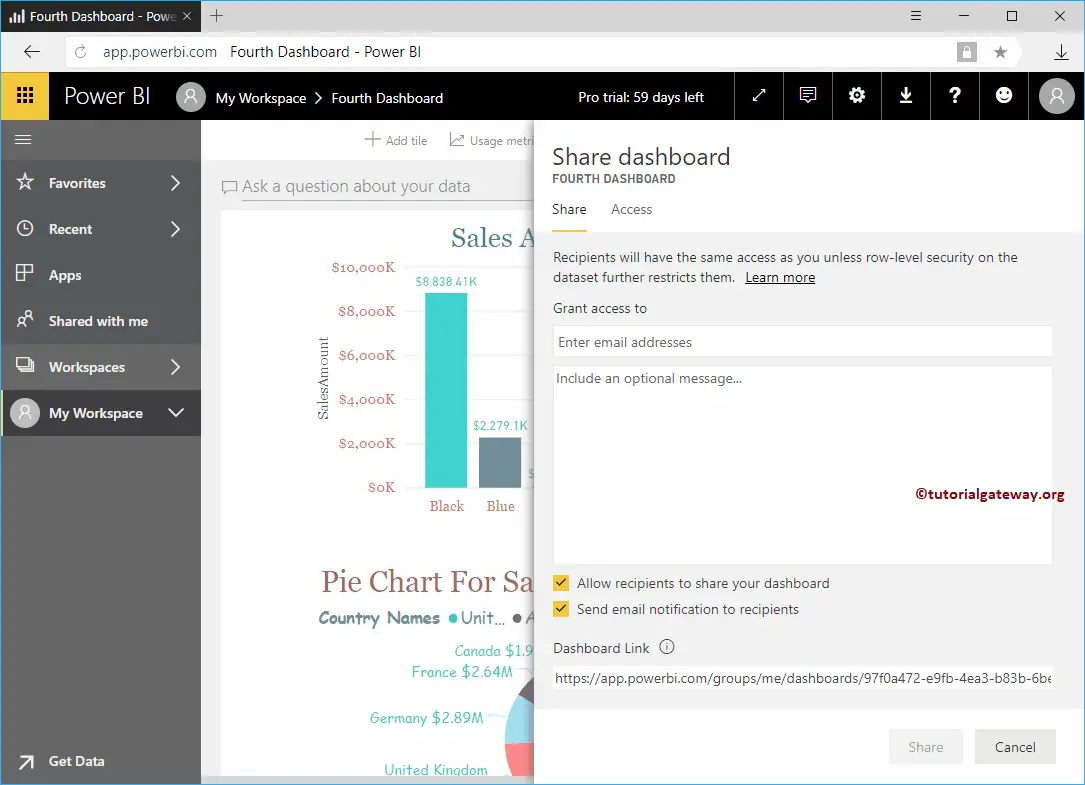
Clicking the Share button opens the Share Dashboard window.
- Grant To: Please provide the Email Ids to whom you want to share this dashboard.
- Optional Message: You can write a Custom Message
- Allow recipient to share your dashboard: This allows the recipient to share this dashboard to other people in his team.
- Send Email Notification to the recipient: Sends an email about this report.
- Dashboard Link: This is the actual link of this Power BI dashboard.
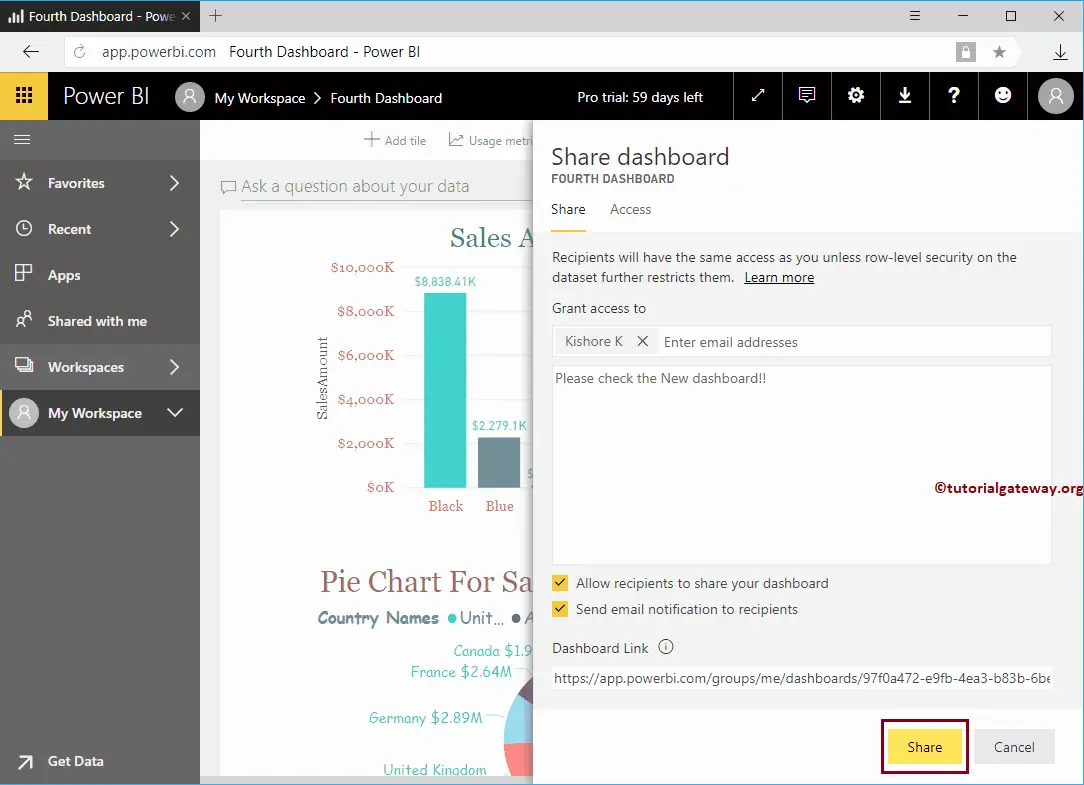
Let me share this report with Kishore, who is working in the same organization
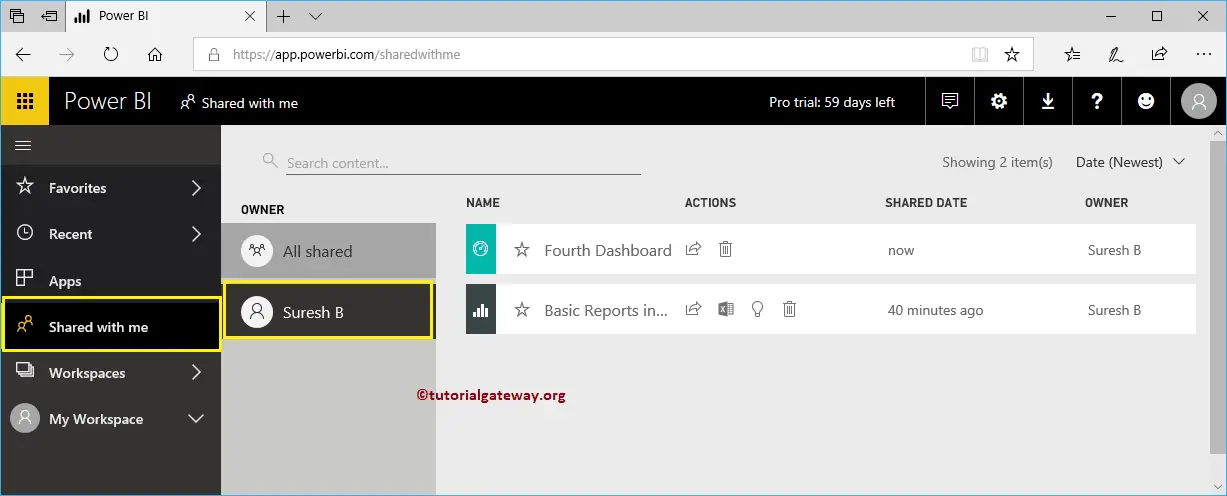
Let me open the Power BI service with the Kishore account. Under the Shared With Me tab, you can see the dashboard that was shared by Suresh.
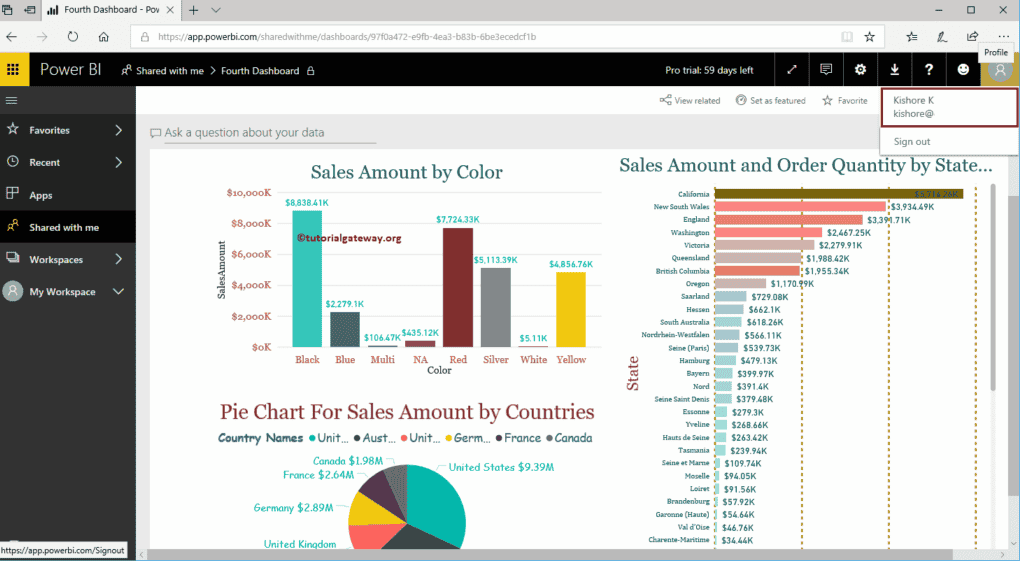
Let me show you the profile to confirm that I logged in as Kishore.
Share a Report in Power BI
In this article, we show you the step by step approach to share a report in Power BI across your organization with a practical example. Before we start sharing Power BI reports, let me show you the existing reports in my Power BI workspace.
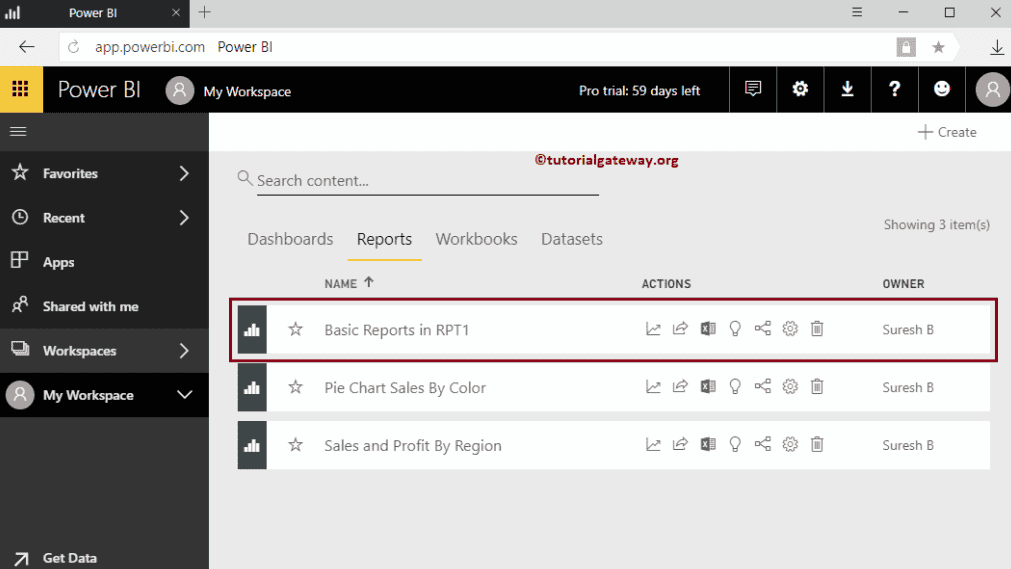
To view them, please click on the Power BI My Workspace, and then go to the Reports tab. As you can see from the screenshot below, currently there are three reports in my Workspace.
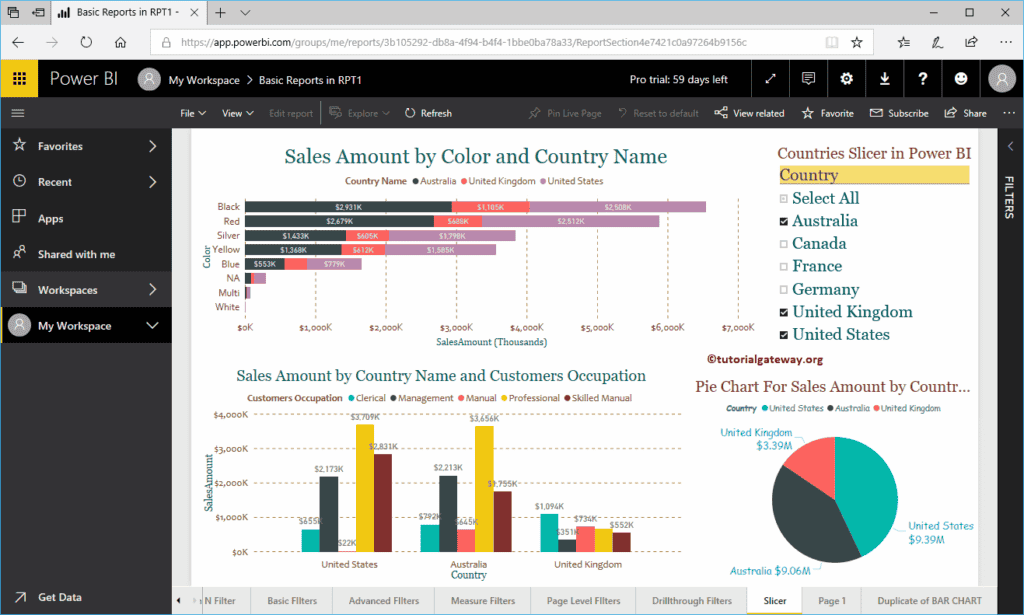
In this Share a Report in Power BI example, we share the Basic Reports in the RPT1 report. Let me open the report to see the visuals in it.
How to Share a Report in Power BI
As you can see from the workspace screenshot below, there are 22 pages in this report.
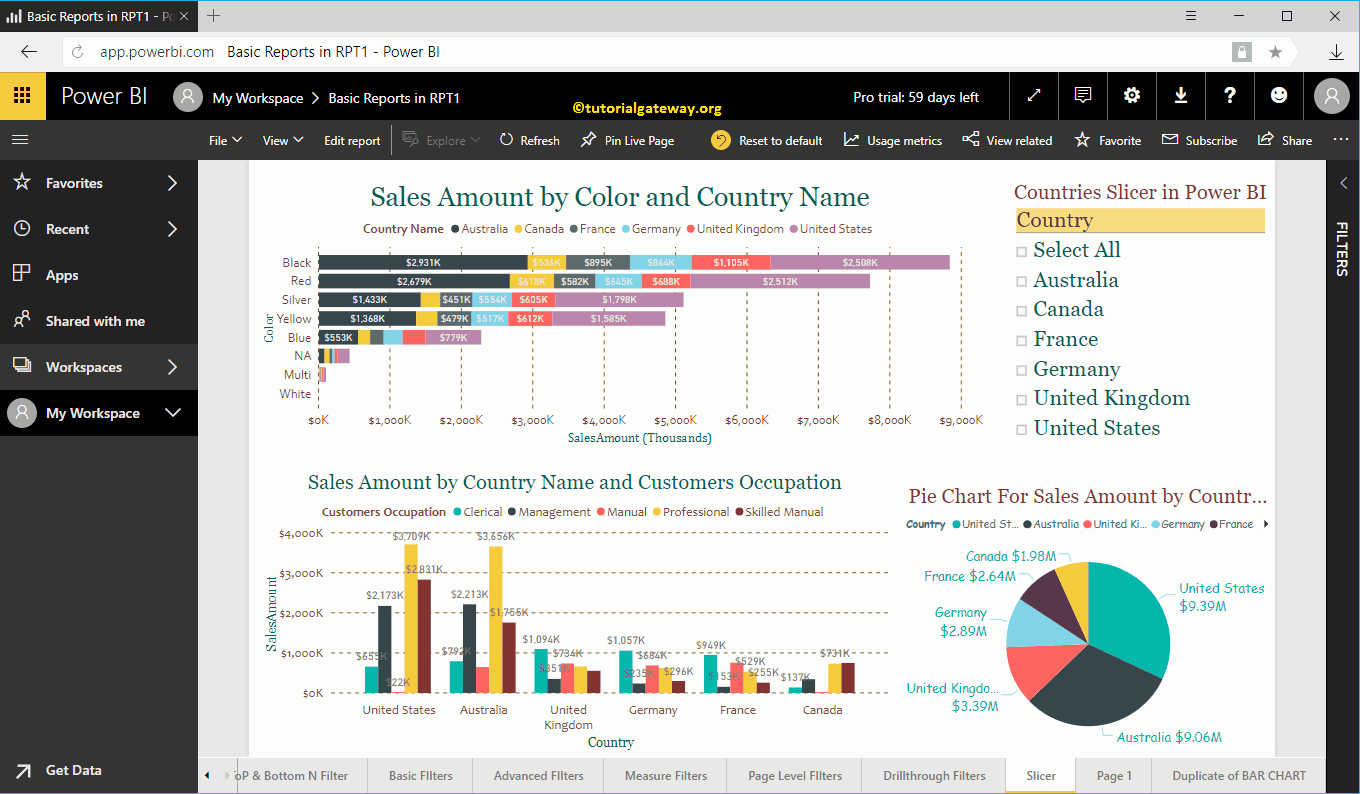
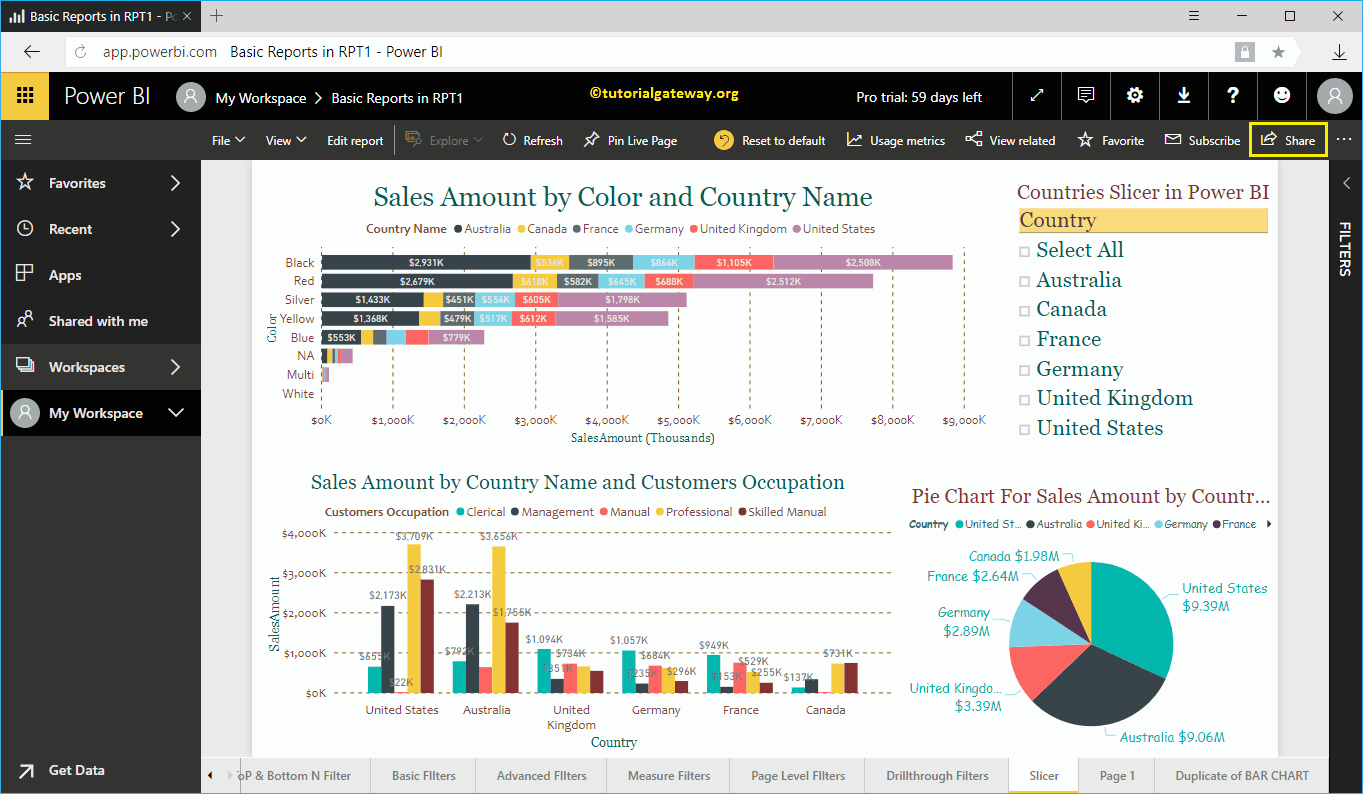
In order to share this report, click on the Share button on the top right corner, as we shown below.
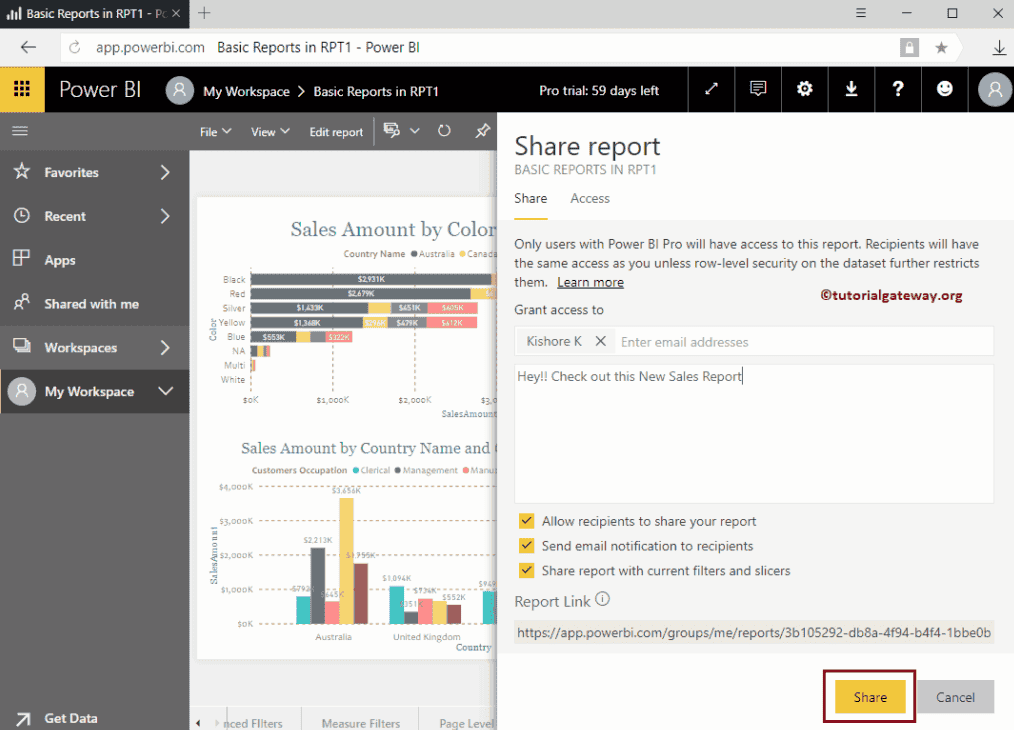
Clicking the Share button opens the Power BI Share Report window.
- Grant To: Please provide the Email Ids to whom you want to share.
- Optional Message: You can write a Custom Message
- Allow the recipient to share your report: This allows the recipient to share this Power BI report with other people in his team.
- Send Email Notification to recipient: Sends an email about this report.
- Share report with Current Filters and Slicers: This shares the report along with the Filters that I applied, and Slicers that I used.
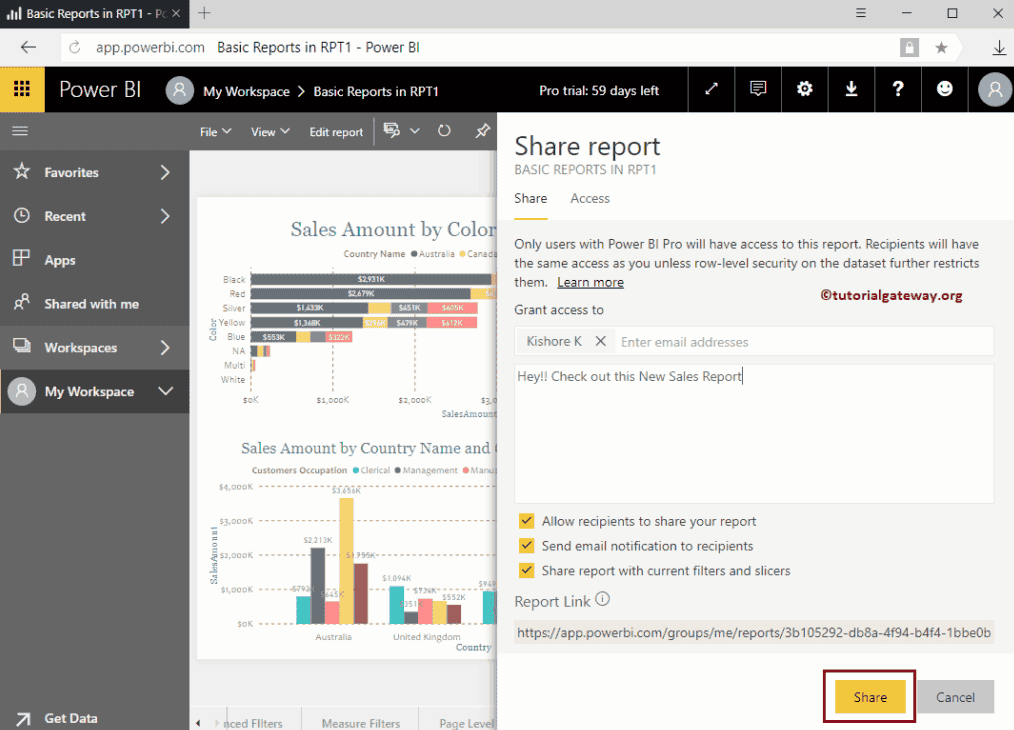
Let me share this report with Kishore, who is working in the same organization
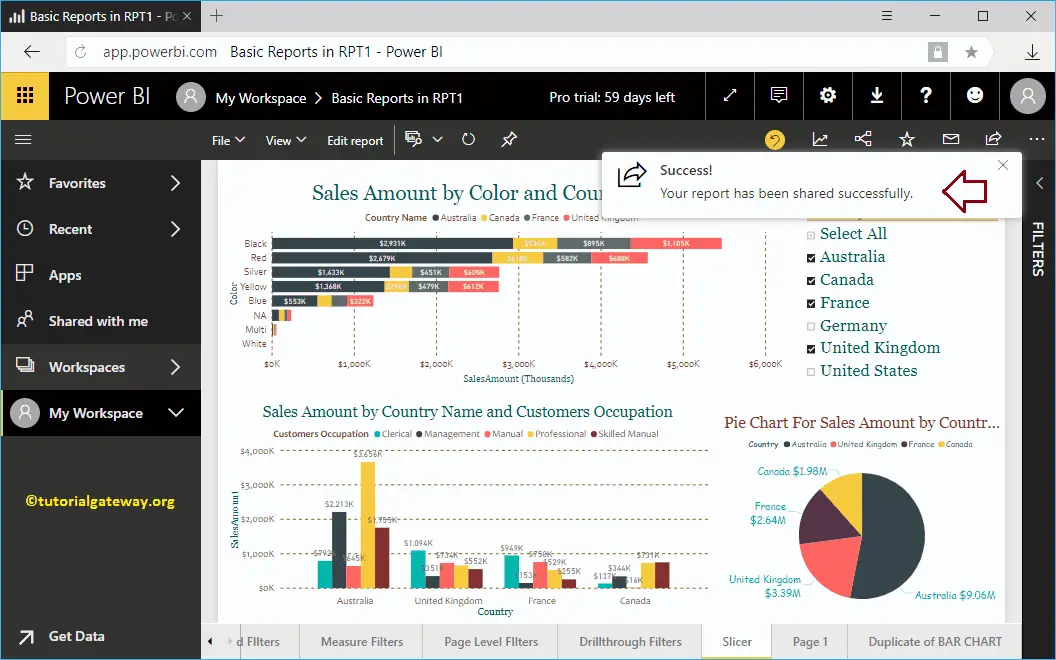
You can see that sharing is successful.
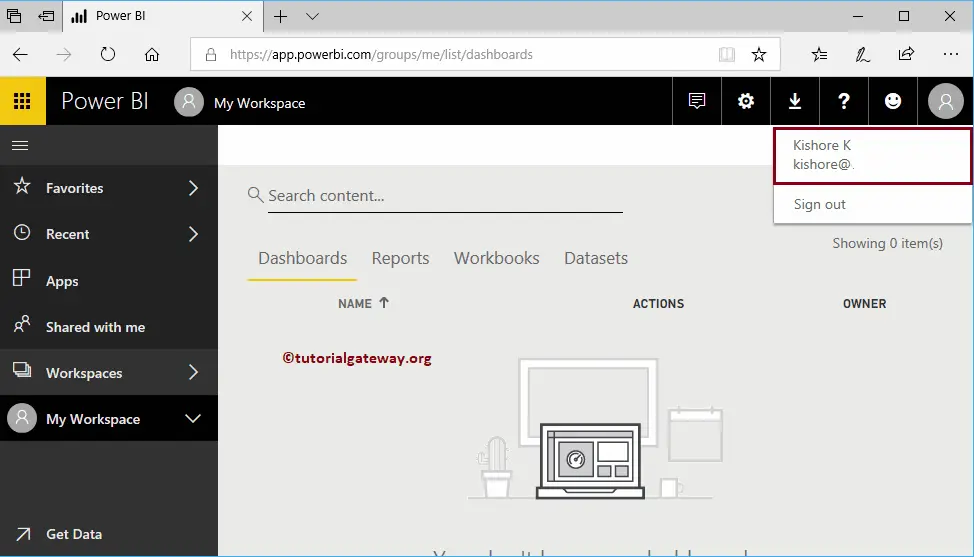
Let me open the Power BI service with the Kishore account
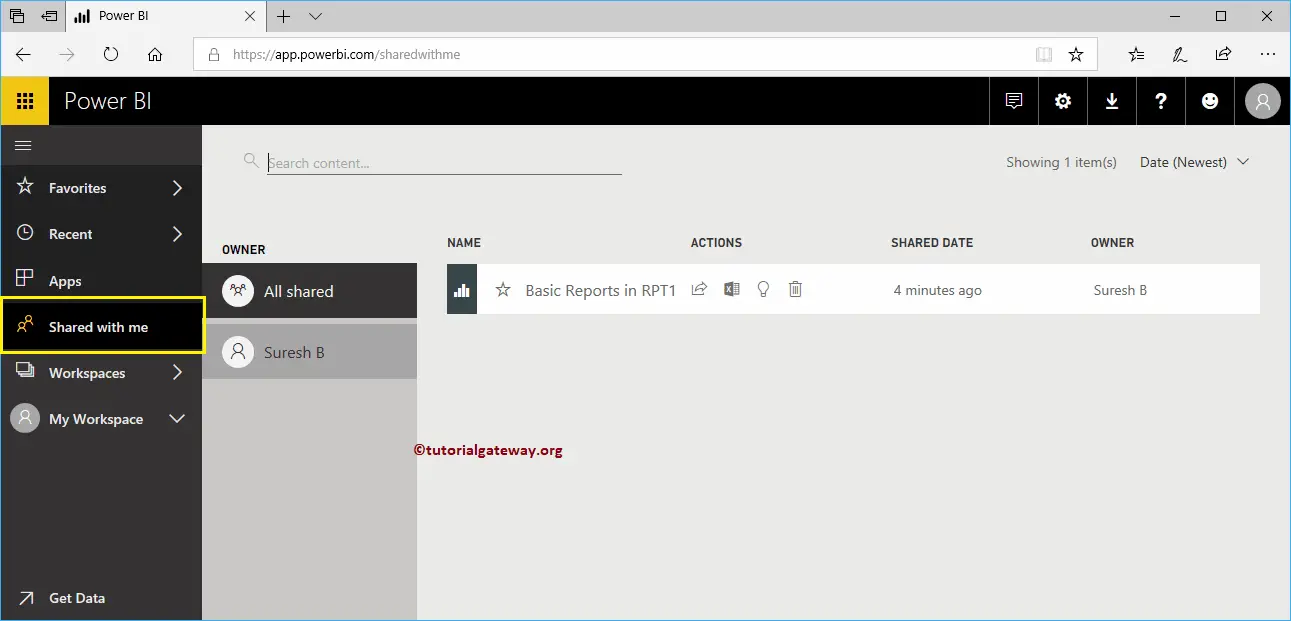
Under the Shared With Me tab, you can see the Report that was shared by Suresh.
You can click on that report to see the Visuals
Share Power BI Workspace
Let us see the step by step approach to share Power BI Workspace across your organization with a practical example. Before we start sharing the Workspace, let me show you the existing Workspace in my Power BI account.
In this Share Power BI Workspace example, we share the New Dashboard that is available in our Sample Workspace.
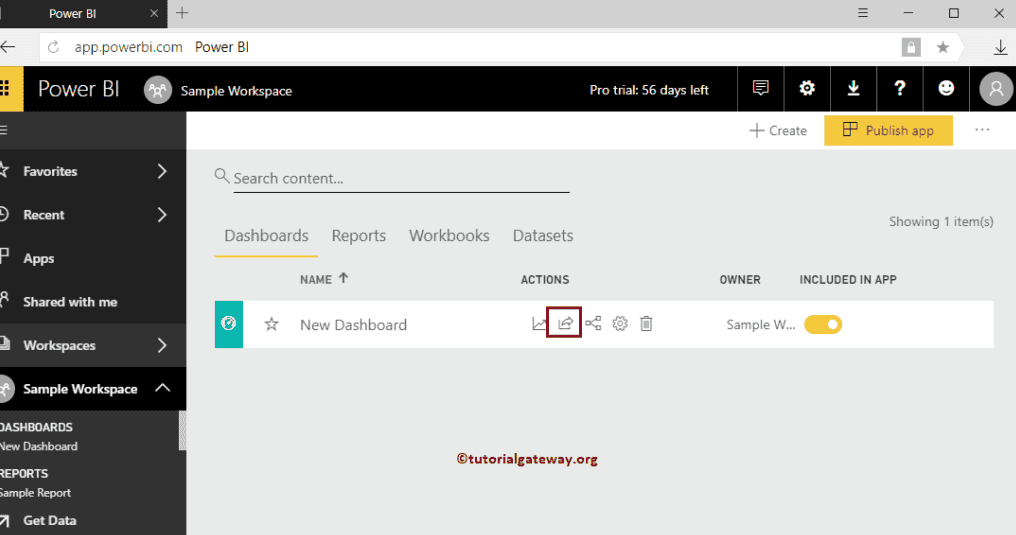
How to Share Power BI Workspace
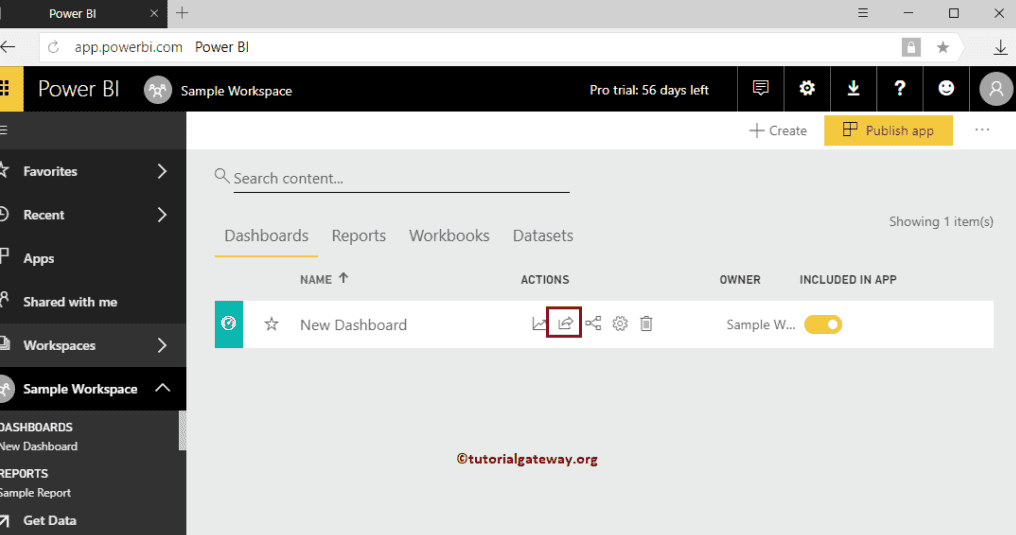
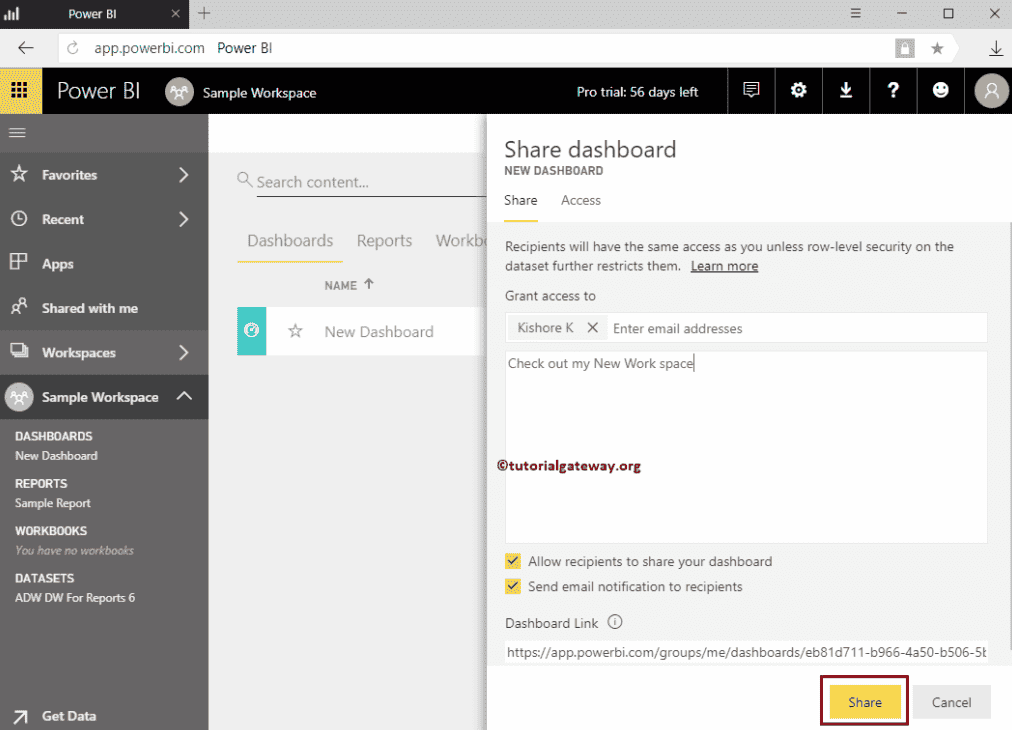
In order to share this Workspace, click on the Share button that we showed below.
Clicking the Share button opens the Share Dashboard window.
- Grant Access To: Please provide the Email Ids to whom you want to share this dashboard.
- Include an Optional Message: You can write a Custom Message
- Allow recipient to share your dashboard: This allows the recipient to share this dashboard to other people in his team.
- Send Email Notification to recipient: Sends an email about this report.
- Dashboard Link: This is the actual link of this Power BI dashboard.
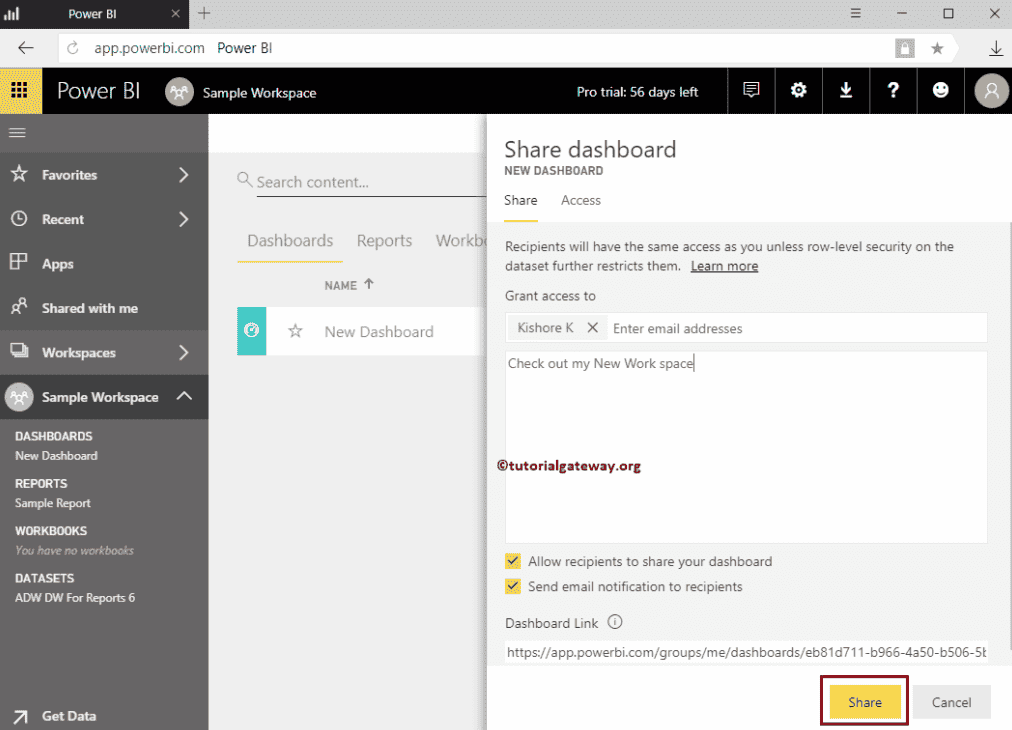
Let me share this with Kishore, who is working in the same organization
As you can see from the screenshot below, the sharing process is successful.
Let me open the Power BI service with the Kishore account.
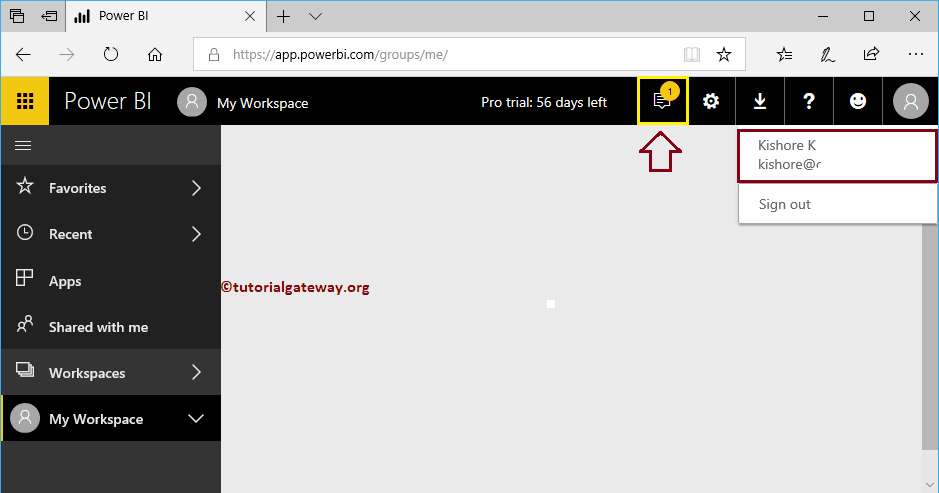
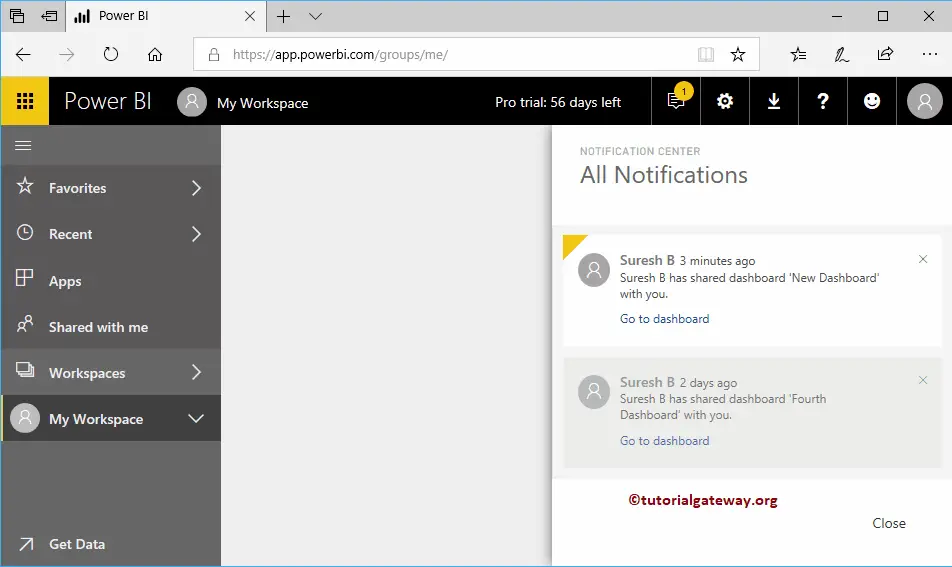
You can see the Notification stating that Suresh has shared New dashboard
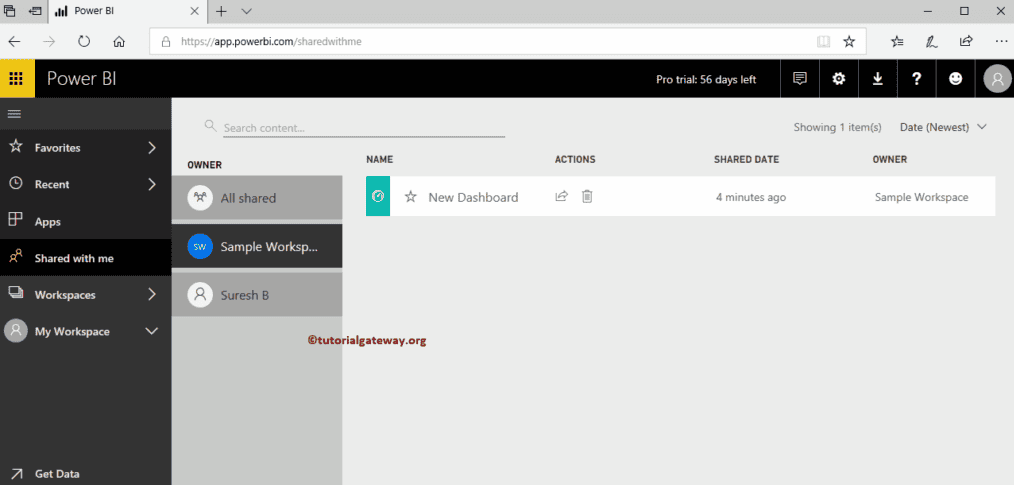
Under the Shared With Me tab, you can see the Sample Workspace that was shared before.
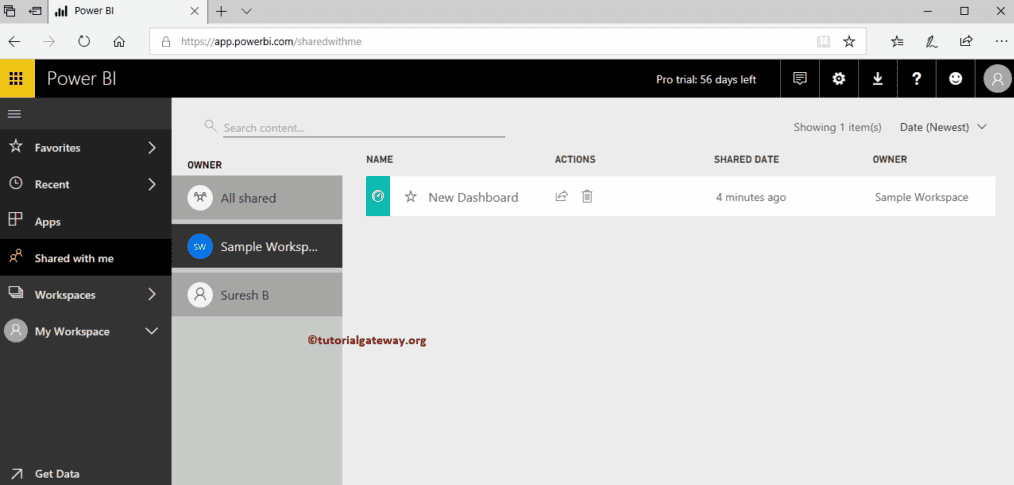
Let me click on the dashboard to see the reports inside that dashboard.
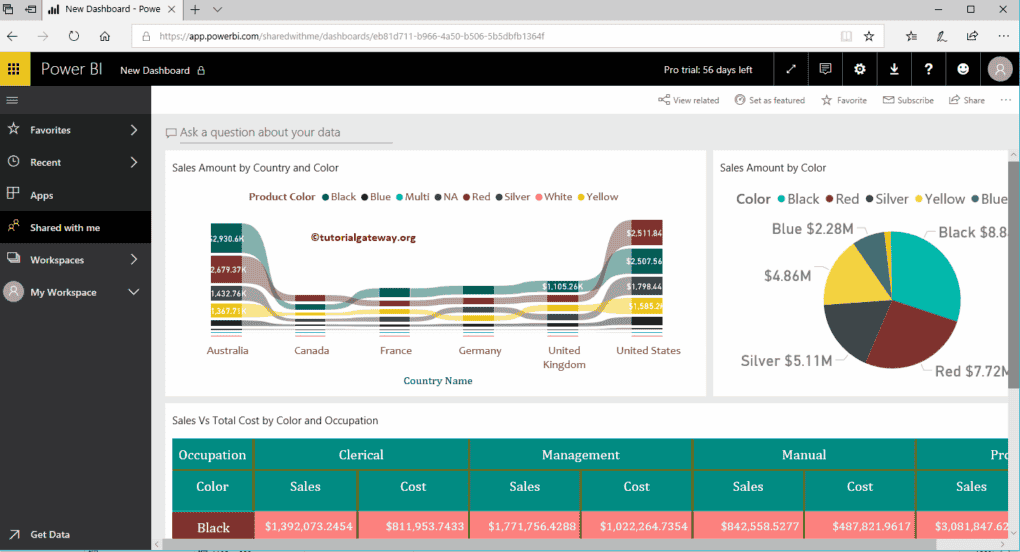
Publish App in Power BI
Let me show you the step by step approach to Publish App in Power BI with a practical example. Before we start publishing the Power BI app, let me show you the existing dashboards in my Power BI workspace.
For this Publishing App in Power BI demonstration, we are using Sample Workspace. I suggest you refer to Create a Workspace article to understand the workspace creation.
Please click on the Power BI Sample Workspace, and then go to the dashboards tab to see the list of available dashboards. As you can see from the screenshot below, currently, there is only one dashboard in this workspace.
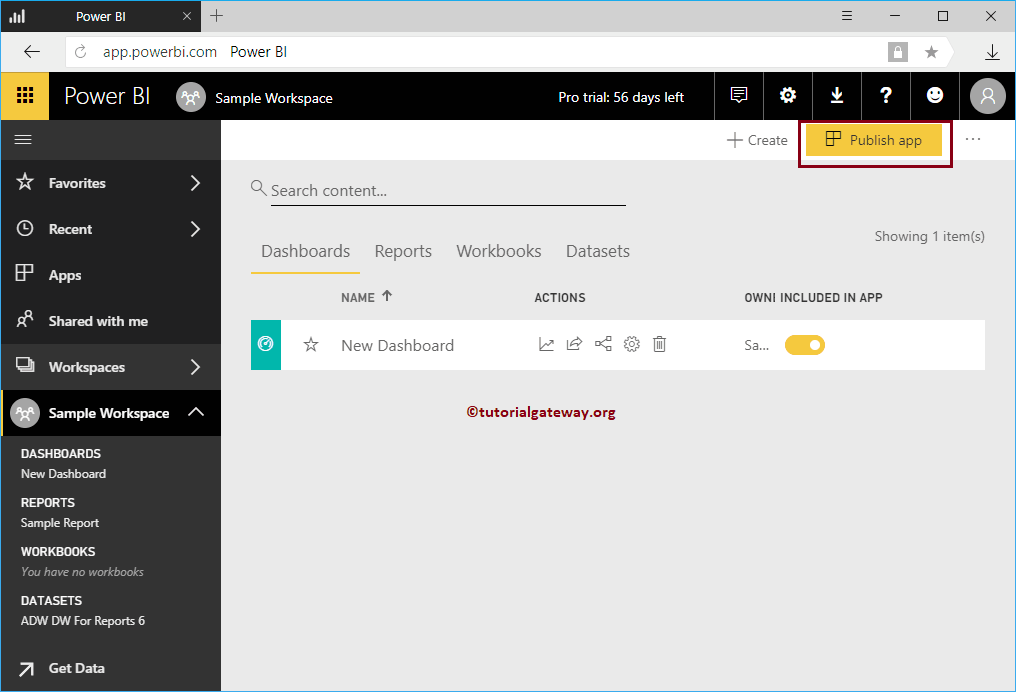
How to Publish App in Power BI
To publish App in Power BI, please click on the Publish App button on the top right corner, as we showed below.
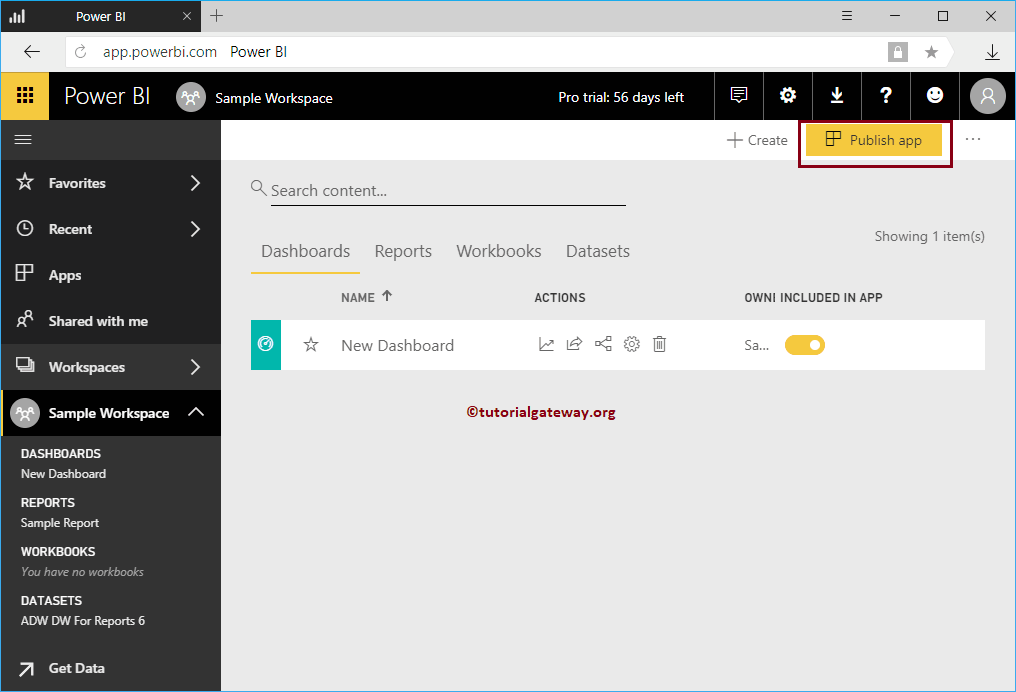
Clicking the Publish App button opens the following Power BI window. Under the Details section,
- Description: Please provide a valid description of this App. It is a required field so, you have to fill something here.
- Background Color: Please select the background color of this App. By default, Green selected.
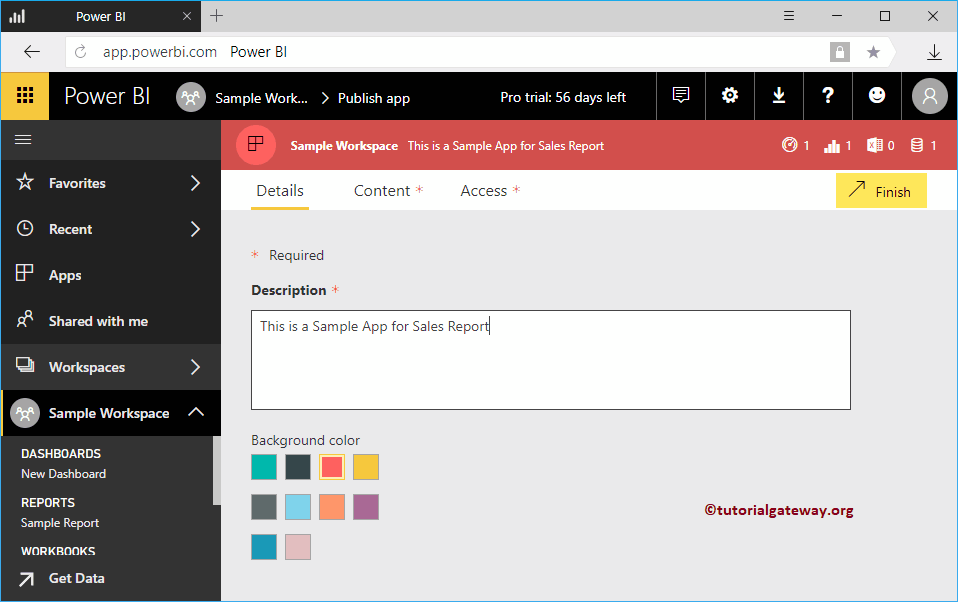
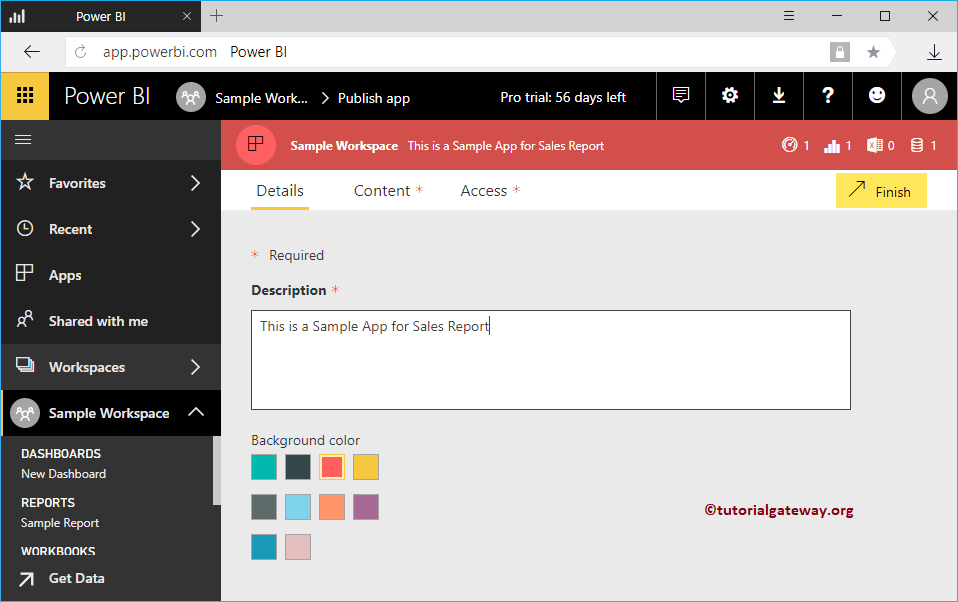
As you can see, we added the description and changed the App color to red.
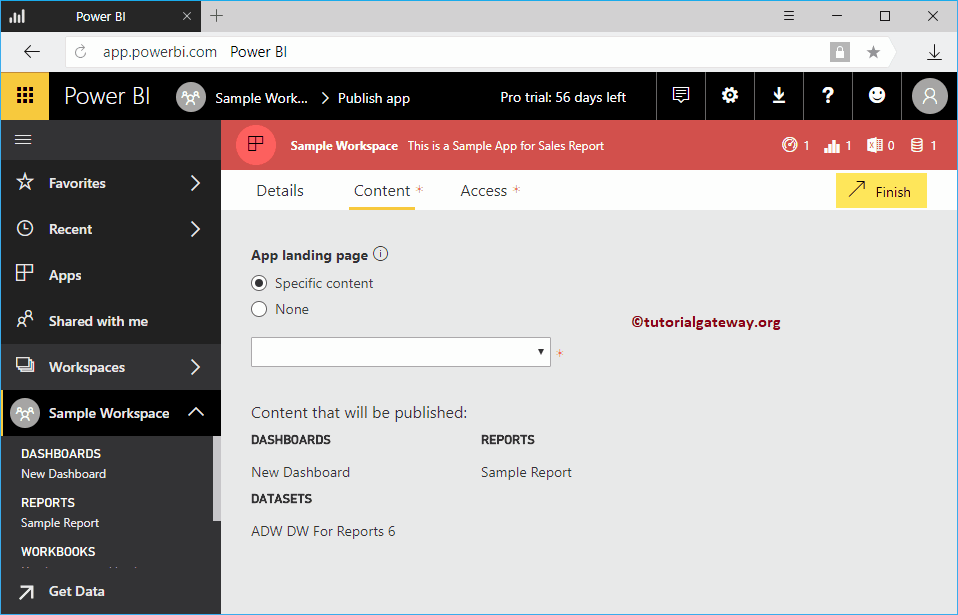
Under the Content tab, specify the App landing page
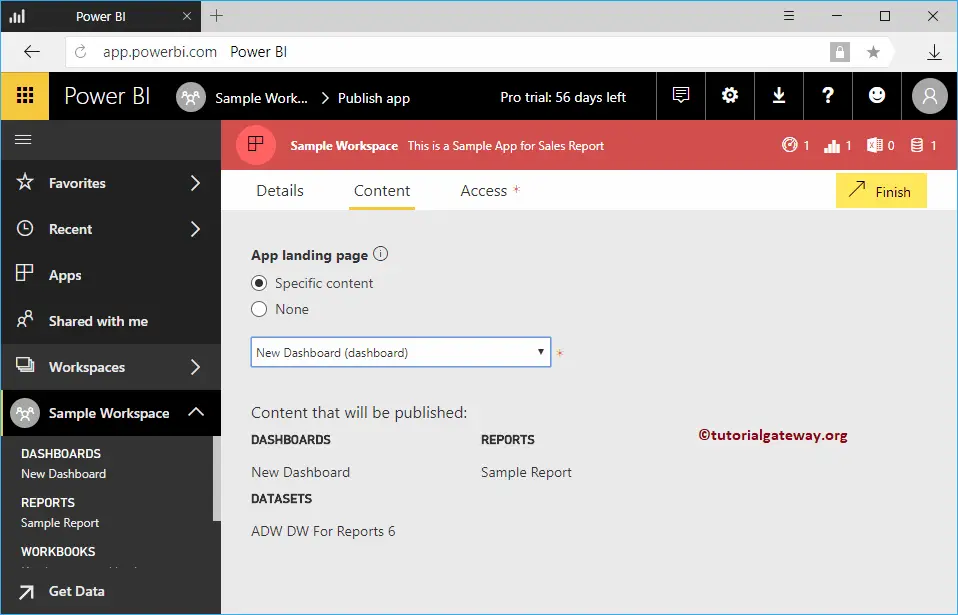
- Specific Content: If you select this option then use the dropdown list to select the dashboard
- None: There is no landing page
Let me select the New dashboard as the landing page
Under the Access tab
- Permissions: Either you can give access to the entire organization or a few individuals or groups.
For this publish app demo, we selected Specific individuals or groups and added Kishore.
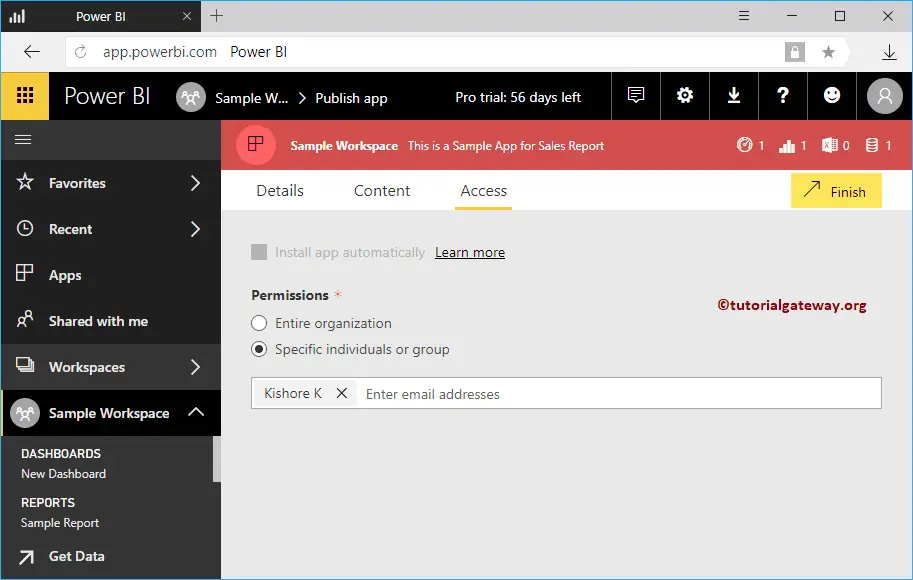
Once you completed, please click the Finish button.
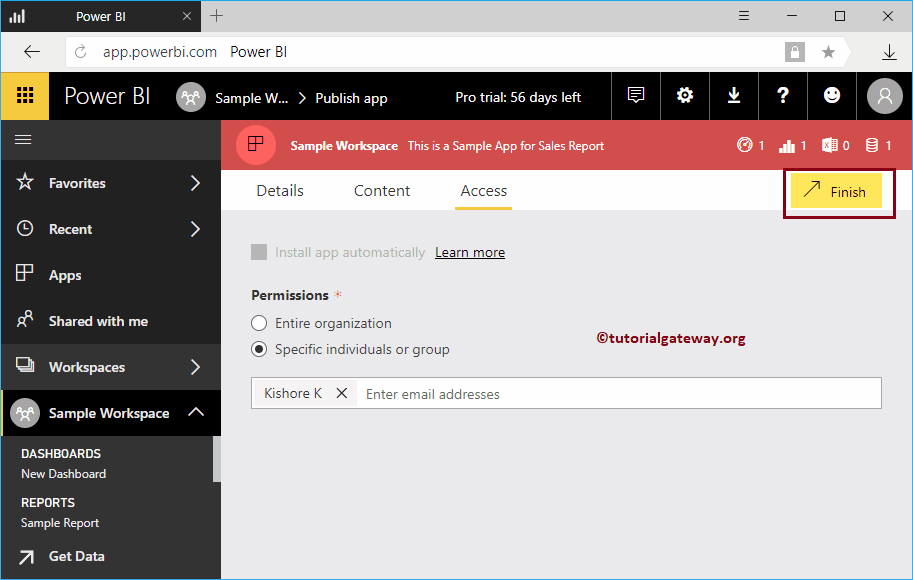
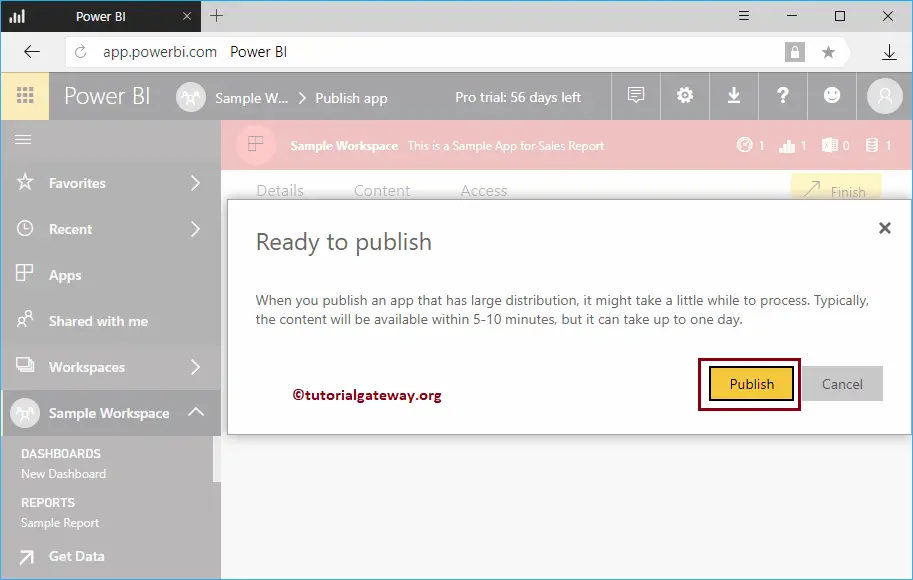
Click Publish button to publish Power BI app.
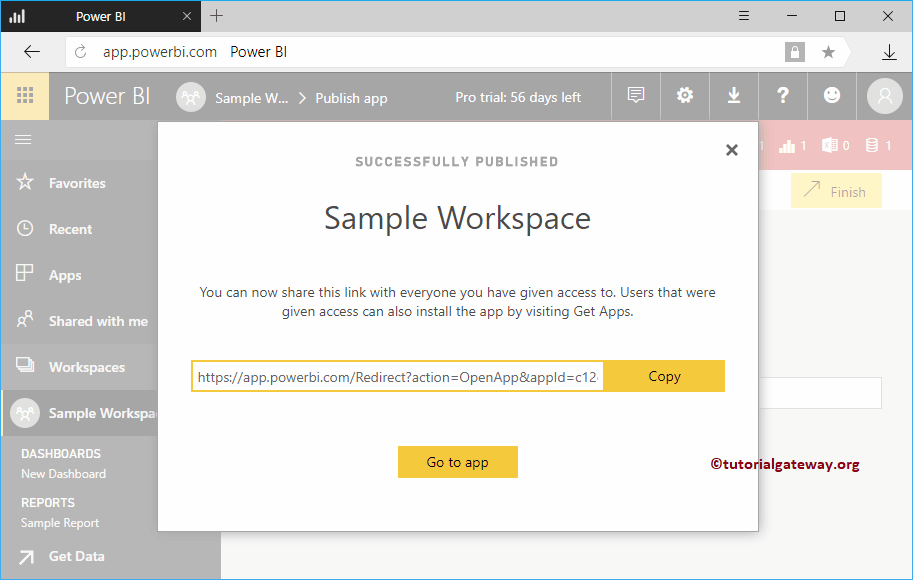
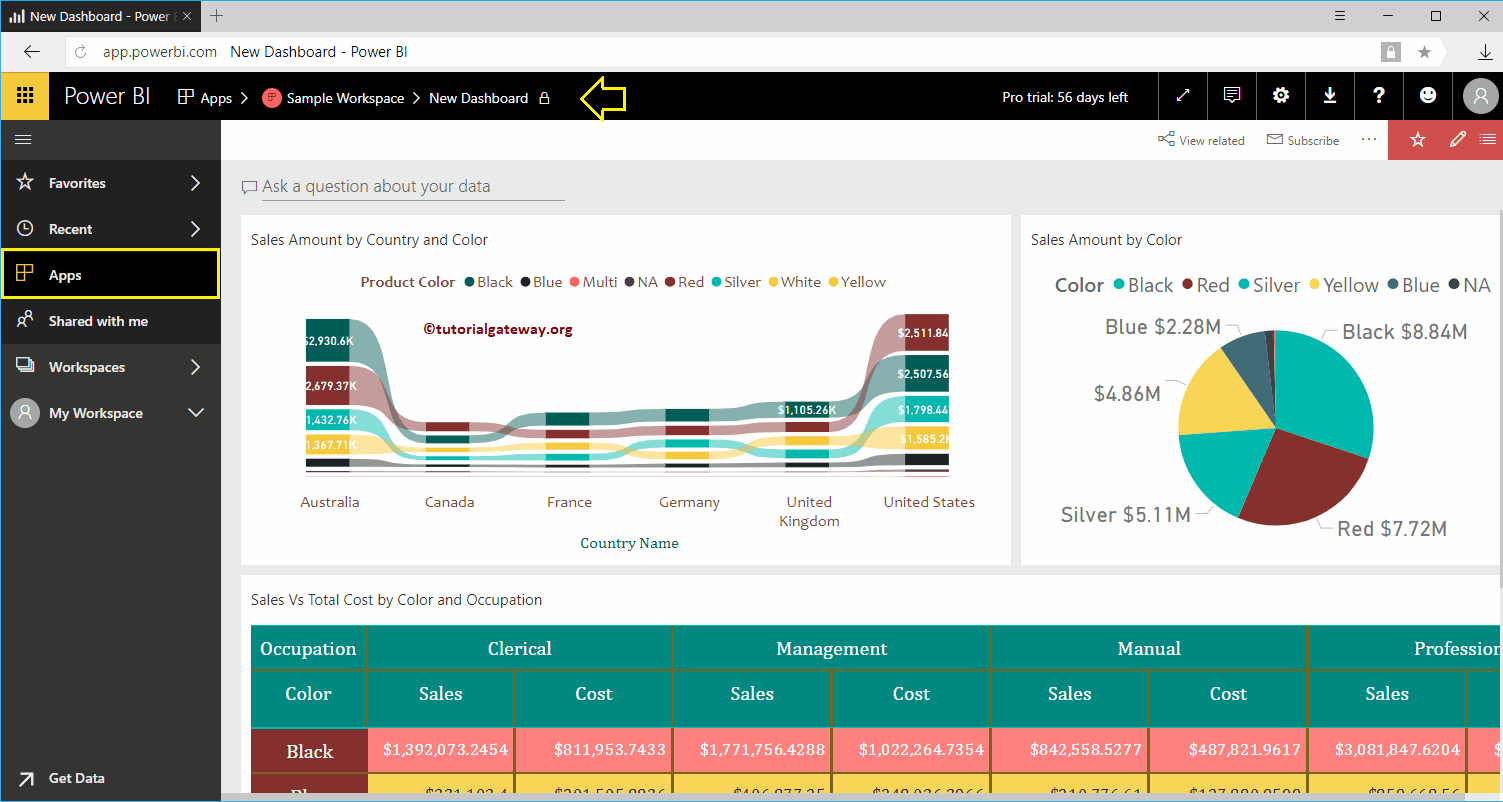
Please save the link. This link helps you to open the App. For now, let me click the Get App button.
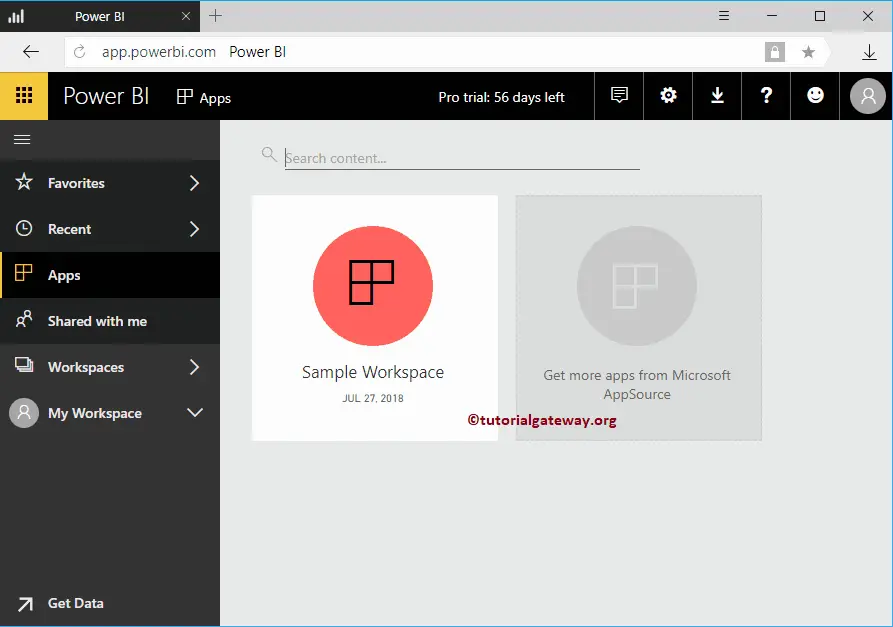
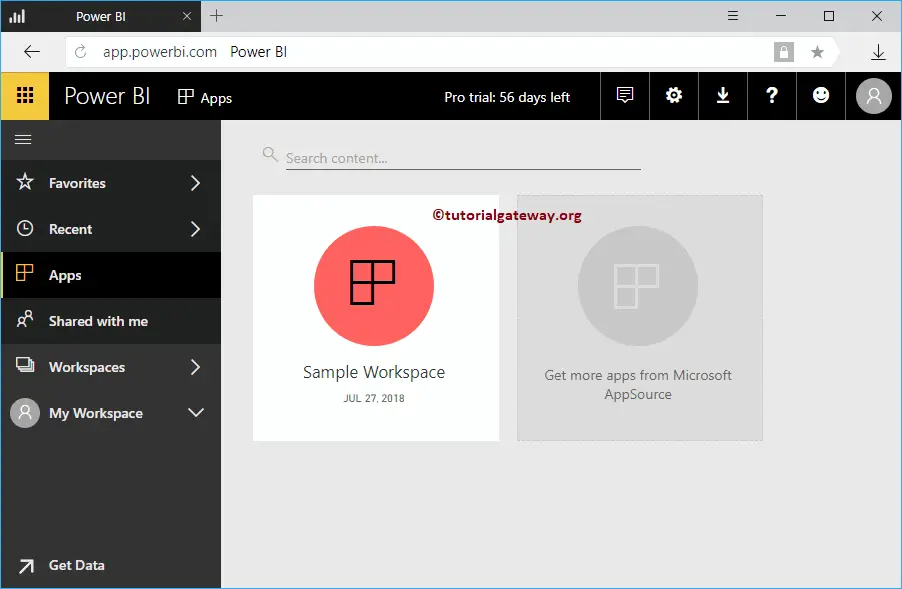
Clicking that button takes you to the following window. If this is not the case, click on the Apps tab inside the left navigation bar.
Sometimes it may open like below. Here, you can click Sample Workspace and see the dashboard inside it.
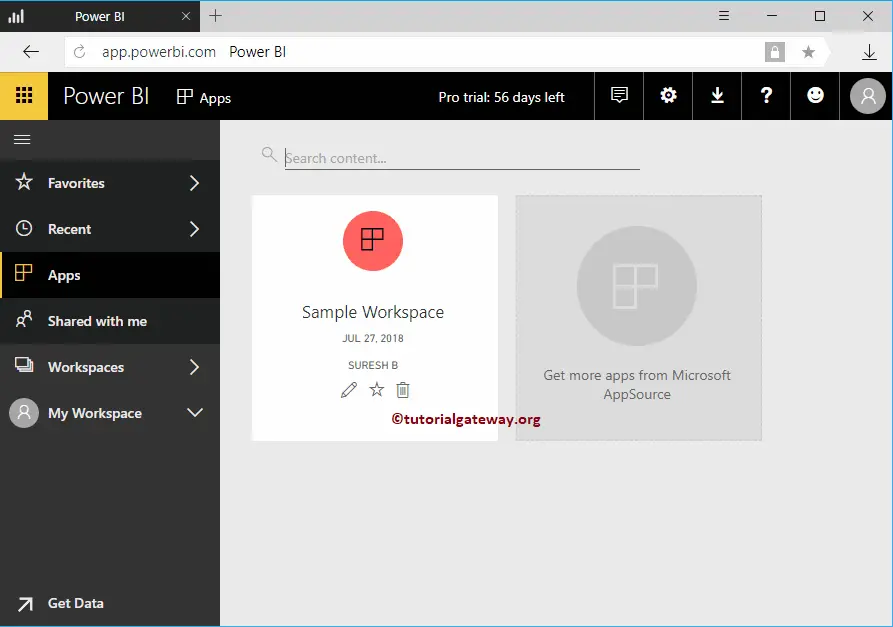
You can hover over this app to edit, delete, and add to favorite
Let me open the URL that we copied in my IOS device. Remember, you have to download the Power BI app from the App Store or Google Play store.
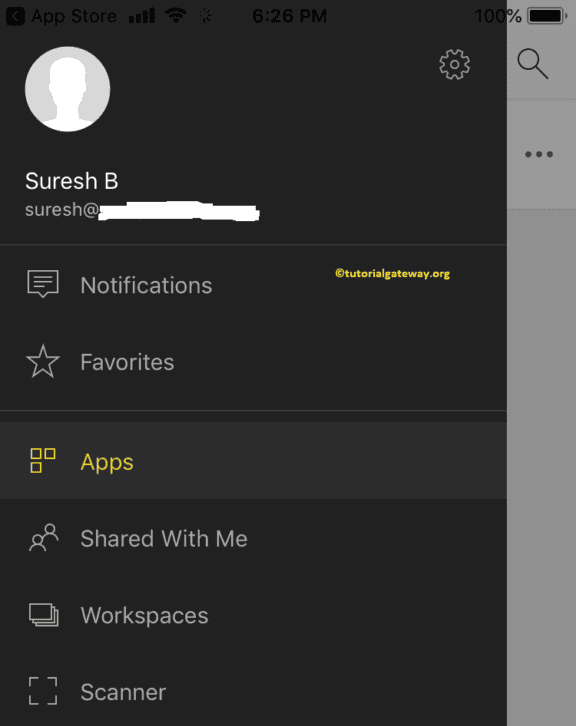
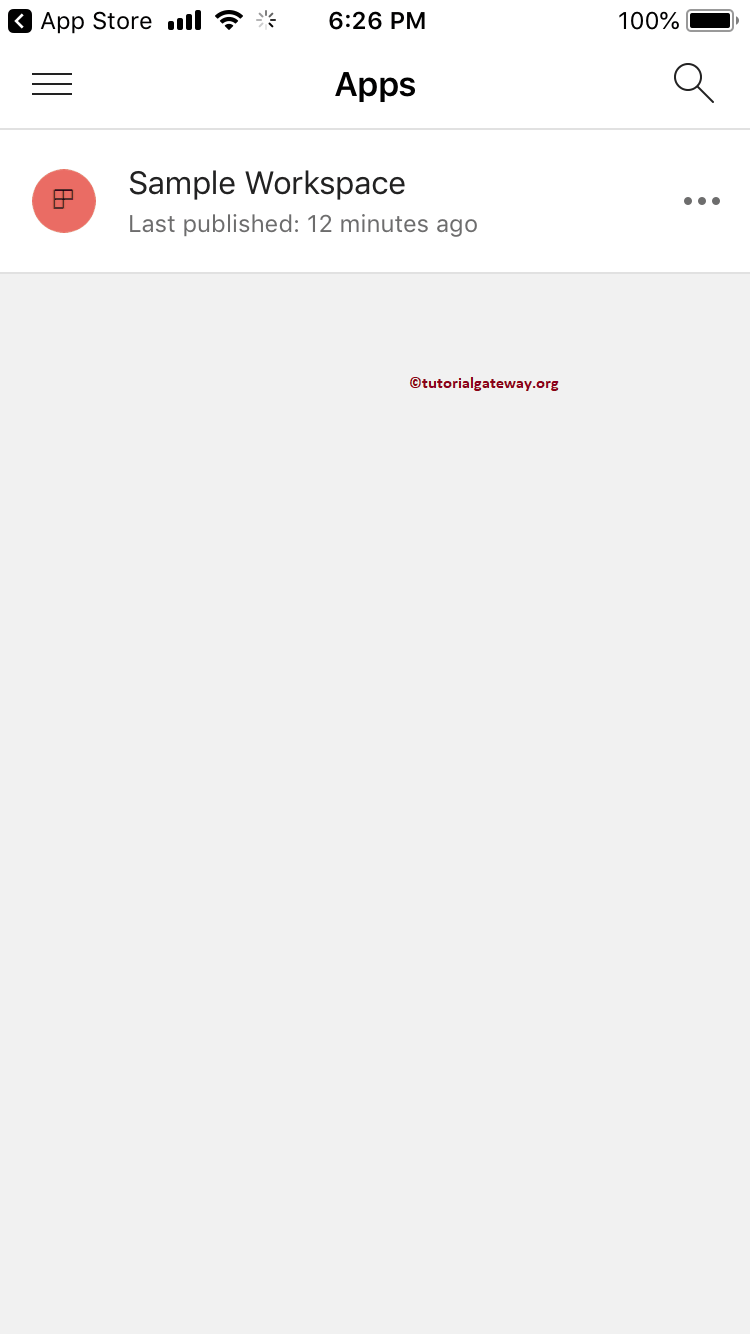
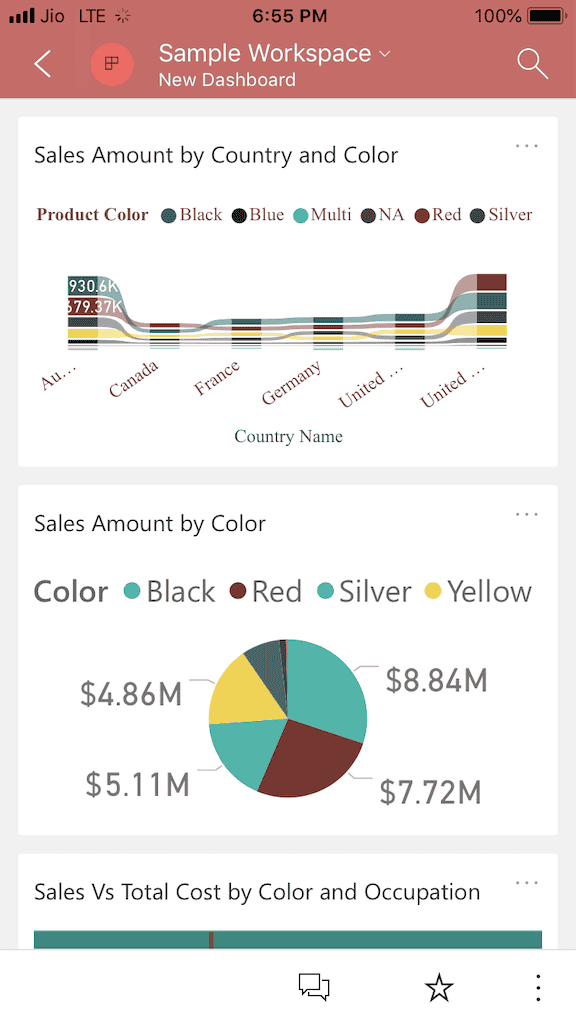
You can see the Sample Worksheet inside our Apps. Click that app to see the data
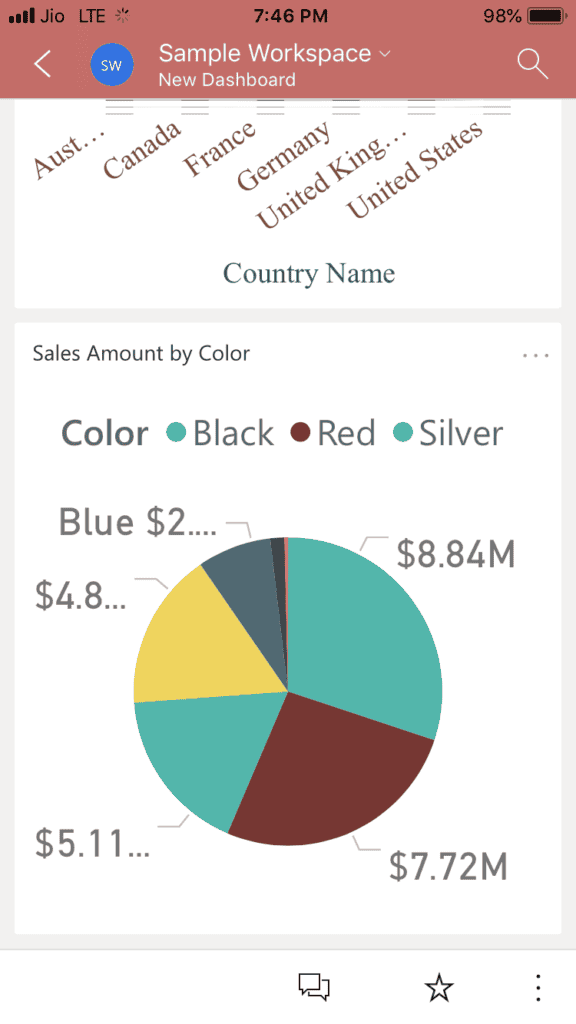
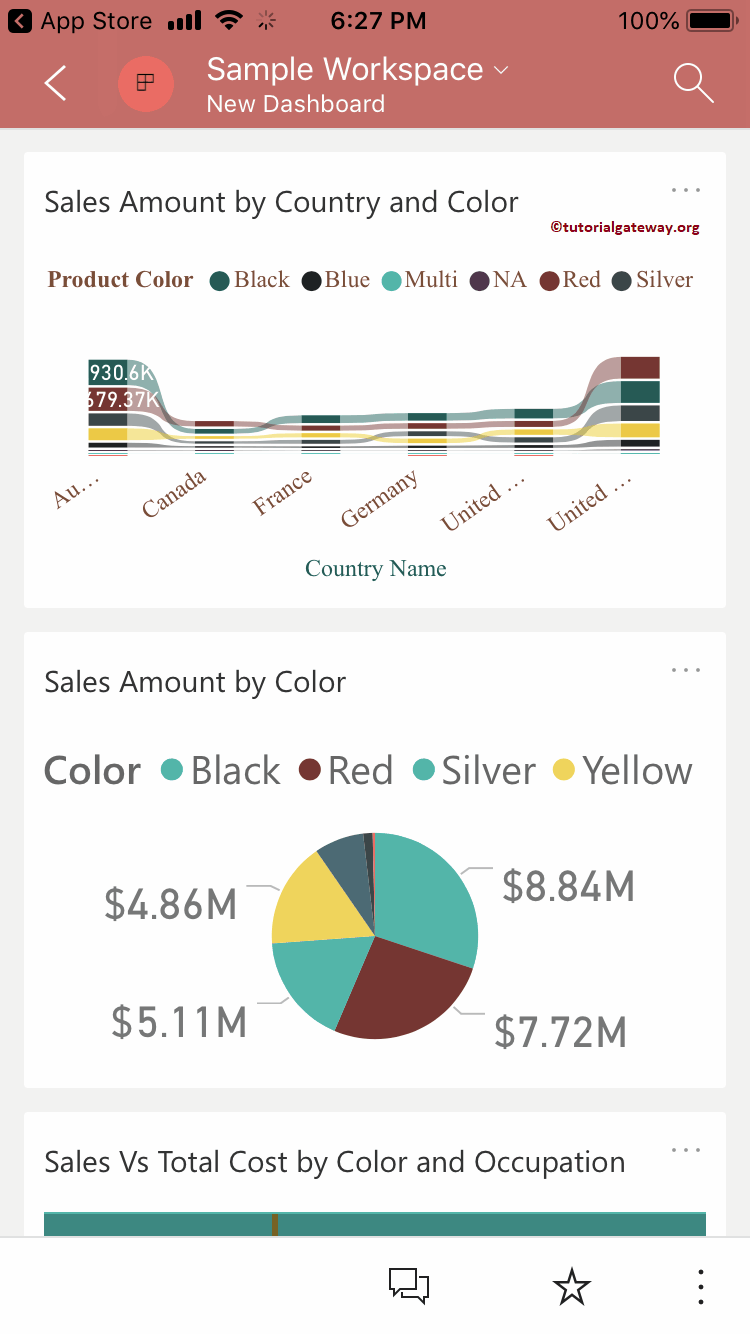
From the below screenshot, you can see the dashboard inside our mobile.
View Published App in Power BI
Let me show you the step by step approach to view the published App in Power BI with a practical example. If you are the Admin/owner of this App, then you can Go to the Apps tab, and click on the required App. If not, then ask your admin to give access to that App.
For this View Published App in Power BI demonstration, we are using the Sample Workspace App that we created earlier. I suggest you to refer Publish App article to understand the Power BI app creation.
From the screenshot below, you can see, we had permitted Kishore. It means he can access this App.
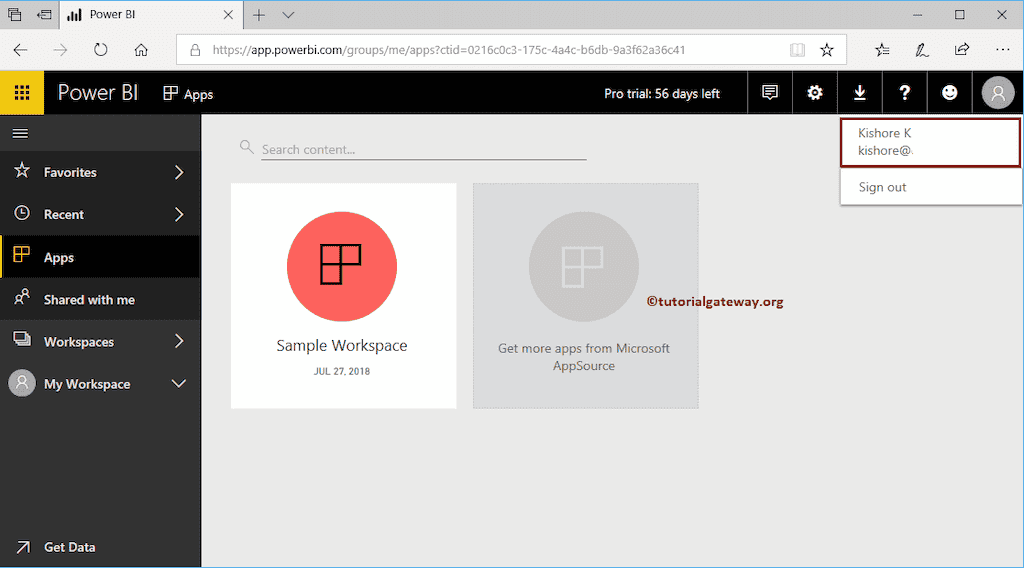
How to view Published App in Power BI
Let me open the Power BI service with the Kishore account. From the screenshot below, you can see the published App inside his Power BI Apps section.
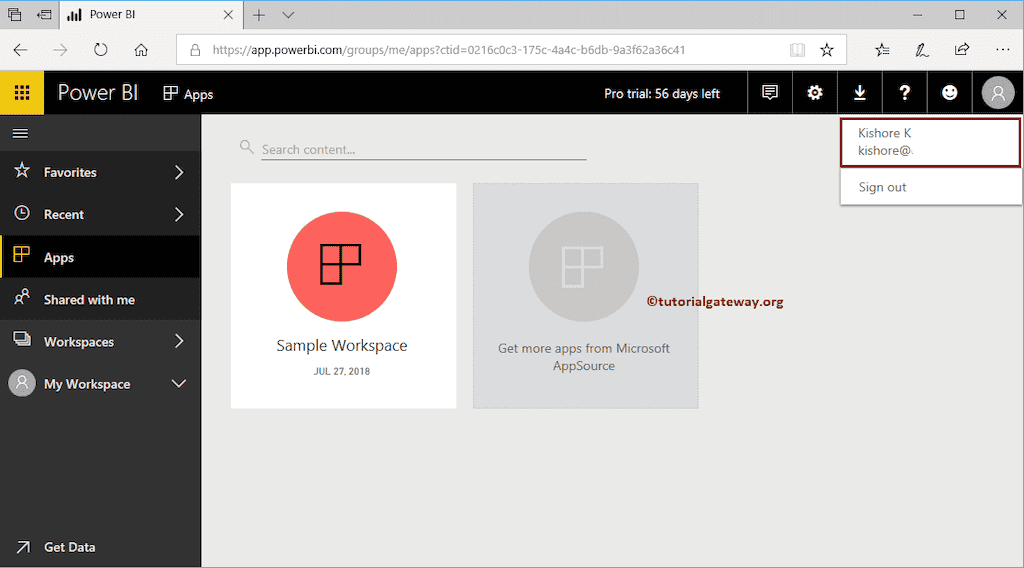
If that is not the case, then Click on the Get Apps button.
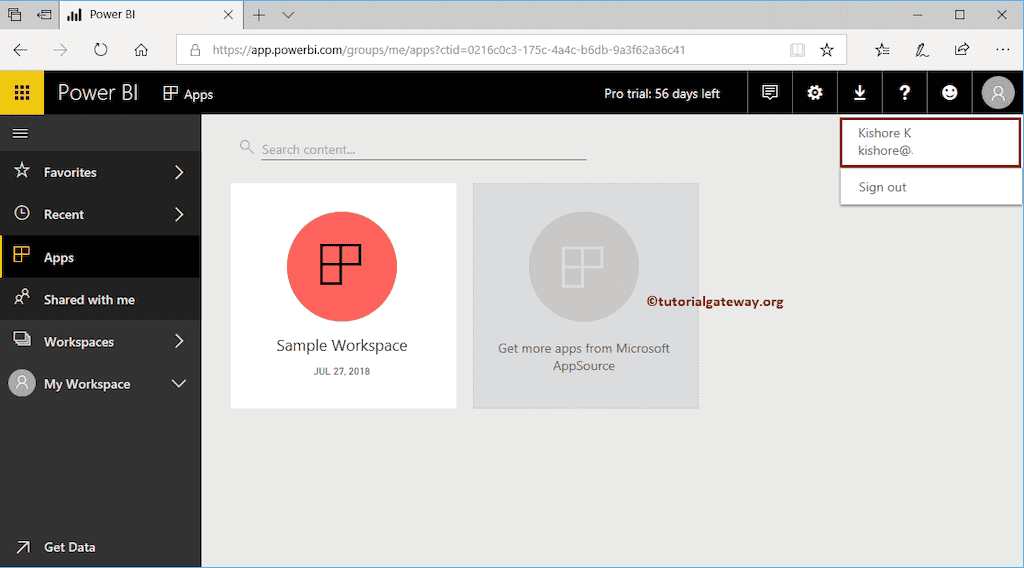
If your Apps page is empty, then click Get Apps button.
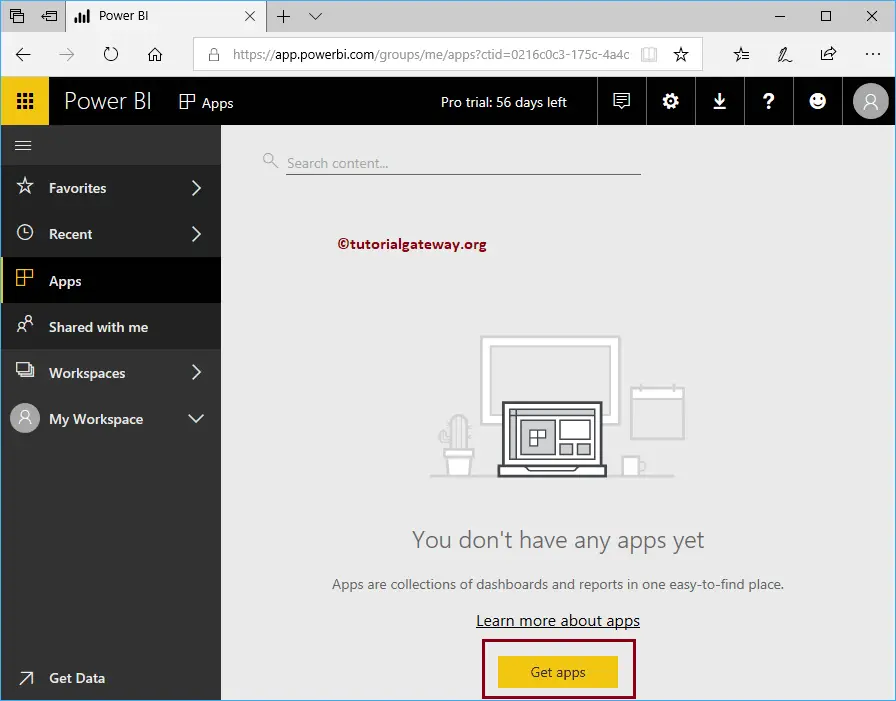
Click the Get Apps button to open the following window. Here, you can select the required App.
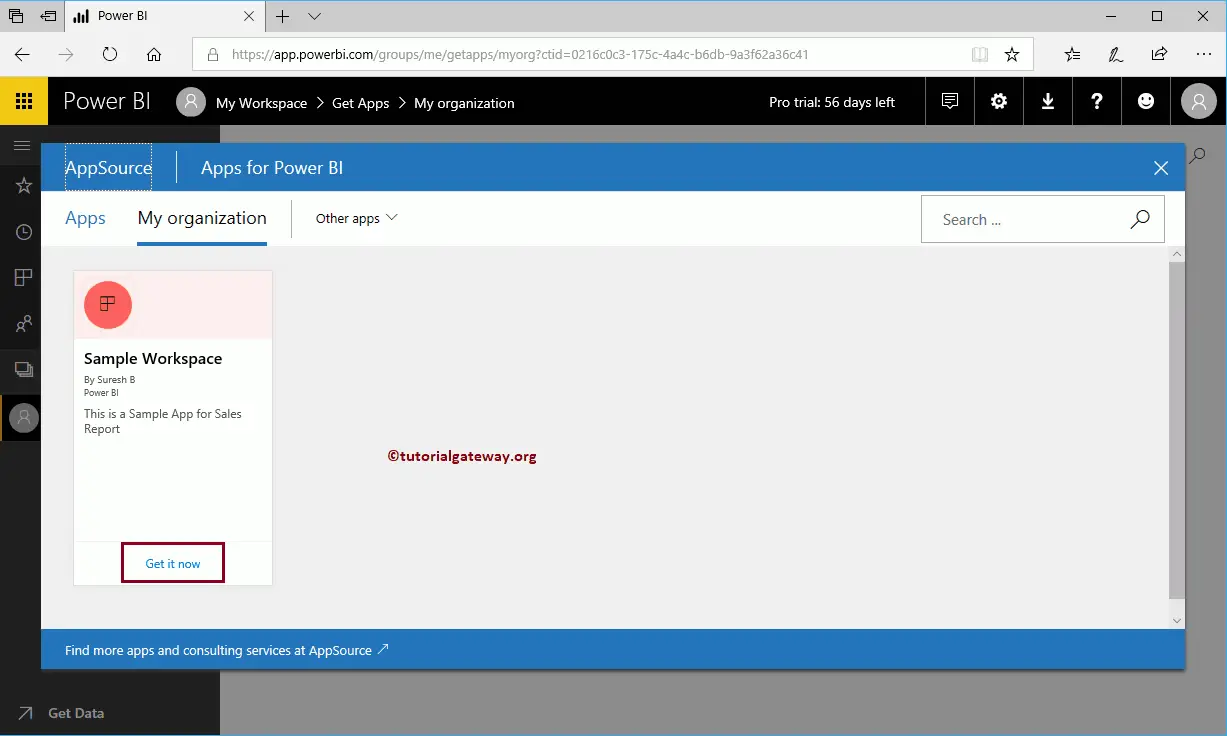
Let me select the Sample Workspace, and click Get it Now.
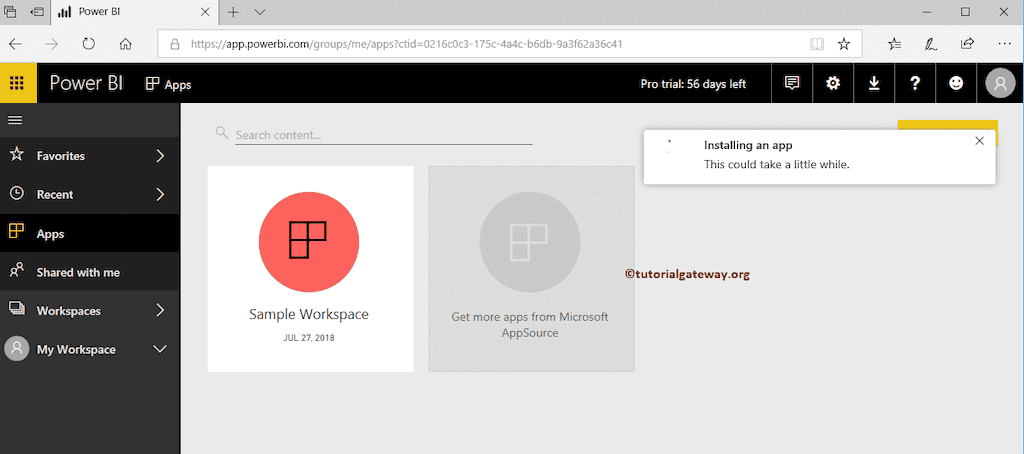
It installs the App into your workspace. After that, you can see or view the published App.
Let me login into my IOS device
I am clicking the apps tab to open the following window.
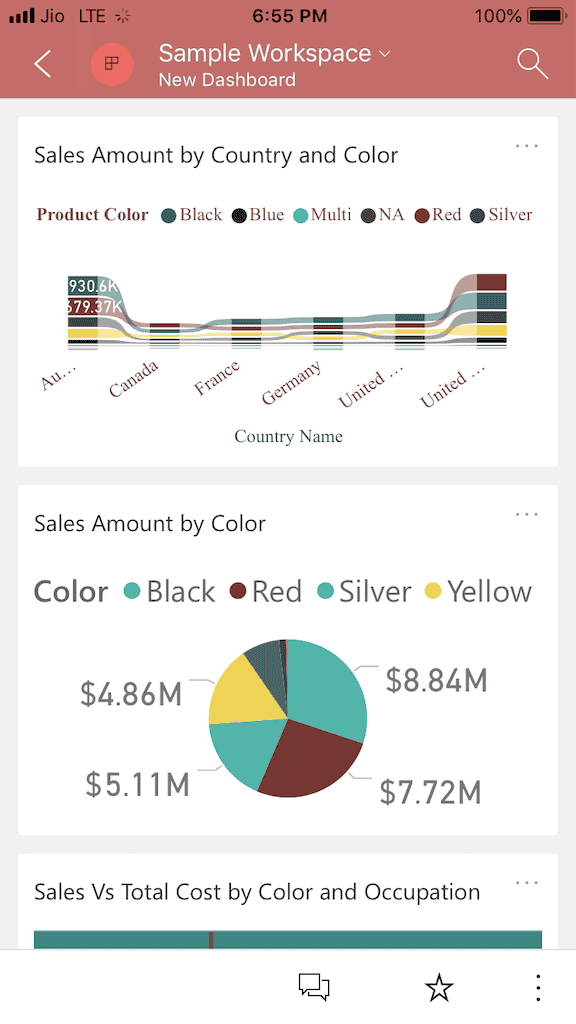
Now you can see the dashboard
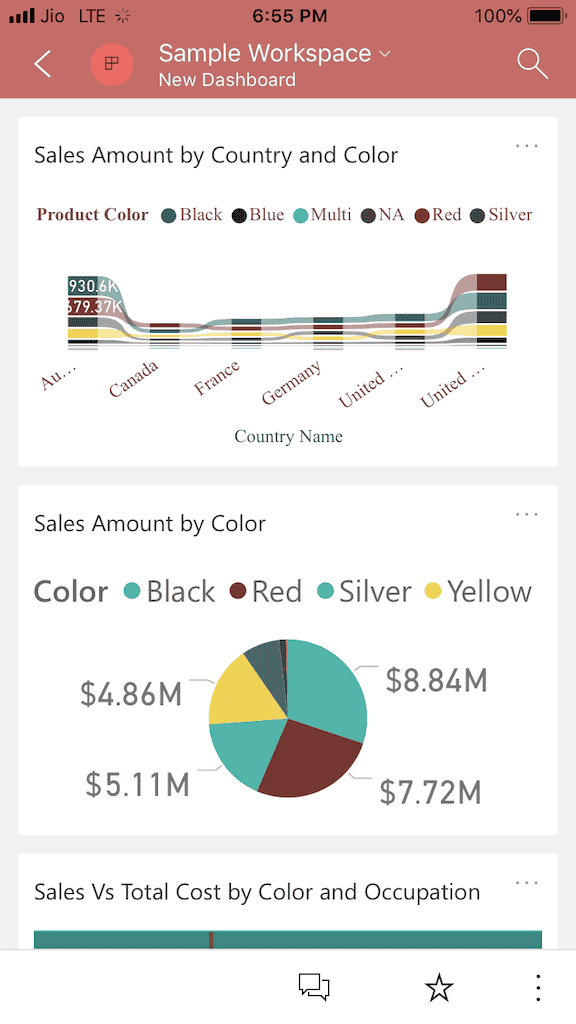
Edit Power BI App
Let me show you the step by step approach to edit Power BI App with a practical example. Before we start editing the Power BI app, let me show you the existing App in my Power BI workspace.
For editing the Power BI App demonstration, we are using the Sample Workspace App that we created earlier. I suggest you refer to the Publish App article to understand the Power BI app creation.
How to edit Power BI App
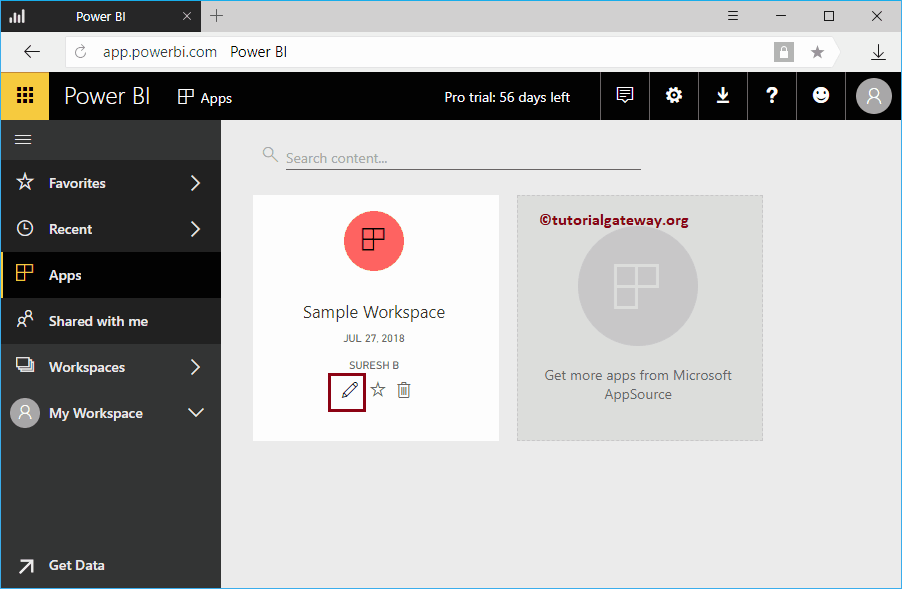
Please hover over your App, and click the edit button, as we shown below.
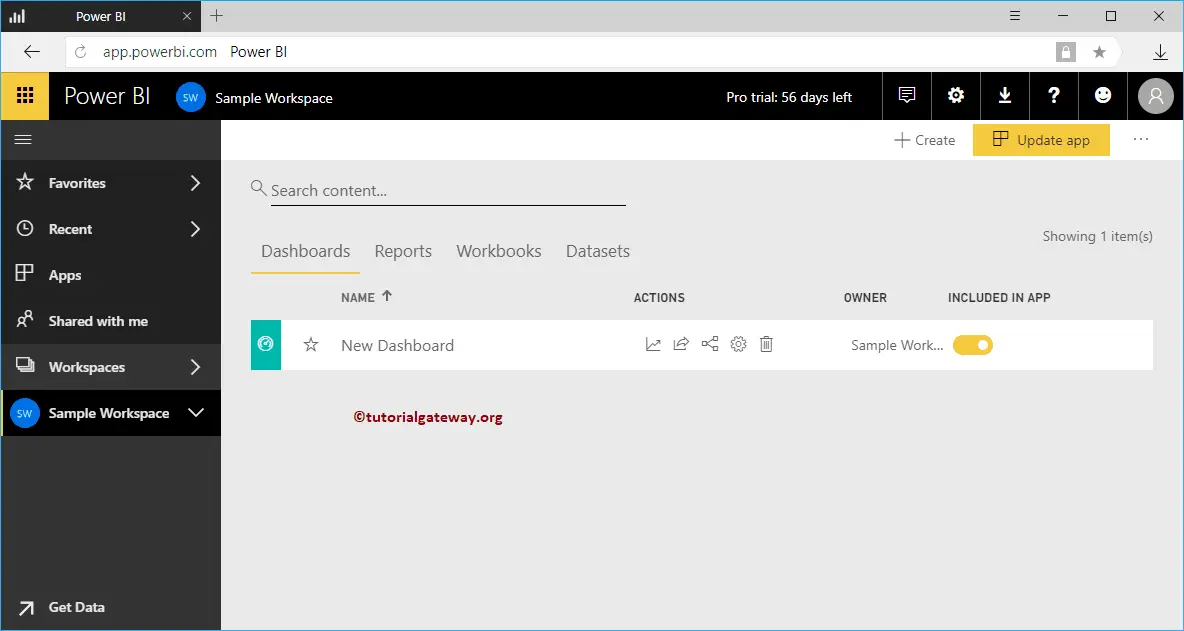
Clicking that button opens the following window. Click on the dashboard to edit the tiles, reports, etc.
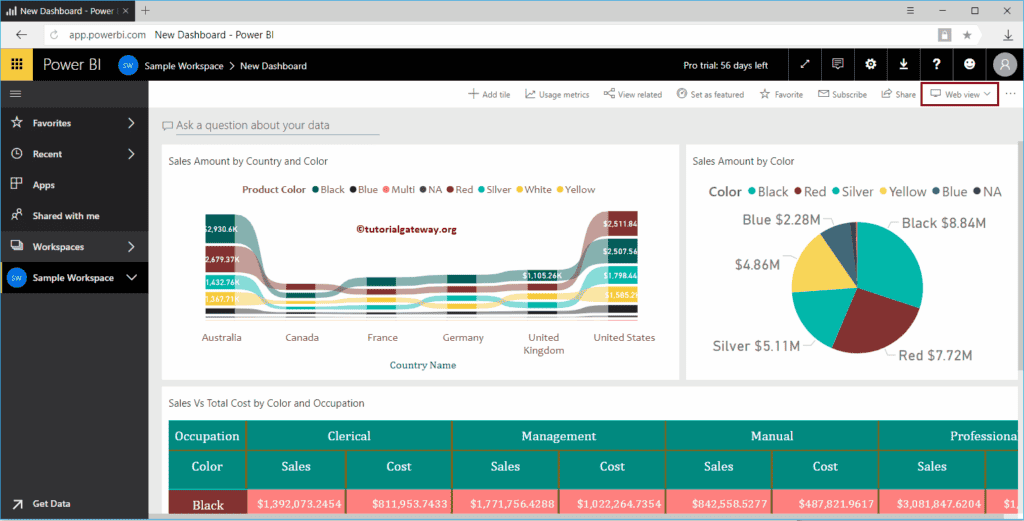
From the screenshot below, you can see the dashboard. By default, it shows the Web Preview.
It means, whatever changes you made here apply to web preview. By clicking that little down arrow changes it to phone preview. So, let me hit the phone preview.
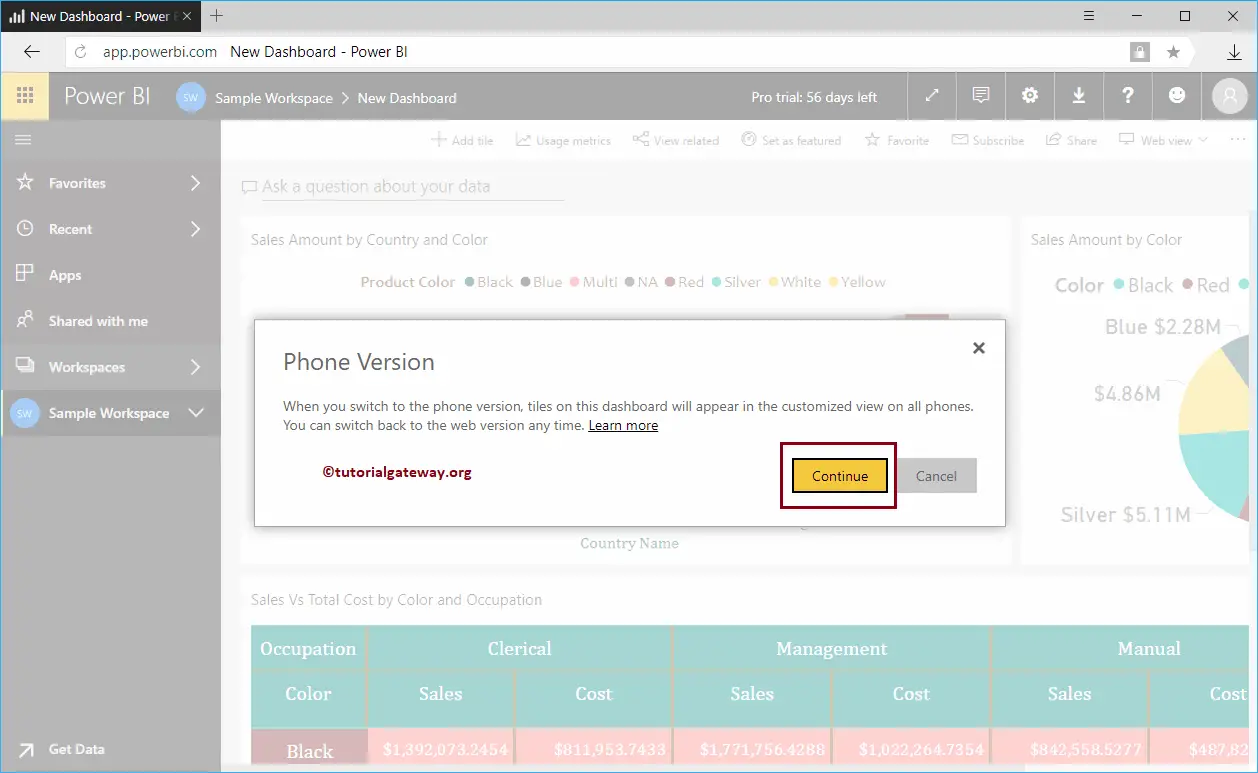
Selecting the Phone preview pop up a new window, click continue.
Now you can see the Phone preview. You can use this window to change the size and location of each tile as per your requirement.
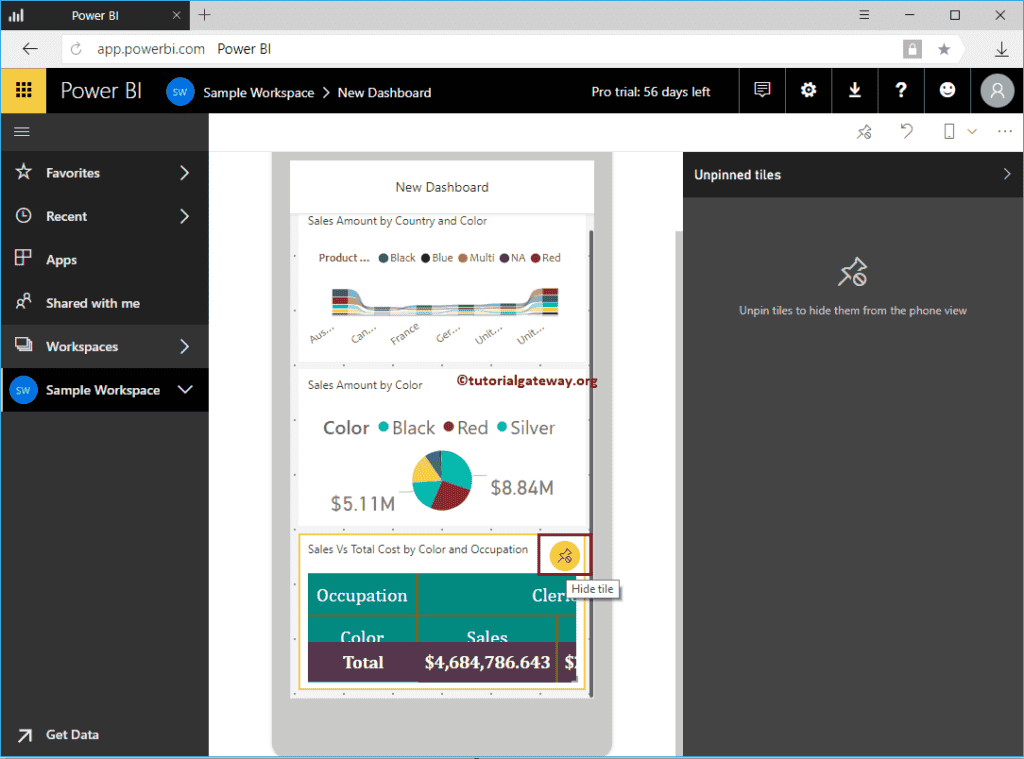
By clicking the little Hide tile button, removes that tile from dashboard and place it in the Unpinned Tiles. Let me hit that button
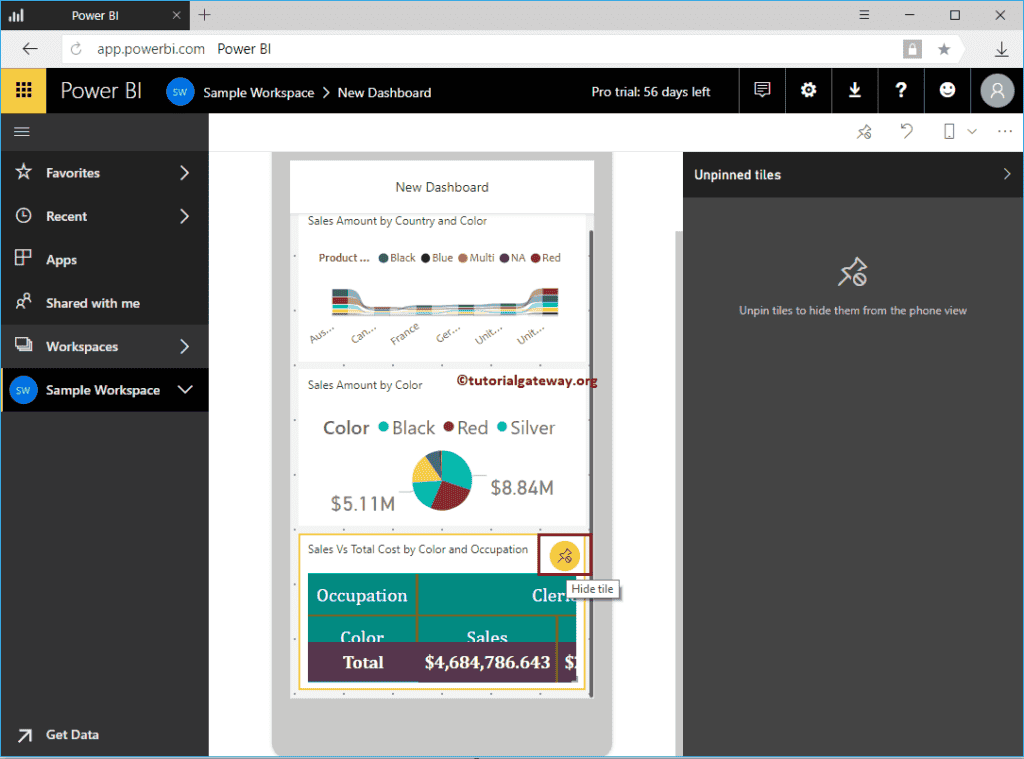
You can see that the report removed from the dashboard. By clicking the Add tile button, you can place it inside the dashboard.
Let me hit that button
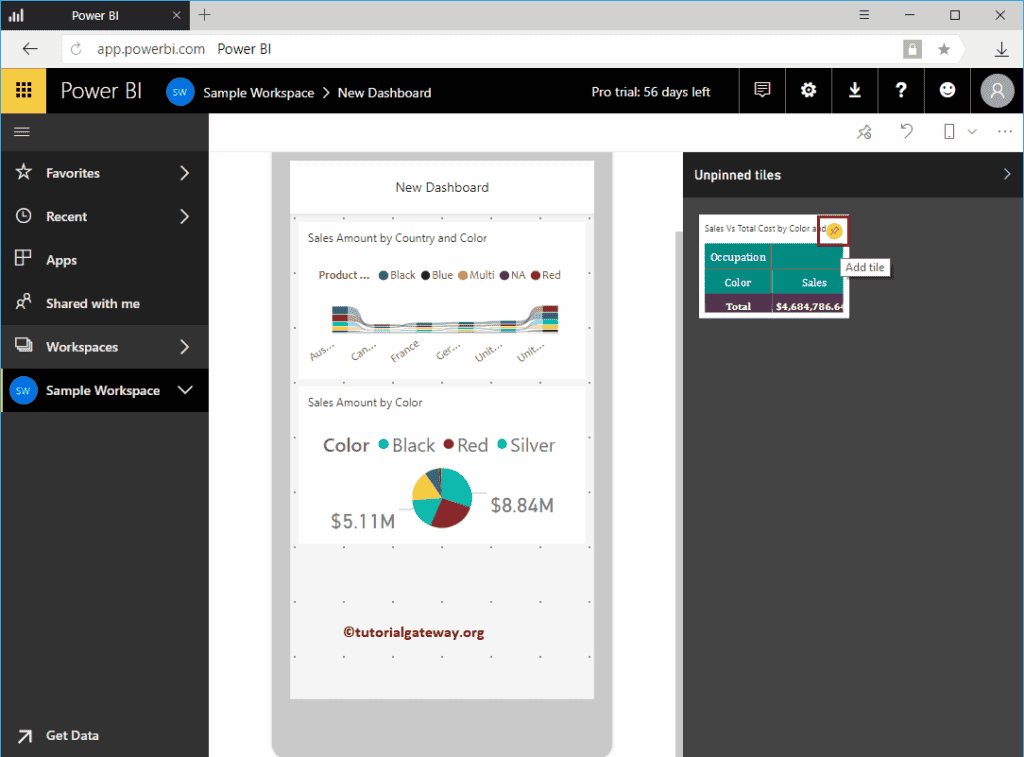
You can see that there are no unpinned tiles.
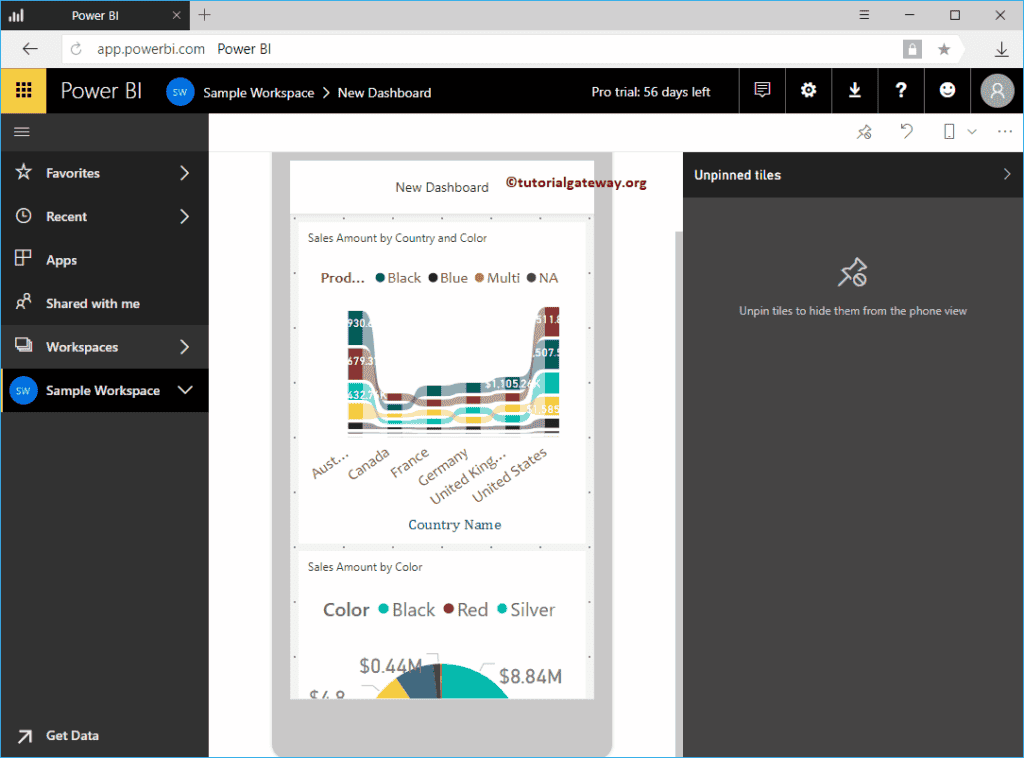
Use the below button to remove all Tiles from the dashboard.
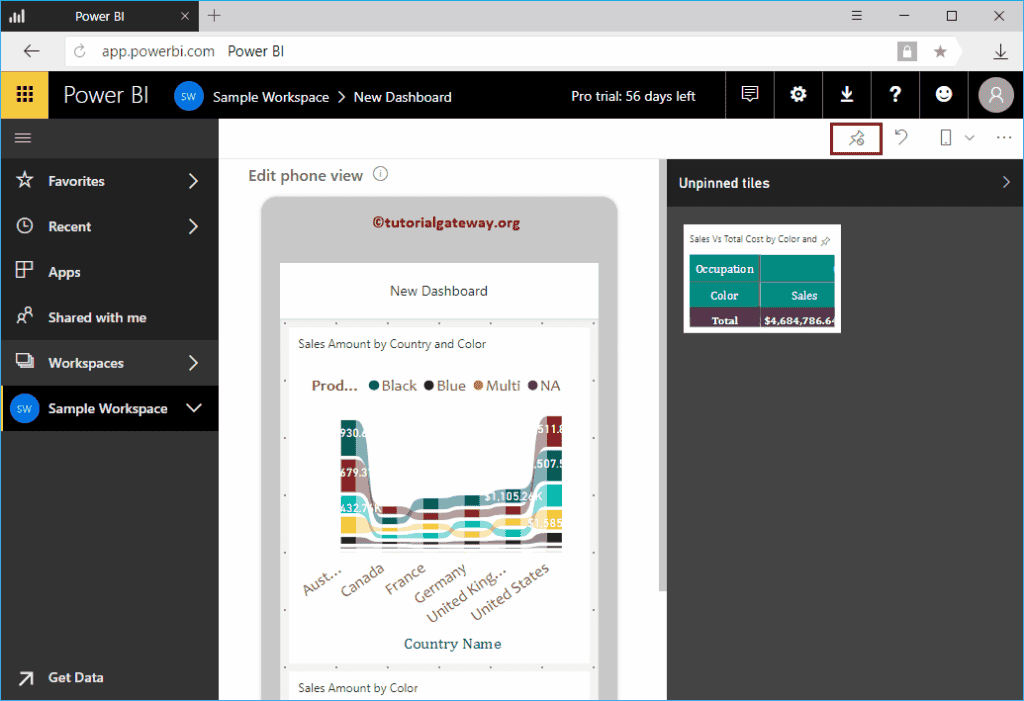
Once you completed editing Power BI app, click the Update App button. Remember, we removed the Matrix from the Phone View.
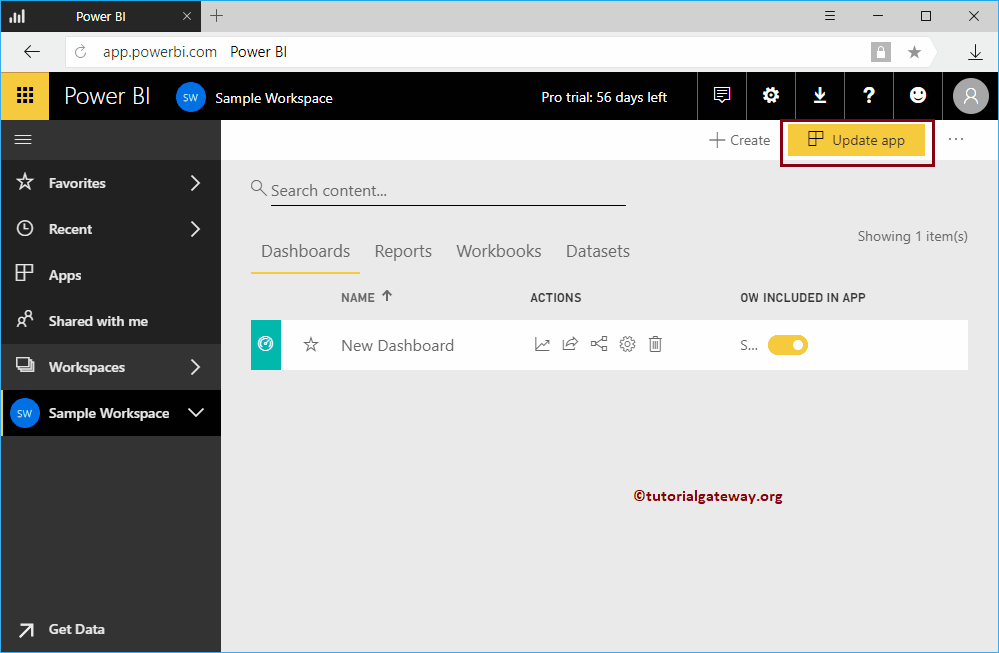
By Hitting the Update App button, it shows you the Details window. If you want, you can change these settings as well otherwise, hit Update App.
Click the Update button
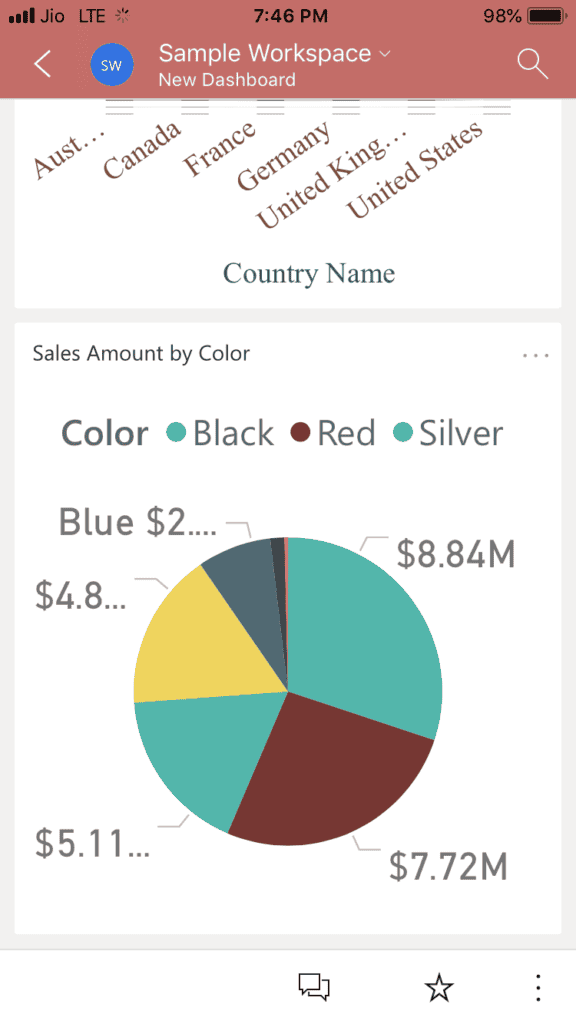
Let me open the App in IOS
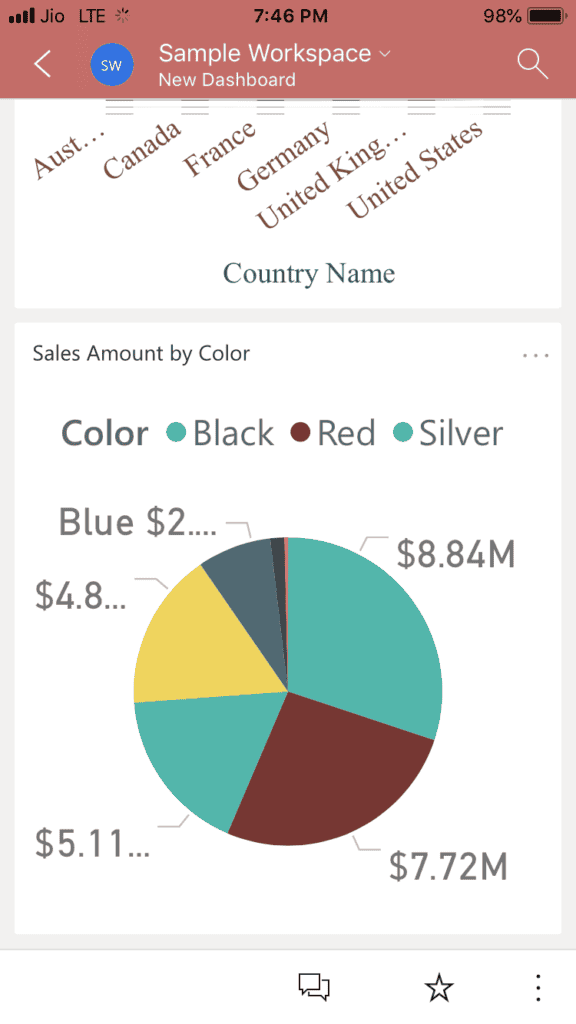
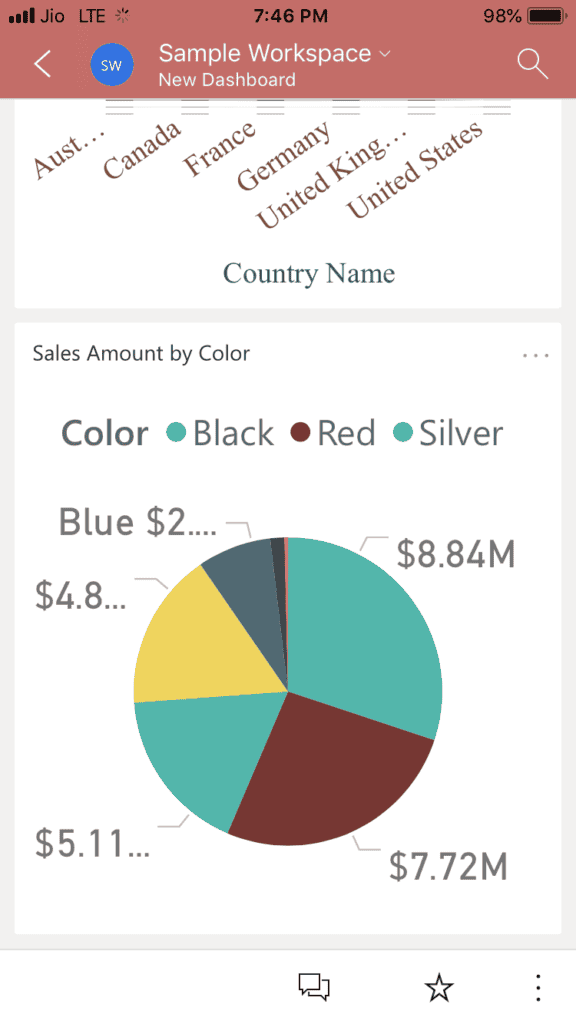
From the below screenshot, you can see there is no Matrix in the Phone view.
