Users Online
· Members Online: 0
· Total Members: 188
· Newest Member: meenachowdary055
Forum Threads
Latest Articles
Articles Hierarchy
Skill 1.7: Design and implement DevTest Labs Part 2
Skill 1.7: Design and implement DevTest Labs Part 2
Configure cost management
Azure DevTest Labs was designed to help development teams more effectively manage costs and resources. One of the key features of this is Cost Management, which allows you to track the cost associated with operating your lab. You can also view trends, set cost targets and thresholds, and configure alerts to keep you informed about your monthly costs. Cost threshold targets allow you to monitor usage throughout the month, and potentially alter behavior accordingly if you see spending happening faster than anticipated during a specified time period.
To view your Cost trend chart, navigate to the blade for your DevTest Labs instance, and select Cost trend from the Configuration and policies blade of your lab (Figure 1-84).
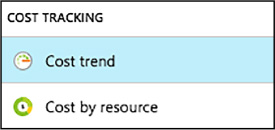
FIGURE 1-84 Cost Trend
Cost trend
The Monthly Estimated Cost Trend chart displays the current calendar month’s estimated cost-to-date, and the projected end-of-month cost for the current calendar month (Figure 1-85).
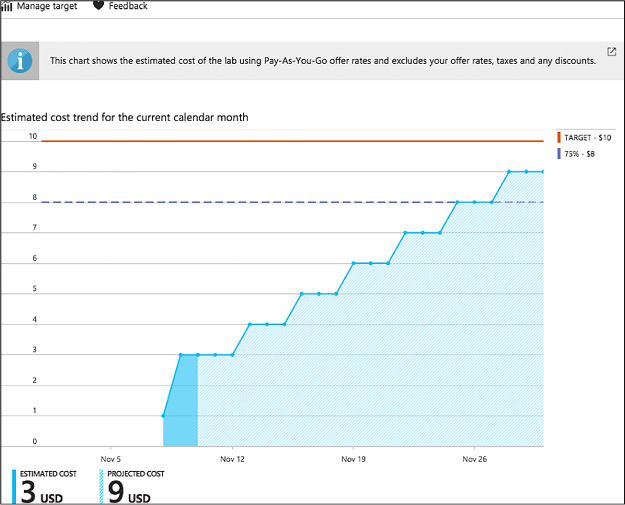
FIGURE 1-85 Cost trend chart
Azure DevTest Labs allows you to modify the time span displayed on the chart, specify target costs, and set up notifications. You can configure these options by completing the following steps:
-
From the Cost trend blade, select Manage target (Figure 1-86).
![]()
FIGURE 1-86 Manage Target
-
On the Manage target blade:
-
Select the time period you would like displayed on the chart. Monthly is the default, and will display the current month. Selecting Fixed allows you to specify a set time period to display on the chart (Figure 1-87).
-
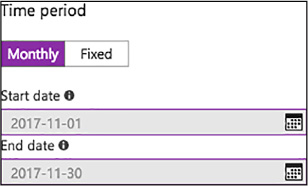
FIGURE 1-87 Target Time Period
-
-
Specify a numeric value (in USD) for your target monthly cost (Figure 1-88).
-
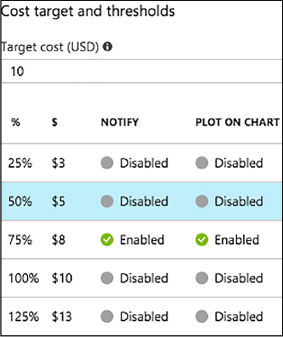
FIGURE 1-88 Target cost value
-
-
Select any desired cost thresholds, and on the Cost threshold blade, specify whether to send notifications, and if you would like the threshold displayed on the trend chart, then select OK (Figure 1-89).
-
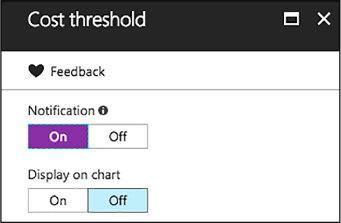
FIGURE 1-89 Target thresholds
-
-
If you chose to enable notifications, click to add an integration of a Webhook under Cost integrations. The lab will post a notification to the specified endpoint if lab spending reaches a threshold for which you have opted to receive notification (Figure 1-90).
-
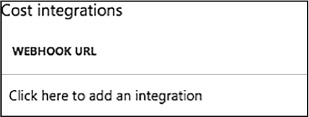
FIGURE 1-90 Add Webhook integration
-
-
On the Configure notification blade, enter a Webhook URL, and Select OK (Figure 1-91).
-
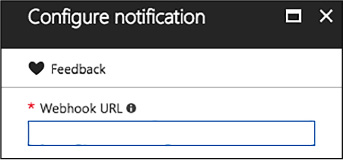
FIGURE 1-91 Webhook URL
-
-
Select OK to save the trend chart targets.
-
The estimated cost value is the current calendar month’s estimated cost-to-date. The projected cost is the estimated cost for the entire calendar month, calculated using the lab cost for the previous five days. These cost numbers are rounded up the nearest whole number, and do not reflect actual costs.
More Info: Webhooks
Webhooks are user defined HTTP/HTTPS endpoints that are usually triggered by an event. You must create a Webhook prior to entering it here. For more details on creating Webhooks, see: https://docs.microsoft.com/azure/azure-functions/functions-create-github-webhook-triggered-function.
Cost by resource
To provide you with more insight into cost of operating each individual resource in your lab, you can also view a breakdown of cost by resource. To view this breakdown, follow these steps:
-
Navigate to the blade of your DevTest Labs instance.
-
On the Configuration and policies blade for your lab, select Cost by resource (Figure 1-92).
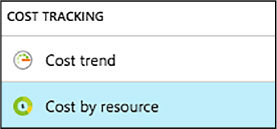
FIGURE 1-92 Cost By Resource
-
View the list of individual resources, and how much money (in USD) is being spent per resource (Figure 1-93).

FIGURE 1-93 Viewing cost by resource
-
The list can be sorted to easier view those resources which have the most associated cost.
Secure access to labs
Security access in DevTest Labs is determined by Azure Role-Based Access Control (RBAC). To understand how access works, it helps to understand the differences between a permission, a role, and a scope as defined by RBAC.
![]() Permission Defined access to a specific action (e.g. read-access to all virtual machines).
Permission Defined access to a specific action (e.g. read-access to all virtual machines).
![]() Role A set of permissions that can be grouped and assigned to a user. For example, the subscription owner role has access to all resources within a subscription.
Role A set of permissions that can be grouped and assigned to a user. For example, the subscription owner role has access to all resources within a subscription.
![]() Scope A level within the hierarchy of an Azure resource, such as a resource group, a single lab, or the entire subscription.
Scope A level within the hierarchy of an Azure resource, such as a resource group, a single lab, or the entire subscription.
Using RBAC, you can segregate duties within your team into roles where you grant only the amount of access necessary to users to perform their jobs. The three RBAC roles most relevant to Azure DevTest Labs are Owner, DevTest Labs User, and Contributor.
The Table 1-3 provides a breakdown of the actions that can be performed by users in each of these roles.
TABLE 1-3 Actions that can be performed by users in specified roles.
|
Actions users in this role can perform |
DevTest Labs User |
Owner |
Contributor |
|
LAB TASKS |
|
|
|
|
Add users to a lab |
No |
Yes |
No |
|
Update cost settings |
No |
Yes |
Yes |
|
VM BASE TASKS |
|
|
|
|
Add and remove custom images |
No |
Yes |
Yes |
|
Add, update, and delete formulas |
Yes |
Yes |
Yes |
|
Whitelist Azure Marketplace images |
No |
Yes |
Yes |
|
VM TASKS |
|
|
|
|
Create VMs |
Yes |
Yes |
Yes |
|
Start, stop, and delete VMs |
Only VMs created by the user |
Yes |
Yes |
|
Update VM policies |
No |
Yes |
Yes |
|
Add/remove data disks to/from VMs |
Only VMs created by the user |
Yes |
Yes |
|
ARTIFACT TASKS |
|
|
|
|
Add and remove artifact repositories |
No |
Yes |
Yes |
|
Apply artifacts |
Yes |
Yes |
Yes |
Add an owner or user at the lab level
Owners and users can be added at the lab level via the Azure portal. This includes external users with a valid Microsoft account (MSA). The following steps guide you through the process of adding an owner or user to a lab in Azure DevTest Labs:
-
Navigate to the blade of your DevTest Labs instance.
-
On your lab’s blade, select Configuration and policies.
-
On the Configuration and policies blade (Figure 1-94), select Access control (IAM).
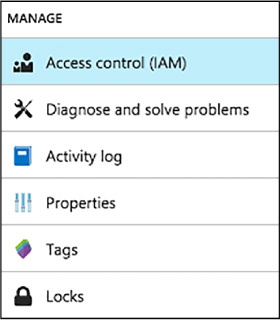
FIGURE 1-94 Access Control (IAM)
-
Select +Add
-
On the Add permission blade, select a role, Owner or DevTest Labs User (Figure 1-95).
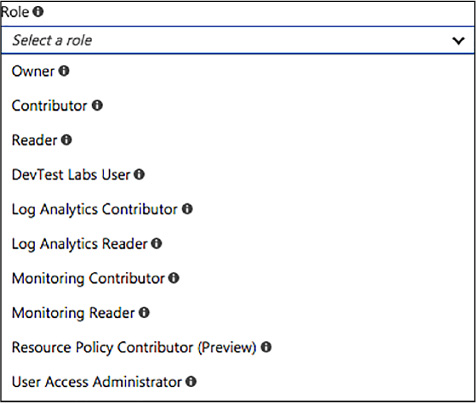
FIGURE 1-95 New lab owner role
-
On the Add permissions blade, enter a name or an email address, and select the user (Figure 1-96).
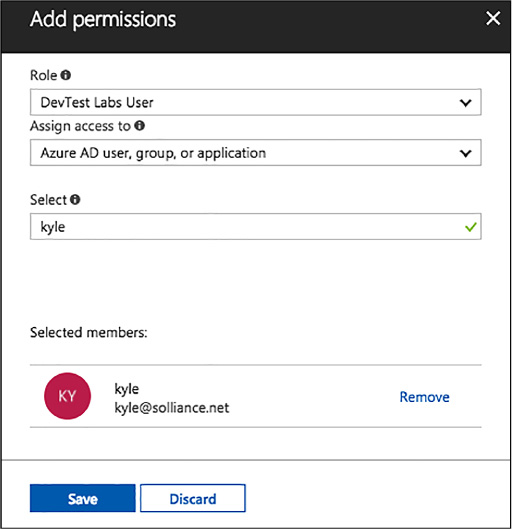
FIGURE 1-96 Add permissions to users
-
Click Save.

