Users Online
· Members Online: 0
· Total Members: 188
· Newest Member: meenachowdary055
Forum Threads
Latest Articles
Articles Hierarchy
GPS Location Tracker with Temboo, Twilio, and Google Maps
GPS Location Tracker with Temboo, Twilio, and Google Maps
Location tracking is important when you want to find the exact location of movable objects, such as vehicles, pets, or even people. GPS technology is very helpful in getting precise locations, which makes it possible to create real-time tracking devices.
In this chapter you will learn:
-
How to connect the Arduino GPS shield with the Arduino Ethernet board
-
How to install and use TinyGPSPlus library with the Arduino Ethernet board
-
How to extract location data and time with Arduino GPS shield in conjunction with TinyGPSPlus library
-
About Google Maps JavaScript API that displays the current location on Google Maps with GPS data
-
How to get GPS location data by SMS with Twilio and Temboo
Hardware and software requirements
You will need the following hardware and software to complete this project:
Hardware requirements
-
Arduino Ethernet board (https://www.sparkfun.com/products/11229)
-
SparkFun GPS Shield kit (https://www.sparkfun.com/products/13199)
-
FTDI Cable 5V (https://www.sparkfun.com/products/9718)
-
9V DC 650mA wall adapter power supply (https://www.sparkfun.com/products/10273)
Software requirements
-
TinyGPSPlus library (https://github.com/mikalhart/TinyGPSPlus/archive/master.zip)
Getting started with the Arduino GPS shield
Arduino GPS shield lets your Arduino board receive information from the GPS (Global Positioning System). The GPS is a satellite-based navigation system made up of a network of 24 satellites.
Arduino GPS shield consists of a GPS receiver that can be used to receive accurate time signals from the GPS satellite network and calculate its own position.
Arduino GPS Shield is currently manufactured by various electronics kit suppliers. The most popular manufacturers are SparkFun Electronics and Adafruit. Throughout this project, we will use the SparkFun GPS Shield kit (https://www.sparkfun.com/products/13199).
The kit comes with an EM-506 GPS module and the Arduino stackable header kit. Click on Assembly Guide (https://learn.sparkfun.com/tutorials/gps-shield-hookup-guide) in the product page, and follow the instructions to solder the headers and GPS module to the shield.
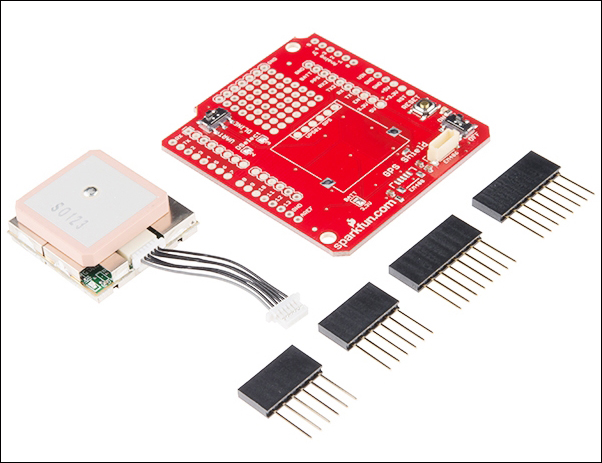
The Arduino GPS shield kit: Image taken from SparkFun Electronics Image courtesy of SparkFun Electronics (https://www.sparkfun.com)
Connecting the Arduino GPS shield with the Arduino Ethernet board
To connect the Arduino GPS shield with the Arduino Ethernet board, perform the following steps:
-
Stack your Arduino GPS shield with the Arduino Ethernet board.
-
Move the UART/DLINE switch to the DLINE position. This is a two-way switch that can be used to select the UART or DLINE mode to communicate GPS shield with Arduino.
-
-
UART: This connects the GPS module's serial lines to Arduino hardware serial (D0/RX and D1/TX).
-
DLINE: This connects the GPS module's serial lines to the Arduino software serial (D2 and D3). See the solder marks label next to the UART/DLINE switch.
-
-
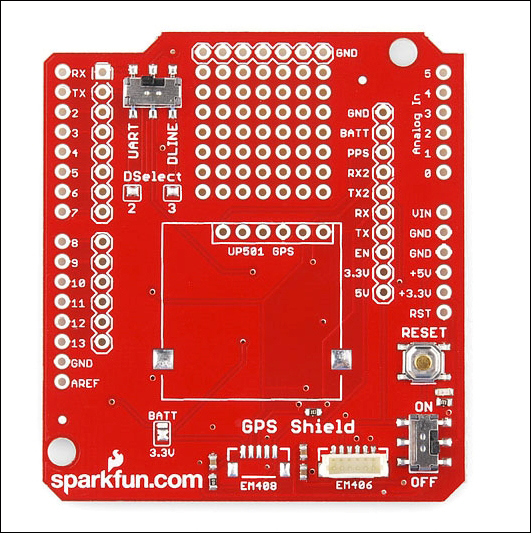
The Arduino GPS shield PCB: Image courtesy of SparkFun Electronics (https://www.sparkfun.com)
-
Connect the 9V DC power supply to your Arduino Ethernet board. Then, connect the Arduino Ethernet board to the computer with an FTDI cable a USB to Serial (TTL Level) converter.
-
Now, download the TinyGPSPlus library from https://github.com/mikalhart/TinyGPSPlus/archive/master.zip and extract it to your Arduino Installation's libraries folder.
Testing the GPS shield
Follow these steps to test the GPS shield:
-
Open a new Arduino IDE, then copy and paste the sample code B04844_06_01.ino from the Chapter 6 code folder of this book. (Note that this is the sample code included with the TinyGPSPlus library to display the current location by latitude and longitude with date and time). You can also open this sketch by navigating to File | Examples | TinyGPSPlus | DeviceExample on the menu bar.
-
Verify and upload the sketch to your Arduino board or Arduino Ethernet board.
-
Open the Arduino Serial Monitor by going to Tools | Serial Monitor. The following output will be displayed:
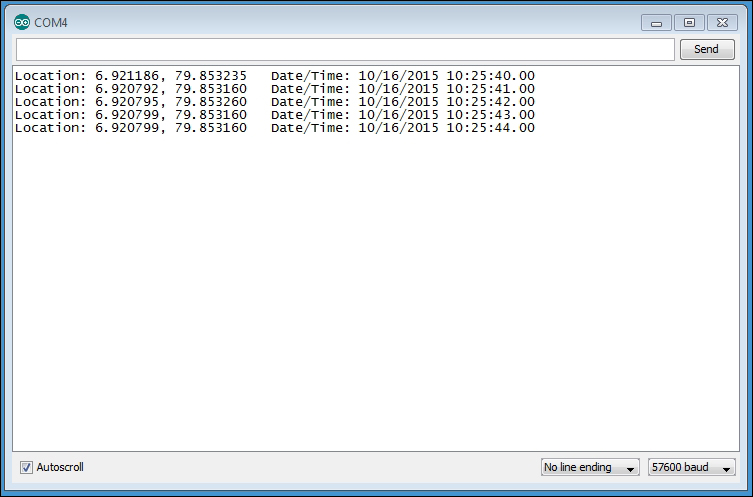
In each entry, the current location is displayed with latitude, longitude, and date/time. Next, you will learn how to use these values to display the location on Google Maps.
Displaying the current location on Google Maps
Google Maps JavaScript API can be used to display the current location with a marker on Google Maps. We can simply pass the latitude and longitude to the Google JavaScript API library and display the current location as a simple marker.
The following steps will explain you how to display the Arduino GPS shield's current location on Google Maps:
-
Open a new Arduino IDE and paste the sample code B04844_06_02.ino from the Chapter 6 code folder. Verify and upload the sketch to your Arduino Ethernet Shield or Arduino Ethernet board.
-
The code consists a mix of Arduino, HTML, and JavaScript. Let's look at some important points of the code.
-
-
The following JavaScript function creates a new Google map position with latitude and longitude:
-
-
var myLatlng = new google.maps.LatLng(-25.363882,131.044922);
The latitude and longitude values should be replaced with the real time returning values of the Arduino GPS shield as follows:
var myLatlng = new google.maps.LatLng(gps.location.lat(),gps.location.lng());
-
-
-
The following JavaScript function will create a map and display a simple marker on Google Maps based on the location provided by the map options:
-
-
var map = new google.maps.Map(document.getElementById('map-canvas'), mapOptions);
-
Open your web browser and type the IP address of the Arduino Ethernet Shield and navigate to the site. Read Chapter 1, Internet-Controlled PowerSwitch, for information on how to find the IP address of your Arduino Ethernet Shield. Example: http://192.168.10.177.
-
Your web browser will display your GPS shield's current location on the Google Map, as shown in the following screenshot:
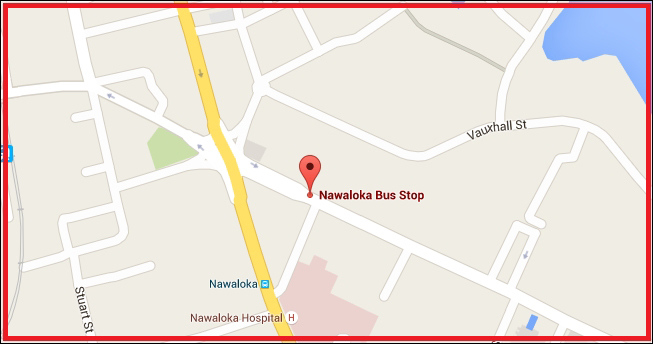
The current location of the Arduino GPS shield is displayed on the Google Map with a marker icon
In the next section, you will learn how to send the current GPS location by SMS to the client using Twilio and Temboo.
Getting started with Twilio
The Twilio platform provides API to programmatically send, receive, and track SMS messages worldwide, while also letting you test your SMS-enabled applications within a sandbox environment.
Creating a Twilio account
Using your Internet browser, visit https://www.twilio.com/. The Twilio landing page will be displayed with the sign up and log in options.
Click on the SIGN UP button. You will be navigated to the new user registration form.
Fill out the form with the relevant information and then click on the Get Started button. You will be navigated to the Human Verification page:
-
In this page, select your country from the drop-down list and type your phone number in the textbox.
-
Click on the Text Me button. You will be navigated to the Enter Verification Page. Meanwhile, your mobile phone will receive an SMS message containing a verification code.
-
In the Enter Verification Page, enter the verification code and click on the Submit button.
After successfully verifying your Twilio account, you will be navigated to the Twilio Getting Started page. This means that you have successfully created a Twilio account.
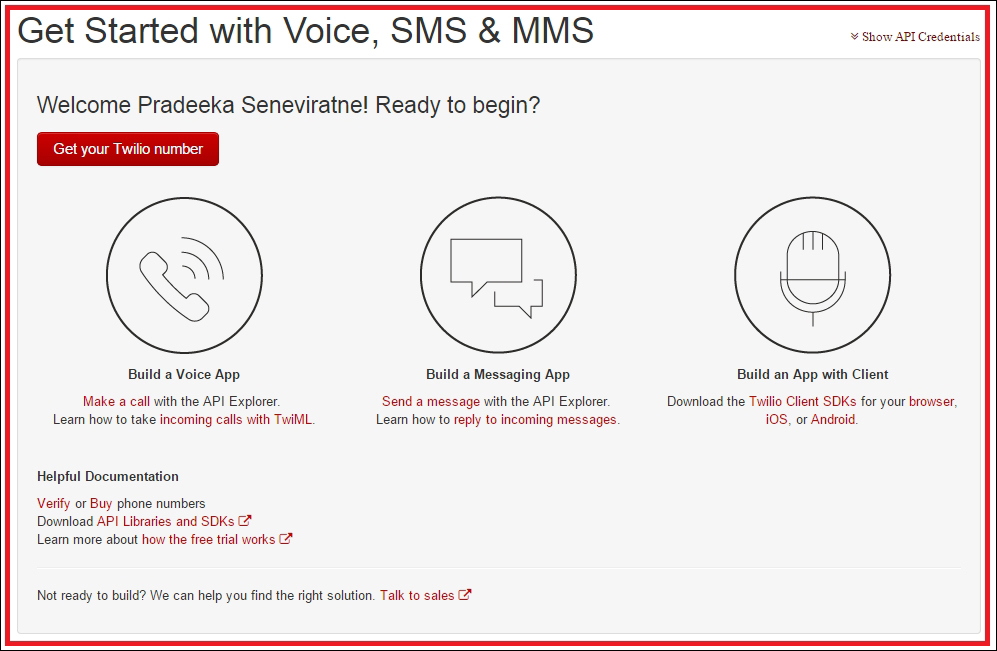
Twilio's getting started page
Finding Twilio LIVE API credentials
At the top of the Twilio getting started page, you will find the Show API Credentials link. Click on it, and the API Credentials panel will expand and display the following information:
-
ACCOUNT SID
-
AUTH TOKEN
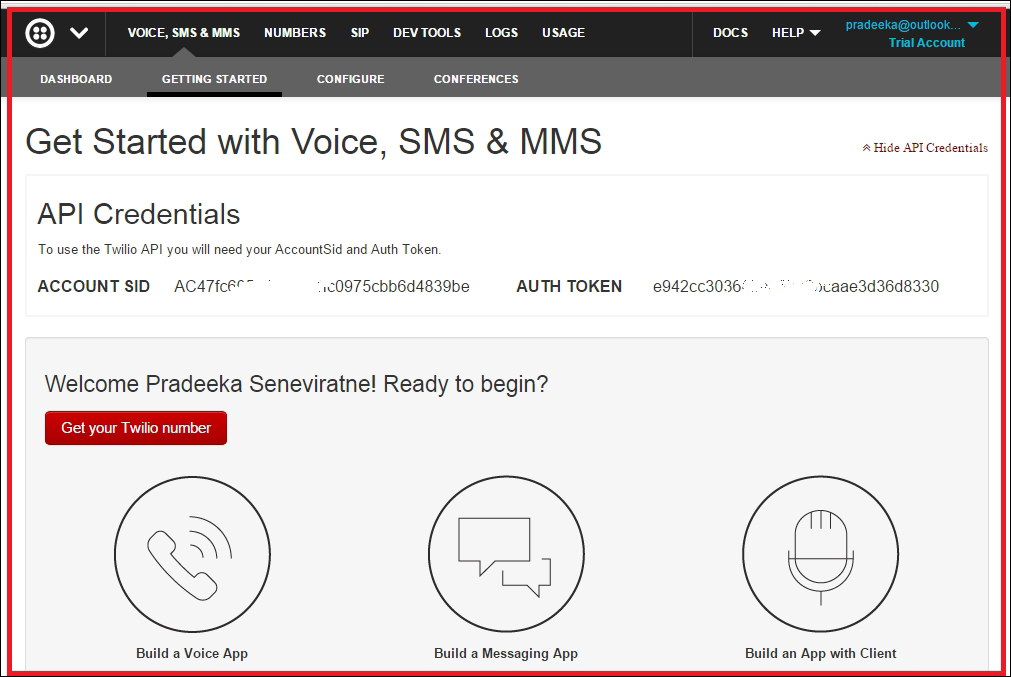
Twilio API Credentials: Account SID and Auth Token
You will need the ACCOUNT SID and AUTH TOKEN in the next section when you connect your Twilio account with Temboo. However, the default account type is a trial account with limited API calls allocated. If you want to get the full benefit of Twilio, upgrade the account.
Finding Twilio test API credentials
At the top-right of the page, click on your account name, and from the drop-down menu, click on Account. The Account Settings page will appear, as shown here:
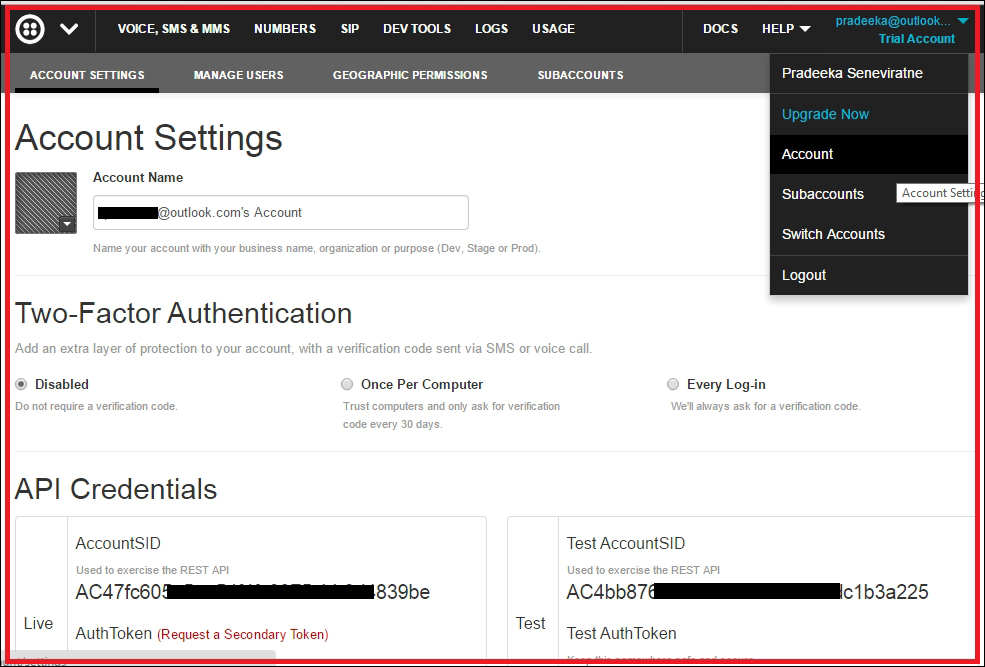
Twilio test API credentials: Test Account SID and Test Auth Token
In this page, under API Credentials, you can find the Test Account SID and Test Auth Token to test your apps with Twilio.
Get your Twilio number
Your Twilio account provides phone numbers to use with Voice, SMS, and MMS. You can obtained one such number by following these instructions:
-
Click on the Voice, SMS & MMS menu item at the top of the page.
-
Click on GETTING STARTED in the submenu of Voice, SMS & MMS.
-
Click on the Get your Twilio Number button. Your first Twilio phone number will generate and you can choose the number by clicking on the Choose this number button. Also, you can search for a different number by clicking on Search, for a different number link.
Some countries, such as Australia, do not have SMS capability for trial accounts. Use a United States number, which will enable you to send SMS internationally.
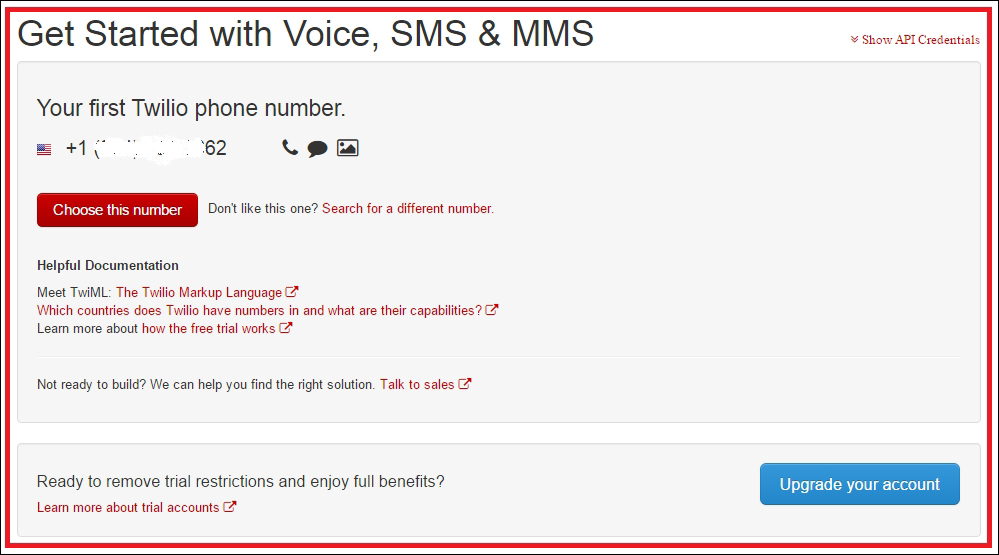
Twilio phone number
-
The following page will be displayed as a confirmation. You can further configure your Twilio phone number by clicking on the Configure your number button:
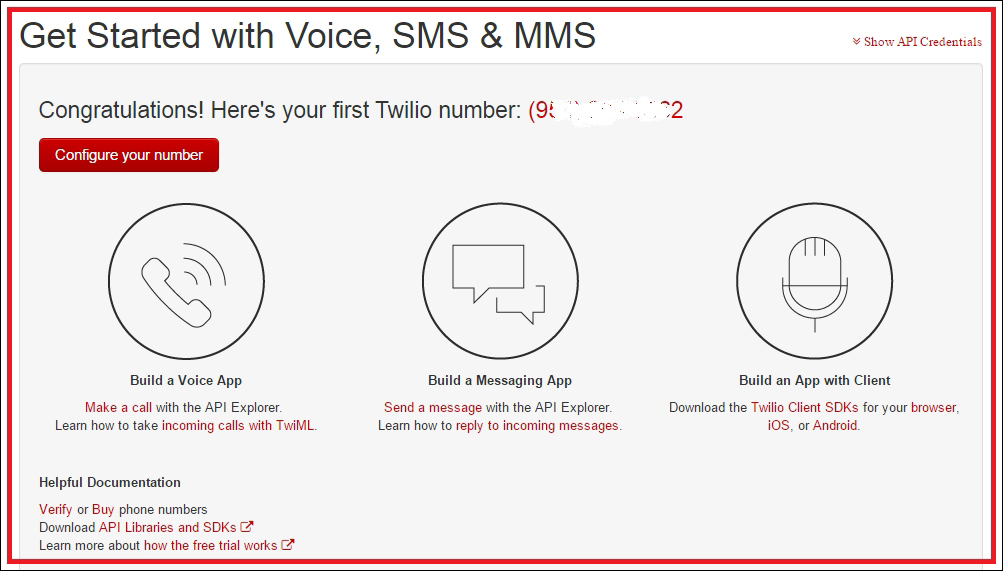
Twilio Phone number configuration page
Creating Twilio Choreo with Temboo
The Temboo provides us with a Choreo to send an SMS using the Twilio account. This Choreo uses Twilio API credentials to authenticate and send SMS to destination phone numbers. The advantage is that by using Temboo Choreos, you can write more complex functions using few lines of code.
Sending an SMS with Twilio API
To send an SMS with Twilio API, perform the following steps:
-
Sign in to your Temboo account. If you still don't have a Temboo account, create one as discussed in Chapter 5, Solar Panel Voltage Logging with NearBus Cloud Connector and Xively.
-
Under CHOREOS, expand Twilio, then expand SMSMessages and click on SendSMS.
-
The right-hand side of the page will load the Twilio SendSMS configuration form.
-
Turn ON the IoT Mode.
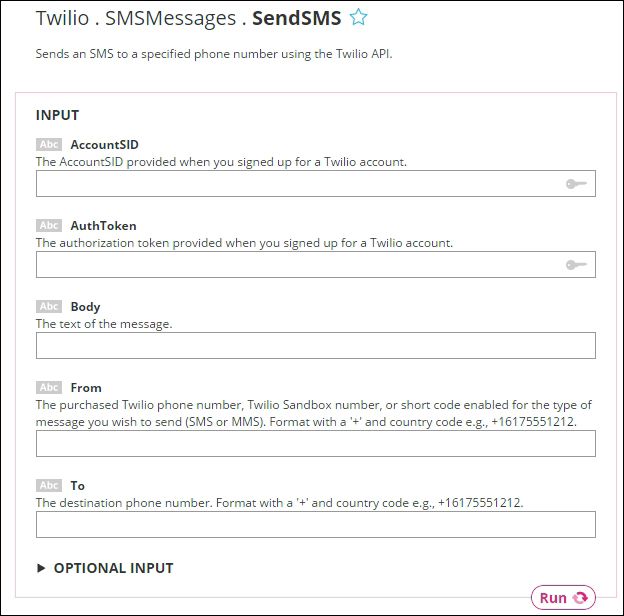
Twilio SendSMS form
-
Fill out the following textboxes with your Twilio API settings:
-
-
AccountSID: Type the Twilio Test Account SID
-
AuthToken: Type the Twilio Test AuthToken
-
Body: You can type any text message here in order to test
-
From: Type Twilio Sandbox number (use your Twilio phone number)
-
To: The destination phone number (use your phone number that associated with the Twilio account)
-
-
-
Click on the Run button to send the SMS to your phone.
Send a GPS location data using Temboo
To send a GPS location data using Temboo, perform the following steps:
-
Open a new Arduino IDE and copy and paste the sketch B04844_06_03.ino from the Chapter 6 code folder.
-
Replace the ToValue and FromValue phone numbers, as shown here:
String ToValue = "+16175XXX213";
SendSMSChoreo.addInput("To", ToValue);
String FromValue = "+16175XXX212";
SendSMSChoreo.addInput("From", FromValue);
-
Save the B04844_06_03.ino sketch in your local drive inside a new folder. Copy the code generated in the HEADER FILE section under the Twilio SendSMS section, and paste it into a new Notepad file. Save the file as TembooAccount.h in the same location.
-
Verify the sketch. If you get a compiler error indicating that the TembooAccount.h header file is missing, restart the Arduino IDE and open the B04844_06_03.ino sketch again and then verify. This will probably solve the issue.
-
Upload the sketch into your Arduino Ethernet board.
-
You will receive the first SMS including the GPS location data from your device. Wait for 30 minutes. You will receive the second SMS. You can change the delay between SMS messages by modifying the following code line as shown:
delay(1800*1000); // wait 30 minutes between SendSMS calls
The value 1,800 seconds is equal to 30 minutes. To convert the 1,800 seconds into milliseconds, multiply it by 1,000.
Summary
In this chapter, you learned how to connect the Arduino GPS shield with Arduino Ethernet Shield while displaying the current location using Google maps with Google Maps JavaScript API. You also used Twilio and Temboo APIs to send SMS messages with GPS location data to the user.

