Users Online
· Members Online: 0
· Total Members: 188
· Newest Member: meenachowdary055
Forum Threads
Latest Articles
Articles Hierarchy
#01_05 A Smart Speaker Machine
A Smart Speaker Machine
Nowadays, speech and voice technology is applied to various IoT platforms. We can see Amazon and Google already having built smart speaker machines, Amazon Echo and Google Home. In this chapter, we will explore and learn how to build a smart speaker machine. For development and testing, we will use the ReSpeaker board to implement a smart speaker machine.
In this chapter, we'll learn the following topics:
-
Introducing smart speaker machines
-
Exploring existing smart speaker machines
-
Introducing ReSpeaker
-
Integrating your IoT boards with ReSpeaker
-
GPIO programming on ReSpeaker
-
Connecting to the Microsoft Bing Speech API
-
Building your own smart speaker machine
Let's explore!
Introducing smart speaker machines
In recent years, big companies such as Amazon, Apple, Google, and Microsoft have invested in speech technology. Speech technology implementation can be through software, hardware, and hybrid software and hardware. Speech technology usually uses Artificial Intelligence methods to detect and recognize speech or voice and then perform something based on the speech/voice input. Amazon Echo and Google Home are samples of speech technology implementations in hybrid hardware and software. They can be called smart speaker machines.
In general, a smart speaker machine consists of microphone and speaker devices as sensor and actuator. The speaker can record human voice and then convert it to analog values. A speaker can be used to generate sounds based on signal parameters such as frequency and amplitude. Human voice in analog form is converted to digital form so we can process it easily. In digital form, we can implement various algorithms to it in a computer. One of these tasks is to convert human speech to text. It is usually called speech-to-text. Alternatively, we also can synthesize human voice from text. We need a specific algorithm based in AI to convert text to human speech/voice. You can see a general design of a smart speaker machine here:

Designing a smart speaker machine usually involved integrating a machine learning program such as speech-to-text and text-to-speech. In this case, we'll build a program to recognize human speech in digital form and then convert it into text.
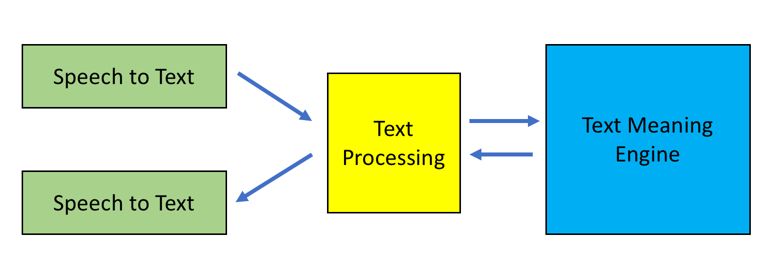
After we obtain text from human speech, we can perform text processing. For instance, if we get the text "turn on LED", we'll perform actions to turn on the LED. It involves text processing to obtain meaning from text. You can see a general design of a text meaning system here:
Exploring existing smart speaker machines
Manufacturers make smart speaker machines to perform automation tasks. In this section, we will explore various smart speaker machines.
Amazon Echo
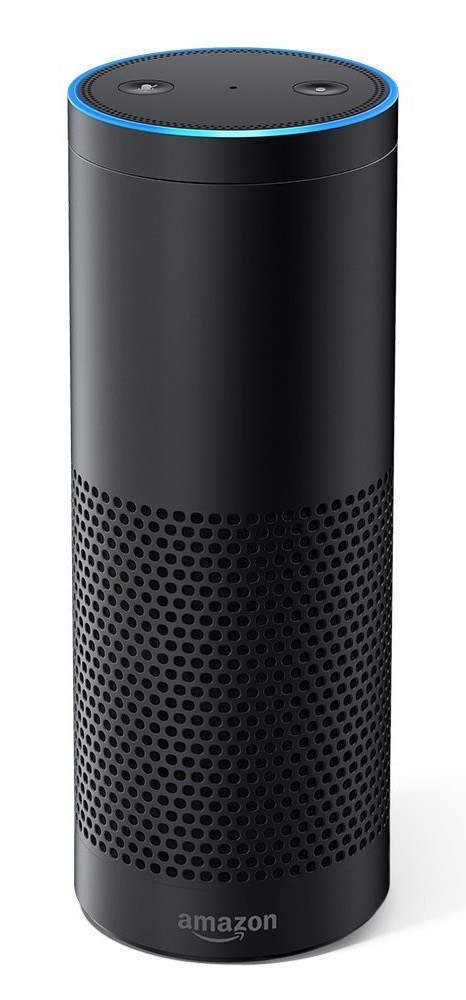
Amazon Echo is a smart hardware system. Amazon has used an artificial intelligence engine in Amazon Echo to enable interaction with users. This program is called Alexa. We can perform tasks on Amazon Echo through voice commands. There are some keywords that are used by Alexa to identify and recognize voice commands. Currently, we can buy Amazon Echo from https://www.amazon.com/dp/B00X4WHP5E/. You can see Amazon Echo here:
Amazon also provides a cheap hardware device for Amazon Echo, called Amazon Echo Dot (https://www.amazon.com/dp/B01DFKC2SO/). The model's size is small and it is 163 grams in weight. You can see Amazon Echo here:

To start communicating with Amazon Echo, we should say Alexa. This is a keyword using which Amazon Echo starts to listen to commands. After recording the commands, Amazon Echo will interpret these commands to perform something.
Google Home
Google Home is a smart speaker machine powered by Google Assistant. This device can guide you based on your experience. As we know, Google has a lot of information from heterogeneous sources, so we can gather information from Google Home by giving it voice commands, including home automation tasks.
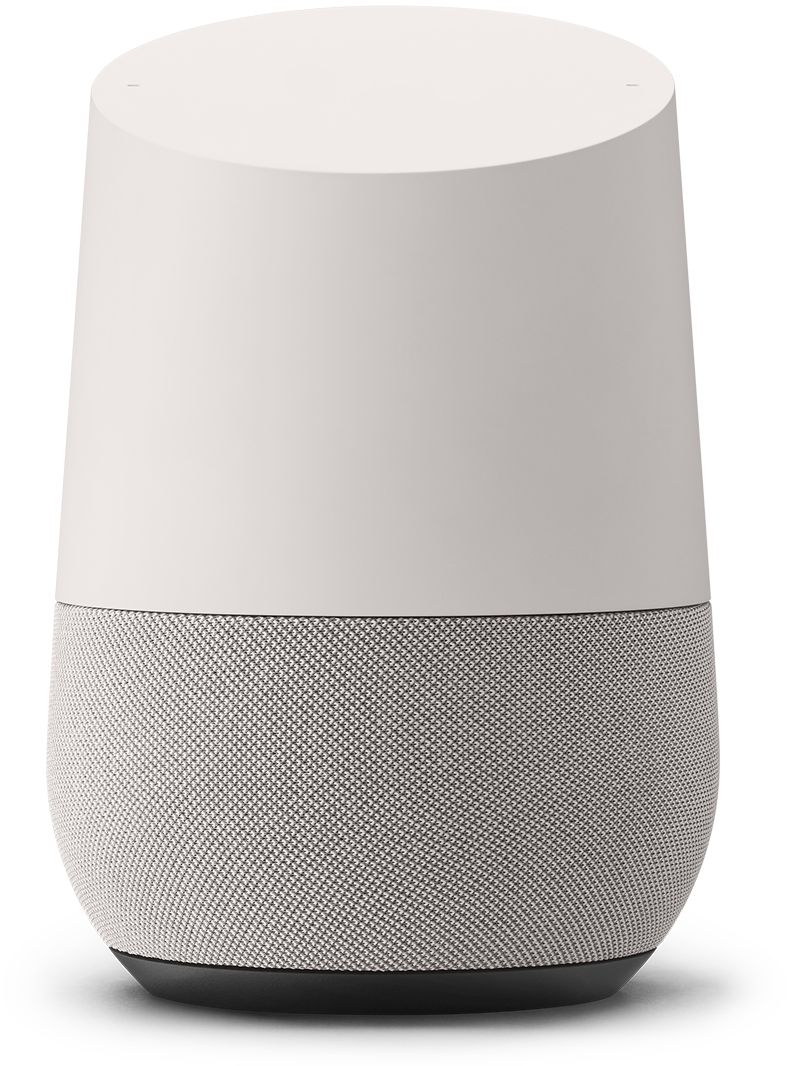
Like Amazon Echo, Google Home needs specific voice commands to perform any task. Some languages are supported, and English is the default language. For further information about Google Home, you can visit the official website at https://madeby.google.com/home/. You can see Google Home here:
Ivee
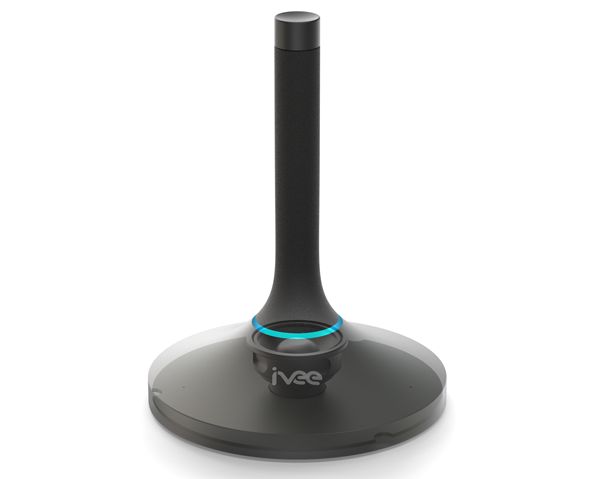
Ivee is a personal voice assistant. Like other machines, Ivee applies natural language speech (NLP) processing with their proprietary algorithms to recognize and understand our speech. Ivee also has an advantage in size. If you're interested, you can visit the official website at https://helloivee.com. Here is what the Ivee looks like:
Triby
Triby is a smart speaker machine that has a built-in Alexa voice service, so the machine can recognize and understand our speech. Since Triby machine use the same services as Amazon Echo, we can get more benefits. In addition, Triby applies additional features and services, such as an e-paper screen so you can read messages or display something. Interested? You can visit the official website at http://www.invoxia.com/triby/. Here's a picture of the Triby:

Introducing ReSpeaker
Technically, making a smart speaker machine is easy. We need a microphone and speaker for input and output audio. We also need an audio processing module and machine learning engine to manipulate speech audio and interpret speech commands.
In this section, we'll learn about one of the platforms for a smart speaker machine--ReSpeaker from SeeedStudio. We can use it with IoT boards such as Arduino and Raspberry Pi to perform automation tasks. You can get this module from SeeedStudio at https://www.seeedstudio.com/ReSpeaker-Core-Based-On-MT7688-and-OpenWRT-p-2716.html. Here it is:
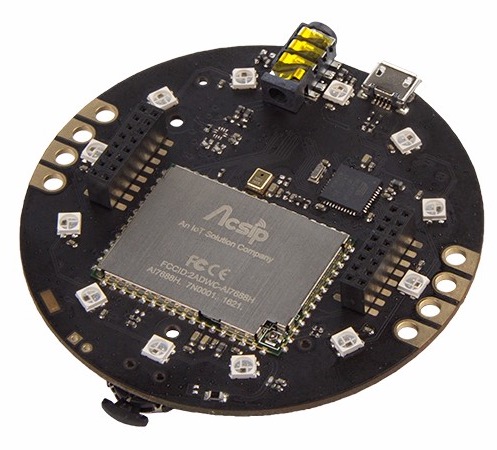
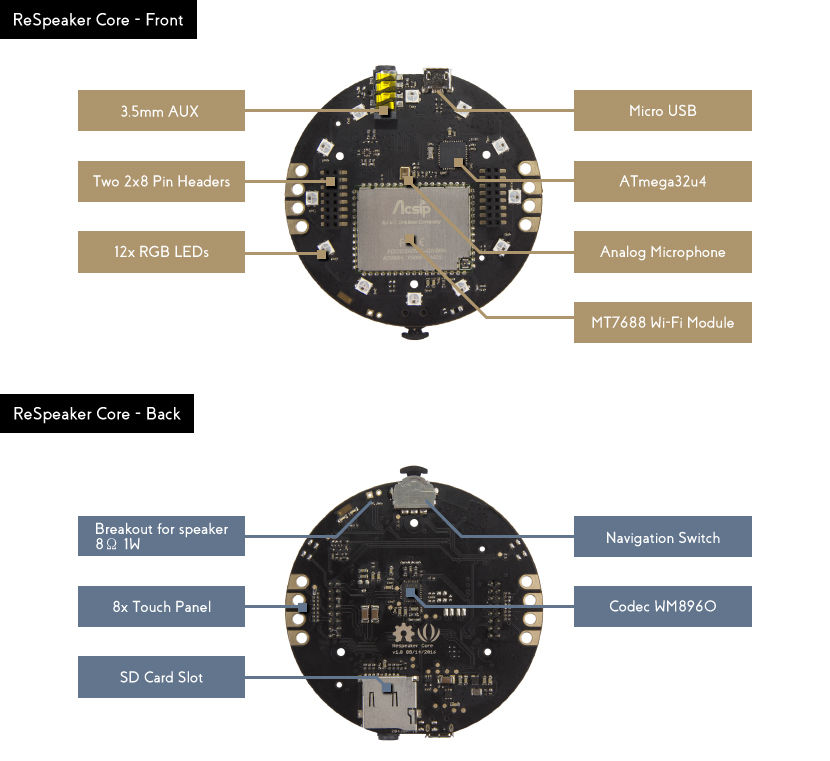
The ReSpeaker board uses the AI7688 Wi-Fi module, running the OpenWrt OS. To implement additional automation tasks, ReSpeaker uses the ATMega32U4 as its coprocessor and WM8960 for its codec engine. You can see the ReSpeaker core board layout in the following figure:
Once we connect ReSpeaker to a power adapter or a computer through a micro-USB cable, we can see the Wi-Fi access point from ReSpeaker. It usually shows up as ReSpeakerxxxxxx, where xxxxxx is a random number. Try to connect to this Wi-Fi from your computer. Then, you we will be asked to join ReSpeaker to an existing Wi-Fi network. You can select your existing Wi-FI or even ignore it.
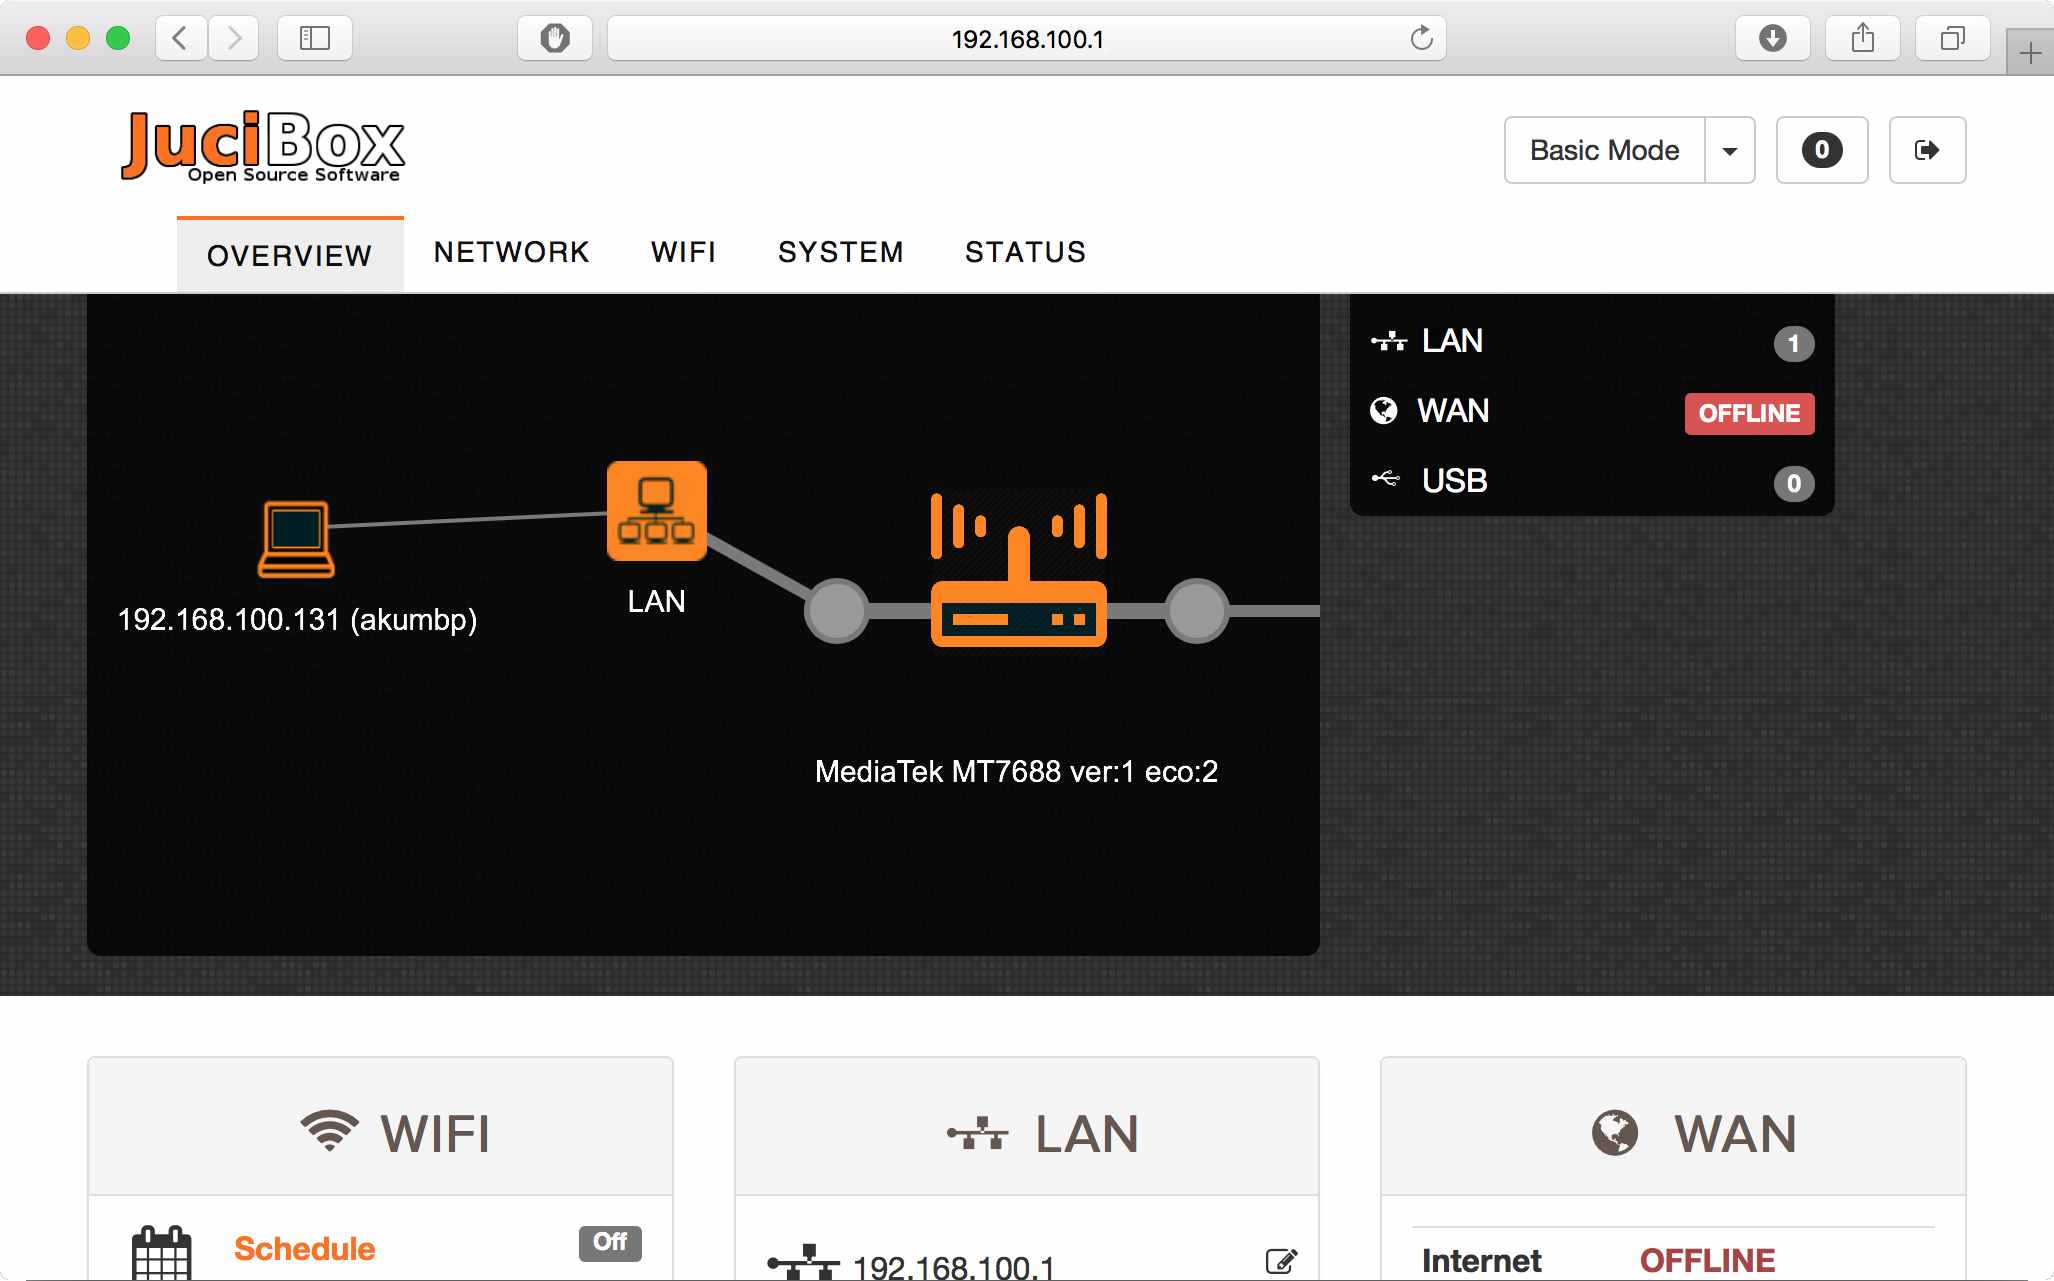
By default, ReSpeaker has the IP address 192.168.100.1 if you connect to the ReSpeaker Wi-Fi. If your ReSpeaker has joined an existing Wi-Fi, you should verify the ReSpeaker IP address. Now you can open a browser and navigate to the IP address of ReSpeaker so you can see the ReSpeaker dashboard, shown in the following screenshot. It shows all states of the ReSpeaker board.
Now we test our ReSpeaker board to build a simple smart speaker machine. If you look at the ReSpeaker core layout, it has a built-in analog microphone. To develop a program in ReSpeaker, the system has provided a Python library to interact with the board. For testing, we'll build a program for speech-to-text using Python.
Open your favorite text editor to write the following Python program:
import logging
import time
from threading import Thread, Event
from respeaker import Microphone
def task(quit_event):
mic = Microphone(quit_event=quit_event)
while not quit_event.is_set():
if mic.wakeup('respeaker'):
print('Wake up')
data = mic.listen()
text = mic.recognize(data)
if text:
print('Recognized %s' % text)
def main():
print('ReSpeaker is running..')
logging.basicConfig(level=logging.DEBUG)
quit_event = Event()
thread = Thread(target=task, args=(quit_event,))
thread.start()
while True:
try:
time.sleep(1)
except KeyboardInterrupt:
print('Quit')
quit_event.set()
break
thread.join()
if __name__ == '__main__':
main()
Save this program as ch05_respeaker_demo.py.
Transfer this file to ReSpeaker via SFTP. I recommend you use the Filezilla client app. You can download this application from https://filezilla-project.org. After you have uploaded the file to the ReSpeaker board, you can execute this program. You can type this command in the ReSpeaker terminal:
$ python ch05_respeaker_demo.py
Now you can start to give a command to ReSpeaker by saying respeaker. After this, you can say anything and the program will convert it to recognize the speech.
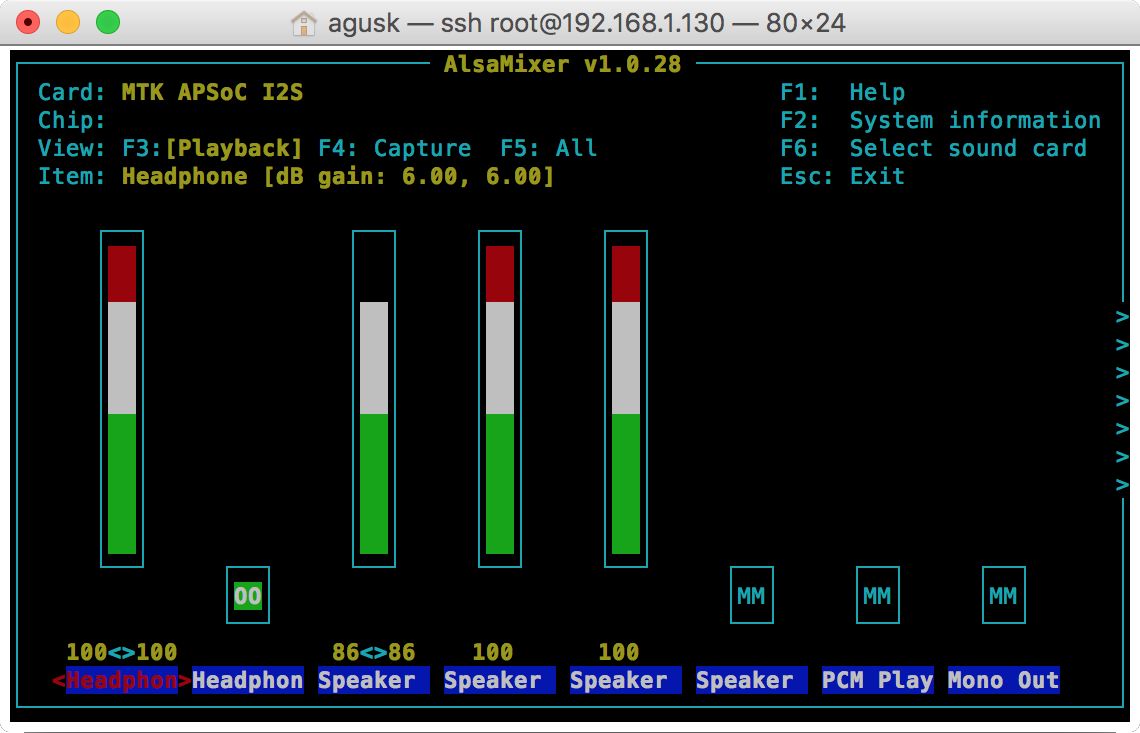
If you get a problem related to the audio channel while running the program, you can configure it using alsamixer. Run this on the ReSpeaker terminal:
$ alsamixer
After its has executed, you should see the AlsaMixer application. Configure the sound card by pressing F6. Once done, you can press the Esc key to exit the program. The AlsaMixer application is shown here:
How it works
This program runs by applying threading. We use the microphone object to obtain speech input. We call wakeup() to activate the ReSpeaker board in order to listen to incoming speech:
mic = Microphone(quit_event=quit_event)
while not quit_event.is_set():
if mic.wakeup('respeaker'):
print('Wake up')
After waking up ReSpeaker, we can listen to speech and perform recognition by calling the recognize() function:
data = mic.listen()
text = mic.recognize(data)
if text:
print('Recognized %s' % text)
Integrating your IoT boards with ReSpeaker
ReSpeaker is built with Arduino (ATmega32U4) and Linux-based OpenWrt with MCU MT7688 so that we can access GPIO pins in our program. We can develop a sketch program for the ReSpeaker board. Start by downloading the ReSpeaker library for Arduino from https://github.com/respeaker/respeaker_arduino_library. Download and extract it to the Arduino library with the name respeaker.
Now you can use the ReSpeaker library in your Arduino IDE. For testing, we'll try to access 12 RGB LEDs using the pixels library.
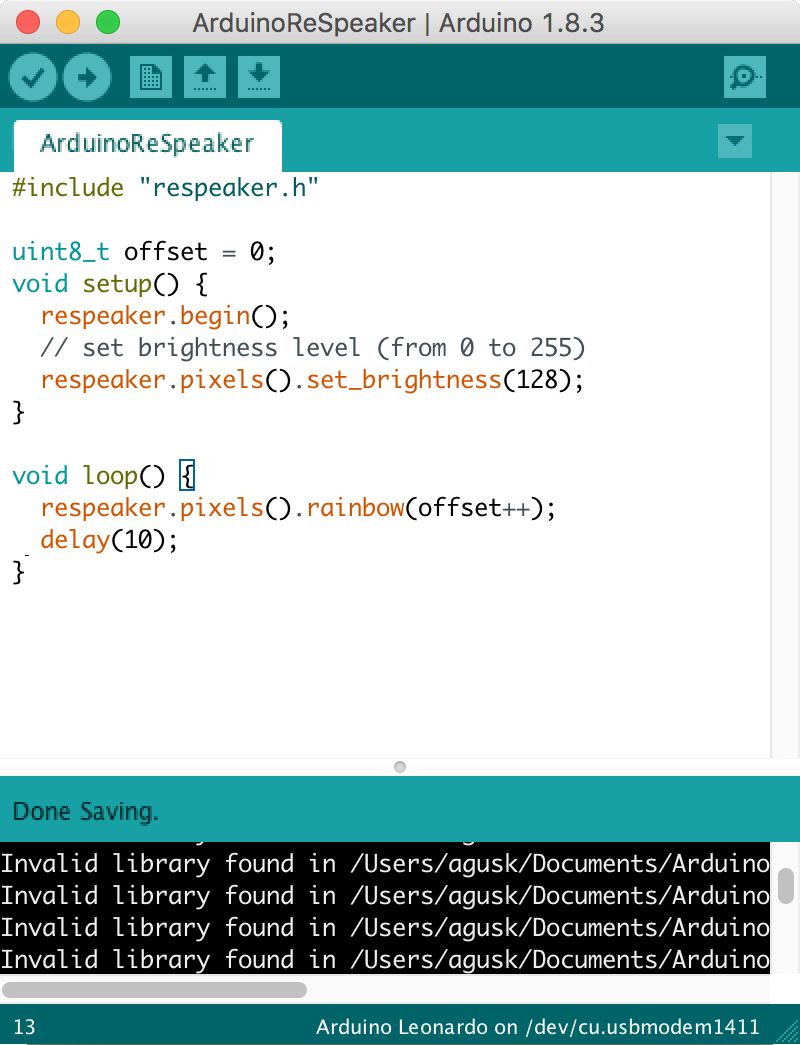
First, you should install Arduino software from this site: https://www.arduino.cc/en/Main/Software. Then, you can write the following sketch program:
#include "respeaker.h"
uint8_t offset = 0;
void setup() {
respeaker.begin();
// set brightness level (from 0 to 255)
respeaker.pixels().set_brightness(128);
}
void loop() {
respeaker.pixels().rainbow(offset++);
delay(10);
}
This program starts to initialize the ReSpeaker library by calling begin() from the respeaker object. In the loop() function, we change colors of the RGB LEDs.
Save this sketch as ArduinoReSpeaker. In order to upload the sketch program to ReSpeaker, you should configure the target board to Arduino Leonardo and change the port to your ReSpeaker port.
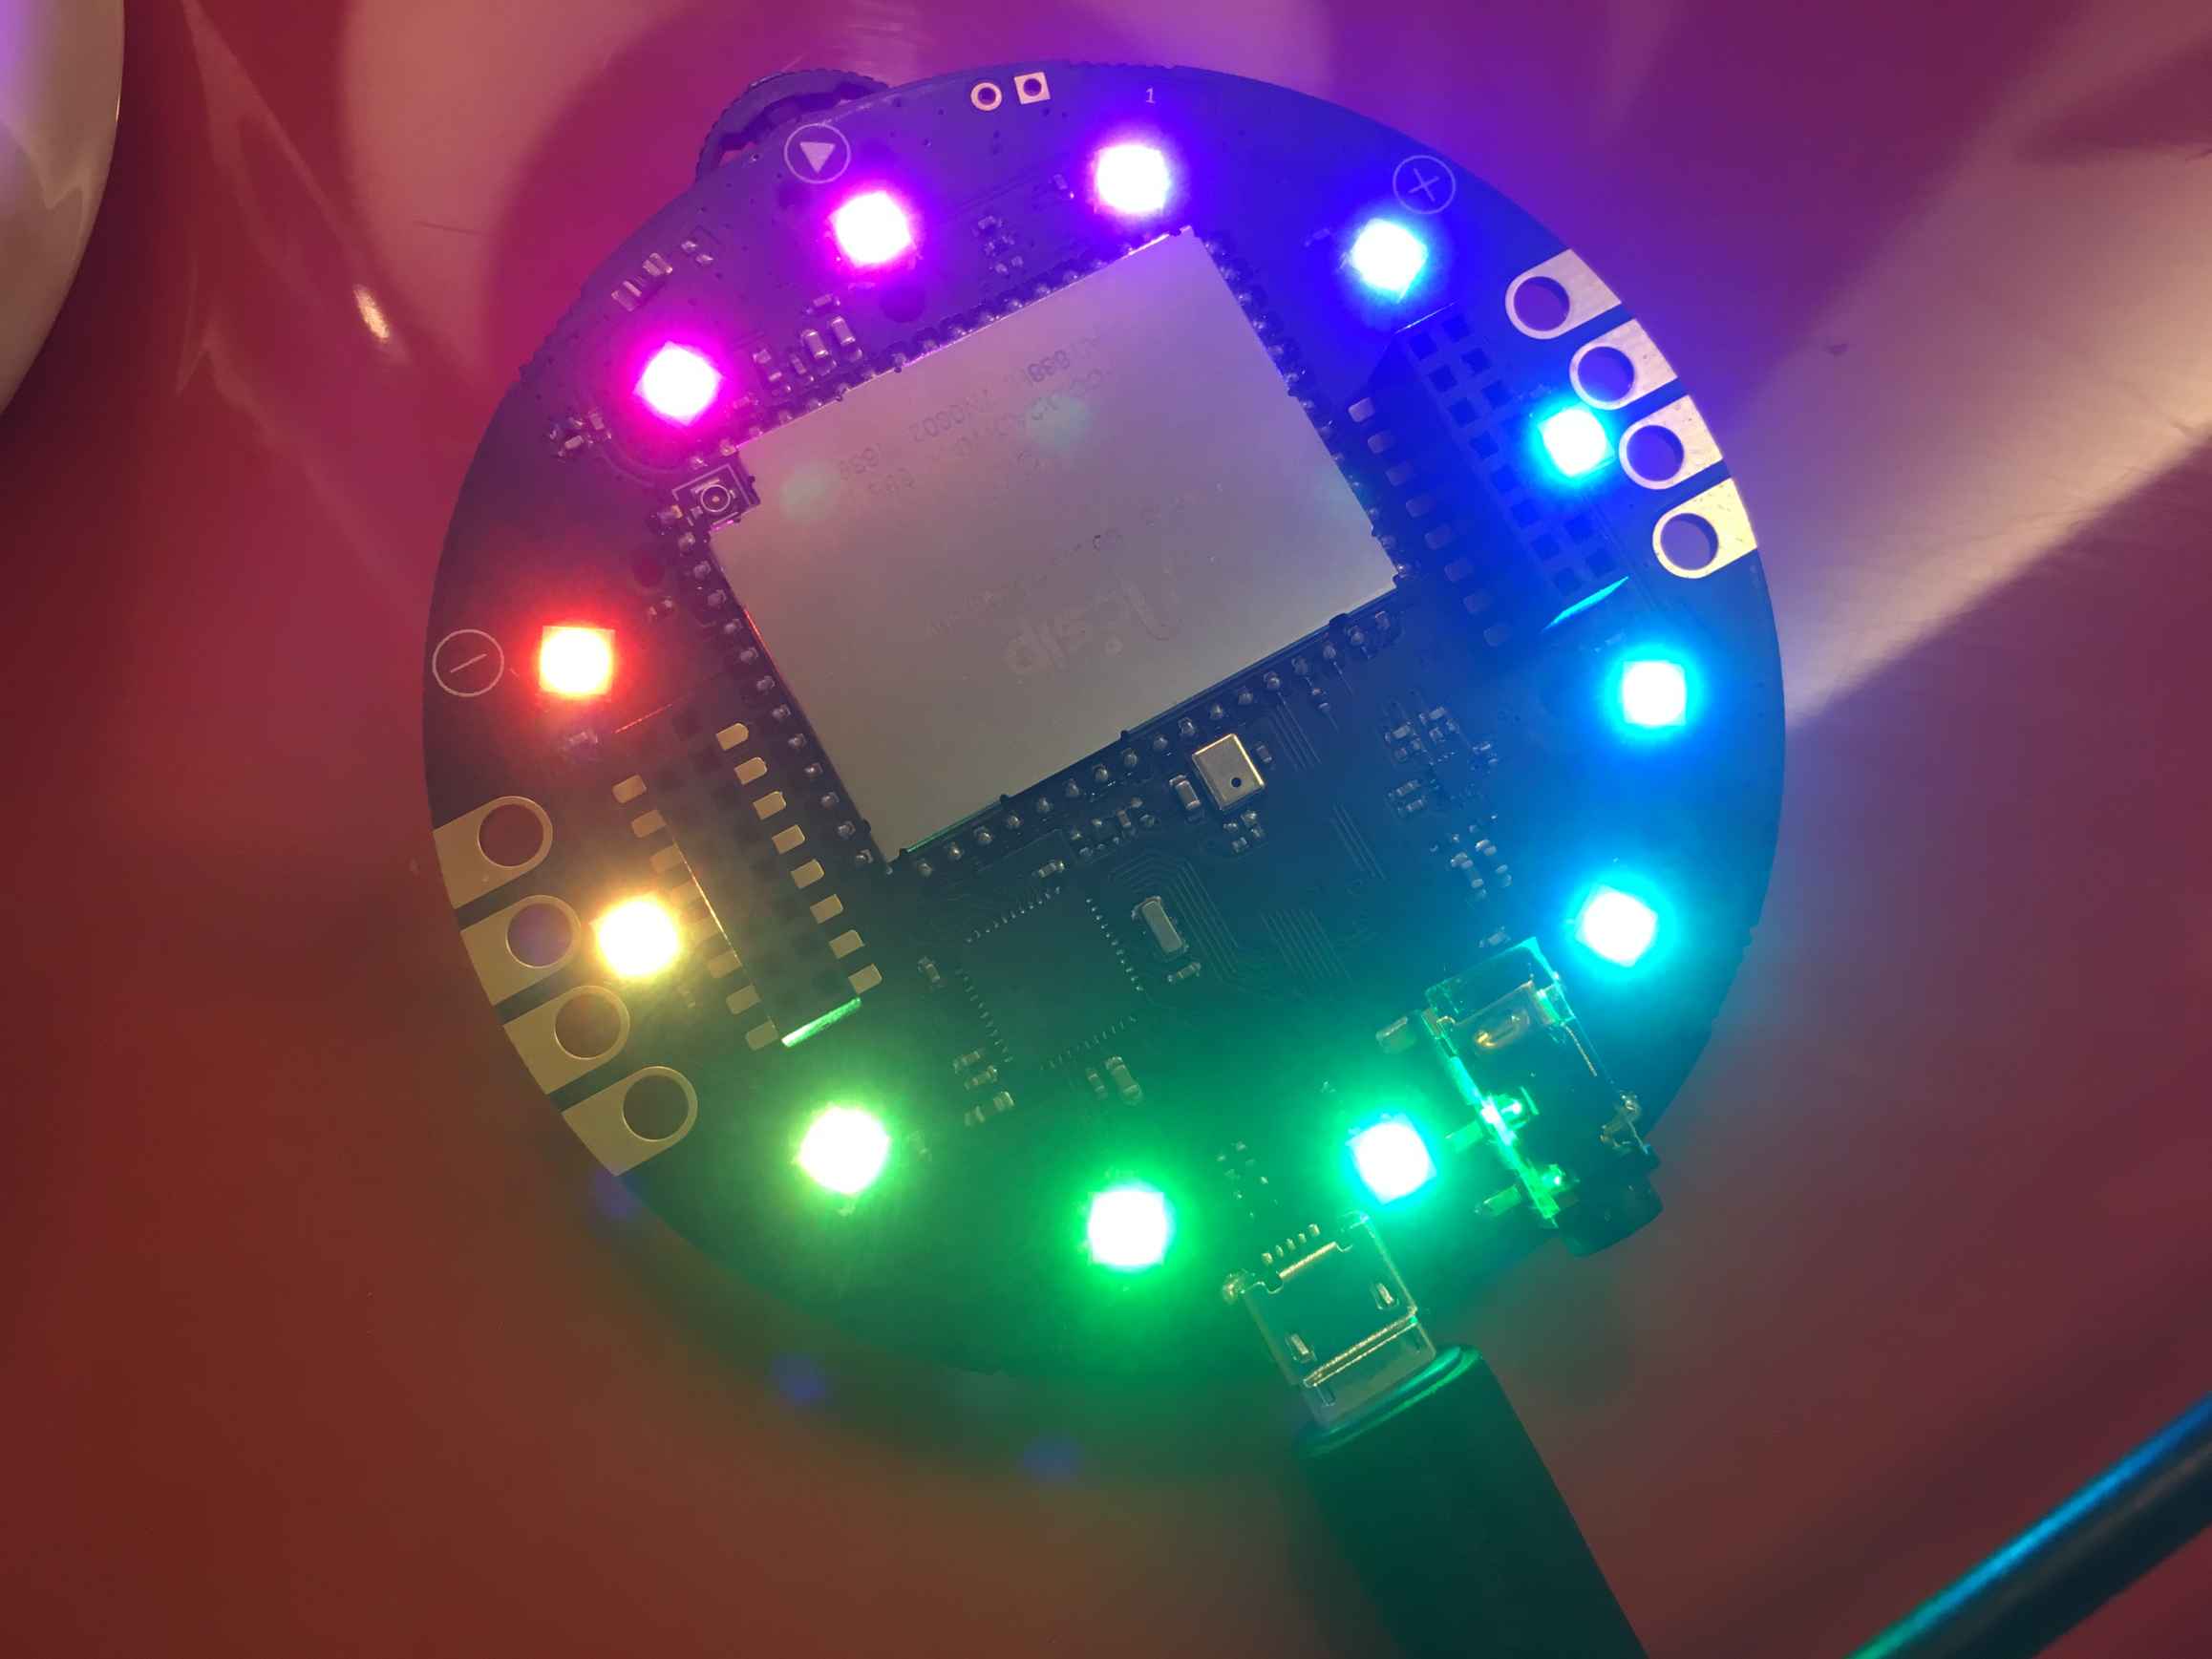
After uploading the program, you should see all RGB LEDs changing their color gradually. You can see it here:
GPIO programming on ReSpeaker
ReSpeaker has one MCU MT7688 and co MCU ATmega32U4, so we can access both MCUs from our program. Inside the board, ReSpeaker runs Linux OpenWrt, so we can perform Linux operations on the ReSpeaker terminal. Not all GPIO pins are accessible from a program. ReSpeaker exposes specific GPIOs.
In general, we can use the following GPIO layout of the ReSpeaker board:
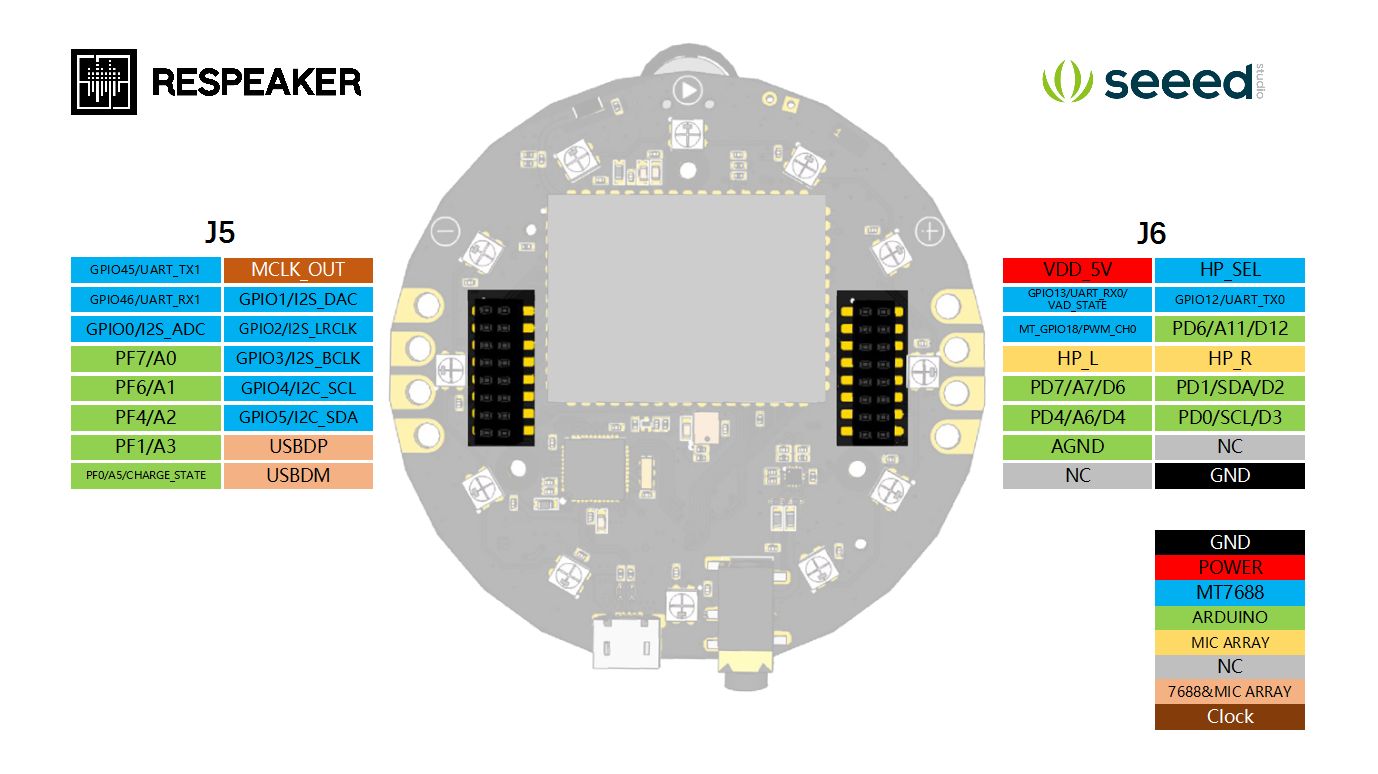
You can see here that some GPIO pins belong to MCU MT7688 and MCU ATmega32U4. If you want to know the complete schematic of the ReSpeaker core board, I recommend you read this document at https://github.com/respeaker/get_started_with_respeaker/blob/master/Introduction.md#hardware.
To access GPIO pins on MCU ATmega32U4, you can use Arduino software. We can write a sketch for Arduino program in the MCU ATmega32U4.
For MCU MT7688, we can access GPIO using GPIO programming for Linux since ReSpeaker uses Linux OpenWrt.
For testing, we'll connect an LED to GPIO on MCU MT7688. You can connect it on MT_GPIO18/PWM_CH0. You can see my wiring here:
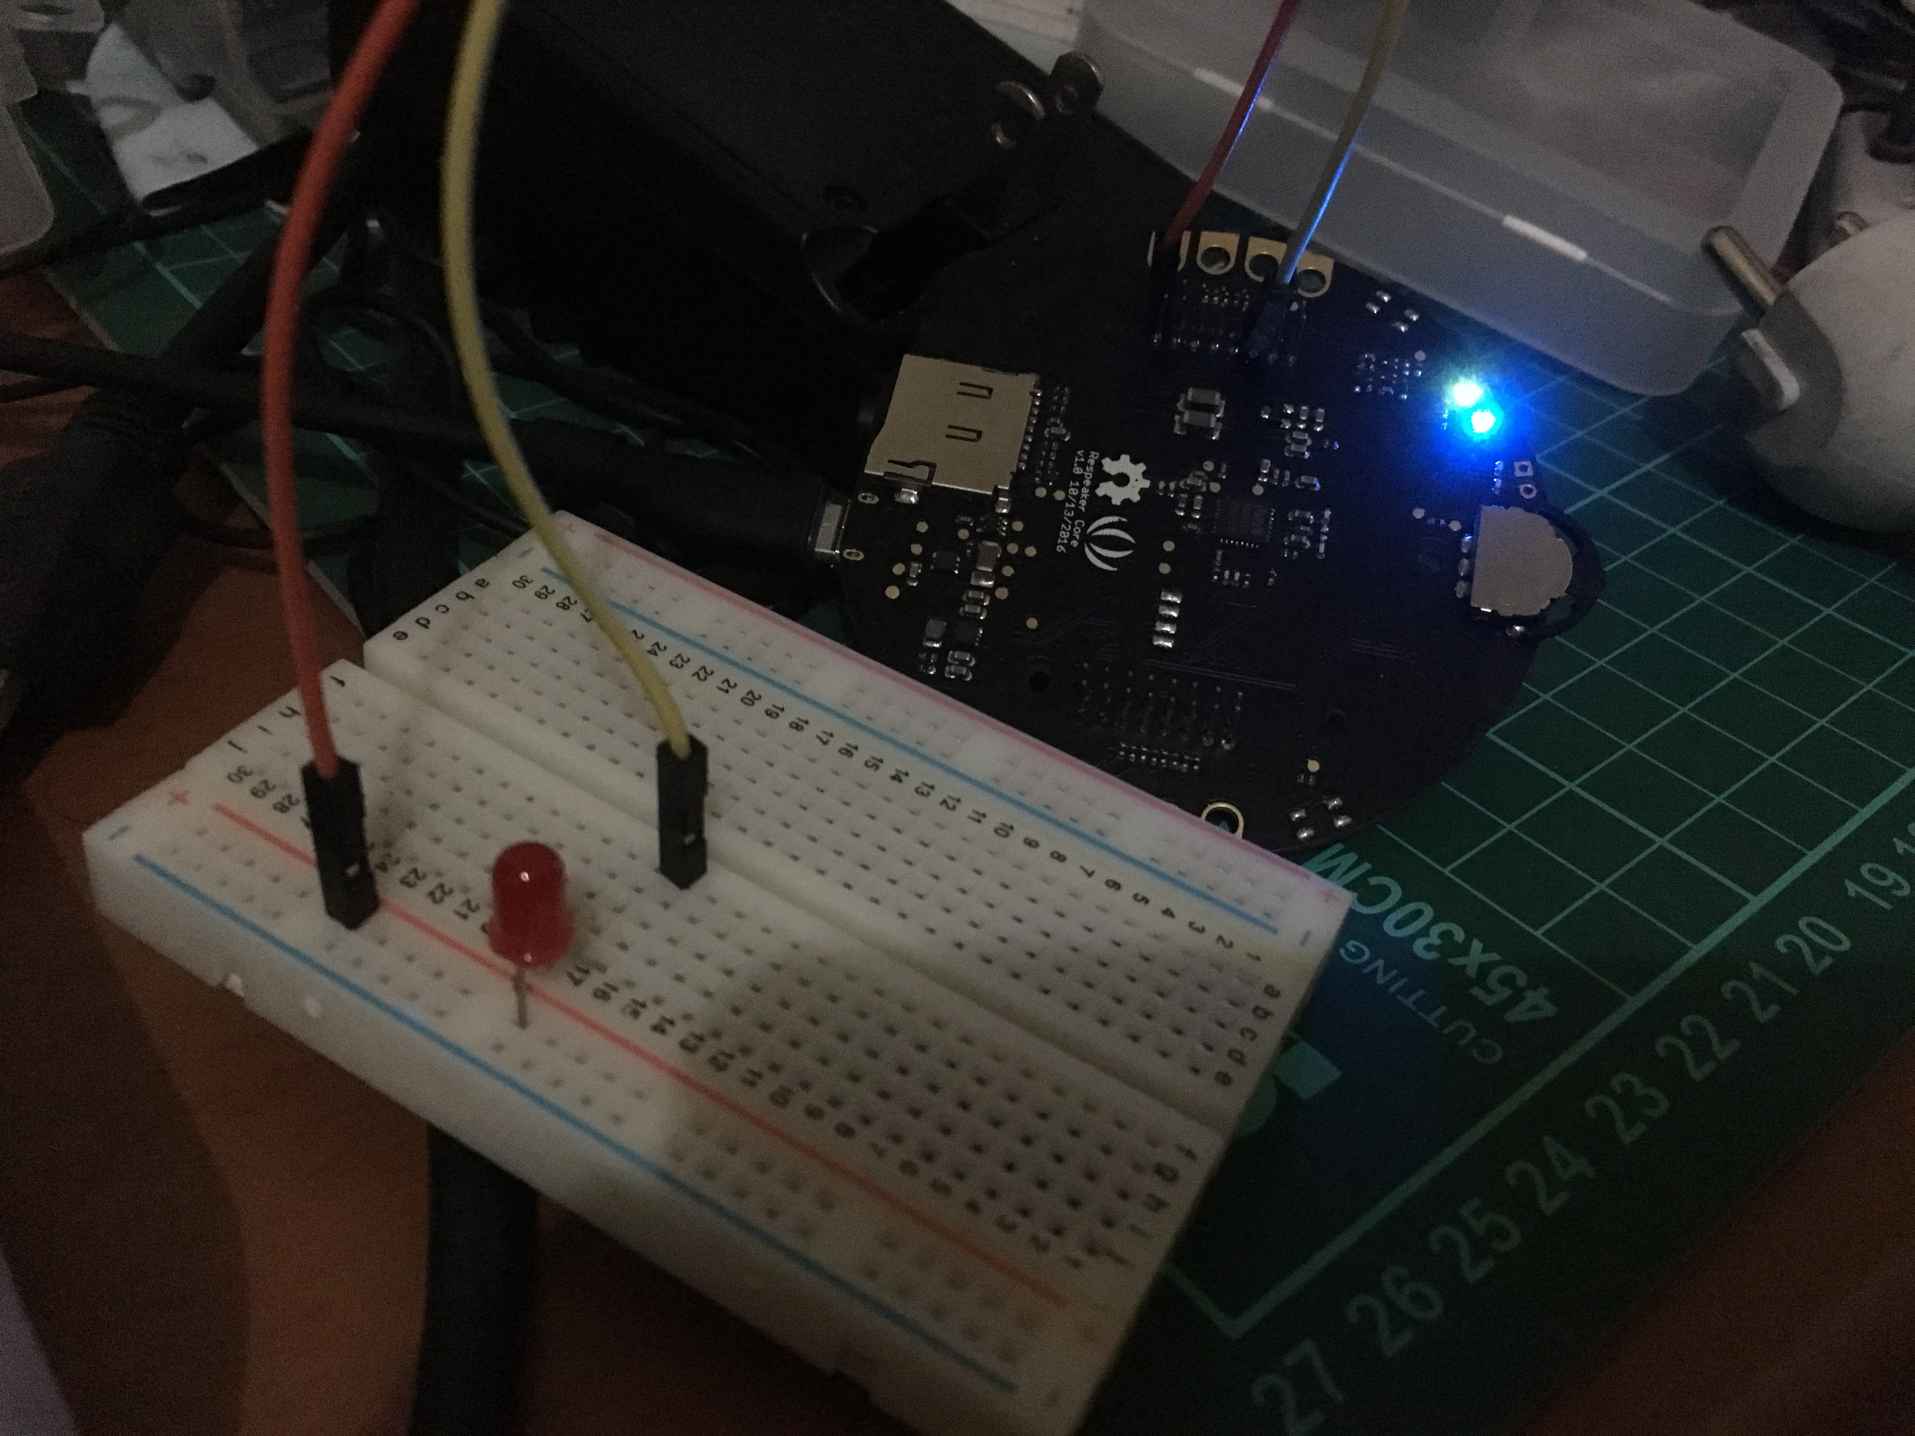
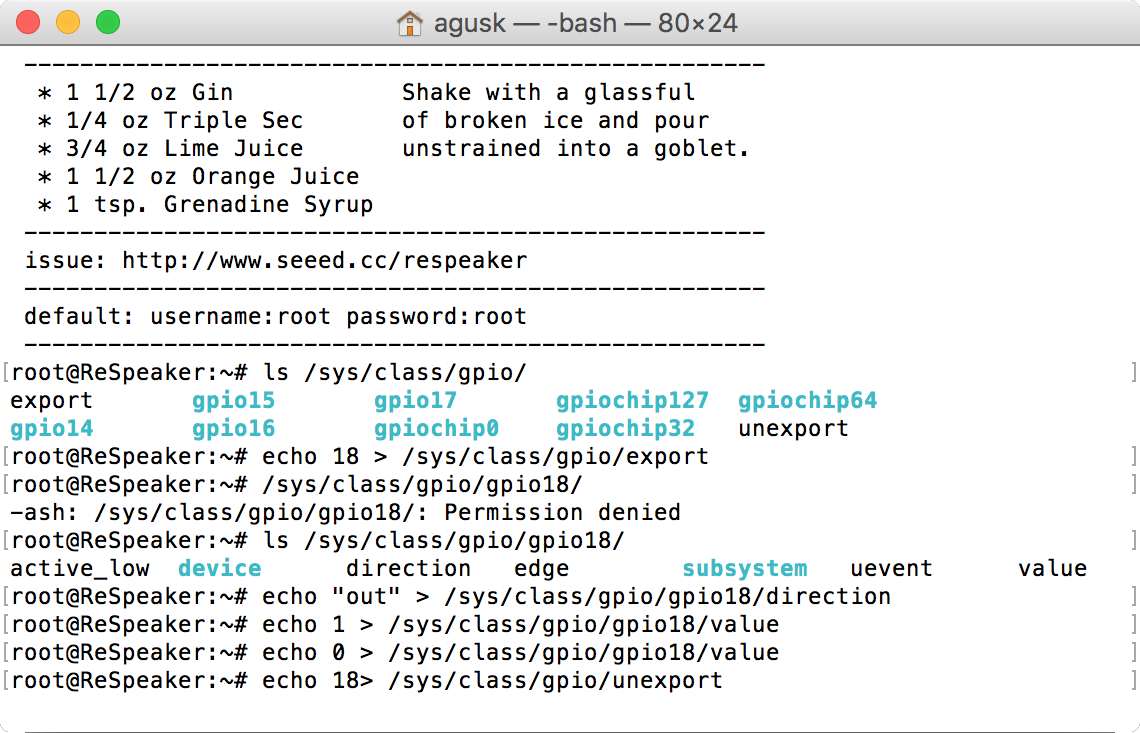
Let's start writing a program using GPIO with the Linux approach. Open the ReSpeaker terminal. Since we use GPIO18 on MCU MT7688, we activate it with the output direction. Type these commands:
$ echo 18 > /sys/class/gpio/export
$ echo "out" > /sys/class/gpio/gpio18/direction
In this case, GPIO18 is activated for output mode.
Now you can set values for HIGH and LOW as 1 and 0. You can type these commands on the ReSpeaker terminal:
$ echo 1 > /sys/class/gpio/gpio18/value
$ echo 0 > /sys/class/gpio/gpio18/value
You should see the LEDs light up.
If you don't need this GPIO anymore, you can release it so other programs can access it. Type this command on the ReSpeaker terminal:
$ echo 18> /sys/class/gpio/unexport
You can see my program output on the ReSpeaker terminal here:
We also can develop a Python program to access GPIO on MT7688. In general, ReSpeaker already provides an installed Python library for MT7688. You read about it at https://github.com/respeaker/respeaker_python_library.
Extending our previous demo, we'll try to turn on/off LEDs on GPIO18 using Python. Type this script:
from respeaker import gpio
gpio18 = gpio.Gpio(18, gpio.DIR_OUT)
# turn on LED
gpio18.write(1)
# turn off LED
gpio18.write(0)
# close gpio
gpio18.close()
Save it as ch05_respeaker_gpio.py. You can run this program by typing this command on the ReSpeaker terminal:
$ python ch05_respeaker_gpio.py
Now you can see LEDs turning on and off.
Connecting to the Microsoft Bing Speech API
ReSpeaker provides connectivity with the Microsoft Bing Speech API. Using this library, we can apply speech recognition such as speech-to-text. For further information about the Microsoft Bing Speech API, you can visit at https://azure.microsoft.com/en-us/services/cognitive-services/speech/.
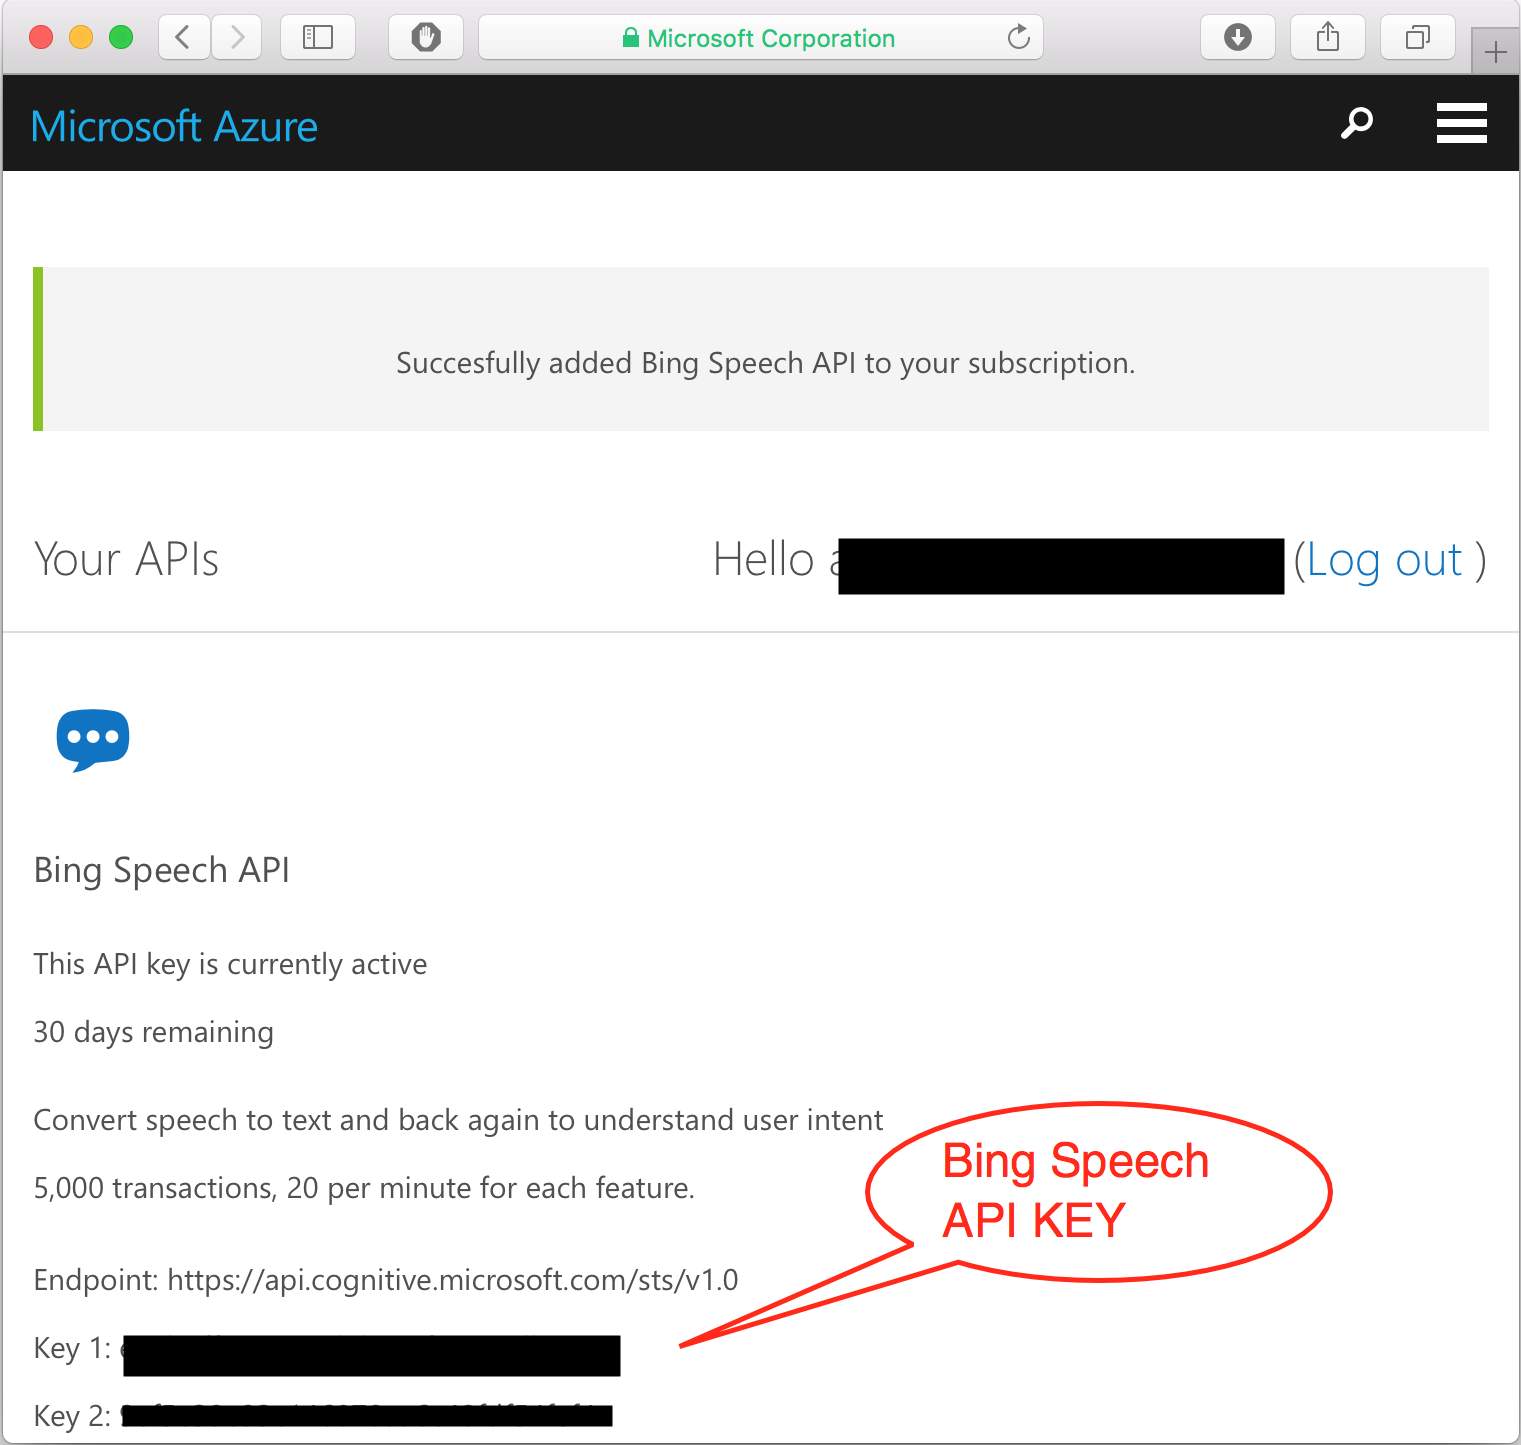
To use the Microsoft Bing Speech API library, you should register and obtain an API key. Microsoft provides trial access to use. The API key can be found on your dashboard page of the Microsoft Bing Speech API. You can see it here:
Now we can write a Python program to use the Microsoft Bing Speech API:
import logging
import time
from threading import Thread, Event
from respeaker import Microphone
from respeaker.bing_speech_api import BingSpeechAPI
# get a key from https://www.microsoft.com/cognitive-services/en-us/speech-api
BING_KEY = '<--bing speech api-->'
def task(quit_event):
mic = Microphone(quit_event=quit_event)
bing = BingSpeechAPI(key=BING_KEY)
while not quit_event.is_set():
if mic.wakeup('respeaker'):
print('Wake up')
data = mic.listen()
try:
text = bing.recognize(data)
if text:
print('Recognized %s' % text)
except Exception as e:
print(e.message)
def main():
print('ReSpeaker is running....')
logging.basicConfig(level=logging.DEBUG)
quit_event = Event()
thread = Thread(target=task, args=(quit_event,))
thread.start()
while True:
try:
time.sleep(1)
except KeyboardInterrupt:
print('Quit')
quit_event.set()
break
thread.join()
if __name__ == '__main__':
main()
Save this program into a file called ch05_respeaker.py.
To run this program, you can type this command:
$ python ch05_respeaker.py
Since this program uses the Microsoft Bing Speech API, your ReSpeaker should be connected to the internet.
After running it, say respeaker until the program wakes up. Then, say something so the program converts speech to text. Speak slowly to make sure ReSpeaker can recognize your voice.
Building your own smart speaker machine
We've already learned how to work with ReSpeaker and develop programs for it. We also can develop a smart speaker machine. You can see our scenario in the following diagram:
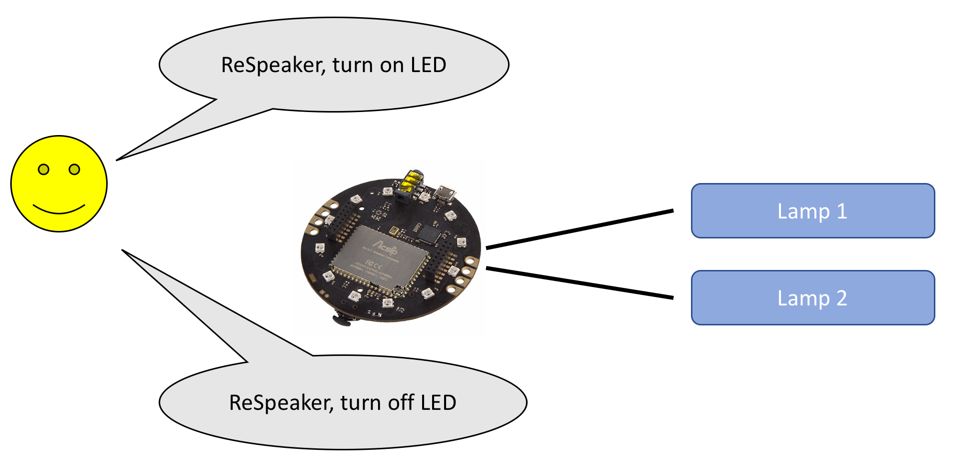
You can see that the ReSpeaker core board connects to lamps. You can see simple a LED (DC) or lamp (AC) with a relay module.
If you use the Microsoft Bing Speech API, you can develop a smart speaker machine for recognizing some phrases such as turn on and turn off. After you obtain the text, you can parse it to determine whether it contains turn on or turn off. This is a basic smart speaker machine. You can customize it based on your use case. For instance, you build an automation system with Arduino/Raspberry Pi. Then, ReSpeaker will be used as speech input. If person says specific word, ReSpeaker will send command to Arduino/Raspberry Pi to perform something.
Summary
We learned about smart speaker machines using the ReSpeaker core board. Some samples are provided to get started with ReSpeaker core.
In the next chapter, we will explore an autonomous firefighter robot and the technology used to build it.

