Introduction to Lightbox in JavaScript
The following article provides an outline on Lightbox in JavaScript. We often come across the situation when we have to display multiple images to the user in small size which can also be called as thumbnails or previews and when the user clicks on any one of the pictures we have to open a big window or modal displaying the selected image in bigger size and provide the previous and next buttons for navigation. This thing which opens up on the click of the image to display images in full size and enable navigation through it is called a lightbox or slideshow.
Most popular and day to day examples can be a google search for images or our gallery in our phones, laptops, etc. We can create this simply by using HTML, CSS and JavaScript coding. The HTML will be used to define the layout or structure of our display, CSS will be used to provide us with different styles which can help us hide, show, display transparent windows, etc which can be further manipulated by using the JavaScript. We can change the styling of our window on the events of HTML like onClick(), on hover, etc.
Steps of Lightbox in JavaScript with an Example
Given below are the steps:
Step #1
Firstly we will write the code for HTML to define the layout and structure of our first screen displaying the thumbnails of images. We will use the onClick() event on each image to open our lightbox cum slideshow in a bigger size. OpenLightboxModal() will be called for that. Note that it is necessary to place the images in the same folder as your code file else you will have to mention the complete path of those images in the src property of the img element.
Code:
<!DOCTYPE html>
<body>
<style>
//Code mentioned in points 3 to 6 should be placed for defining style using css
</style>
<div class="rowStyle">
<div class="colStyle">
<img src="beach.jpg" onclick="openLightboxModal();jumpToSlide(1)" class="hover-shadow thumbnails" alt="The Beauty Of Oceans" />
</div>
<div class="colStyle">
<img src="nightSky.jpg" onclick="openLightboxModal();jumpToSlide(2)" class="hover-shadow thumbnails" alt="Nothing Can match the Glory Of Night" />
</div>
<div class="colStyle">
<img src="auroraBorialis.jpg" onclick="openLightboxModal();jumpToSlide(3)" class="hover- shadow thumbnails" alt="The Playful Northern Lights" />
<div class="colStyle">
<img src="sunset.jpg" onclick="openLightboxModal();jumpToSlide(4)" class="hover-shadow thumbnails" alt="Calming Shades of Sunset" />
</div>
</div>
Step #2
Now, we will define the modal for lightbox and call closeLightboxModal()on click of the close symbol which we are providing at top right-hand side corner to get back to thumbnails. The arrows are defined on both sides to switch the slides to previous and next one by calling switchSlide() method. The bottom of the lightbox will display all images in a transparent view and on hovering the mouse over it there CSS property will be changed to completely visible and on click of those small thumbnails on bottom band jumpToSlide() method will be called to open it respectively.
Code:
<div id="Lightbox" class="modal">
<span class="close pointer" onclick="closeLightboxModal()">×</span>
<div class="modal-content">
<div class="slide">
<img src="beach.jpg" class="image-slide" alt="The Beauty Of Oceans" />
</div>
<div class="slide">
<img src="nightSky.jpg" class="image-slide" alt="Nothing Can match the Glory Of Night" />
</div>
<div class="slide">
<img src="auroraBorialis.jpg" class="image-slide" alt="The Playful Northern Lights" />
</div>
<div class="slide">
<img src="sunset.jpg" class="image-slide" alt="Calming Shades of Sunset" />
</div>
<a class="preceding" onclick="switchSlide(-1)">❮</a>
<a class="succeeding" onclick="switchSlide(1)">❯</a>
<div class="dots">
<div class="colStyle">
<img src="beach.jpg" class="modal-thumbnails hover-shadow" onclick="jumpToSlide(1)" alt="Toy car on the road" />
</div>
<div class="colStyle">
<img src="nightSky.jpg" class="modal-thumbnails hover-shadow" onclick="jumpToSlide(2)" alt="Nothing Can match the Glory Of Night" />
</div>
<div class="colStyle">
<img src="auroraBorialis.jpg" class="modal-thumbnails hover-shadow" onclick="jumpToSlide(3)" alt="The Playful Northern Lights" />
</div>
<div class="colStyle">
<img src="sunset.jpg" class="modal-thumbnails hover-shadow" onclick="jumpToSlide(4)" alt="Calming Shades of Sunset" />
</div>
</div>
</div>
</div>
</div>Step #3
Now it is time to define the style for the above structure using CSS. Here, flex is used to display the images responsively that means they will adjust according to the size of the device. Firstly, style is declared for thumbnails on the first page.
Code:
html {
box-sizing: border-box;
}
*, *:before, *:after
{ box-sizing:
inherit;
}
body { margin:
0;
}
.thumbnails {
width: 100%;
}
.rowStyle
display:
flex;
flex-direction: rowStyle;
justify-content: space-between;
}
.rowStyle >>
.colStyle {
padding: 0 8px;
}
.colStyle {
float: left;
width: 25%;
}
Step #4
Now, we will define CSS for the lightbox cum slideshow which will reside in the modal.
Code:
.modal {
display:
none;
position:
fixed; z-
index: 1;
padding: 10px 62px 0px
62px; left: 0;
top: 0;
width: 100%;
height:
100%;
overflow:
auto;
background-color: black;
}
.modal-content {
position:
relative;
display: flex;
flex-direction:
column; justify-content:
center; margin: auto;
padding: 0 0 0 0;
width: 80%;
max-width: 1200px;
}
Step #5
CSS for the slides inside the modal will firstly be set to none and modified further accordingly.
Code:
.slide {
display:
none;
}
.image-slide {
width:
100%;
}
.modal-thumbnails { width: 100%;
}
.dots {
display:
flex;
flex-direction: rowStyle;
justify-content: space-between;
}
Step #6
When inactive the lower band and first-page thumbnails will have transparent visibility and on hovering of the mouse, it will be completely visible.
CSS for the same is as follows:
Code:
img.thumbnails, img.modal-thumbnails { opacity: 0.6;
}
img.active,
.thumbnails:hover,
.modal-thumbnails:hover { opacity: 1;
}
img.hover-shadow {
transition: 0.3s;
}
.hover-shadow:hover {
box-shadow: 0 4px 8px 0 rgba(0, 0, 0, 0.2), 0 6px 20px 0 rgba(0, 0, 0, 0.19);
}
.close {
color:
white;
position:
absolute; top:
10px;
right: 25px;
font-size:
35px;
font-weight: bold;
}
.close:hover,
.close:focus { color: #999;
text-decoration:
none; cursor: pointer;
}
.preceding,
.succeeding {
cursor:
pointer;
position:
absolute; top:
50%;
width: auto;
padding: 16px;
margin-top:
-50px;
color: white;
font-weight:
bold; font-size:
20px; transition:
0.6s ease;
border-radius: 0 3px
3px 0; user-select:
none;
-webkit-user-select: none;
}
.succeeding { right:
0;
border-radius: 3px 0 0 3px;
}
.preceding:hover,
.succeeding:hover {
background-color: rgba(0, 0, 0, 0.8);
}
Step #7
Here we go. We are all set with the view but this is the time to write the main code for our lightbox. JavaScript is used to manipulate the view and slides. It is triggered by the above- mentioned HTML events. Firstly all the methods or functions for clickable events are written and then the main function which is showSlide() is called which contains the main logic for displaying the image you want depending on the parameter passed to it from the below functions.
Code:
<script>
let indexOfSlide = 1;
showSlide(indexOfSlide);
function openLightboxModal() {
document.getElementById('Lightbox').style.display = 'block';
}
function closeLightboxModal() {
document.getElementById('Lightbox').style.display = 'none';
};
function switchSlide(n) {
showSlide(indexOfSlide += n);
};
function jumpToSlide(n) {
showSlide(indexOfSlide = n);
};
Step #8
The crucial of all showSlide() function which holds the logic for slide displaying is as follows.
Code:
function showSlide(n) {
const slides = document.getElementsByClassName('slide');
let modalThumbnails = document.getElementsByClassName('modal-thumbnails');
if (n >
slides.length) {
indexOfSlide = 1;
};
if (n < 1) {
indexOfSlide = slides.length;
};
for (let i = 0; i < slides.length; i++) { slides[i].style.display = "none";
};
for (let i = 0; i < modalThumbnails.length; i++) {
modalThumbnails[i].className = modalThumbnails[i].className.replace(' active', '');
};
slides[indexOfSlide - 1].style.display = 'block'; modalThumbnails[indexOfSlide - 1].className += ' active';
};
</script>
</body>
</html>
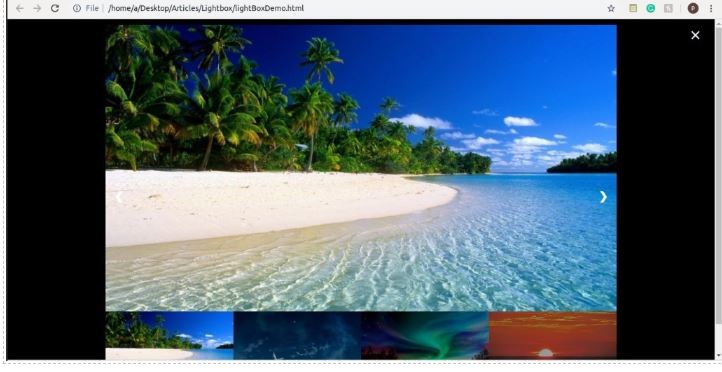
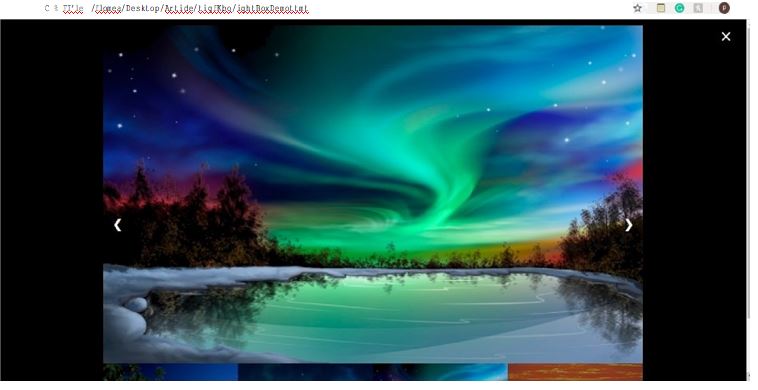
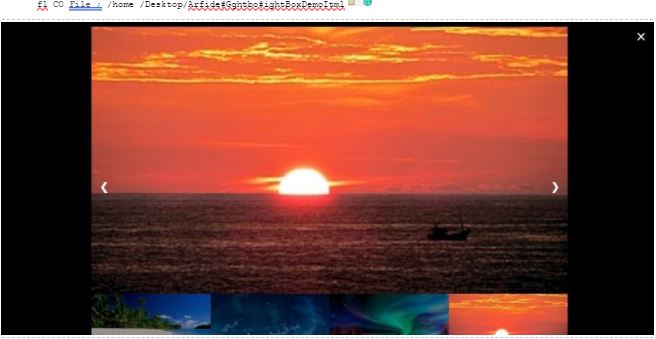
Output of above code is as follows:


On clicking cross symbol on top right corner output is:

In this way, using JavaScript we can manipulate the view and present our desired contents on the actions of users like clicking on previous, next tab clicking on the thumbnail, etc.

