Users Online
· Guests Online: 10
· Members Online: 0
· Total Members: 207
· Newest Member: najman444
· Members Online: 0
· Total Members: 207
· Newest Member: najman444
Forum Threads
Newest Threads
No Threads created
Hottest Threads
No Threads created
Latest Articles
Articles Hierarchy
How to design Simple Company ID Card in Adobe Photoshop
How to design Simple Company ID Card in Adobe Photoshop
Hello, everyone today we are going to show you "How to design Simple Company ID Card in Adobe Photoshop". In this tutorial, you will learn how to design an ID card for your company. Dont worry if you are new here this is a step by step tutorial also have a screenshot of each step so you can practice it by yourself by downloading the project PSD file.
First, the most apparent reason to use ID badges is to improve the security of your company. Employee IDs serve as a form of instant identification for everyone in the building. They can also be used to restrict entrance to certain areas and even certain machines.
Resources
Images used:
- Business Model from Unsplash.com
- Bar Code from Tech-IT.com
Fonts used:
- Raleway Family
Step 01
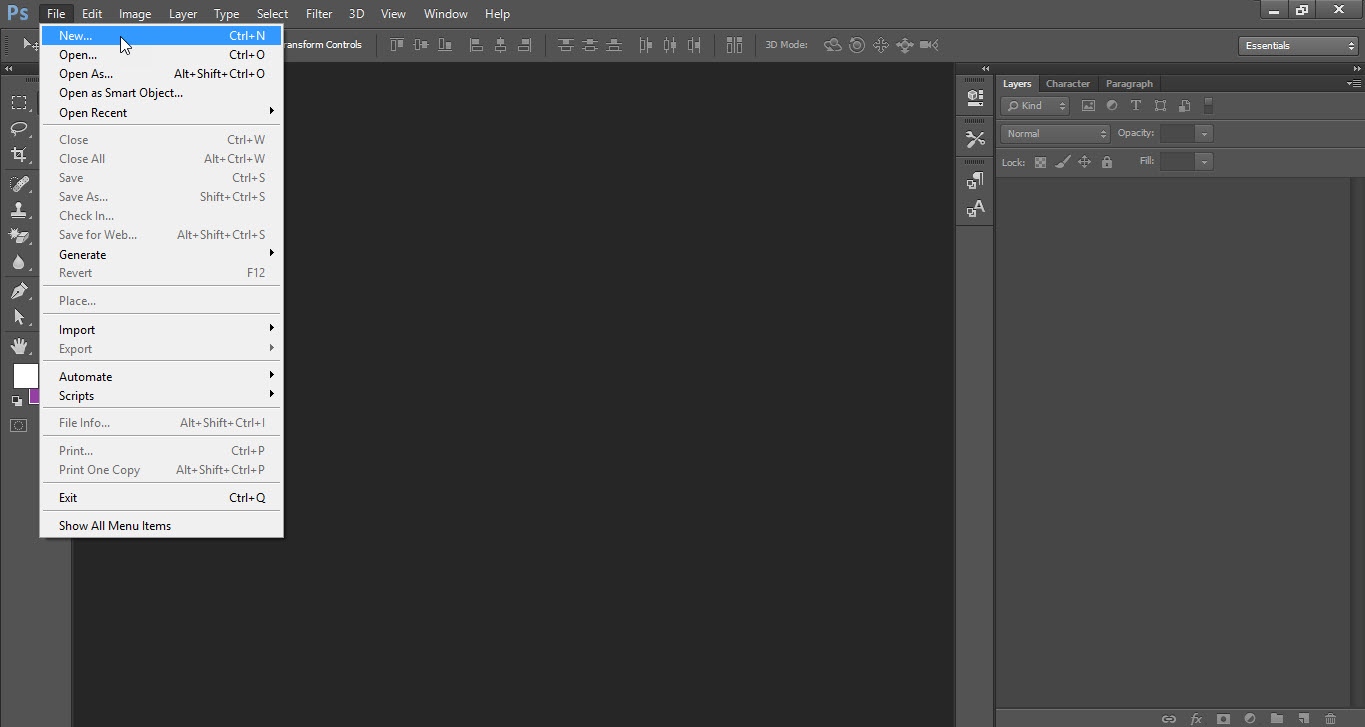
- Open the Adobe Photoshop software.
- Go to the "File" menu and click on the "New" option.
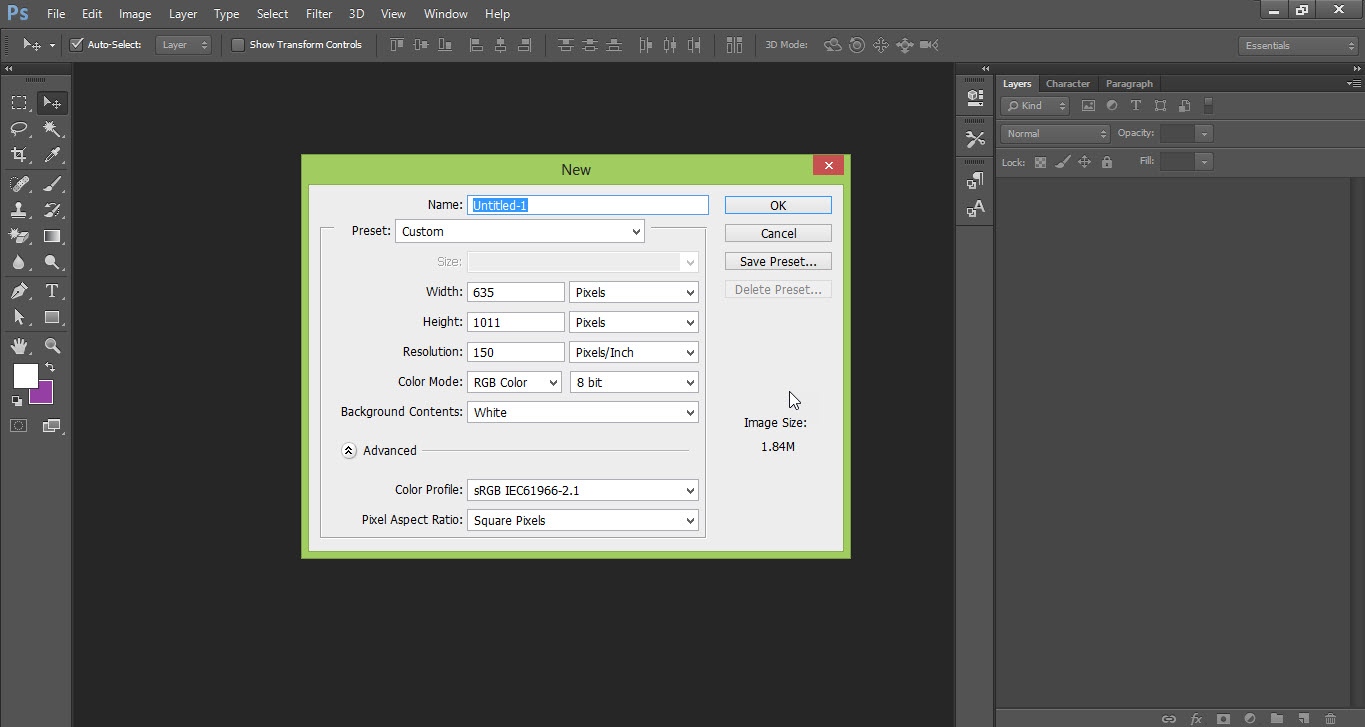
- The "New" window will be opened.
- Select the "Size & Color Mode" and click on ok.
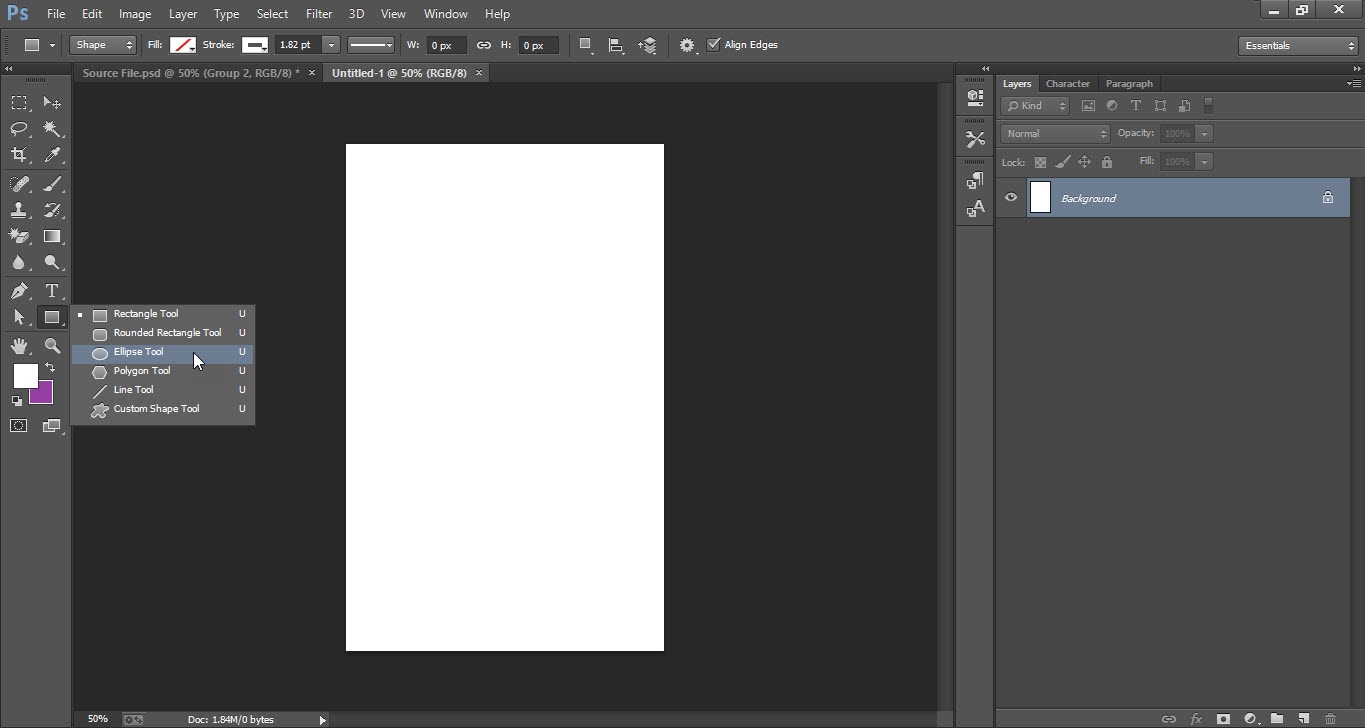
- First, we have to create the background design.
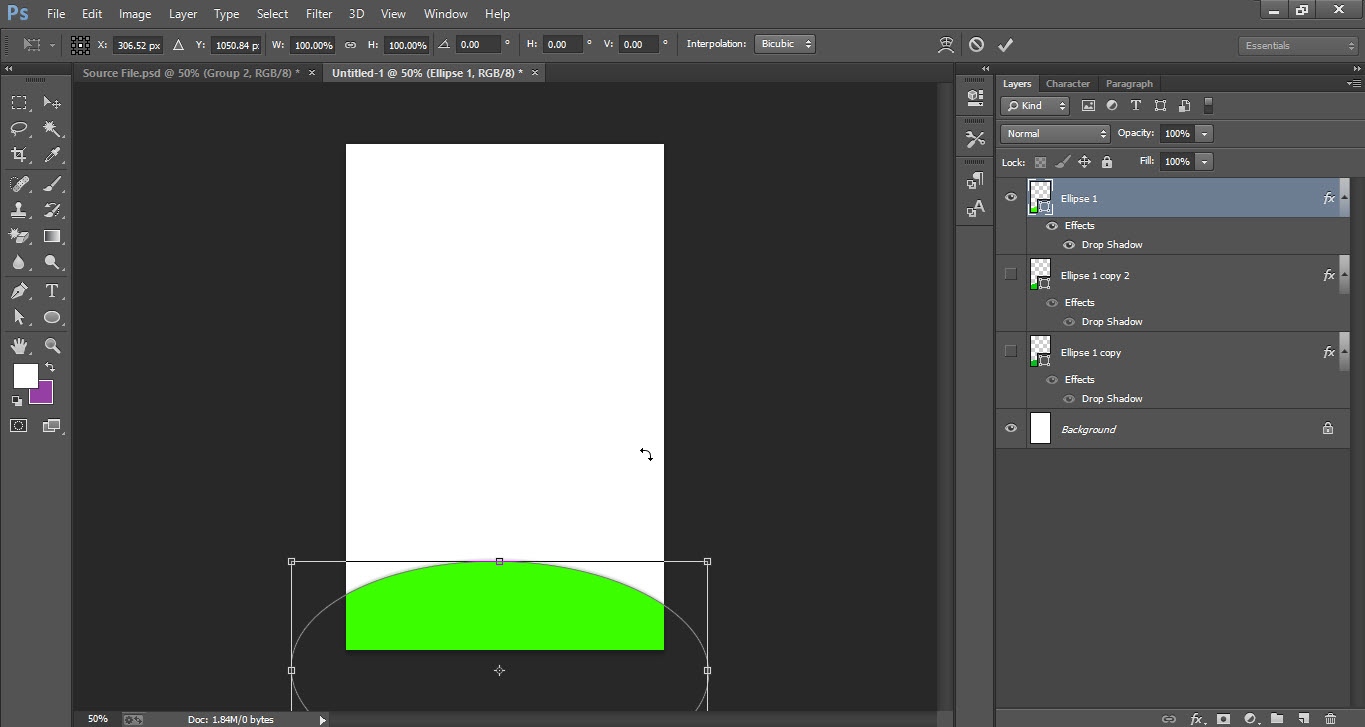
- To do so, take the "Ellipse Tool" from the "Tools Bar".
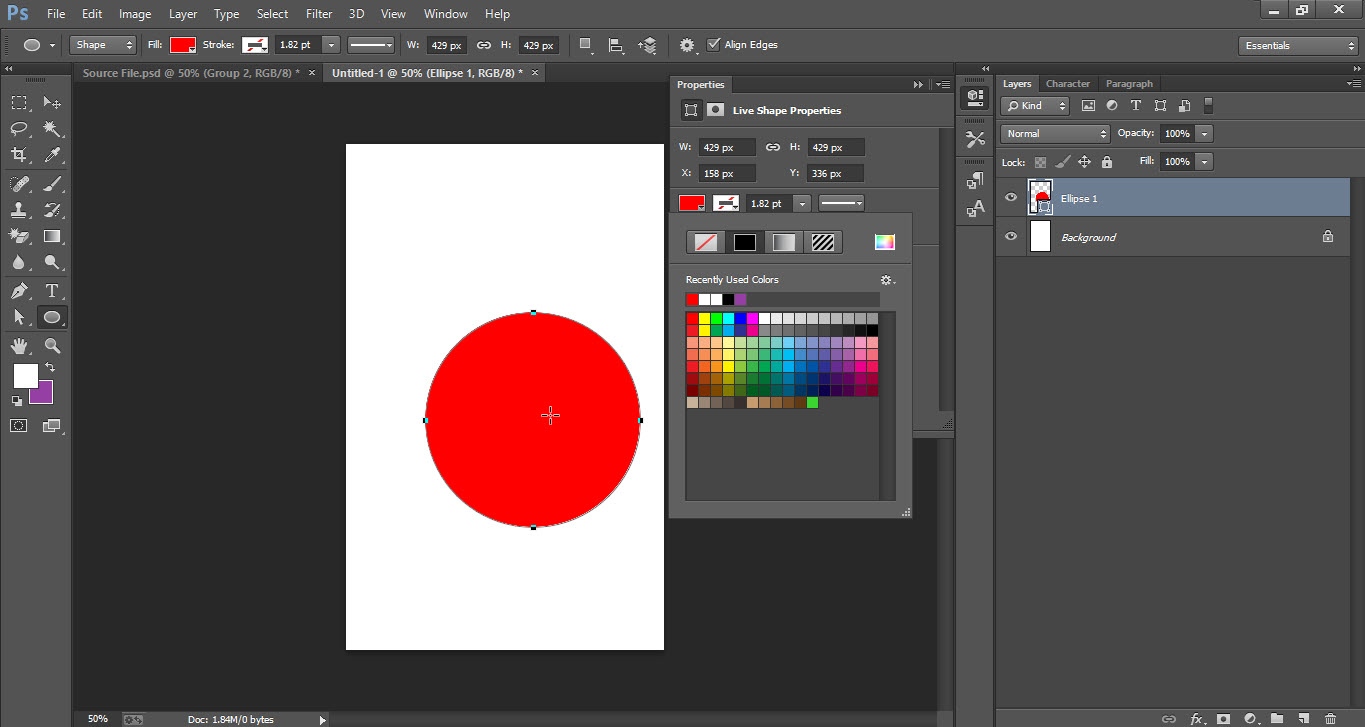
- Draw a circle and fill it with any color you want.
- Press Ctrl+T to "Transform" the circle.
- Place the ellipse shape on the lower side of the canvas.
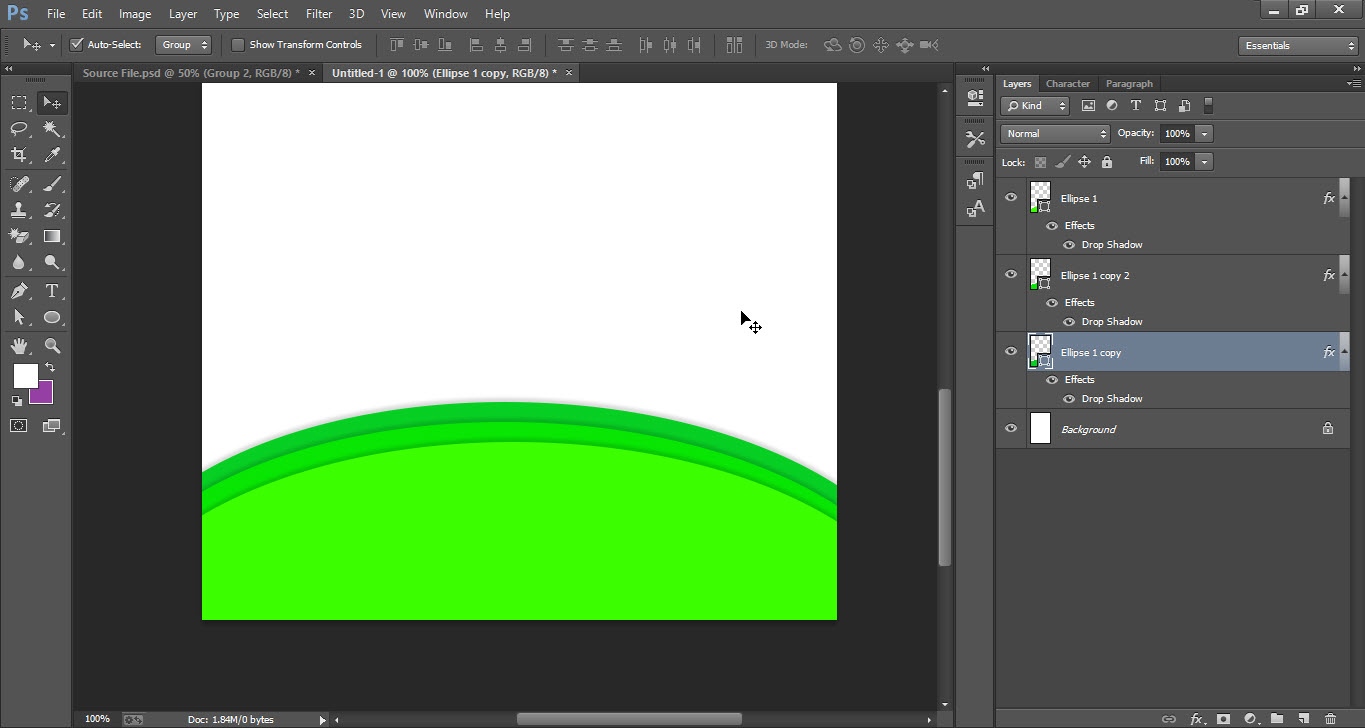
- Now press Ctrl+J two times to make two copies of the ellipse shape.
- Use the arrow key and arrange the shape as shown.
- Double click on “Right Side” of the 1st ellipse shape layer.
- A "Layer Style" window will be opened.
- Tick the "Drop Shadow" option and bring down the "Opacity" to "15%".
- Apply the "Drop Shadow" to all the 3 layers.
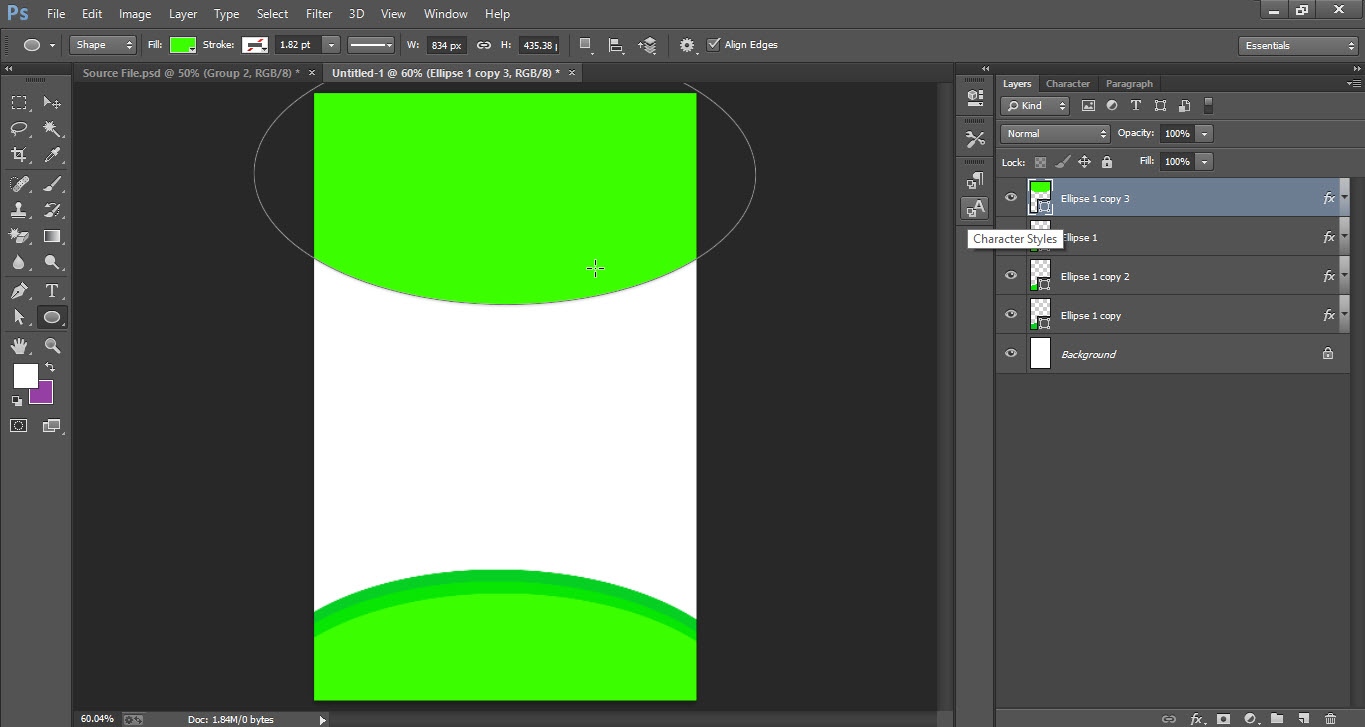
- Now take the "Ellipse Tool" from the "Tools Bar".
- Draw a circle and place it on the upper side of the canvas.
- So the background is ready now we have to add some other details.


Step 02
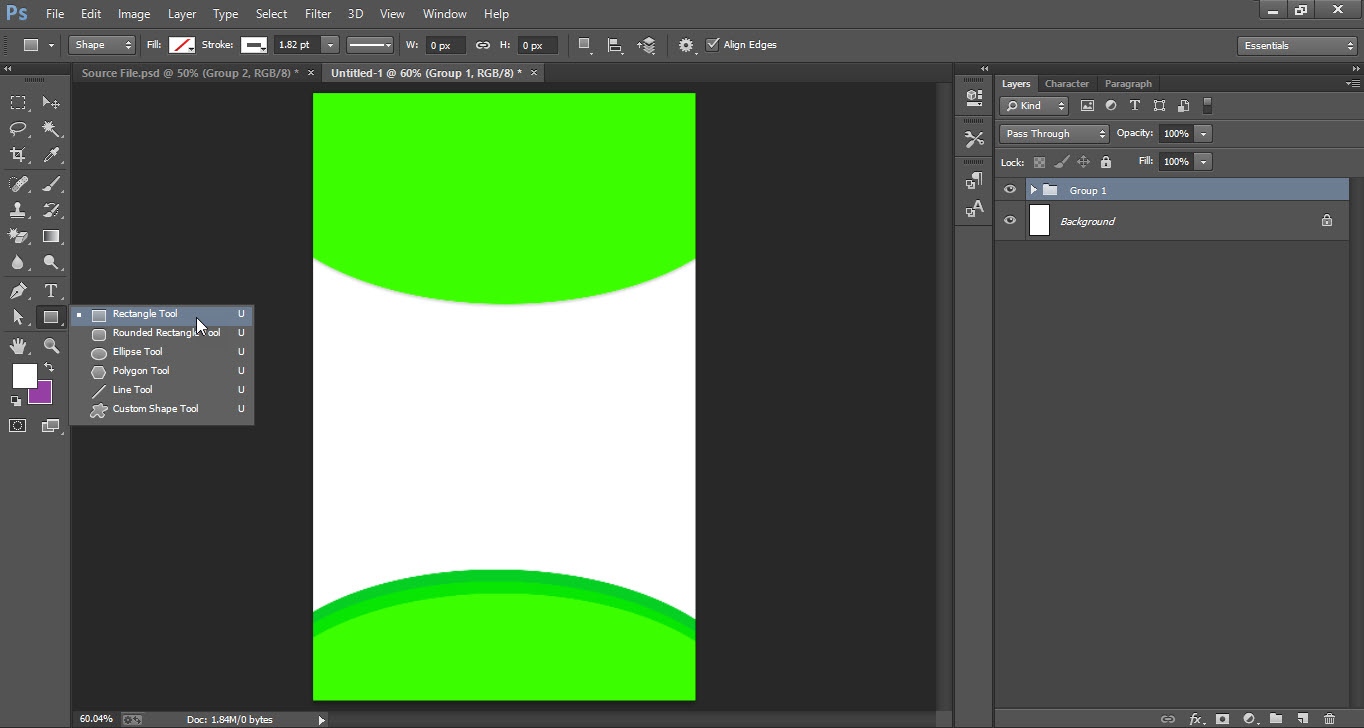
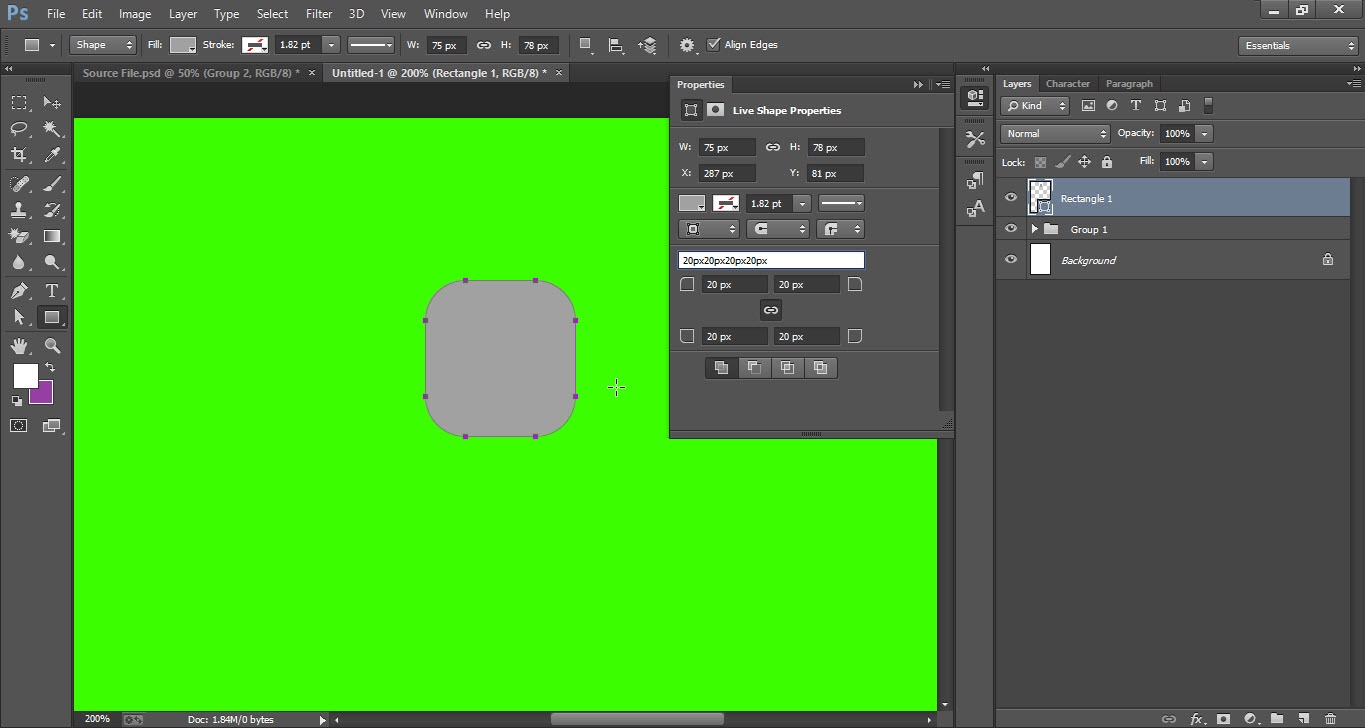
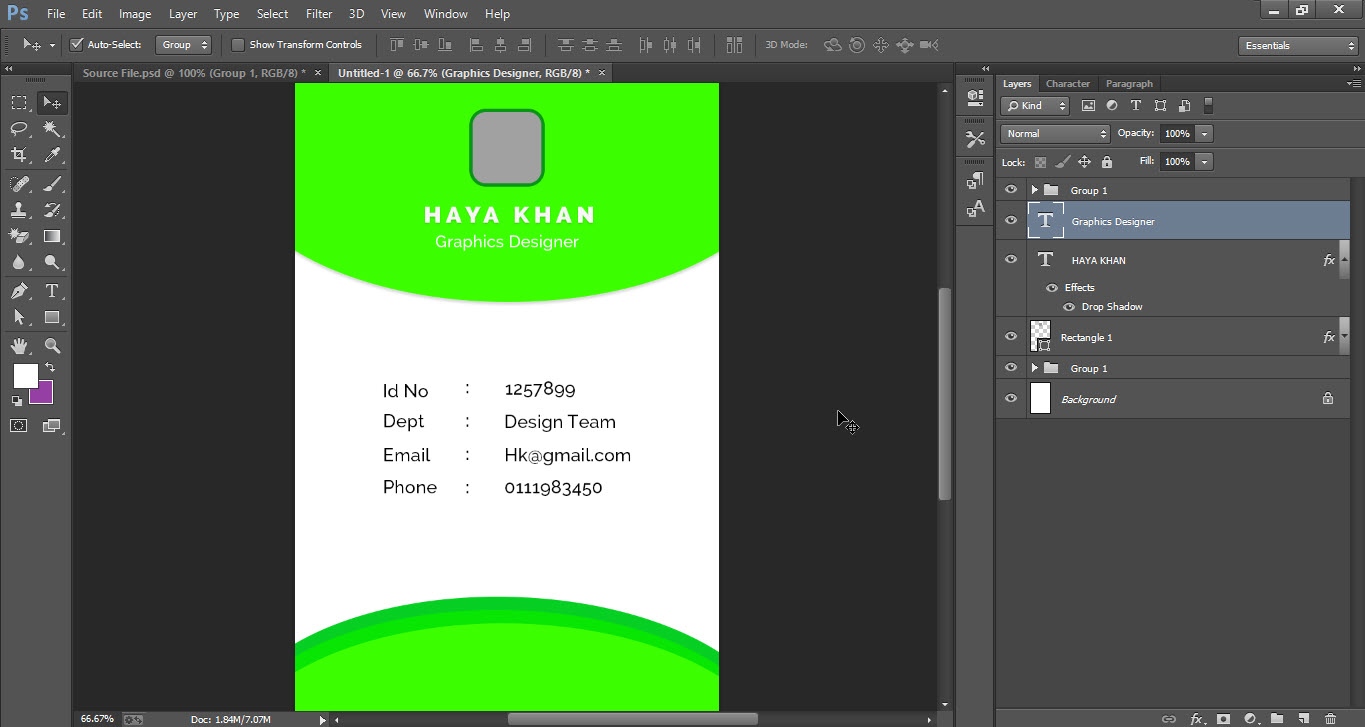
- Take the Rectangle Tool from the Tools Bar.
- Draw a small Rectangle and fill it with Gray color.
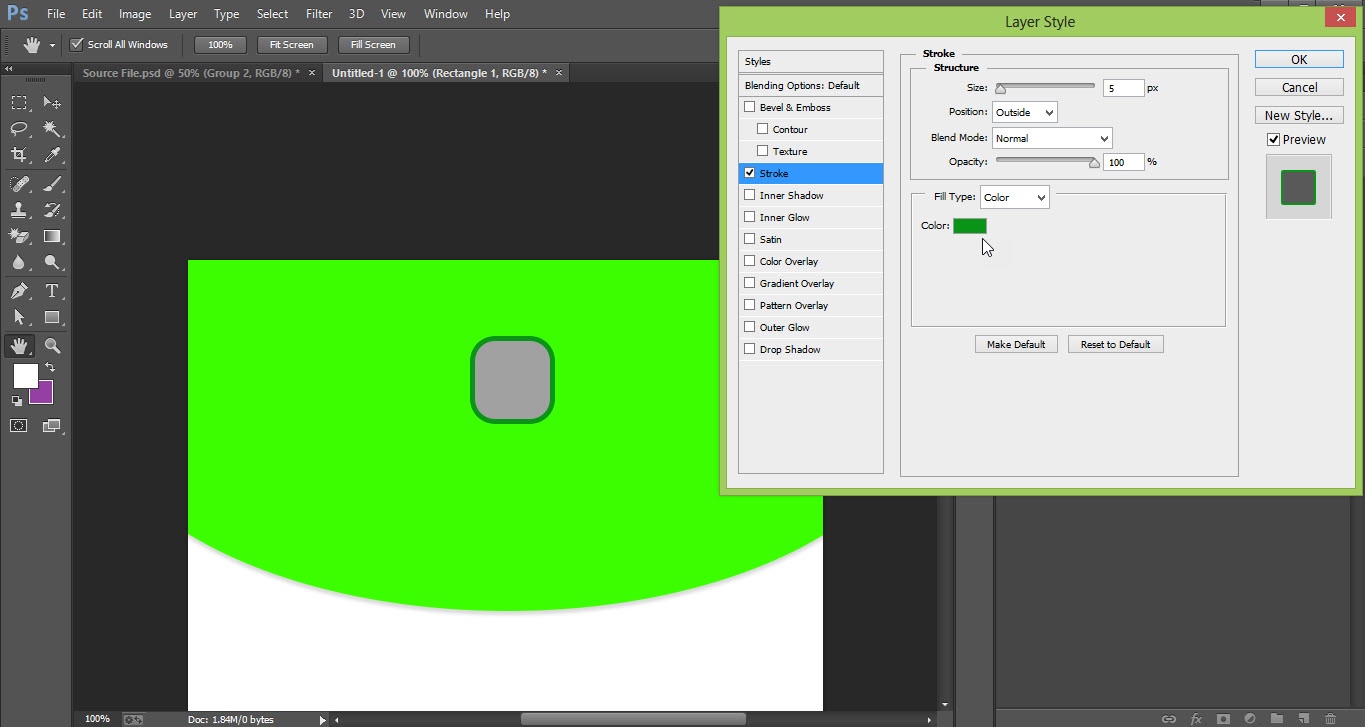
- Double click on the right side of the Rectangle Layer.
- Tick the Stroke option and drag the Size Slider down.
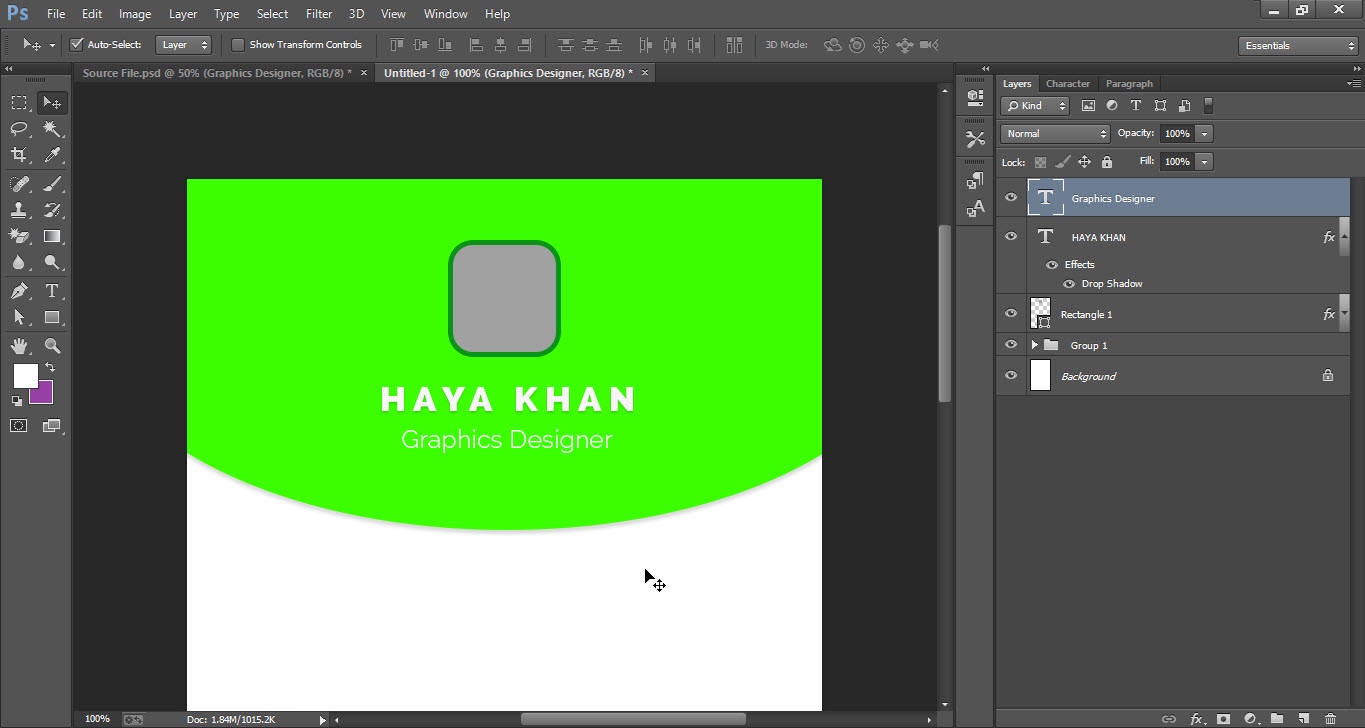
- Now add the details of the employee.
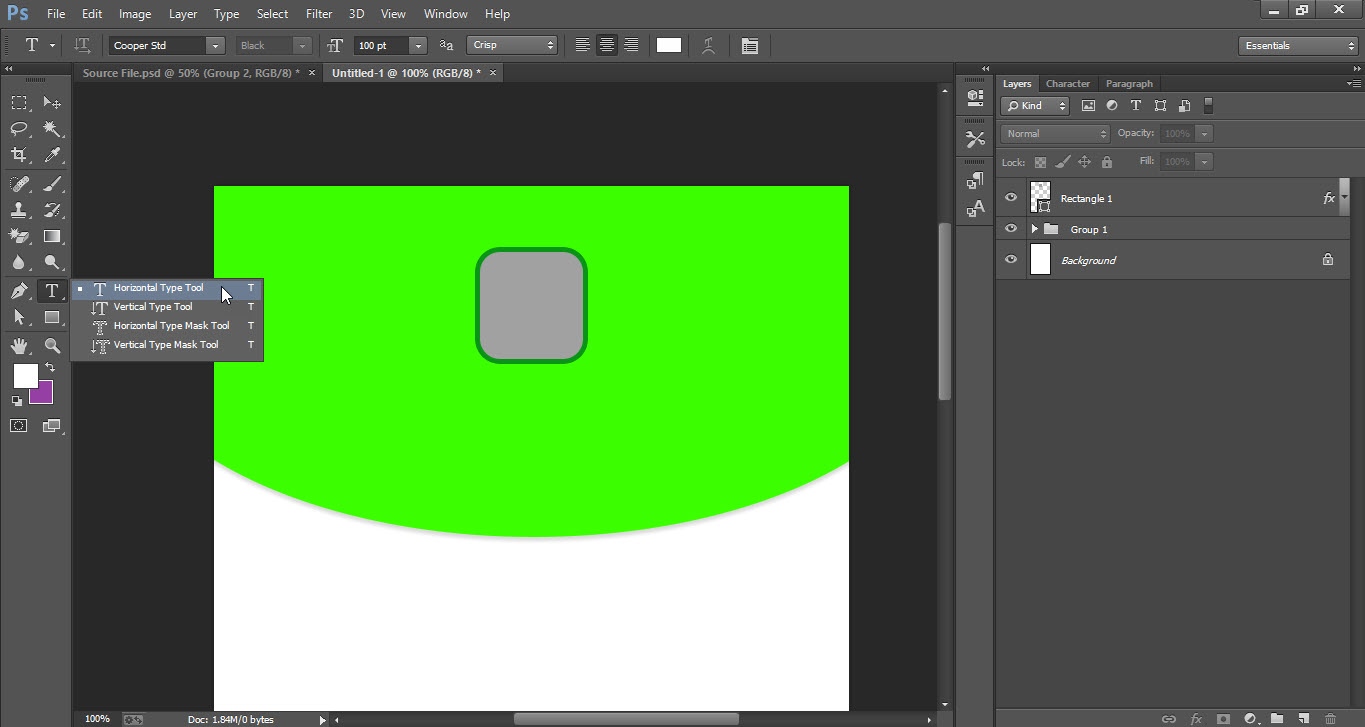
- So take the Horizontal Type Tool from the Tools Bar.
- First, add the “Name” of the cardholder and “Designation”.
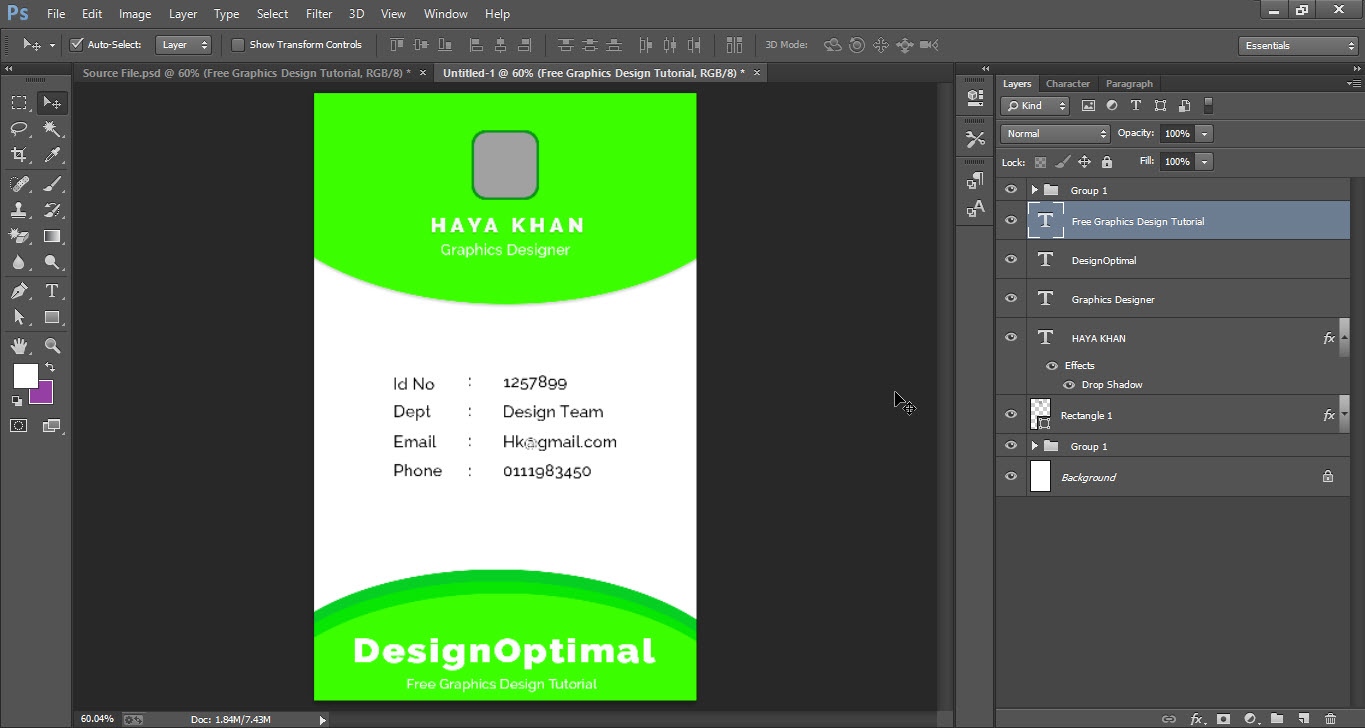
- Now add the other details related to the company.
- At the lower side of the canvas add the name of the company and website.
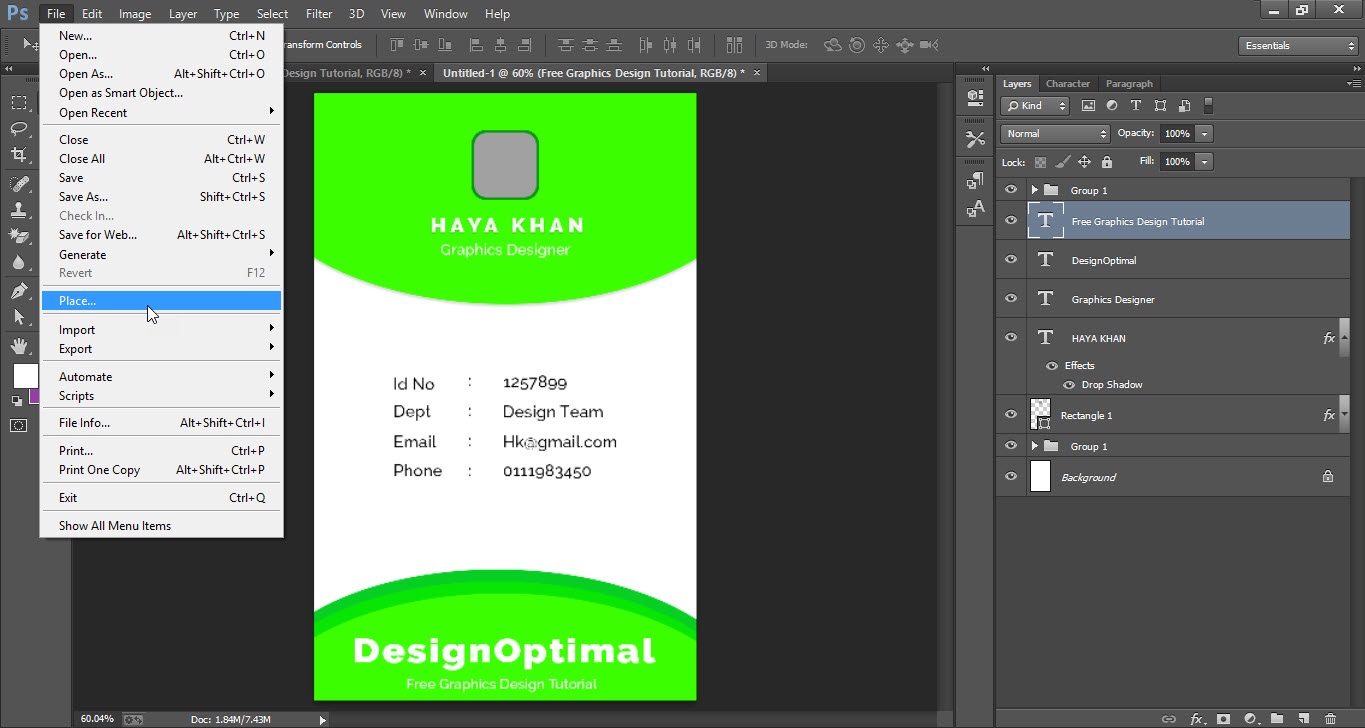
- Now add the Bar Code to the card.
- To do so, go to the File menu and click on the Place option.
- Place the bar code under the details.
- Now add the image to the rectangle so go to the File menu and click on the Place option.
- Place the image on the rectangle and hold the Alt key and click once between the rectangle layer and the image layer.
- Finally, your design is ready.

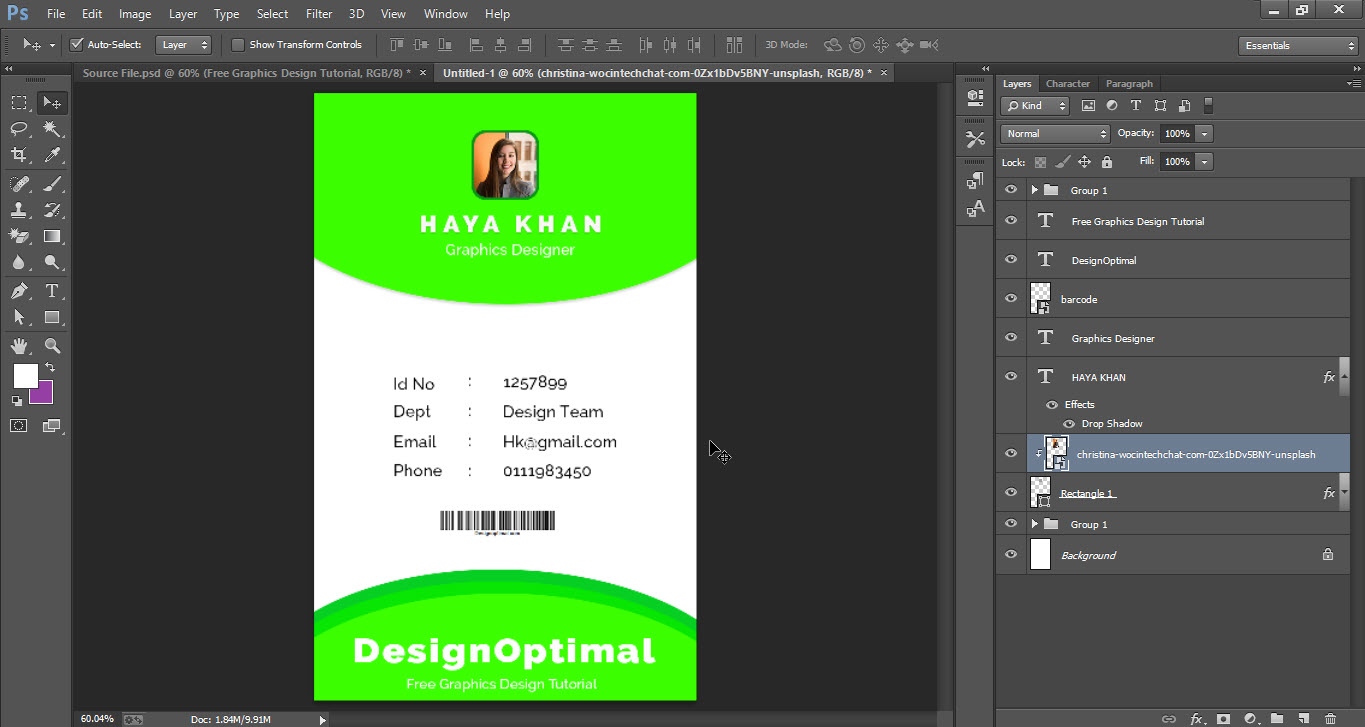
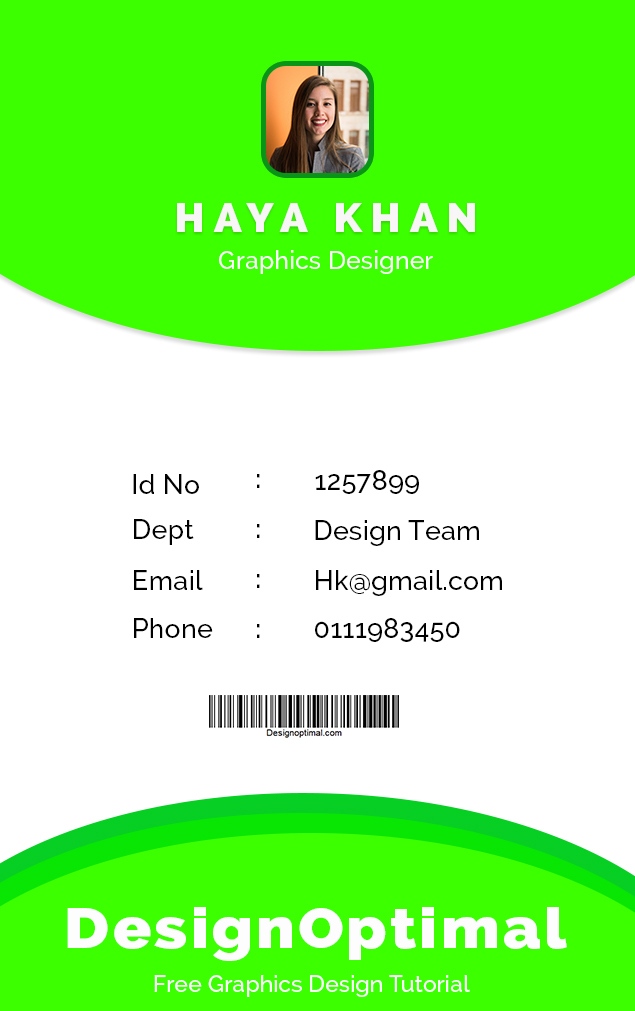
This is how the final result looks like
Comments
No Comments have been Posted.
Post Comment
Please Login to Post a Comment.

