Users Online
· Guests Online: 8
· Members Online: 0
· Total Members: 207
· Newest Member: najman444
· Members Online: 0
· Total Members: 207
· Newest Member: najman444
Forum Threads
Newest Threads
No Threads created
Hottest Threads
No Threads created
Latest Articles
Articles Hierarchy
How To Make Slice Face Effect In Photoshop
How To Make Slice Face Effect In Photoshop
In this Photoshop tutorial, well use selection and shape tools to create the 3D illusion of face sliced into a few parts and well color in some shadows and make things seem much cool practicing a few tips and methods in Photoshop CC.
Resources
Images used:
Step 01
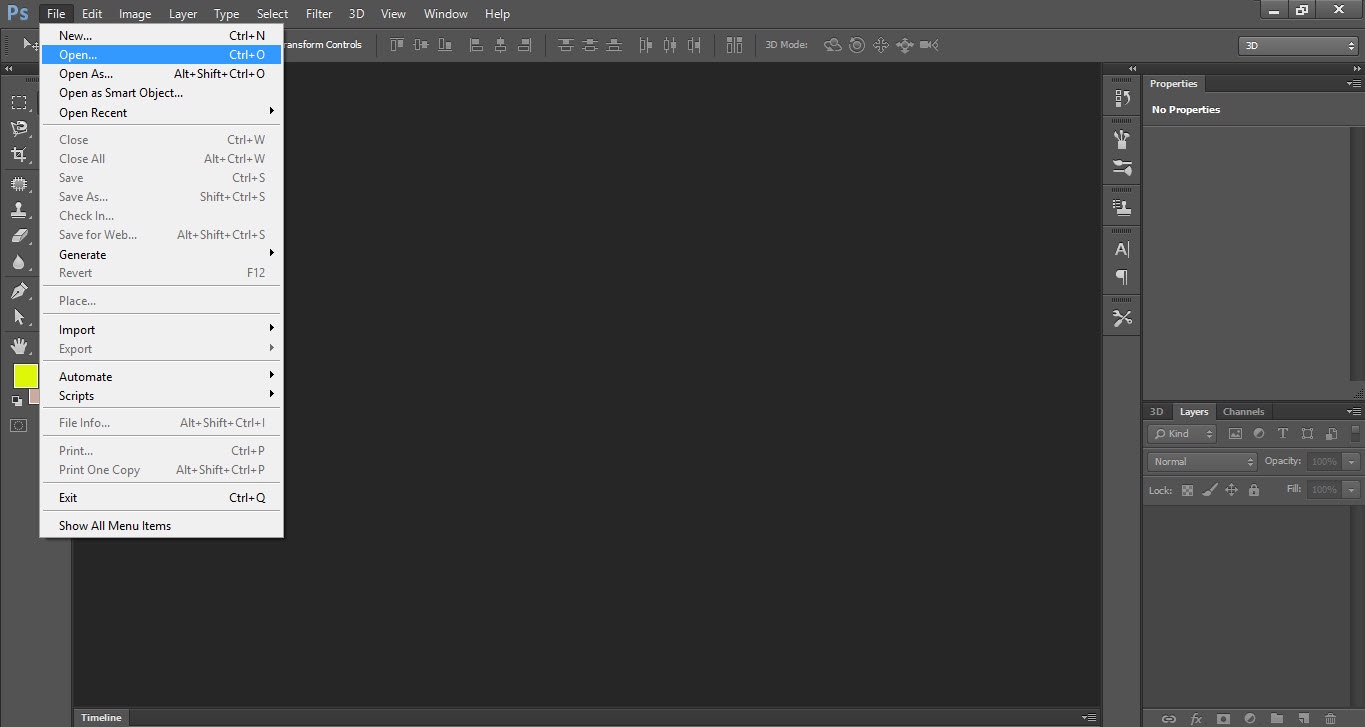
- Open photoshop software
- Go to the File menu and click on Open
- Select the picture.
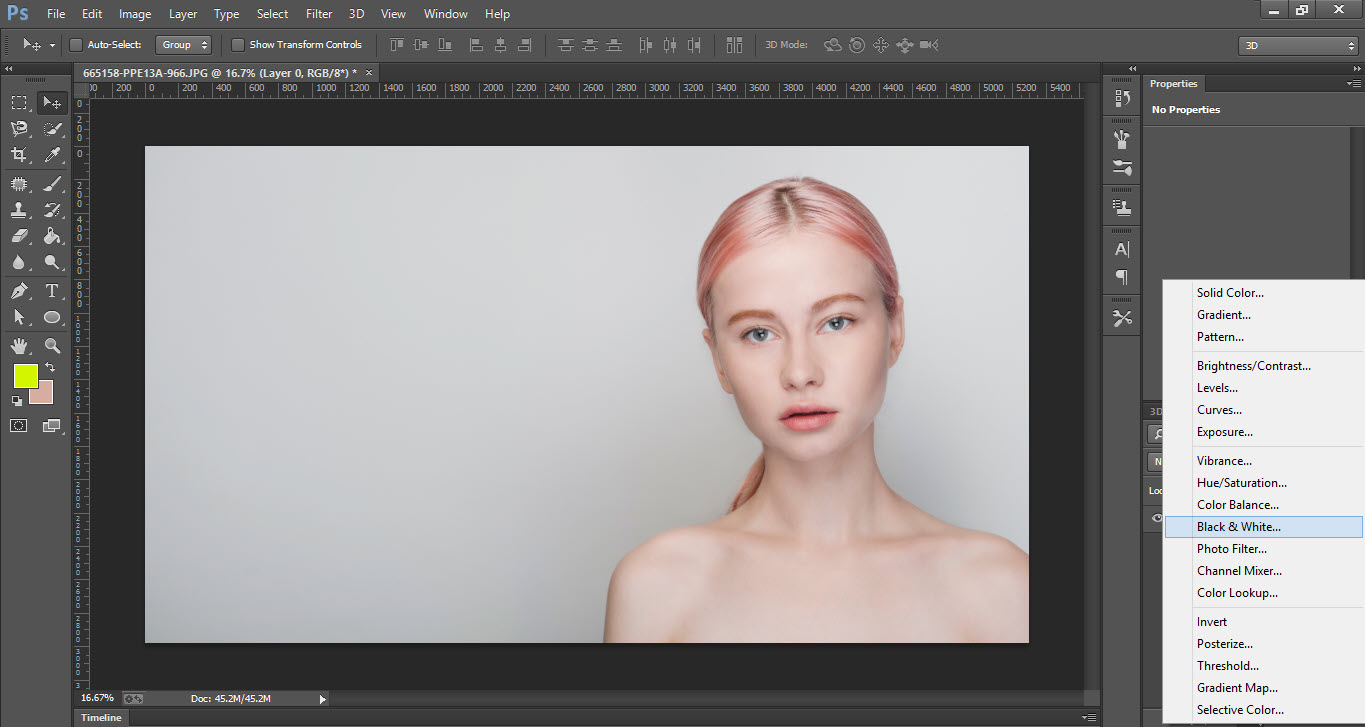
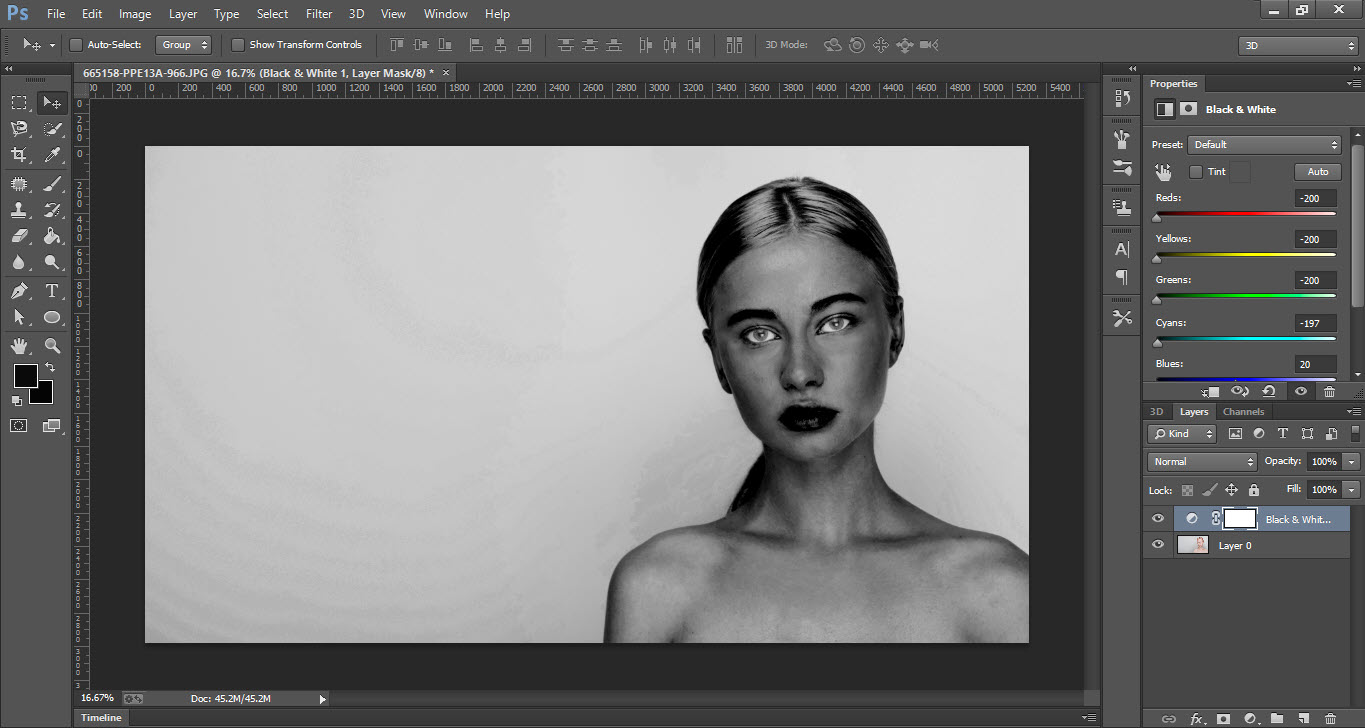
- Go to the "Adjustment layer" and click on "Black & White" option.
- Make sure that all the slider is on "0%".
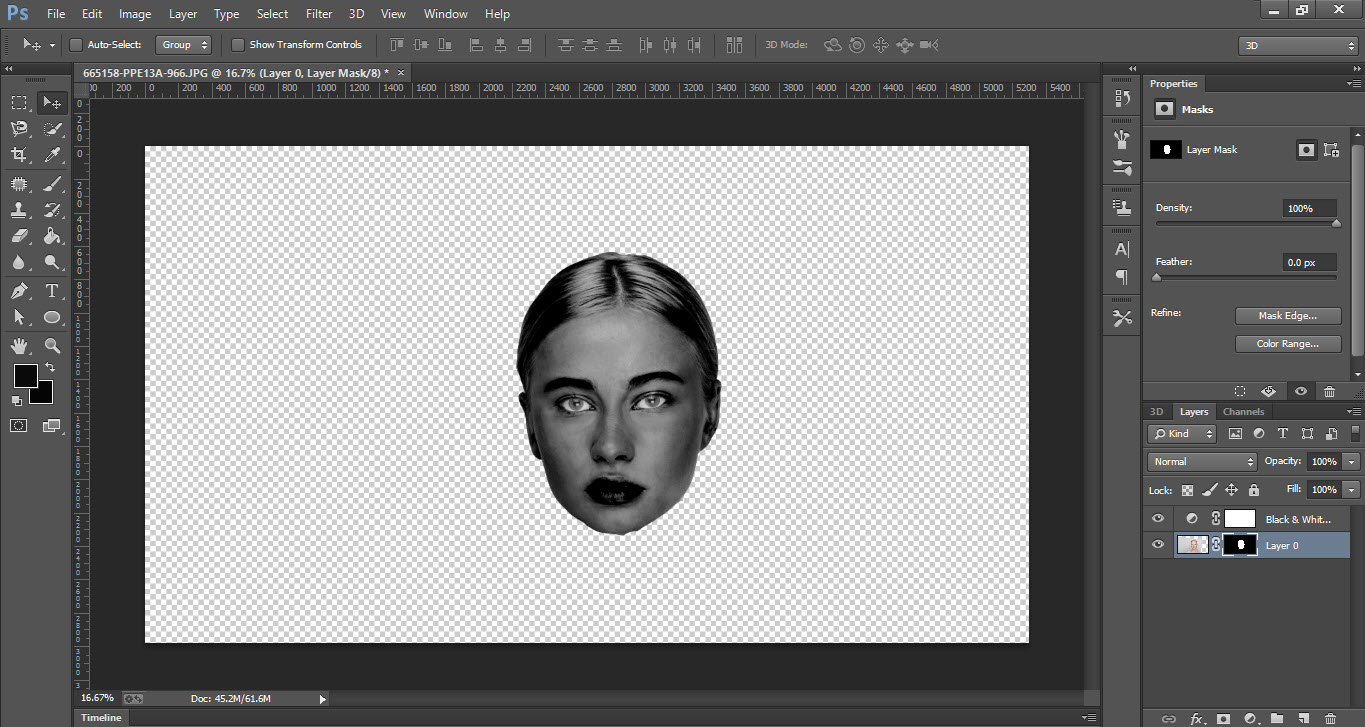
- Now go to Tool Bar and select "Magnetic Lasso Tool".
- Make selection of the face.
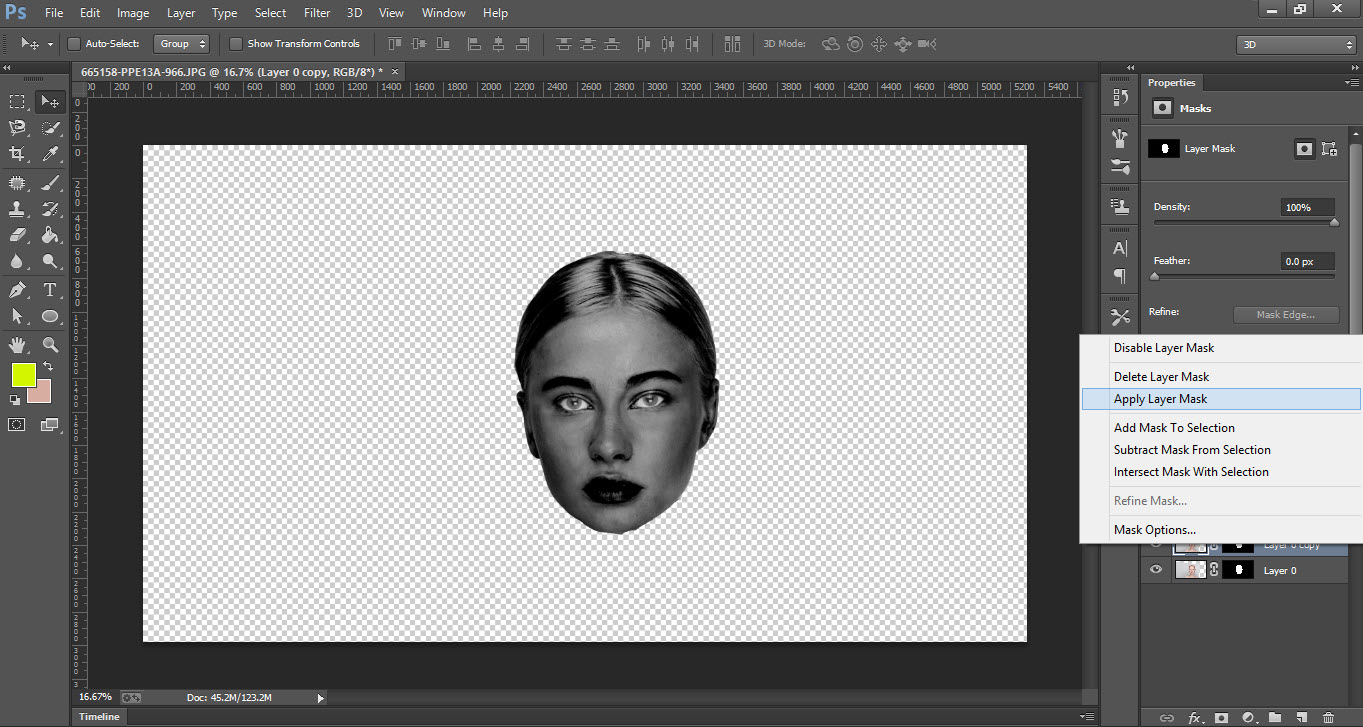
- Now click on the Layer Mask button so the face will be separate from the body.
- Press "Ctrl+J" which make a copy of the same layer.
- Go to the copy of Layer mask right click on the layer mask and click on "Apply Layer Mask".
- Name it Slice From Here.
Step 02
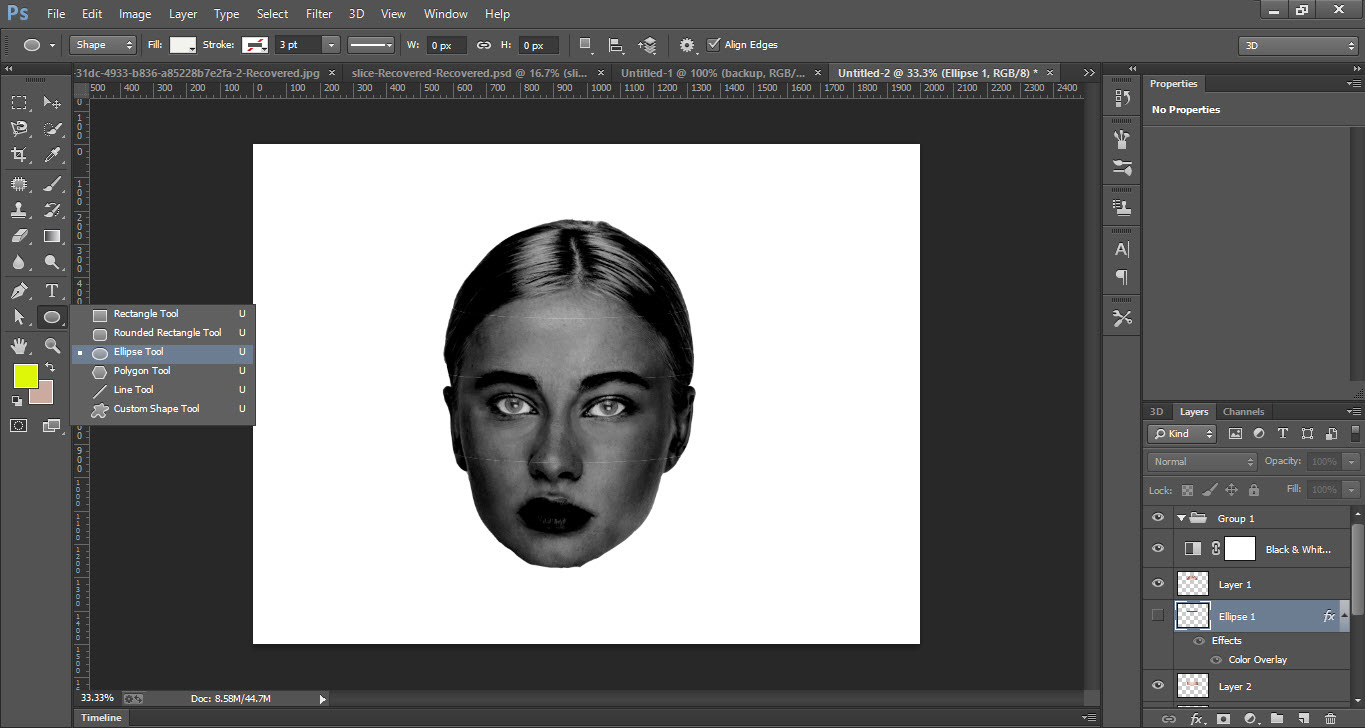
- Now go to the "Tool Bar" and "Select Ellipse Tool".
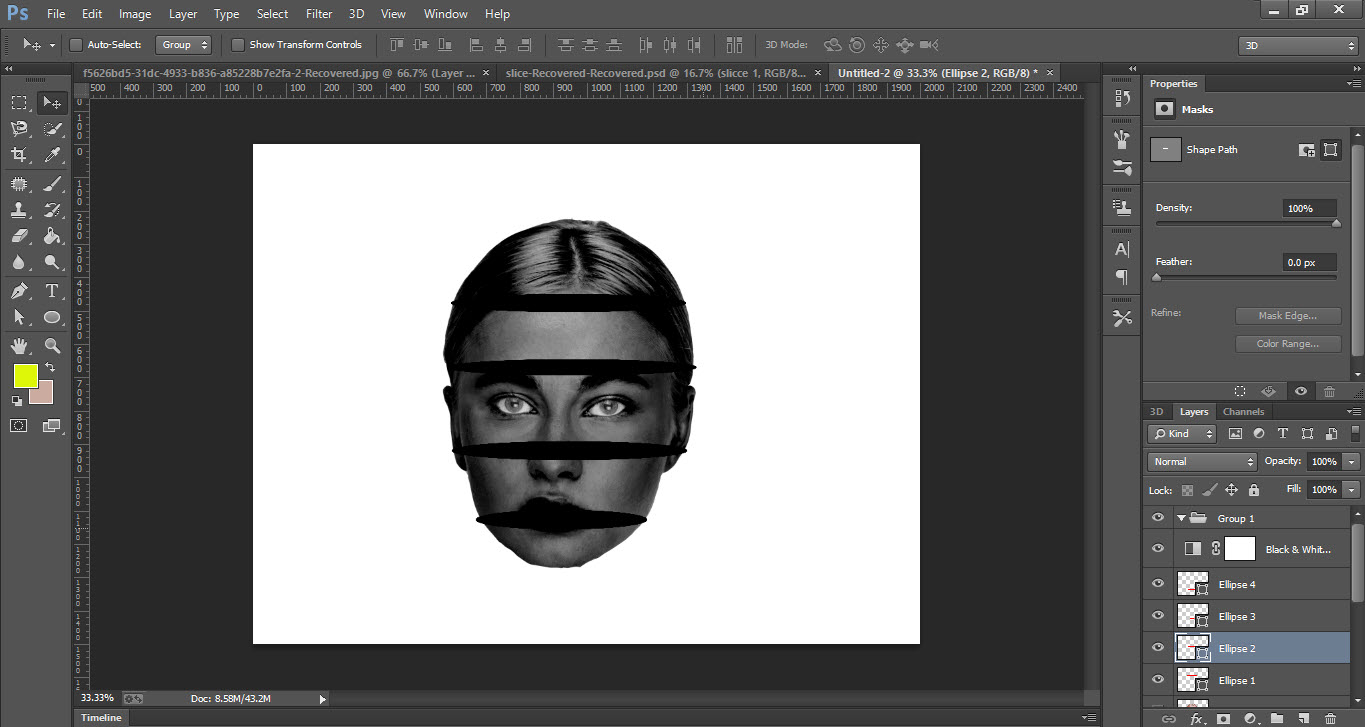
- Draw a round shape on the face with the help of Select Ellipse Tool as shown in the screenshot.
- Name this layer "Cute 1".
- Do the same for the whole face and rename each layer (exp; cut 2, cut 3 & so on).
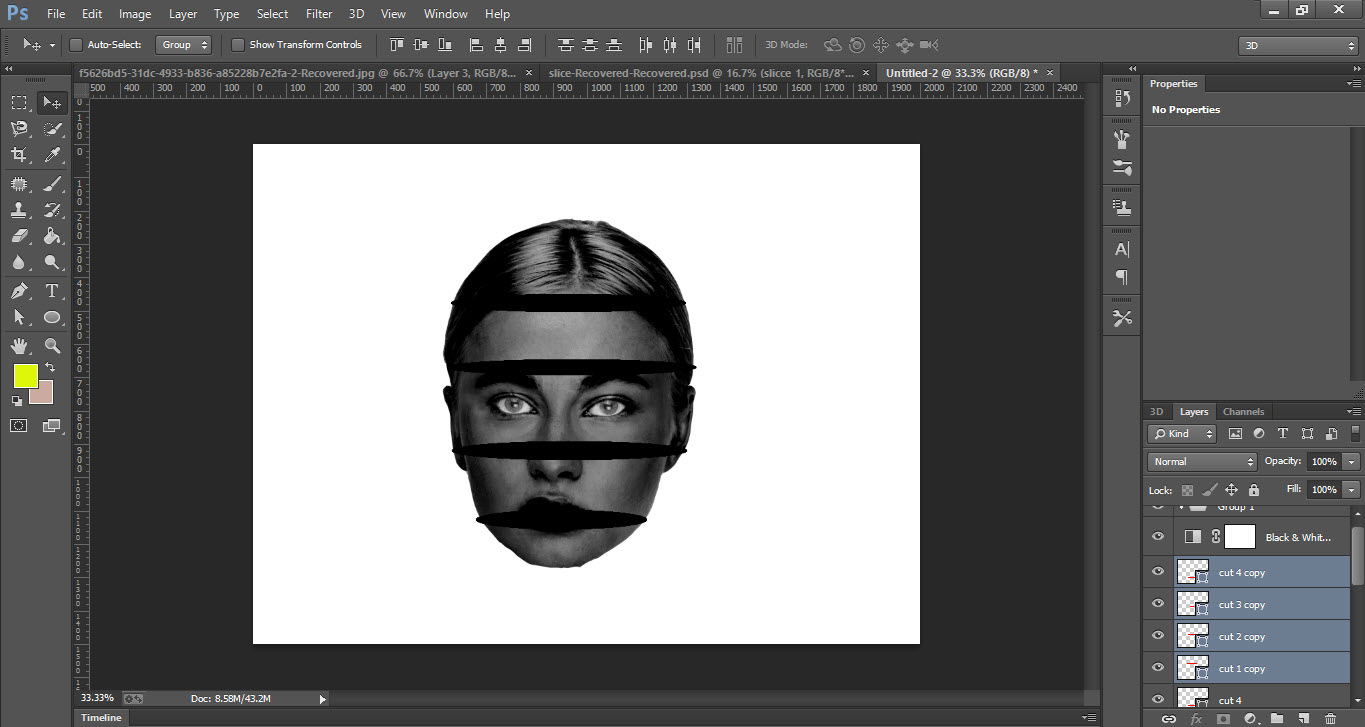
- Now make a copy of all the "Cuts layers".
- To do so hold "Shift Key" click on the first cut then on the last cut it will select all the cuts layers.
- Now press "Ctrl+J".
Step 03
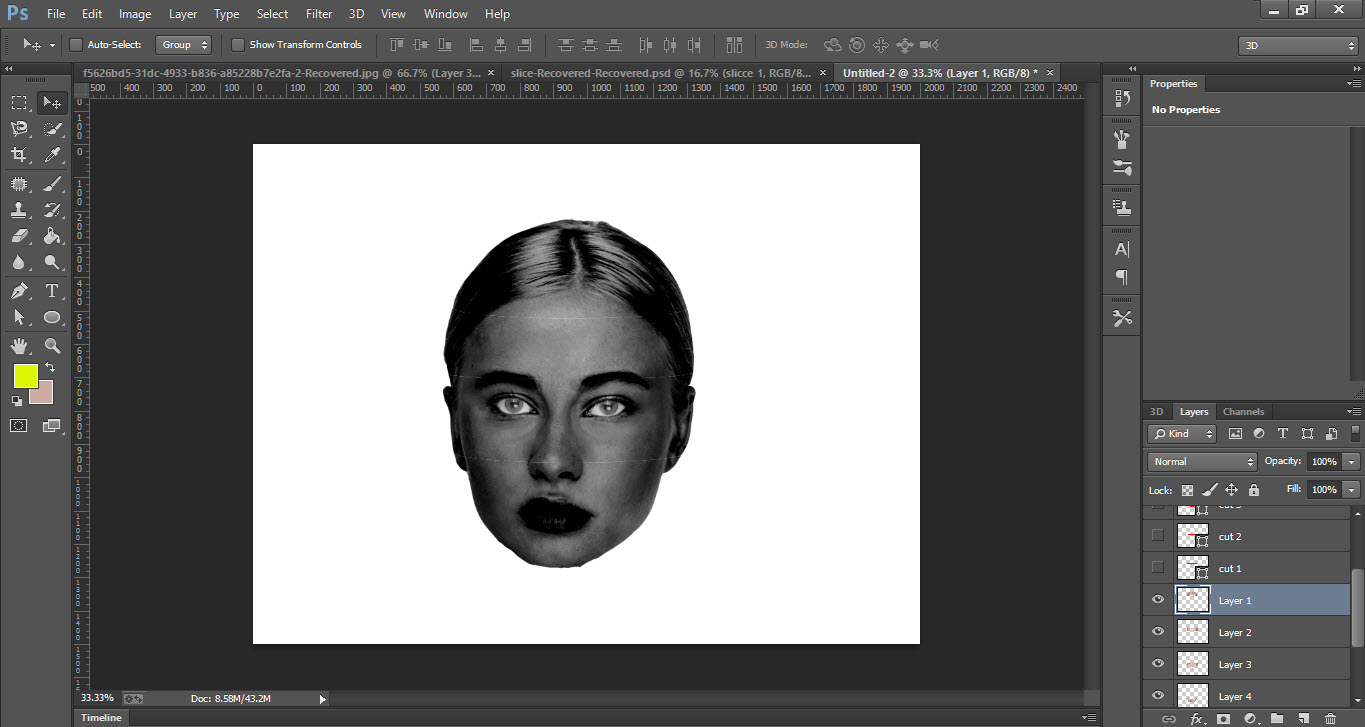
- Now Turn Off all the cuts layer.
- Now we will use cuts copy the original cuts will be used later.
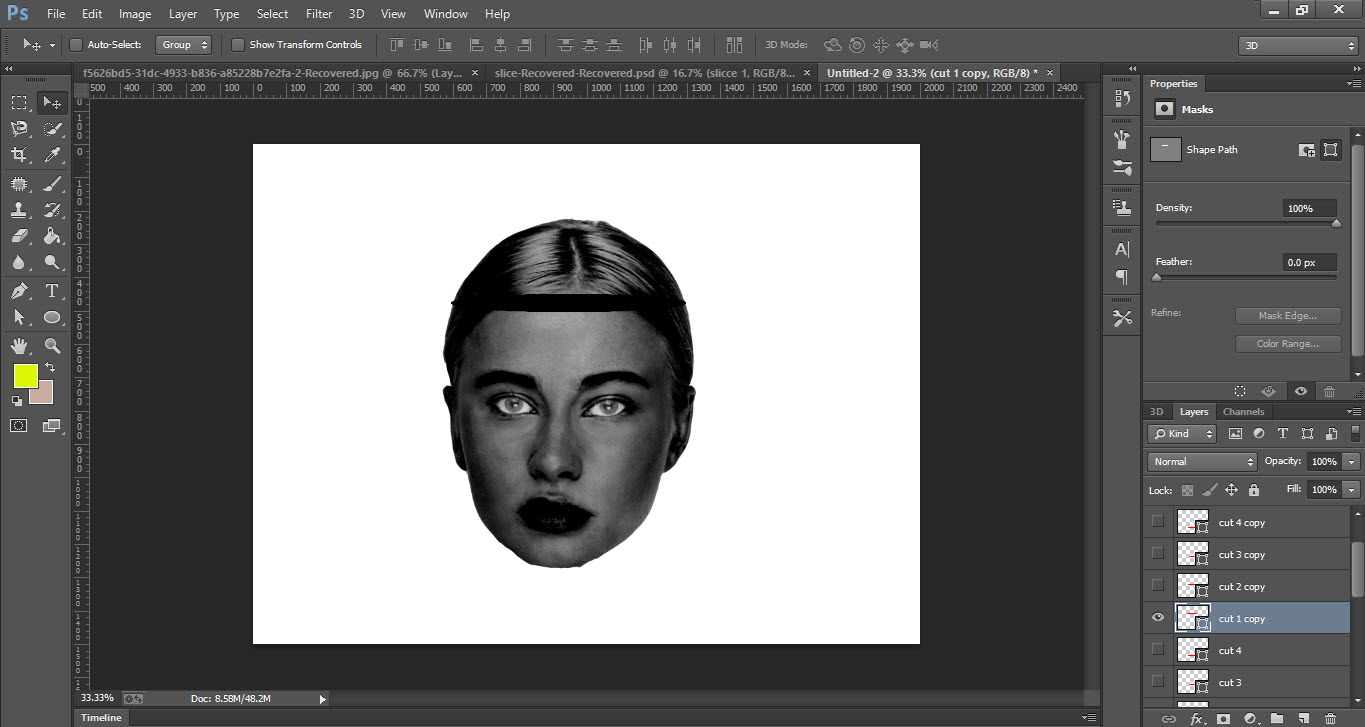
- So first Turn On Cut 1 Copy.
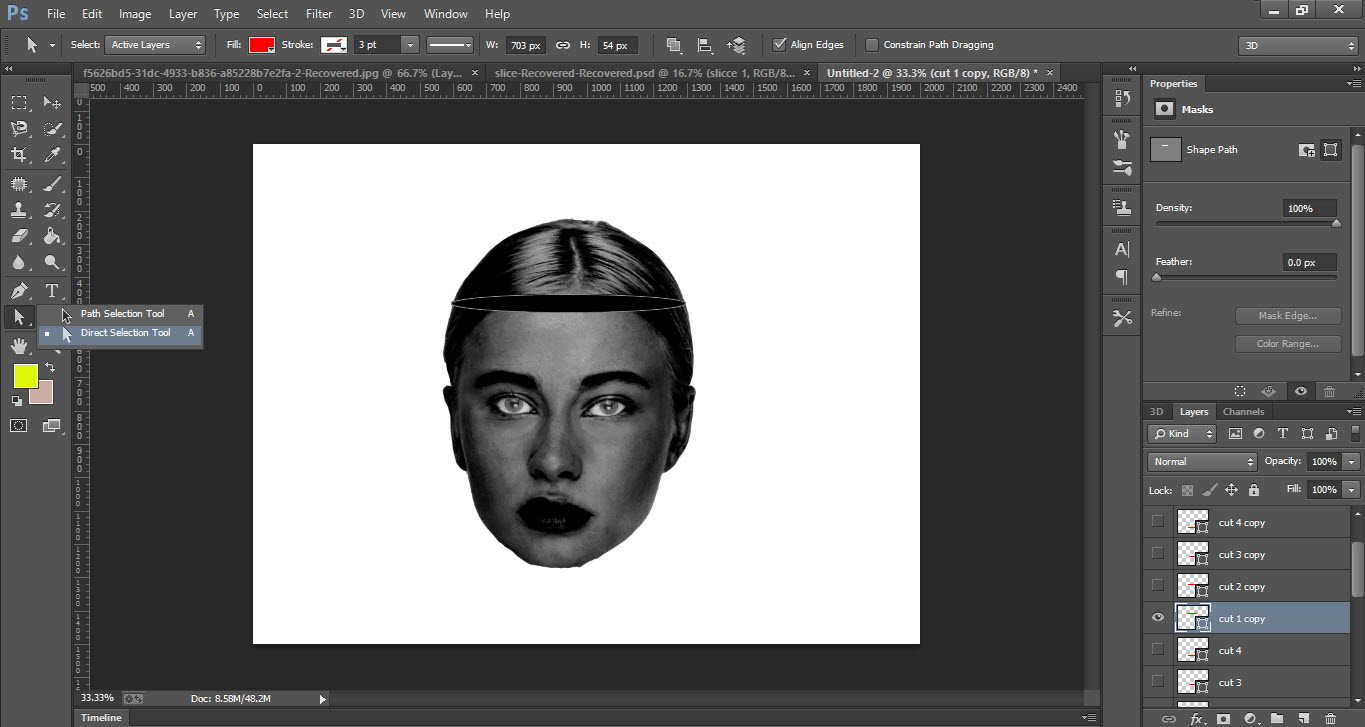
- Go to Tool Bar and right-click on Path Selection Tool.
- Select the Direct Selection Tool.
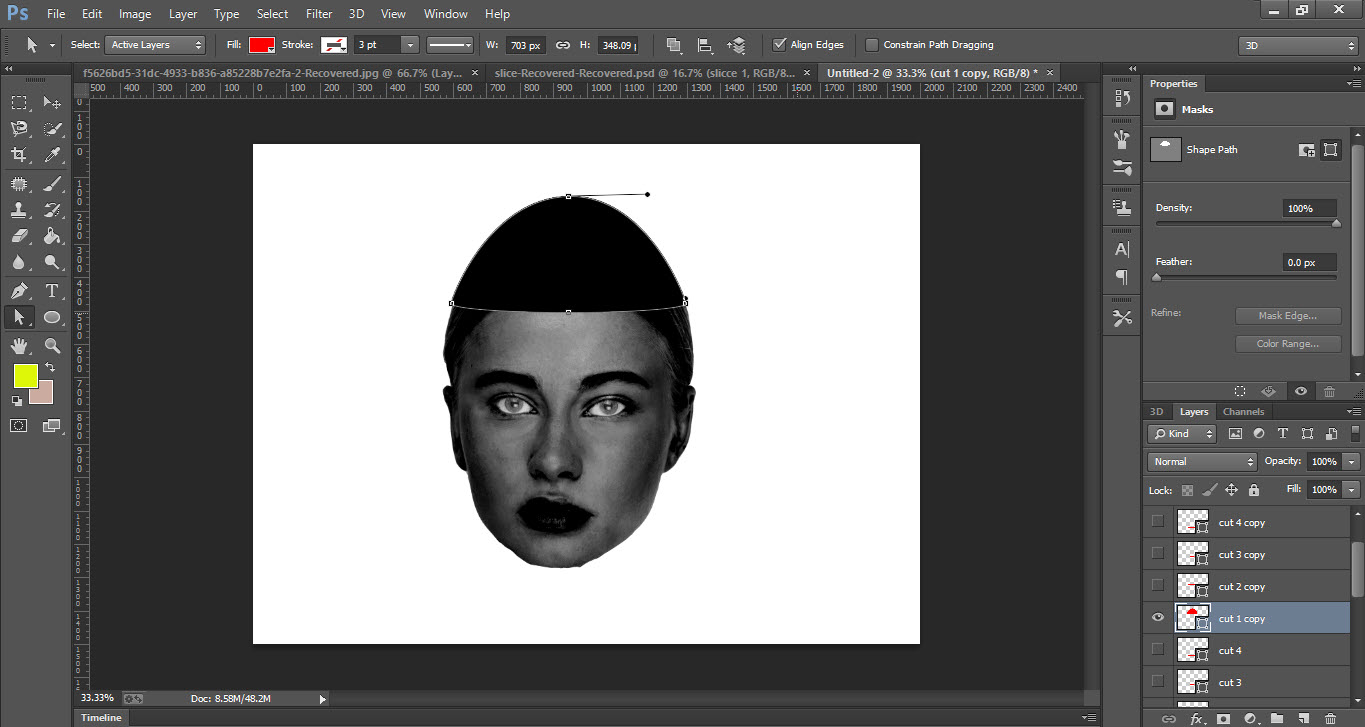
- Then click on the ellipse shape you will see small points on the edges.
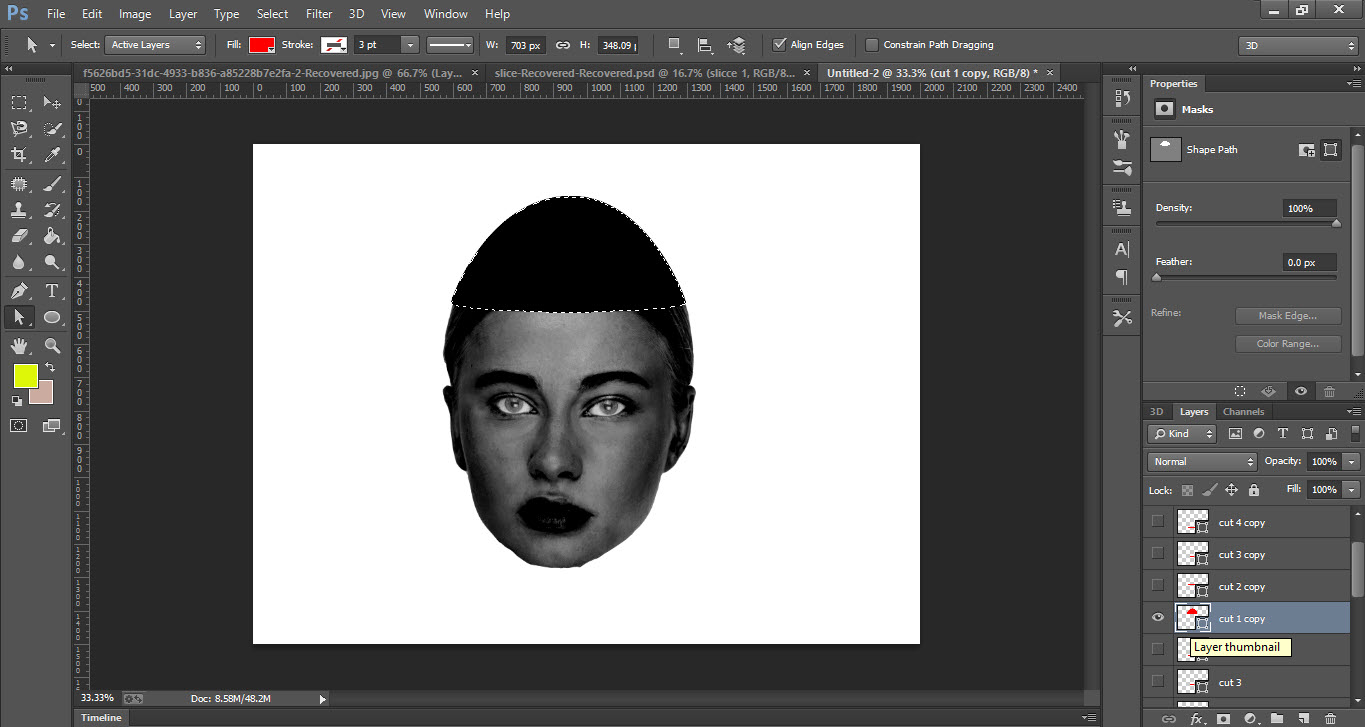
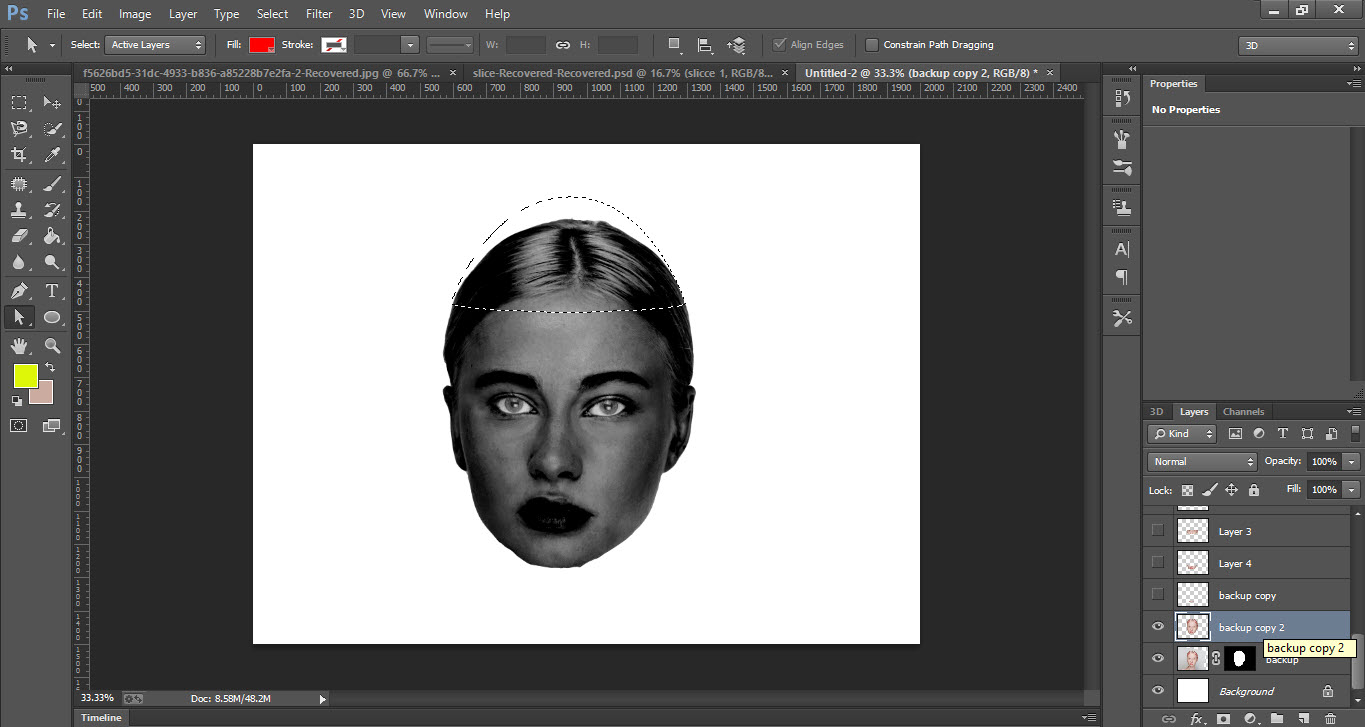
- Hold click on the top point and move up, make sure it goes outside the face.
- Now hold Ctrl key and click on the cut 1 copy thumbnail(it will make a selection).
- Go to the Slice From Here layer and press on Ctrl+Shift+J.
- It will separate that piece from the face and rename it Slice 1.
- Now delete the Cut 1 Copy layer.
- Do the same process for the whole face.
Step 04
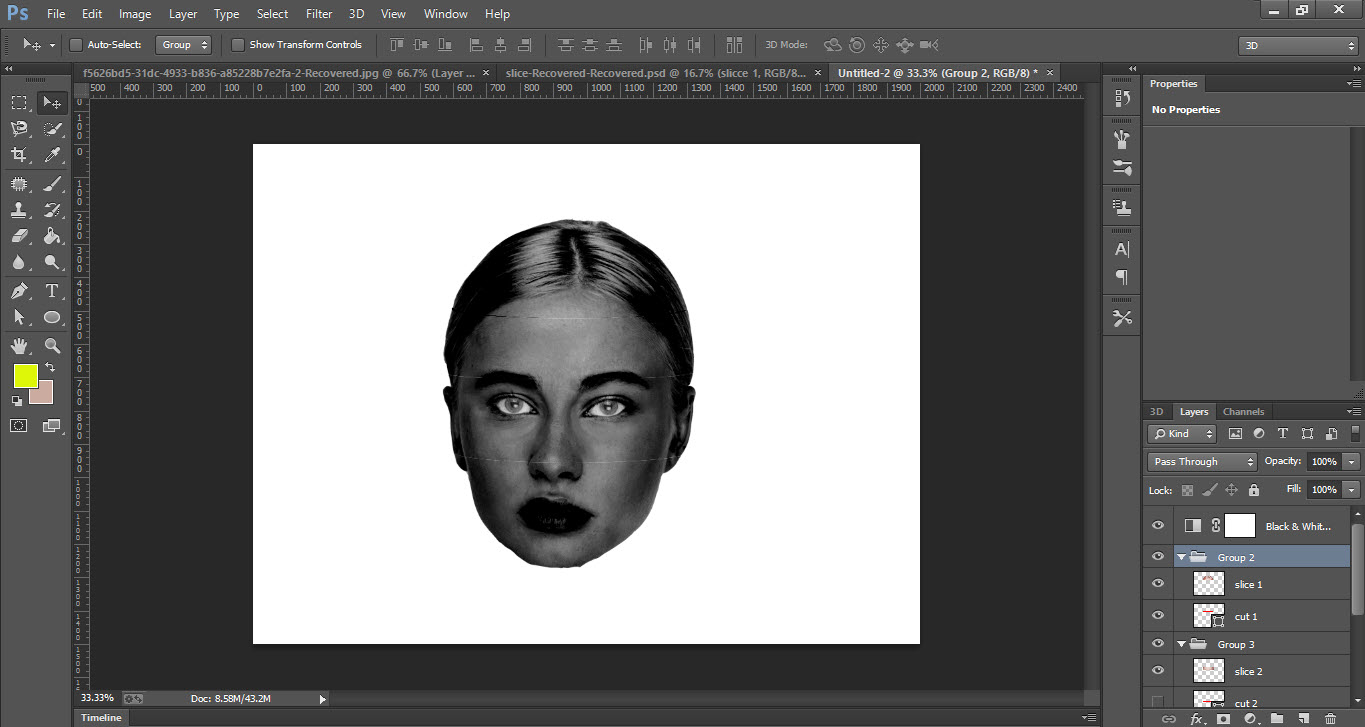
- Leave the Slice 1 start from Slice 2.
- Select the Cut 2 and put it under the Slice 2.
- Now grouped Slice 2 and Cut 2.
- Now select Cut 3 layer and put it under the Slice 3 layer and grouped it.
- Do the same for all layers.
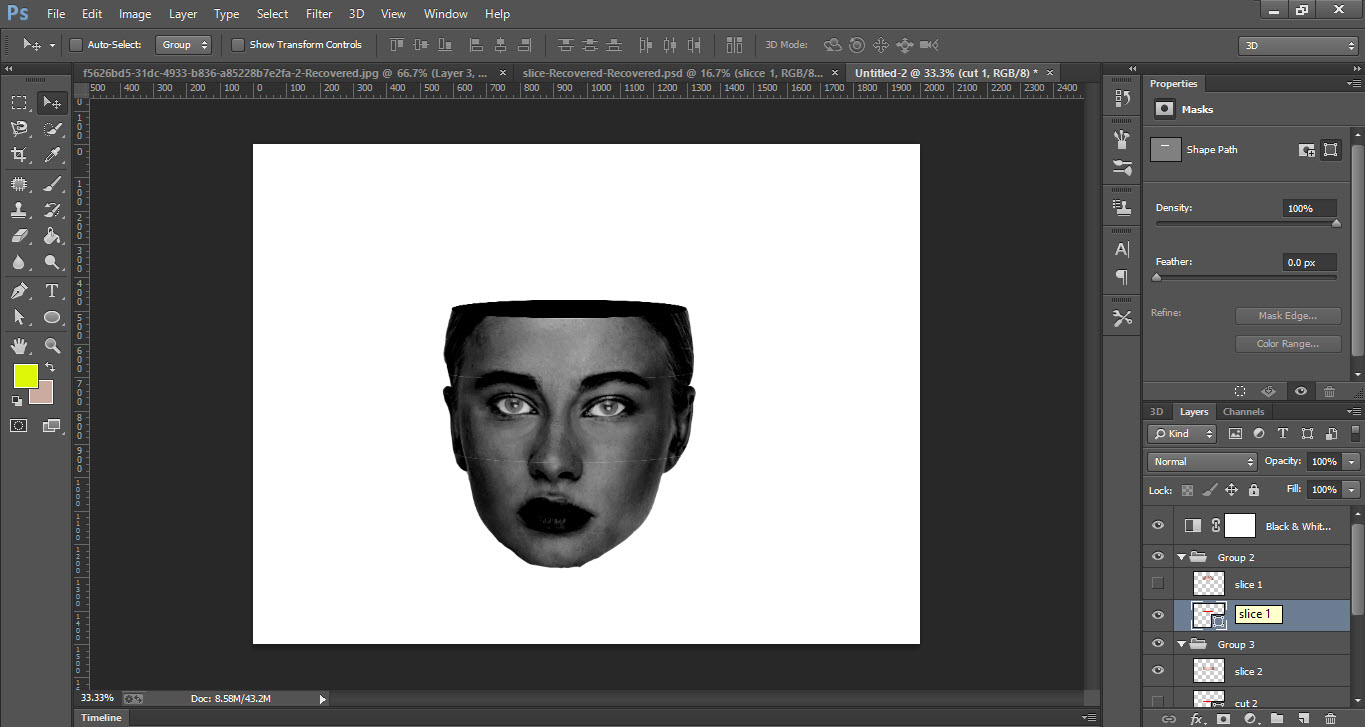
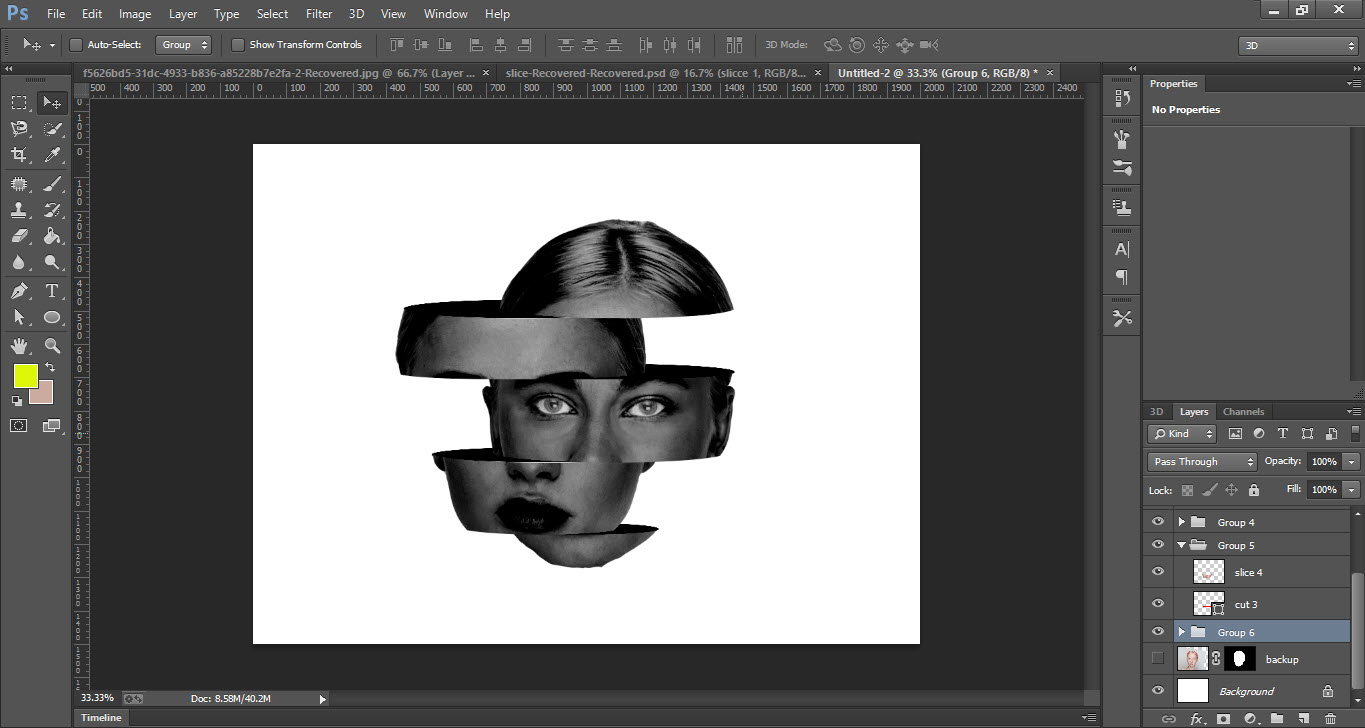
- Select the Slice 1 layer and select the Move Tool.
- Use Arrow Keys to move the slice left or right.
- Move all the slices as shown in the screenshot.
Step 05
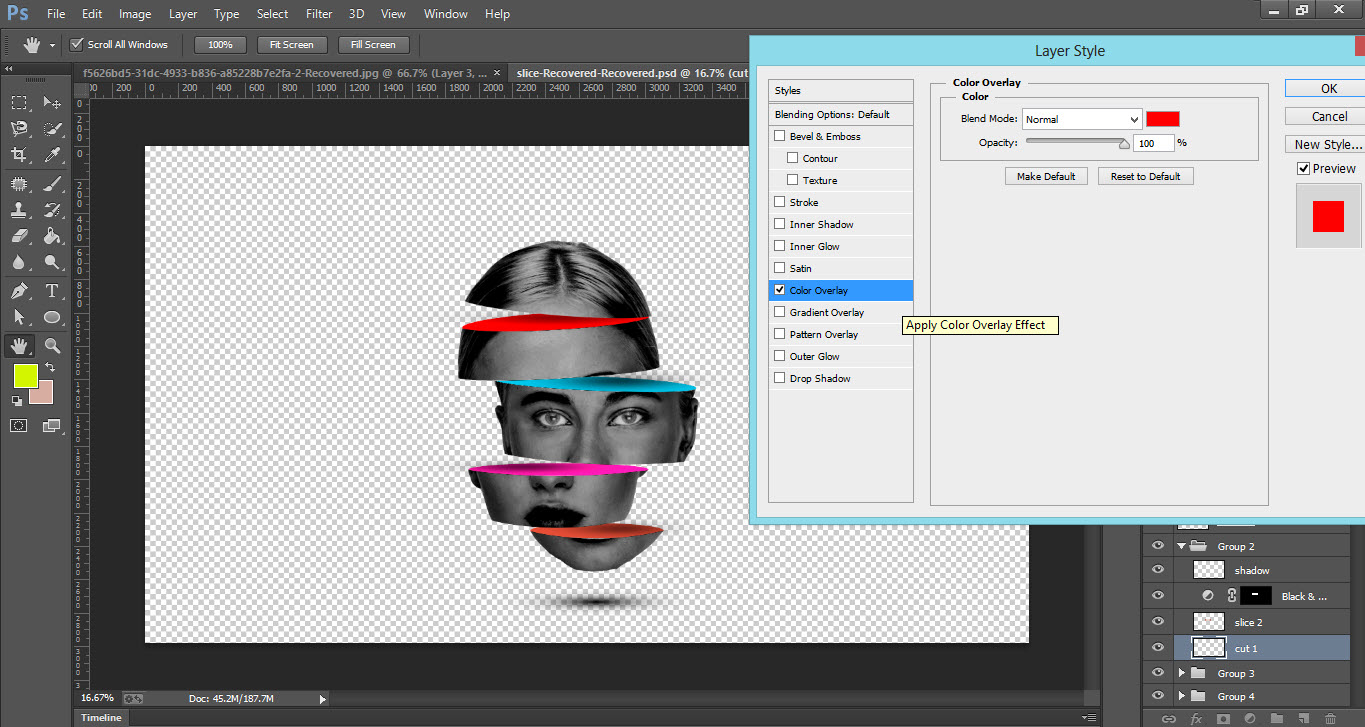
- Now select the Cut 1 and double click on the thumbnail of the cut 1.
- Style Layer window will be opened then click on Color Overlay option and you can change color from there.
- Now we have to make Shadow so select black color and take Brush from Brush Tool.
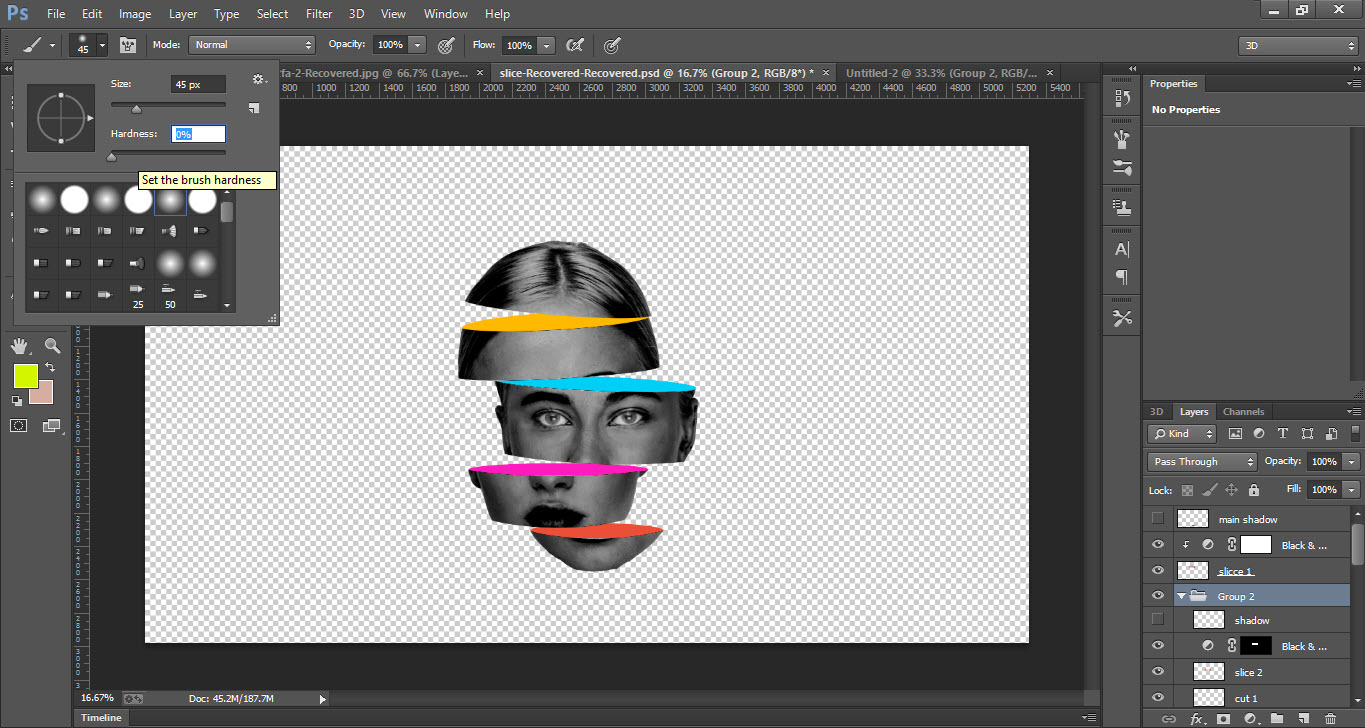
- Make sure that the hardness of the brush is 0%.
- Set the background according to your point of view.
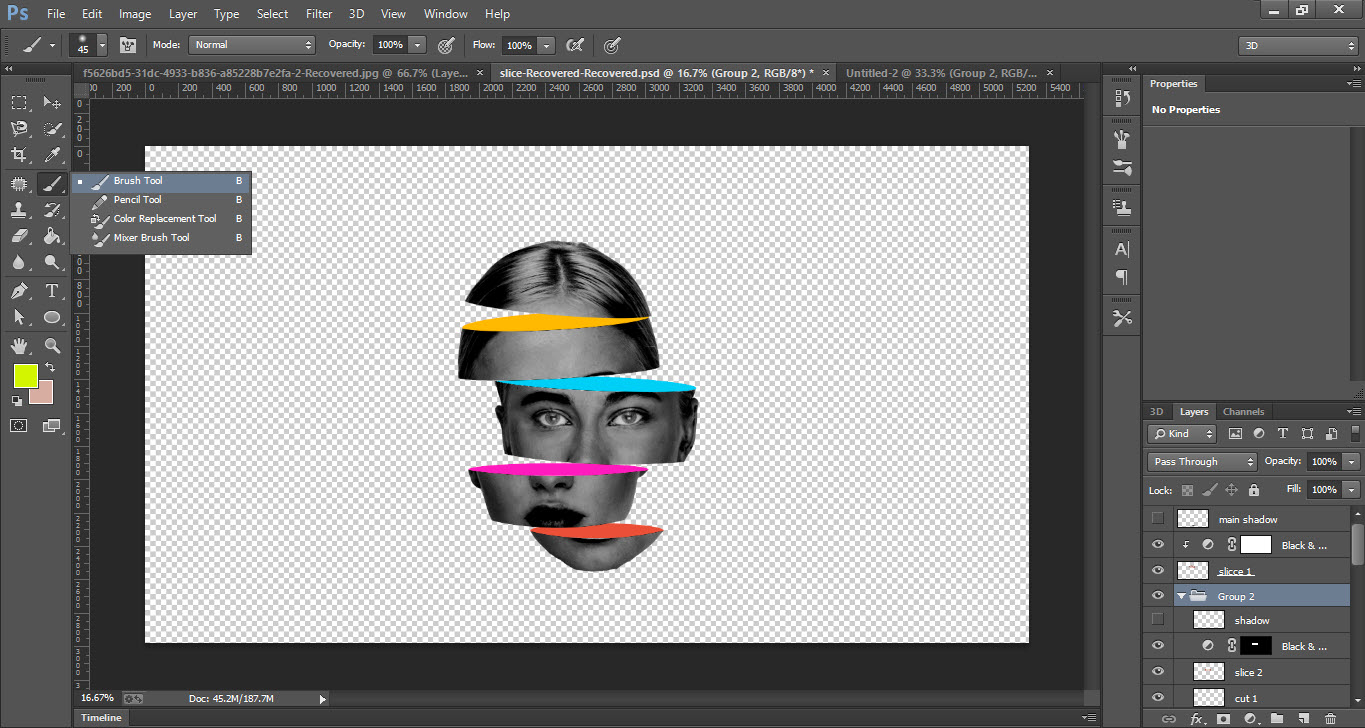
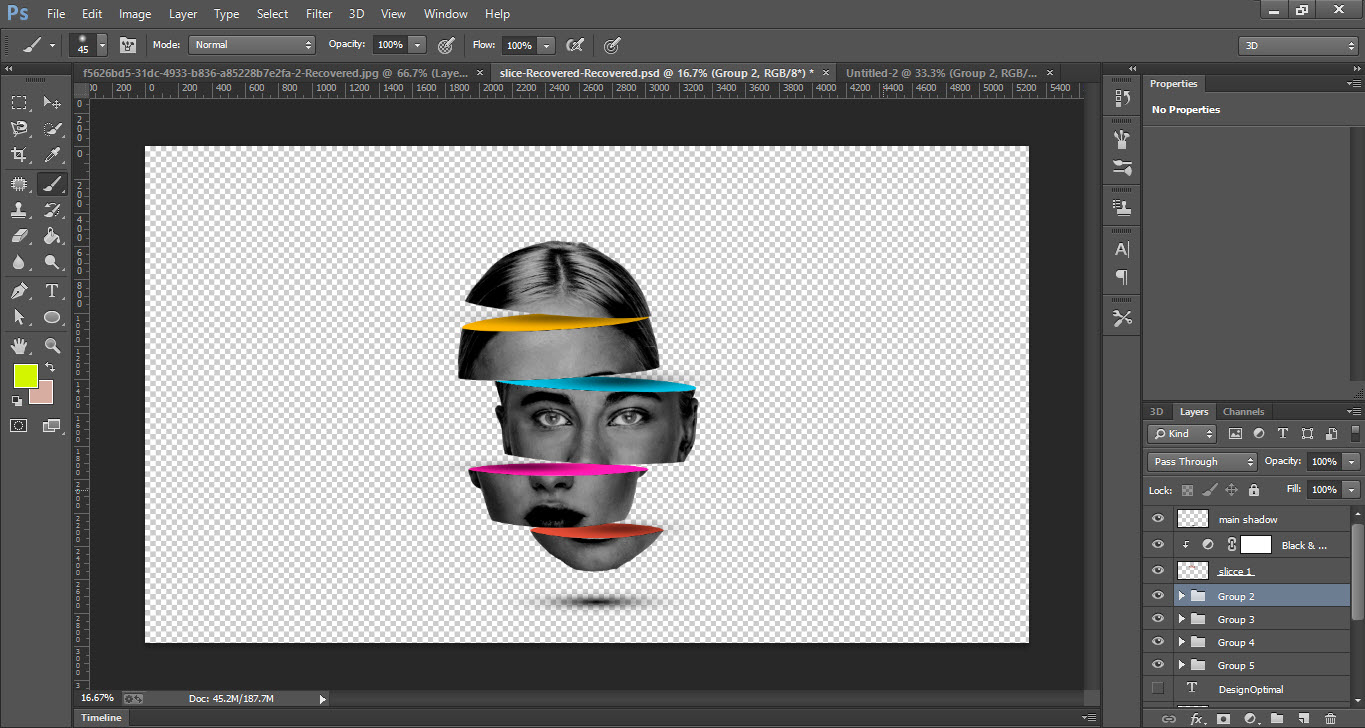
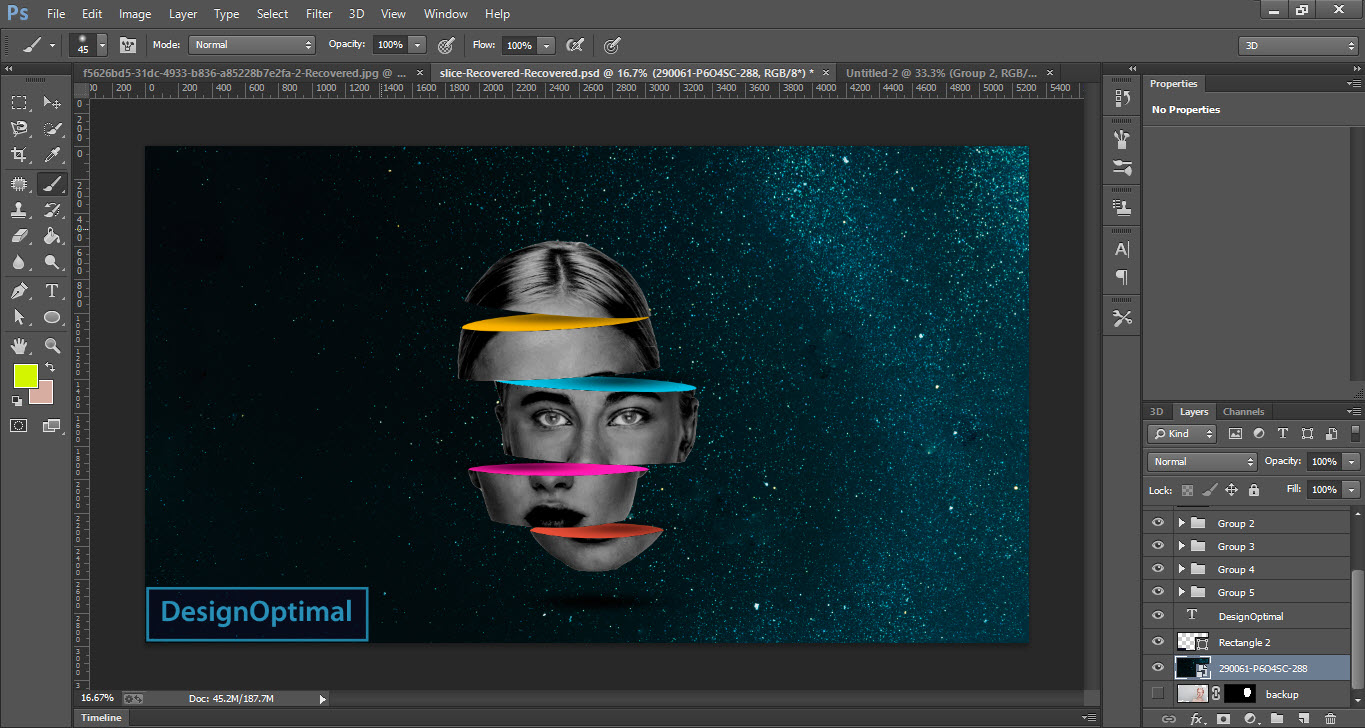
This how the final result looks like

Comments
No Comments have been Posted.
Post Comment
Please Login to Post a Comment.

