In this article, we will show you, How to install Informatica (irrespective of the version) with the screenshots. Installing the Informatica includes following steps so, Please follow the steps in the same order we mentioned below:
- Step 1: Informatica Server Installation
- Step 2: Configure Informatica Repository Service and Informatica Integration Service. Please refer Informatica Admin Console article to configure the Repository and Integration services.
- Step 3: Informatica Client Installation
Before we start installing Informatica,
- We need Database Server (SQL or Oracle)
- Create a Database inside your server. Remember this will be assigned while creating Informatica Domain. Refer Step 5B
- Create a database User and provide the administrator credentials to the above-created database. We are going to use this user credentials while connecting to the database. Refer Step 5B
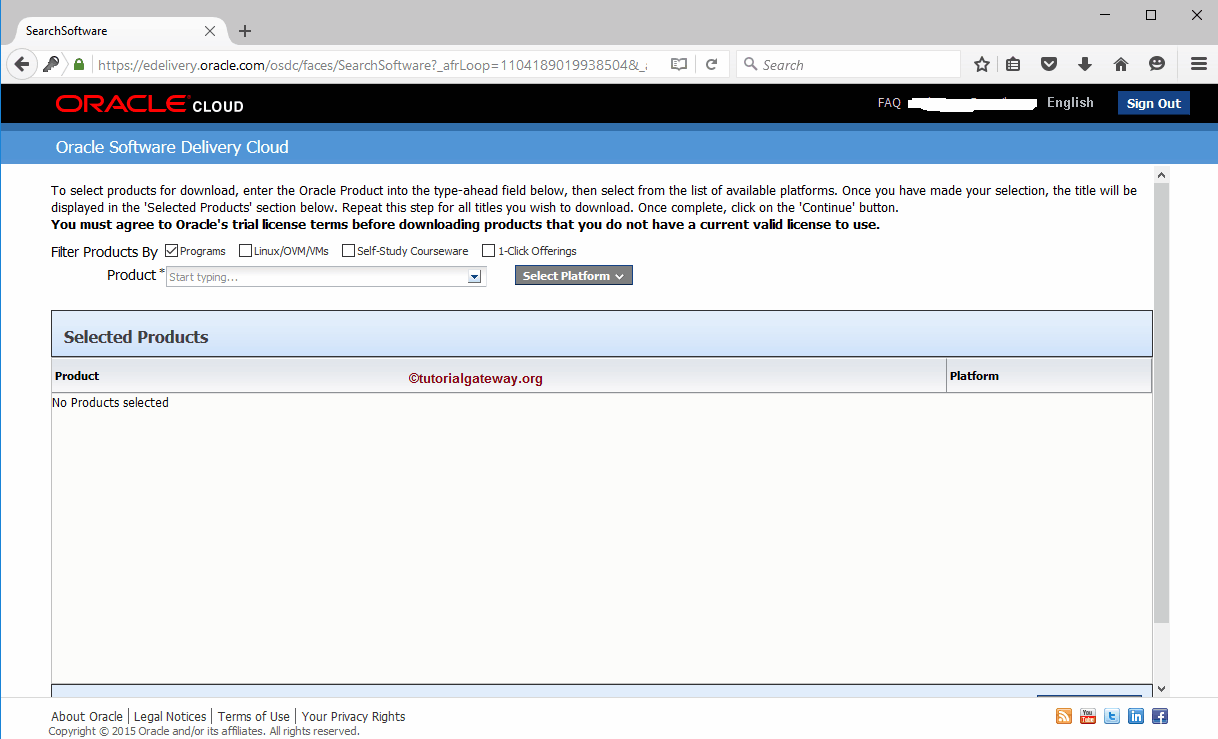
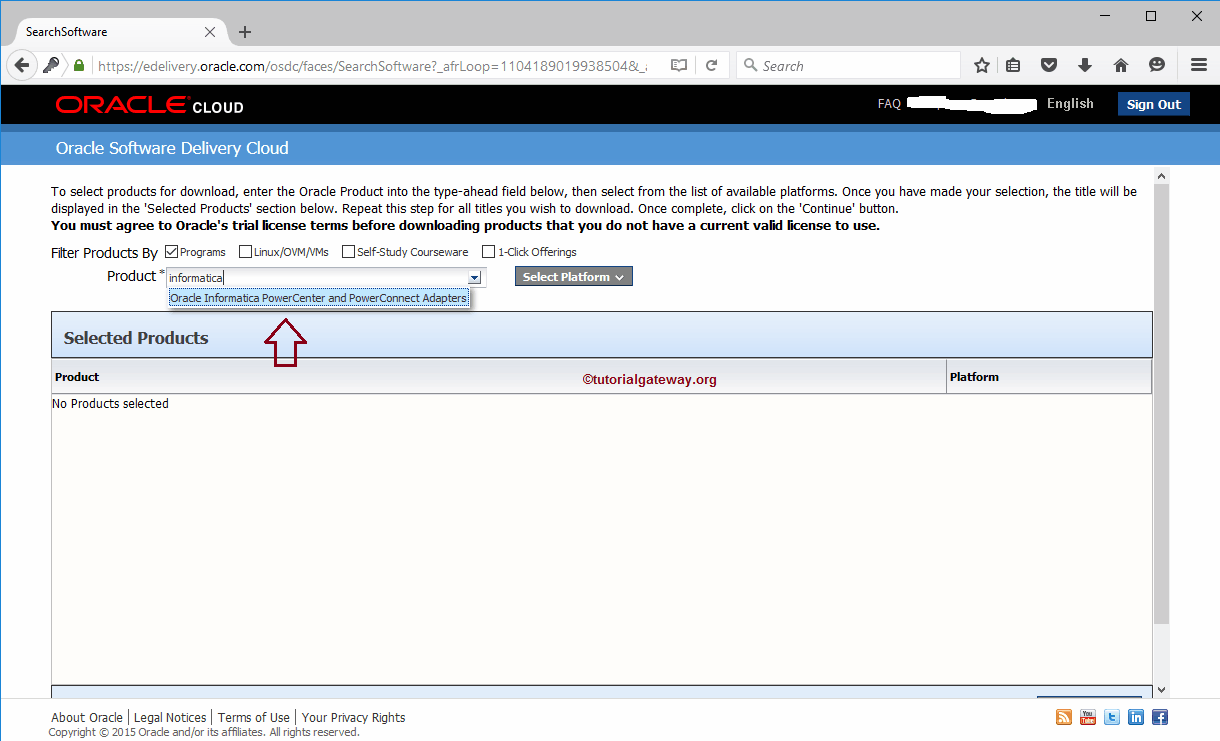
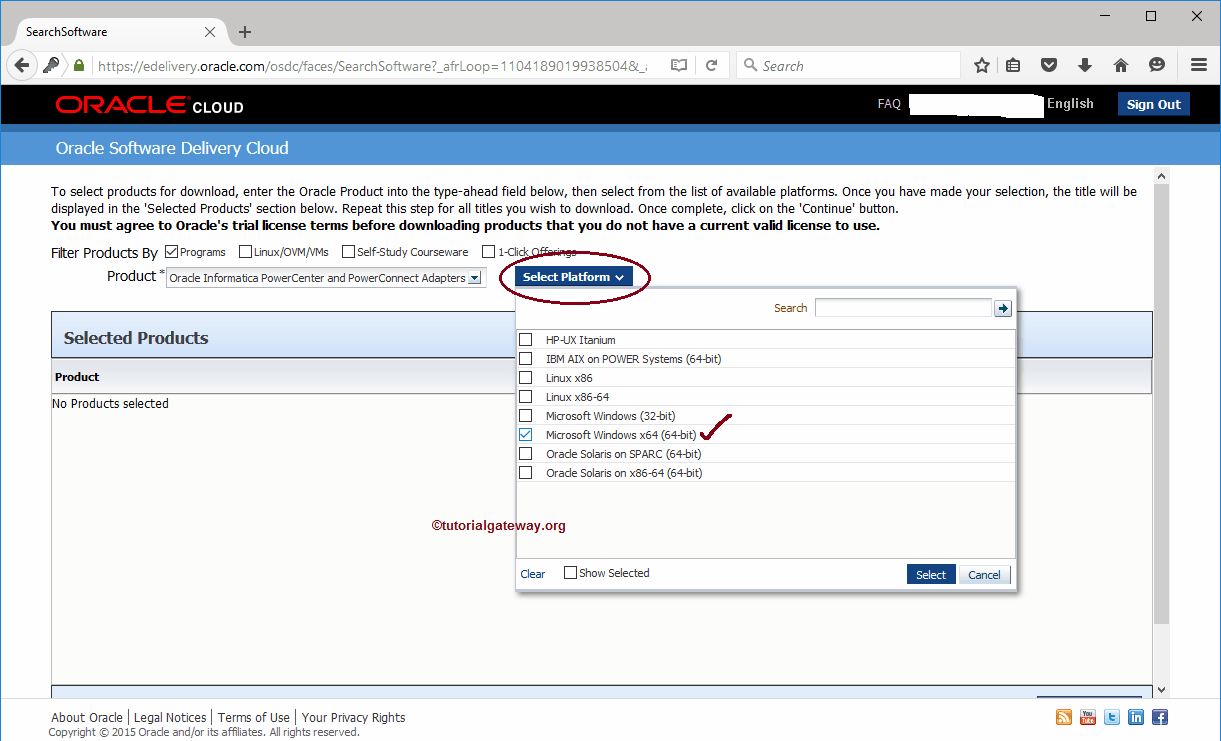
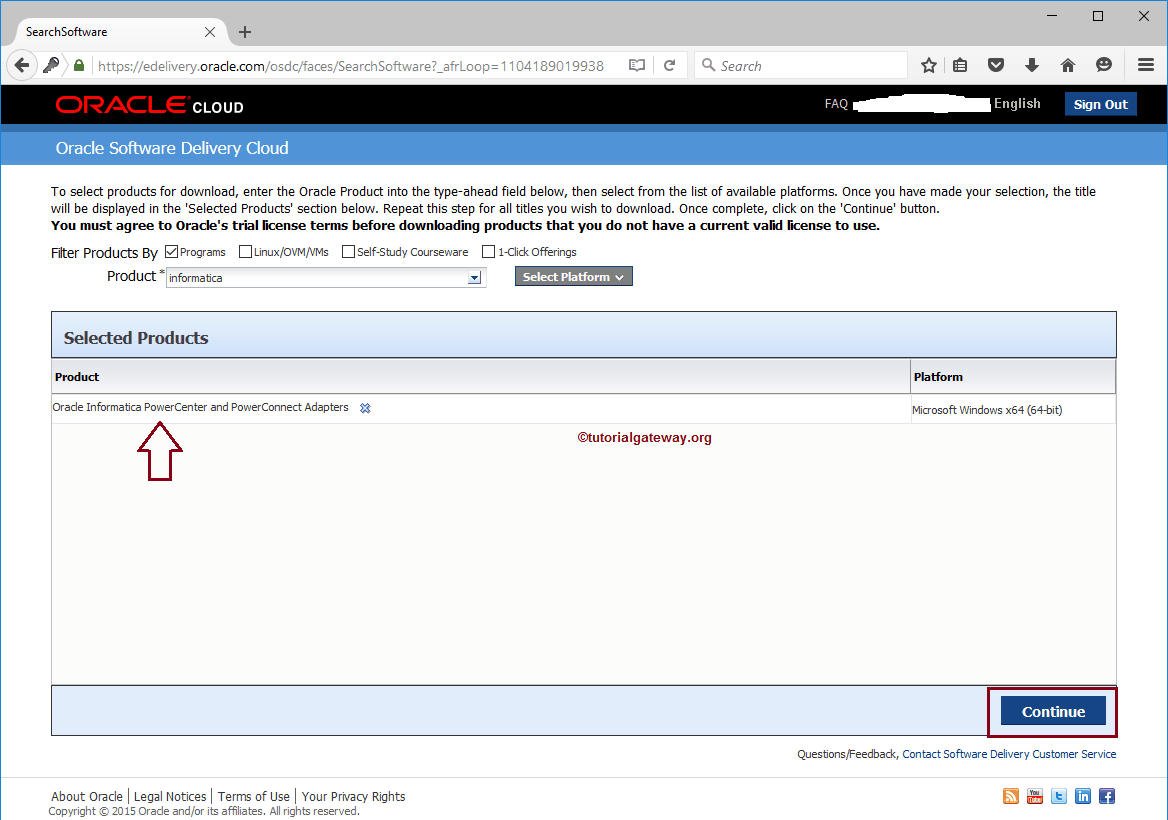
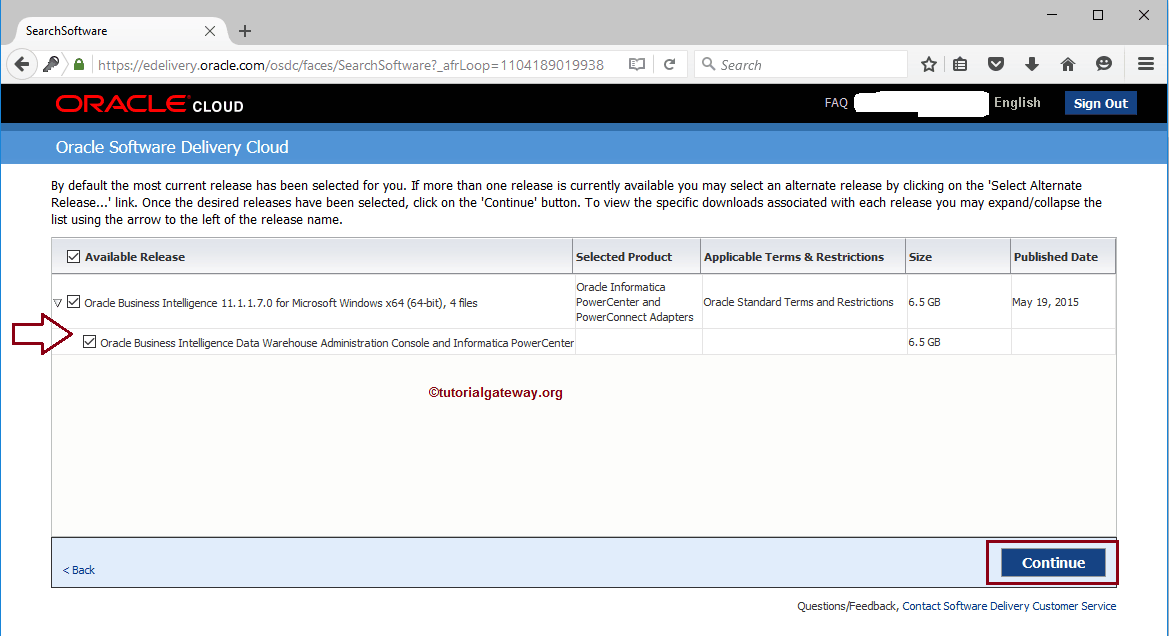
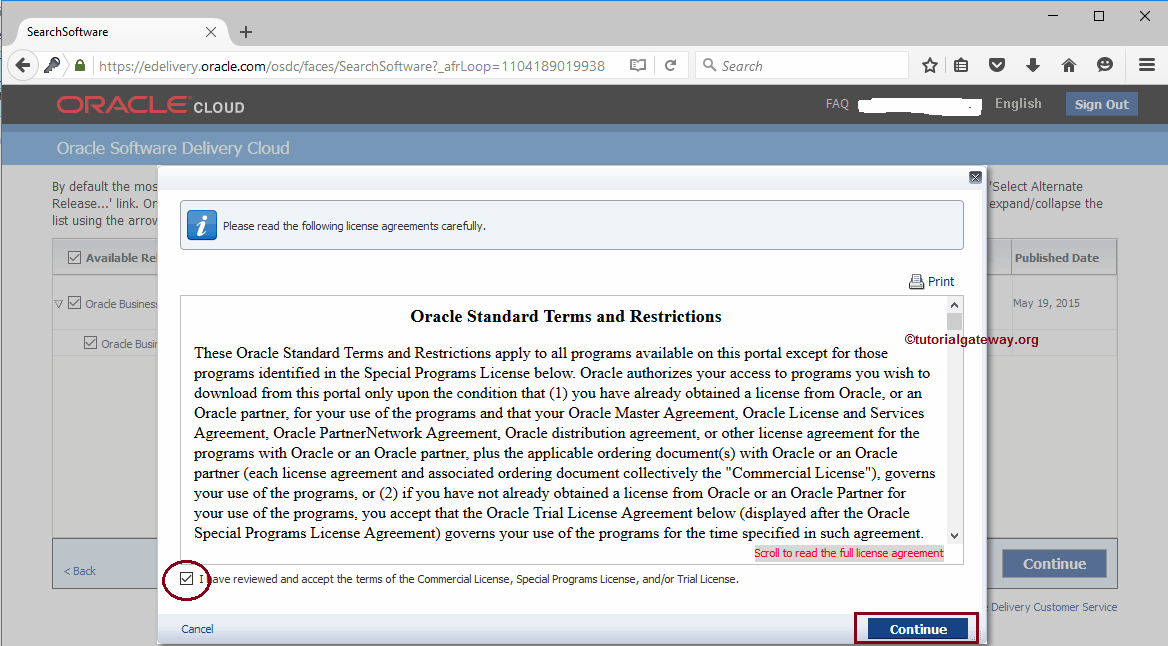
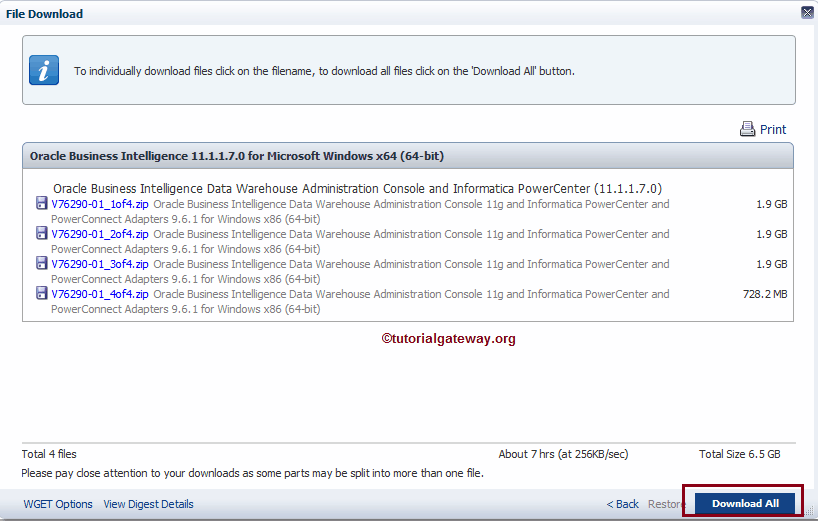
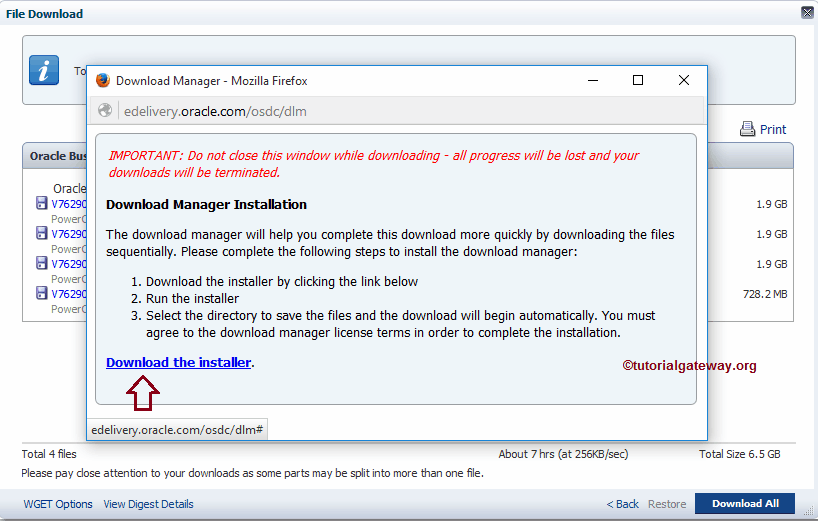
TIP: Please refer Download Informatica article to understand the steps involved in downloading Informatica 9.6.1
Step by Step process to install Informatica
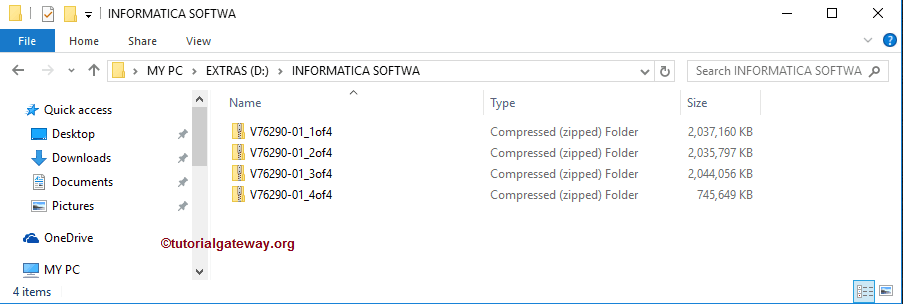
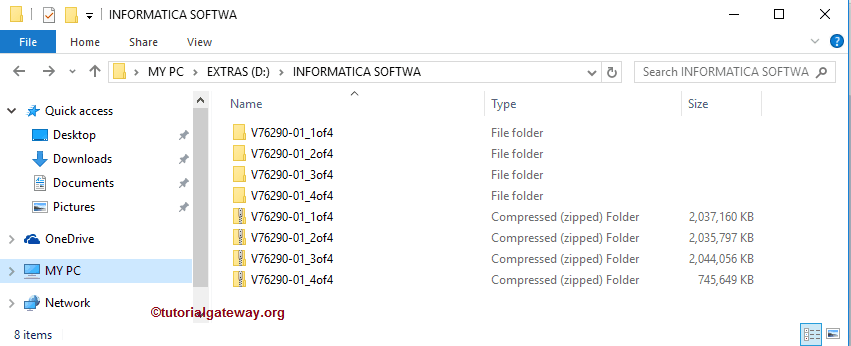
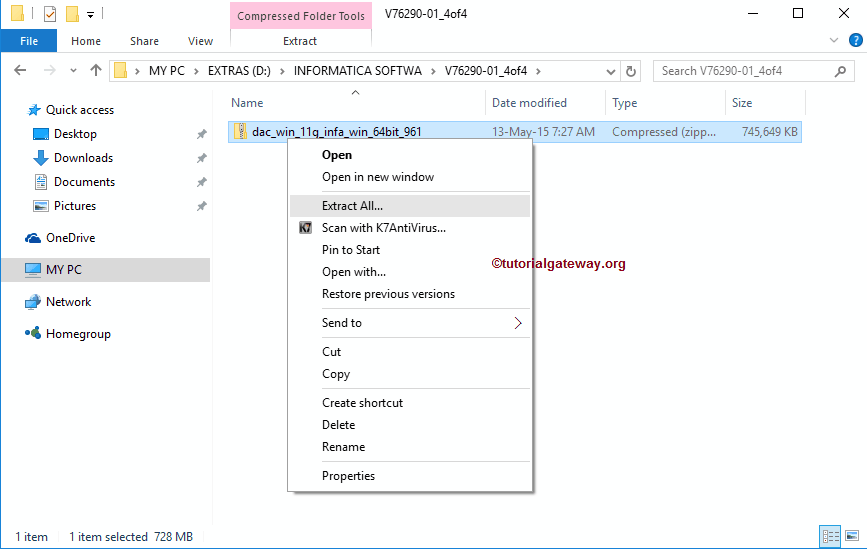
Once you extracted the dac_win_11g_infa_win_64bit_961 zip file, four ZIP files and one KEY file will be opened. Please select and extract all of them. The following screenshot will show you the ZIP files and extracted folders.
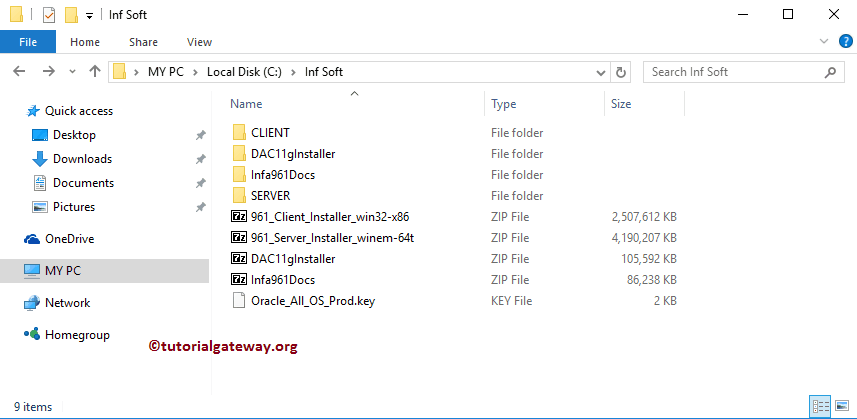
Informatica Server Installation
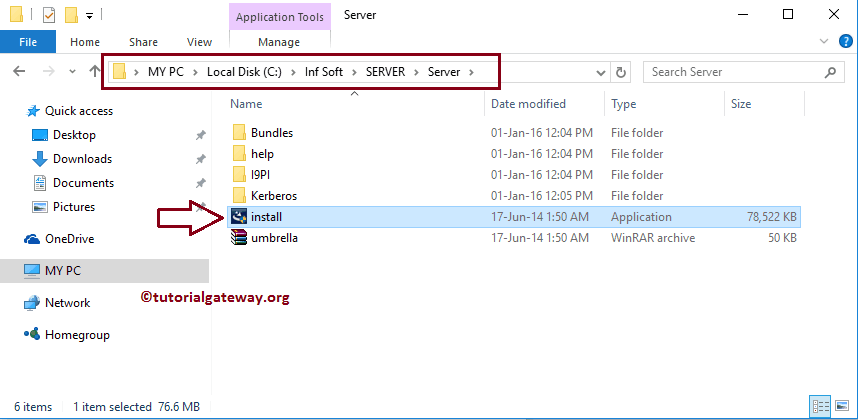
Please navigate your file system to the Server folder and click on the install.exe application as shown below
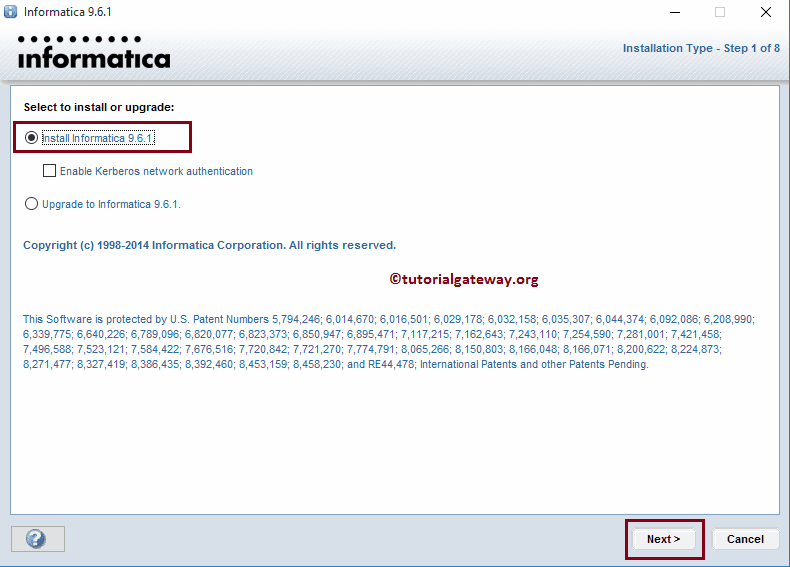
Step 1: Once you click on install application, Informatica installation wizard will be opened as shown below. Here we have two options:
- If you are installing Informatica for the first time (like we do) then, select install Informatica 9.6.1 option.
- If you are upgrading from the previous version such as 9.5 or any other then, please select Upgrade to Informatica 9.6.1
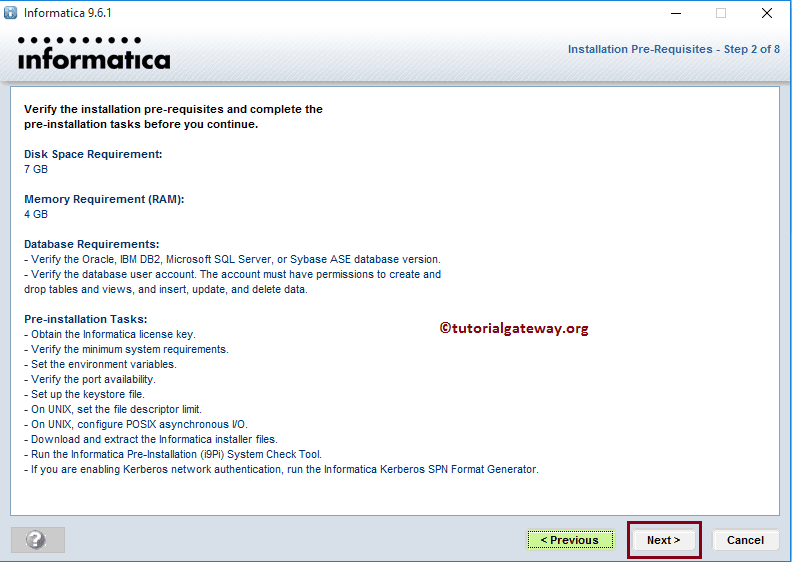
Step 2: Here you can verify the Disk space, Software and Hardware requirements to install Informatica
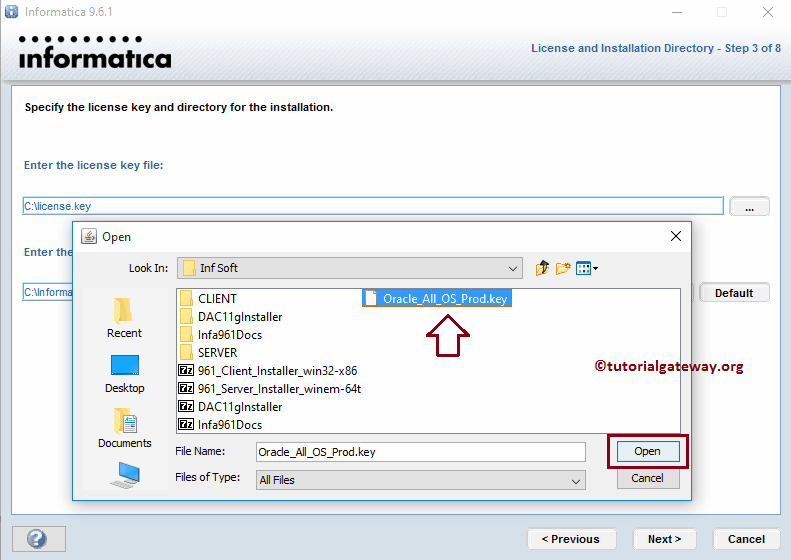
Step 3: Here we have to select the Oracle licence key so click on the … button beside the first text box. This will open our file system to navigate and select the Oracle licence key. From the below screenshot you can observe that we selected the key from Inf Soft folder.
NOTE: Here you can also change the default installation directory
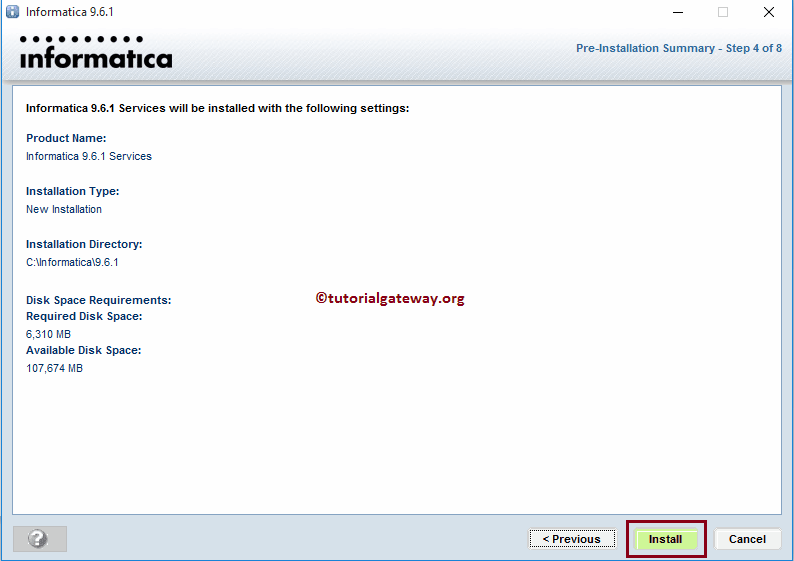
Step 4: Click Next button to start installing the Informatica server
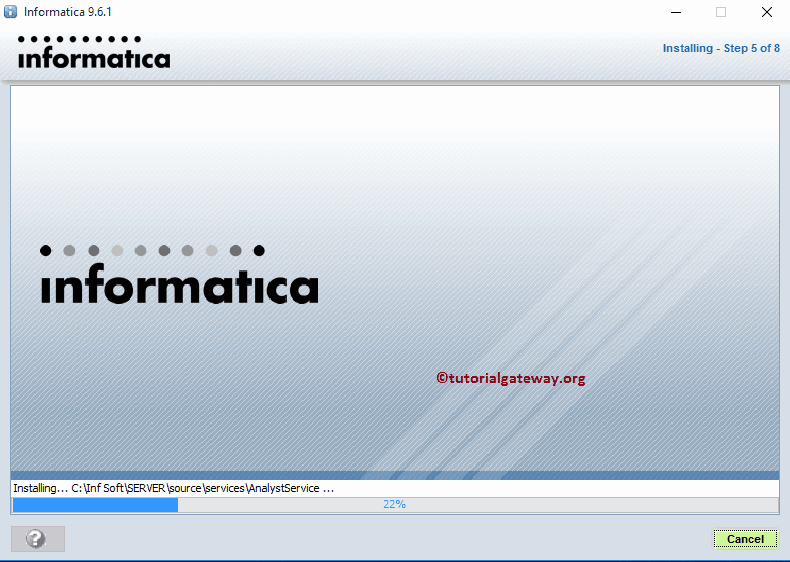
5th Step: Please wait until it installs 100%
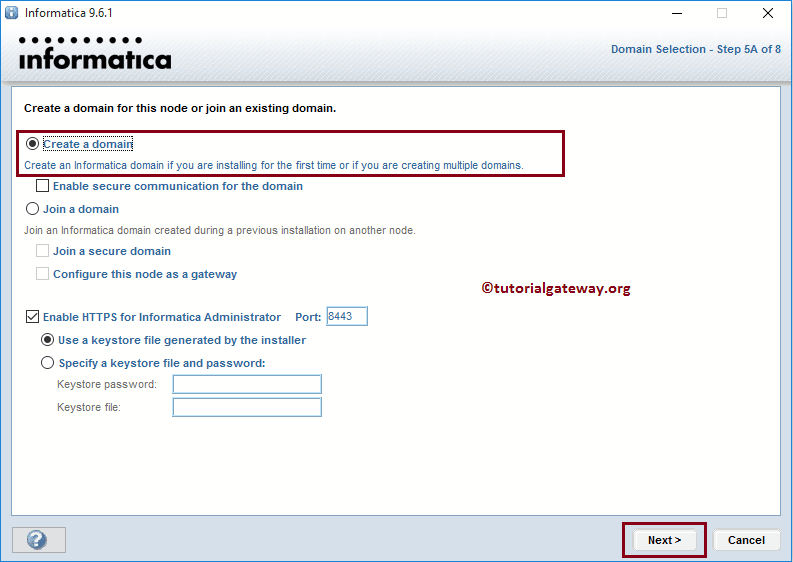
Step 5A: Here we have multiple options. If you are installing for the first time, Please leave the default settings and click the Next button:
- Create a Domain: This option will help you to create the Informatica domain. If you are installing for the first time then select this option. (Default)
- Join a Domain: You can select this option if you want to join the existing domain that was already created in your previous installation.
Step 5B: Within the First section, we have to configure the database settings.
- Database type: Please select the database type you are using.
- Database User ID: Please provide the Username to connect with the database
- User Password: Please provide the password of the above-mentioned database user
Within the second section we have a Database connection:
- Database address: Please provide the Hostname and Port number of the above-specified database. Default port number for SQL Server is 1433
- Database Services Name: Please provide the name of the database you already created.
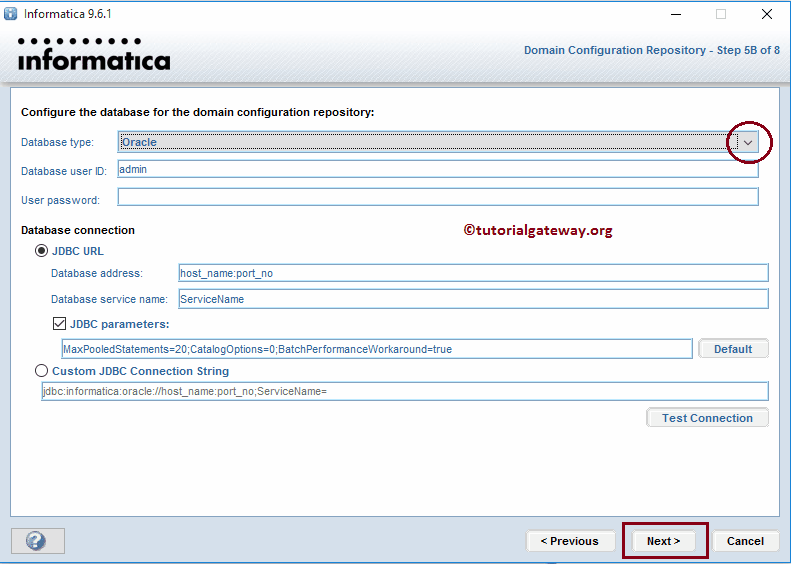
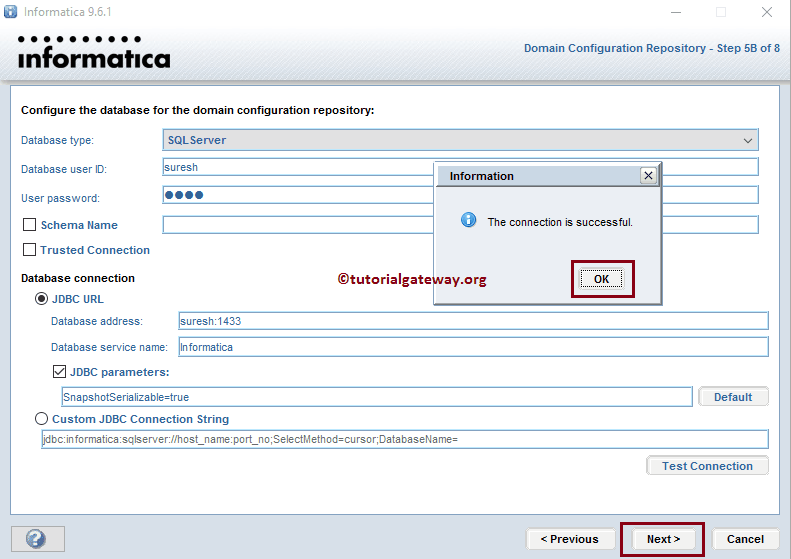
Please fill your database details. Before you click on Next button, Please test your connection setting by clicking on the Test Connection button.
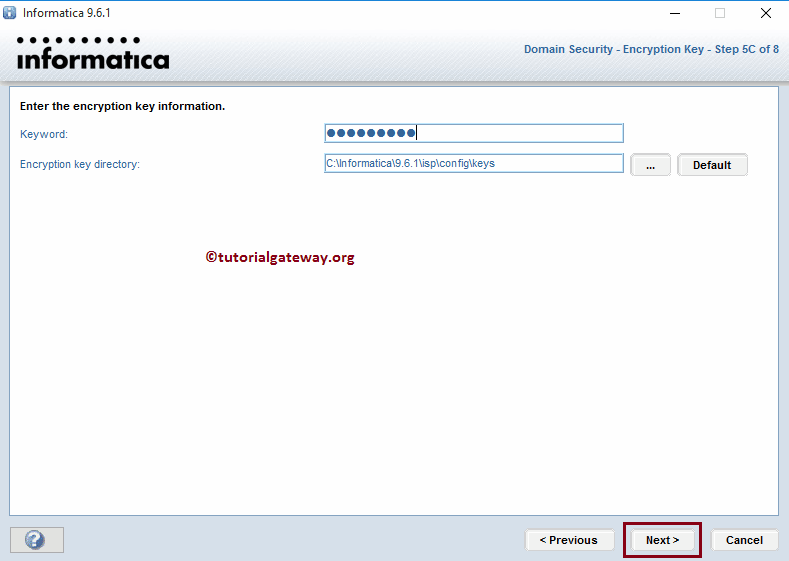
Step 5C: Here we have to specify the encryption key details (which is a combination of upper case, lower case and a special character). This is just for domain security
Step 6: Please provide the Domain password and confirm it by retyping it.
TIPS:
- These are the credentials that we are going to use to log in to the Informatica Admin Console. So, Please note down the Domain username as Username and Domain password as the password.
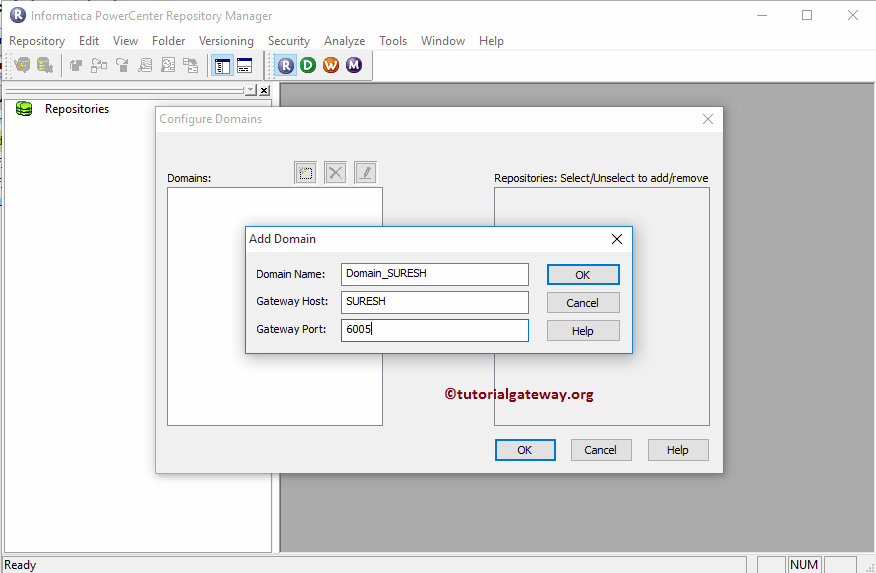
- Please note down the Domain Name, Hostname and port Number because, we are going to use these values while Adding the Domains and Repository services in Informatica Repository.
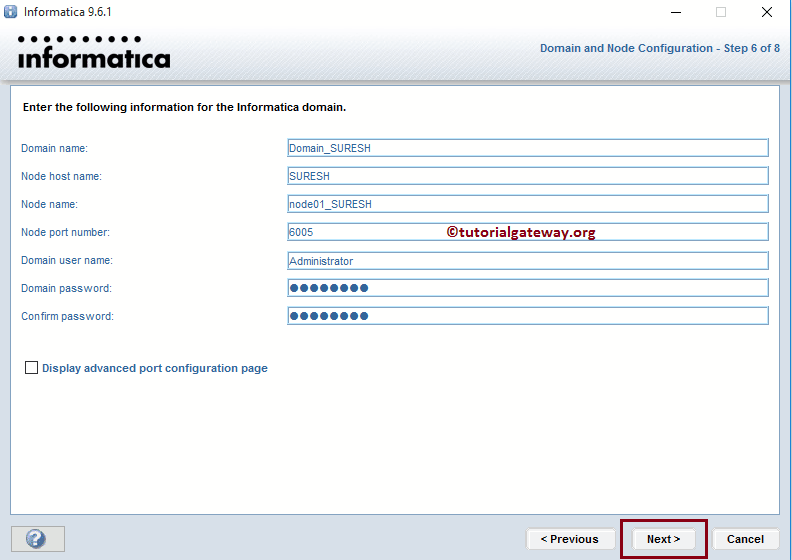
Step 6: If you want the Informatica service under a different account then please checkmark the Run Informatica under a different user account option and provide the username and password.
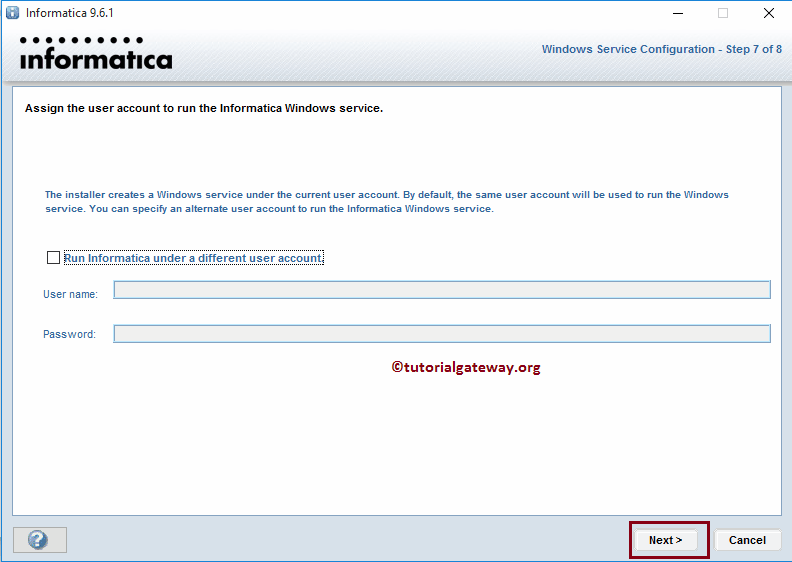
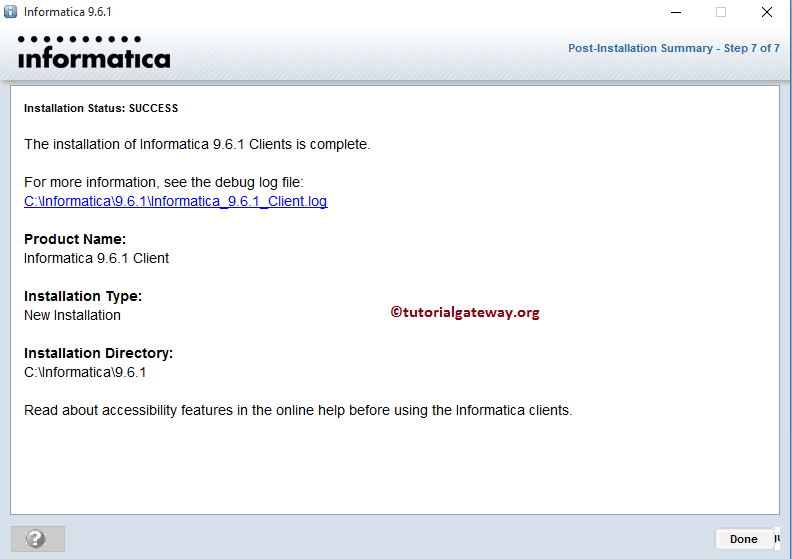
Once you click on the next button, the following screenshot will be displayed. From the below screenshot you can observe that We successfully installed the Informatica Server into our local hard drive
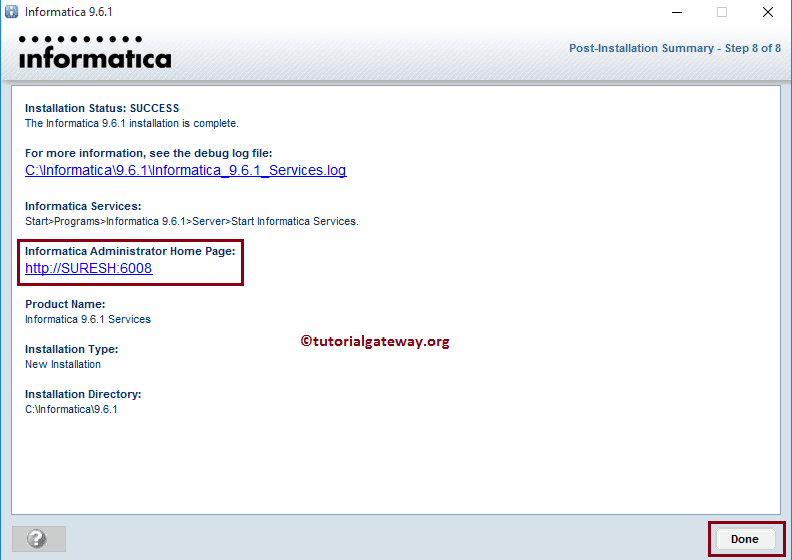
Please click Informatica Administrator home page URL to open the Informatica Admin Console. Within the Home page, we have to configure the Informatica Repository Service and Informatica Integration Service. Please refer Informatica Admin Console article to understand the same.
Informatica Client Installation
Once you completed configuring the Informatica Repository Service and Integration Service. Please navigate your file system to Client folder and click on the install batch file as shown below
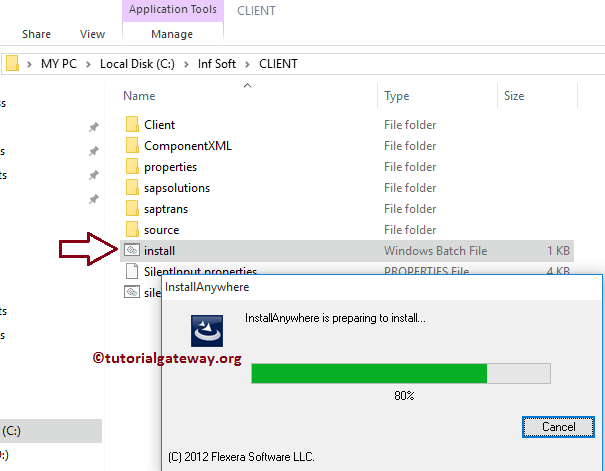
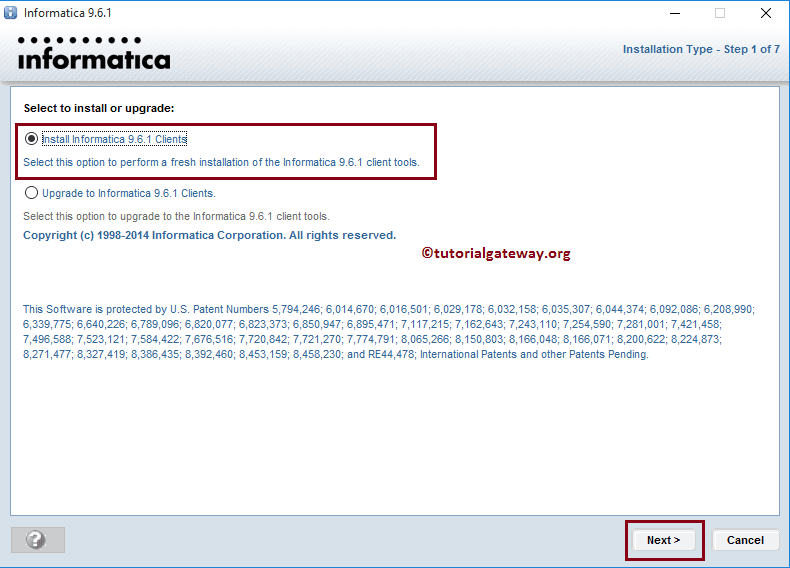
Step 1: Once you click on install batch file, Informatica installation wizard will be opened as shown below. Here we have two options:
- If you are installing Informatica client for the first time (like we do) then, select install Informatica 9.6.1 Clients option.
- If you are upgrading from the previous version such as 9.5 or any other Client then, select Upgrade to Informatica 9.6.1 Clients
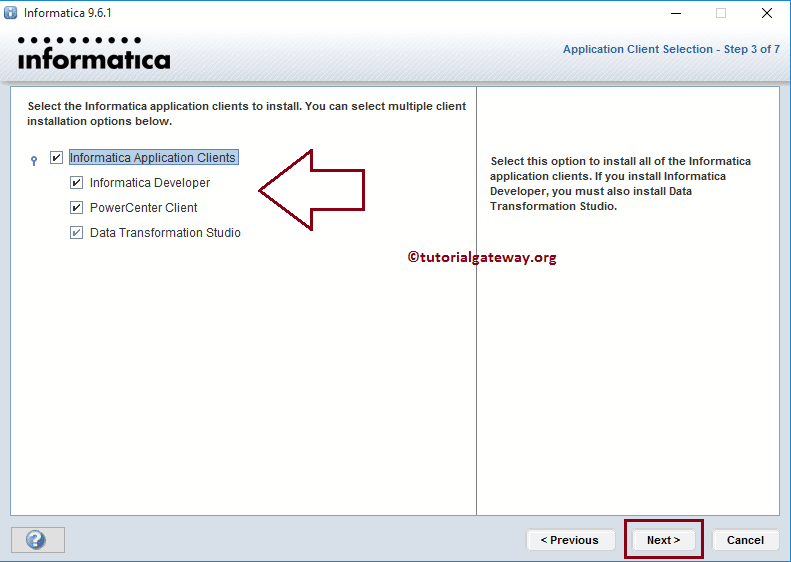
Step 3: Please select all the check marks and click the Next button
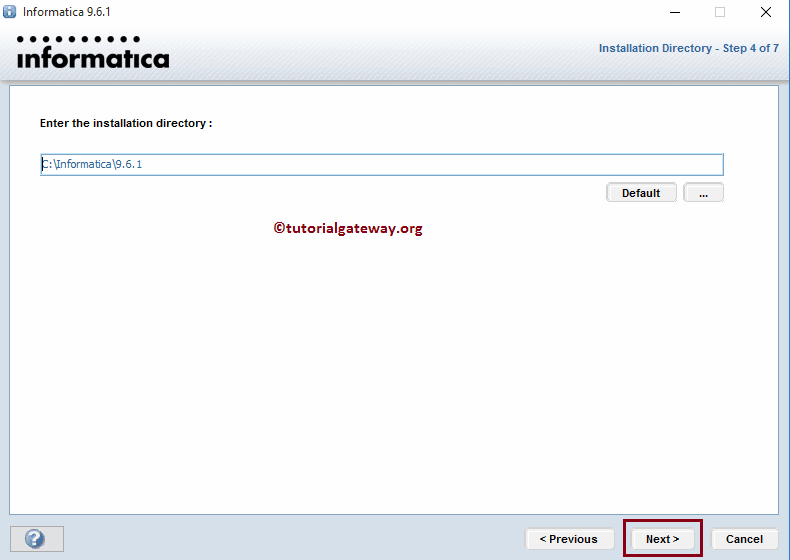
Step 4: Here you can leave the default installation directory or change by clicking the … button as shown below
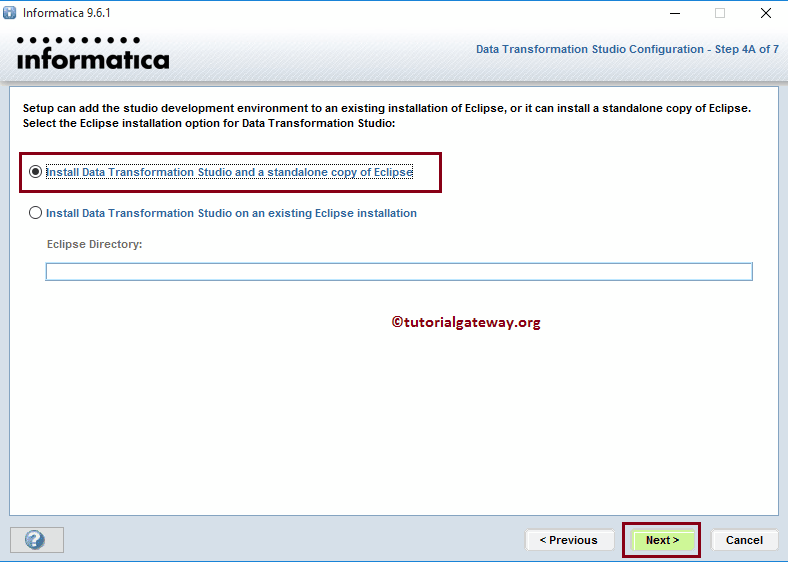
Step 4A: Here we have multiple options to choose from:
- Install Data Transformation Studio and a Standalone copy of Eclipse: If you are installing the Informatica for the first time then, Please select this option because this will create a standalone copy of Eclipse
- Install Data Transformation Studio on an existing Eclipse installation: This option will add the development environment to the existing installation of eclipse
Click Next button to start installing Informatica client
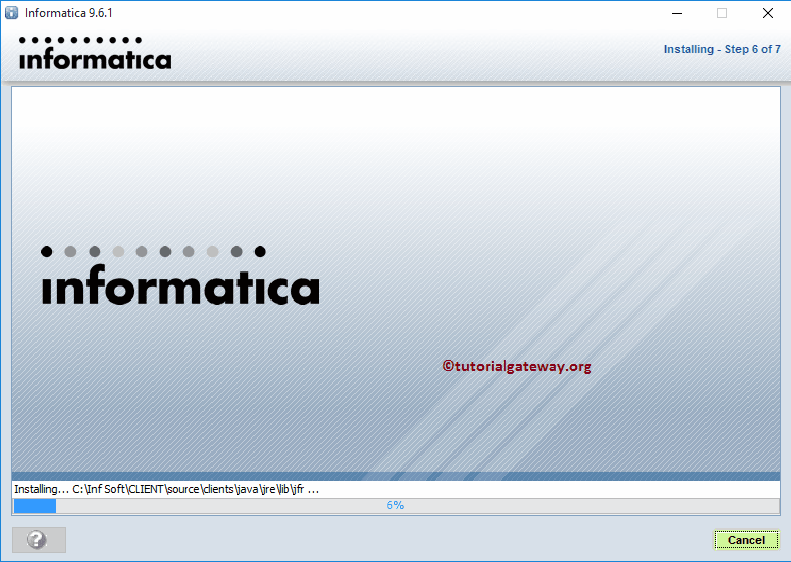
Step 6: Please wait until it installs 100%
From the below screenshot you can observe that we successfully installed Informatica client
Informatica Admin Console
In this article, we will show you, How to use the Informatica Admin Console page to configure the Informatica Repository Service and Informatica Integration Service.
In order to open the Informatica Admin Console, Please Go to the Start menu -> Programs -> Informatica -> Server -> Informatica Administrator home page.
NOTE: Please refer How to install Informatica article to understand the steps involved in configuring the Informatica Server and Clients.
Informatica Admin Console
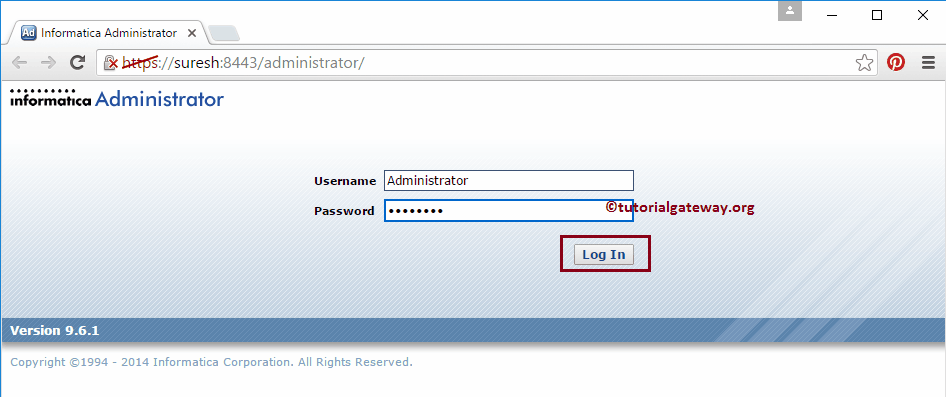
Once you click on the Administrator home page, the following page will be opened. Please provide the Username and password you specified while installing the Informatica Server. Please refer Step 6 in How to install Informatica article
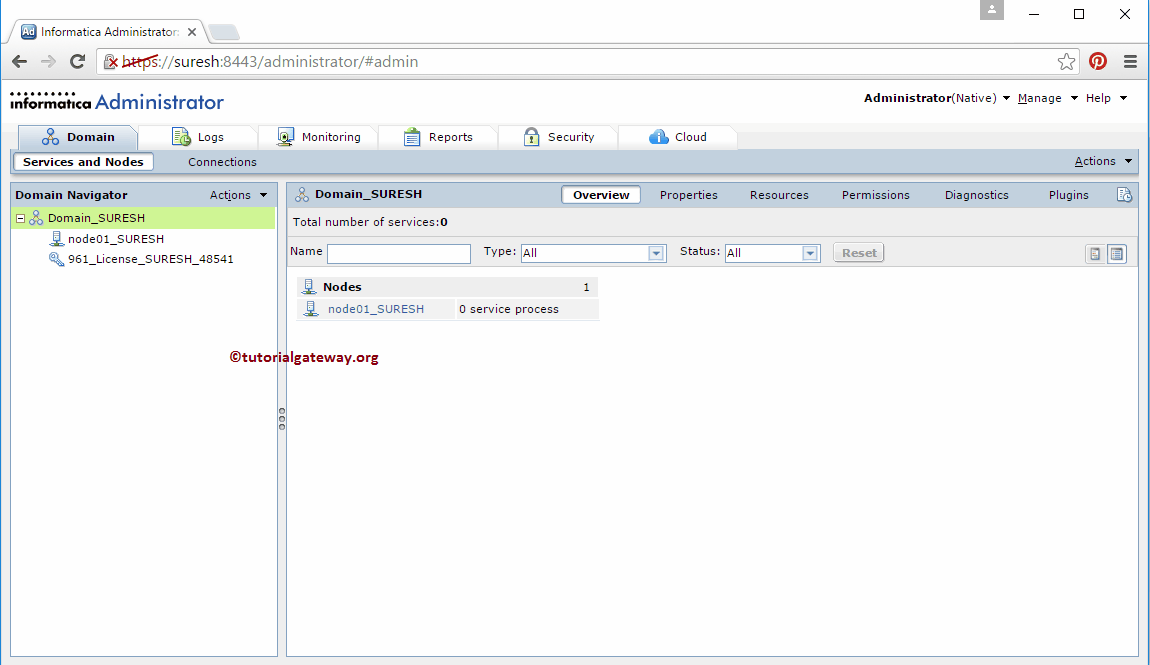
Once you log in successfully, you will enter into the Informatica Admin Console. Here, you can see the Domain name and licence key that we used for the installation
Configuring Informatica Repository Service
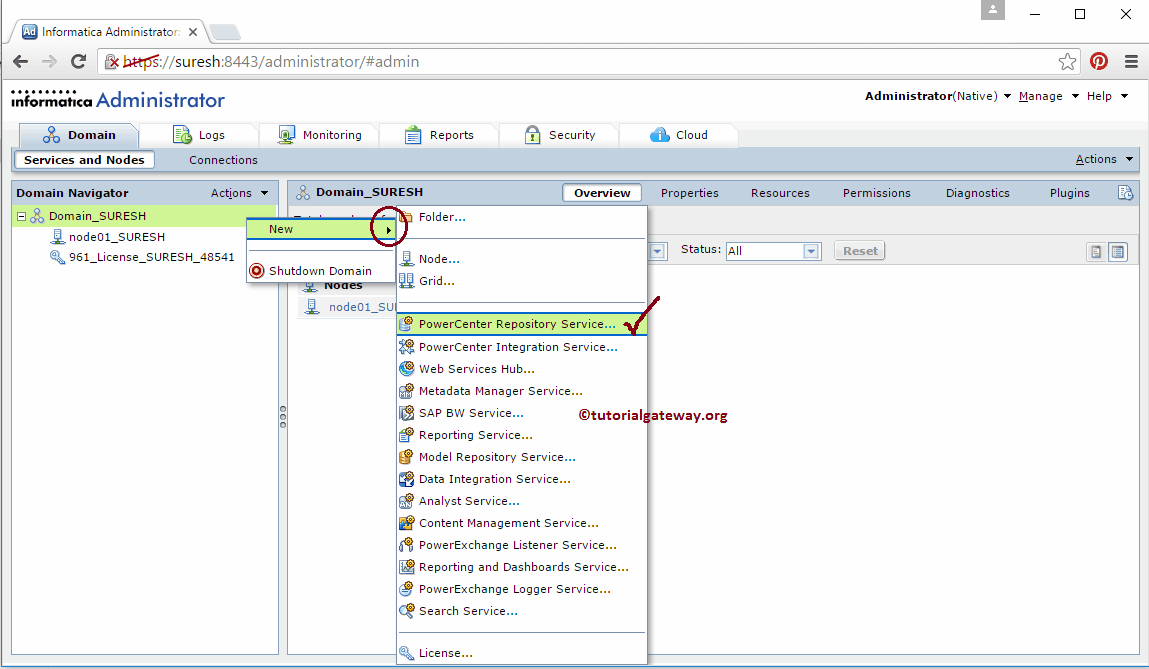
In order to create Informatica Repository Service, Right Click on the domain name -> New -> Power Center Repository Service.. as shown in the below screenshot.
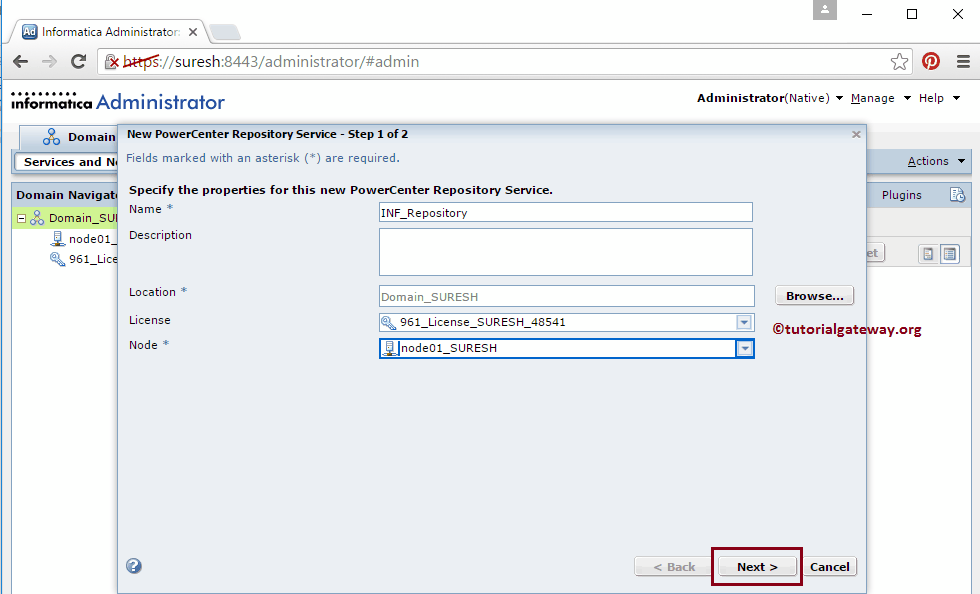
Once you select the Power Center Repository Service.. option following window will be opened to create New Power Center Repository Service. Here we have multiple options such as:
- Name: Please provide any unique name for the Repository service.
- Description: Please provide a valid description of the repository service
- Location: By default, our domain will be selected automatically
- License: Select the Licence key from the drop-down list.
- Node: Select the node from the drop-down list.
Once you fill the details, Please click on the Next button to go to Step 2
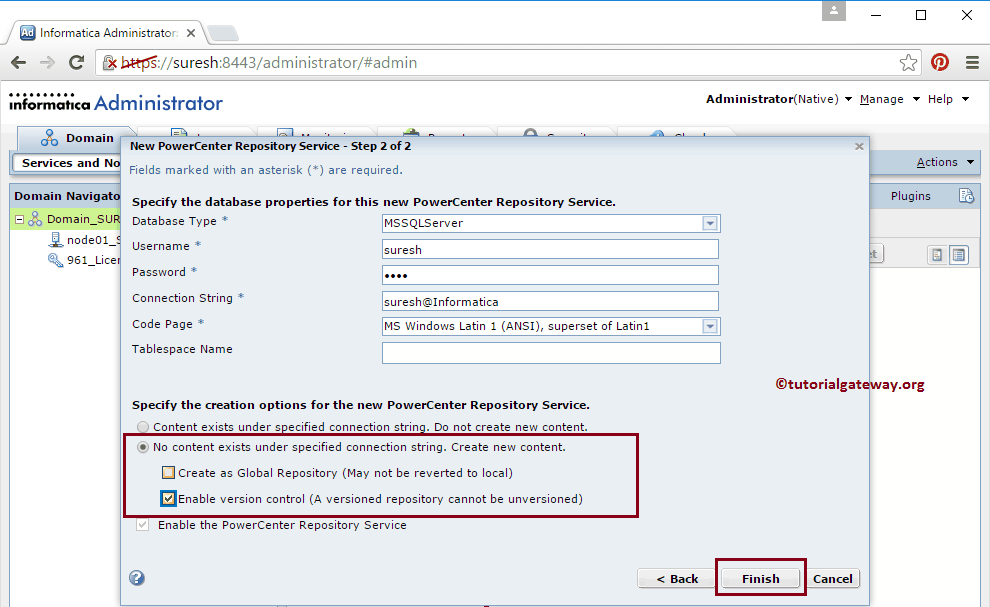
Within step 2 we have to specify the database properties:
- Database type: Please select the database type you are using. Here we are using SQL Server 2014 so we are selecting MSSQLServer.
- Username: Please provide the Username to connect with the database
- Password: You have to provide the password of the above-mentioned database user
- Connection String: You can leave the server instance name and the database name.
Next, Please check to mark the version control option as shown below. This will enable us to change the Operating Mode from Exclusive to Normal mode
Next, Click on the Edit button beside the repository properties to edit or change the repository default properties.
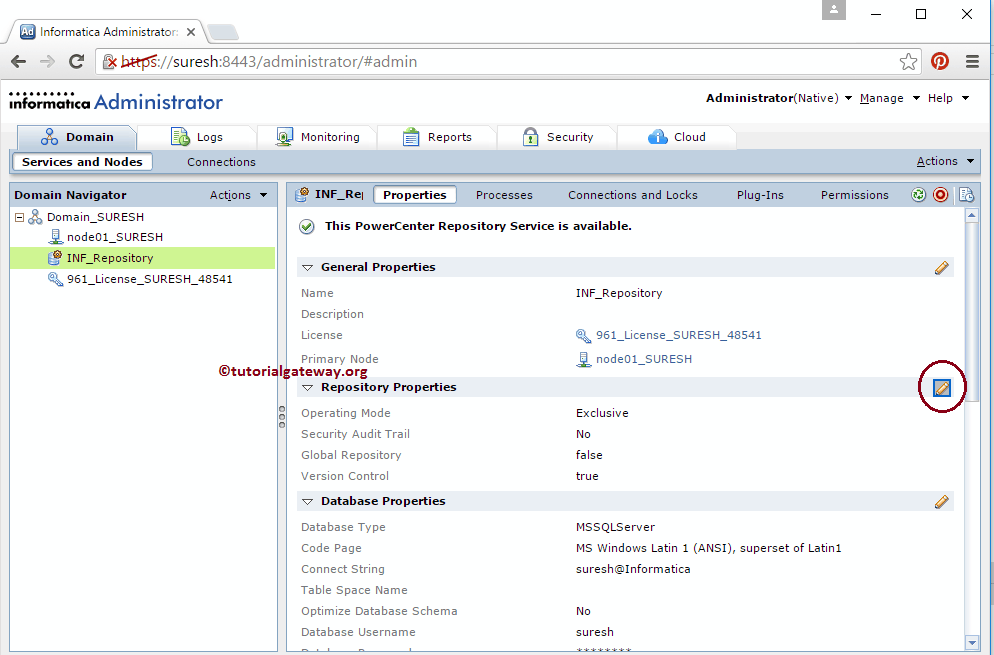
By default Repository operating mode will be in exclusive. We have to change the Operating Mode from Exclusive to Normal mode.
NOTE: If you forgot to check to mark the version control option in the above step then, it will be impossible to change the operating mode.
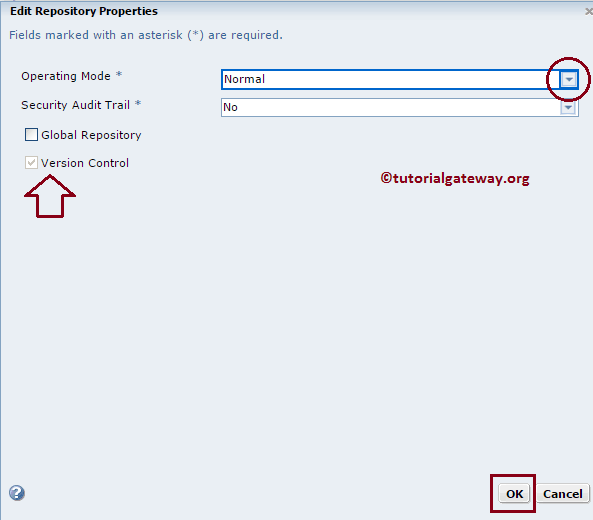
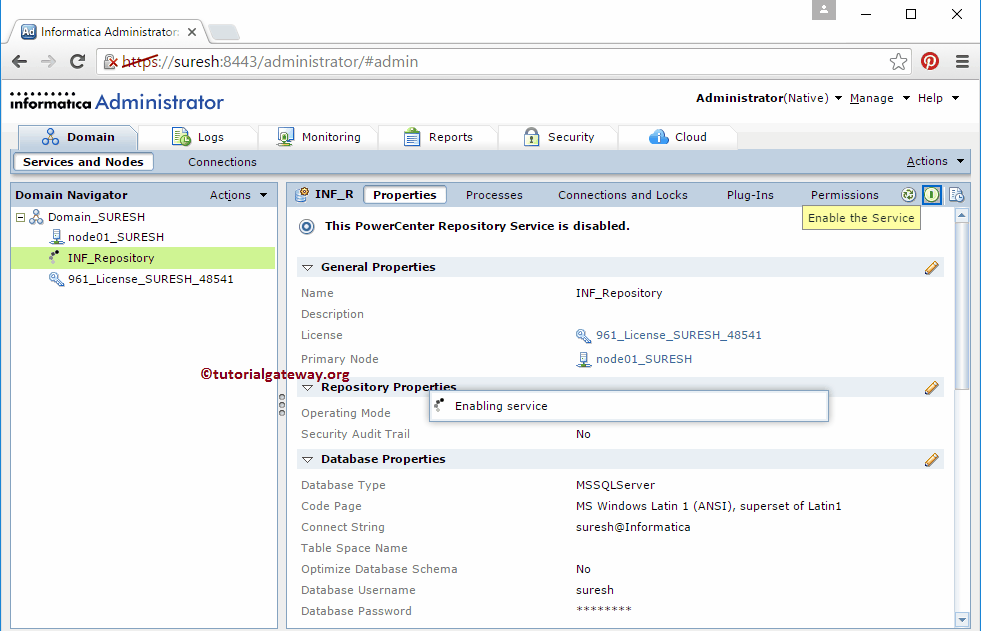
Click OK button to change the Operating mode and then enable the Informatica Repository Service by clicking the below-shown button
Configuring Informatica Integration Service
In order to create Informatica Integration Service, Right Click on the domain name -> New -> Power Center Integration Service.. as shown in the below screenshot.
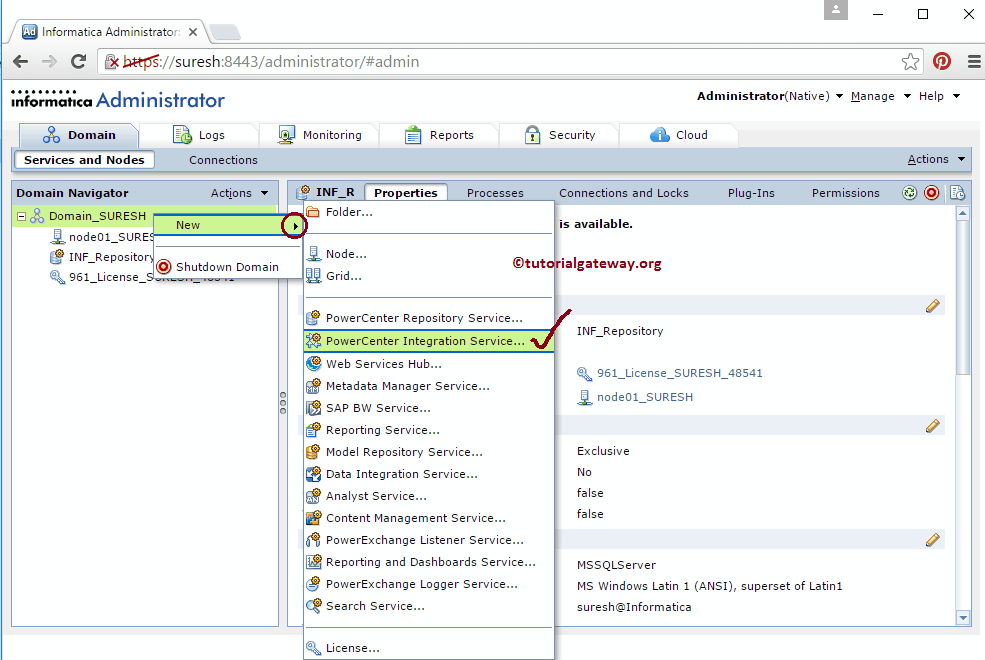
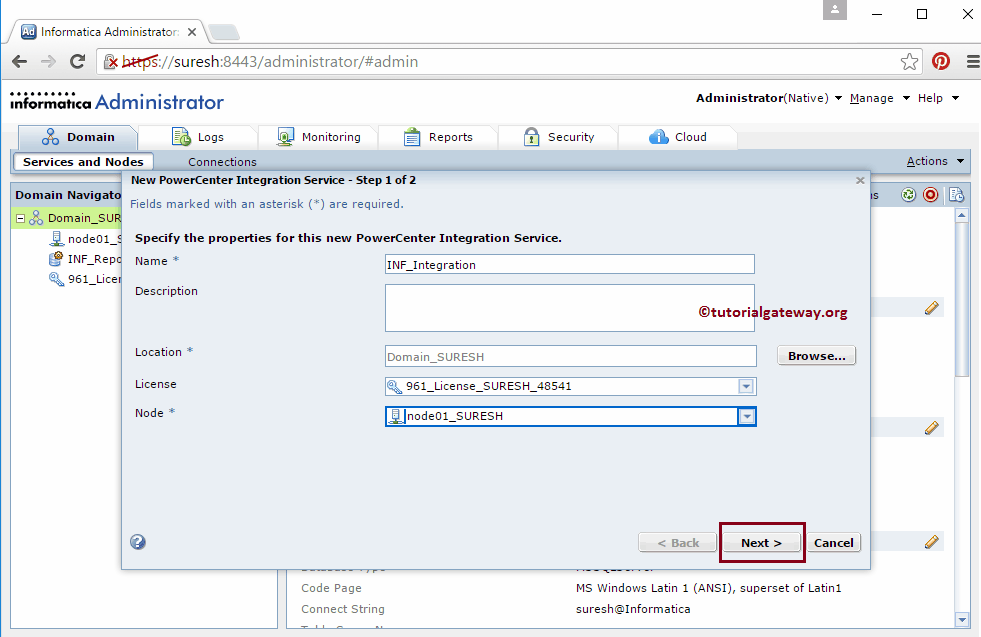
Once you select the Power Center integration Service.. option following window will be opened to create New Power Center Integration Service. Here we have multiple options such as:
- Name: Please provide any unique name for the Integration service.
- Description: Please provide a valid description of the Integration service
- Location: By default, our domain will be selected automatically
- License: Please select the Licence key from the drop-down list.
- Node: Please select the node from the drop-down list.
Once you fill the details, Please click on the Next button to go to Step 2
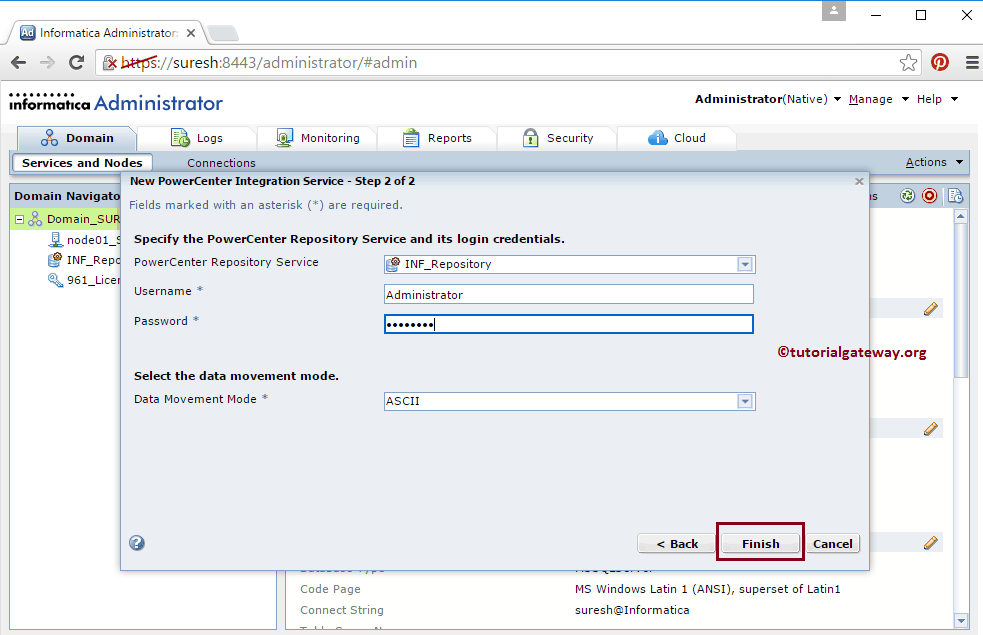
Within step 2 we have to specify the credentials:
- Power Center Repository Service: Here, you have to select the already created Power Center Repository Service. If you forgot to do so, First create it and then create Integration service.
- Username: Please provide the username to login Informatica Admin Console
- Password: Please provide the password to login Informatica Admin Console
- Data Movement Mode: Please leave it to default ASCII mode.
Once you fill the required details, Please click on the finish button to finish creating the New Power Center Integration Service
Once you finish creating the New Power Center Integration Service, you have to Enable the service by clicking the below-shown button
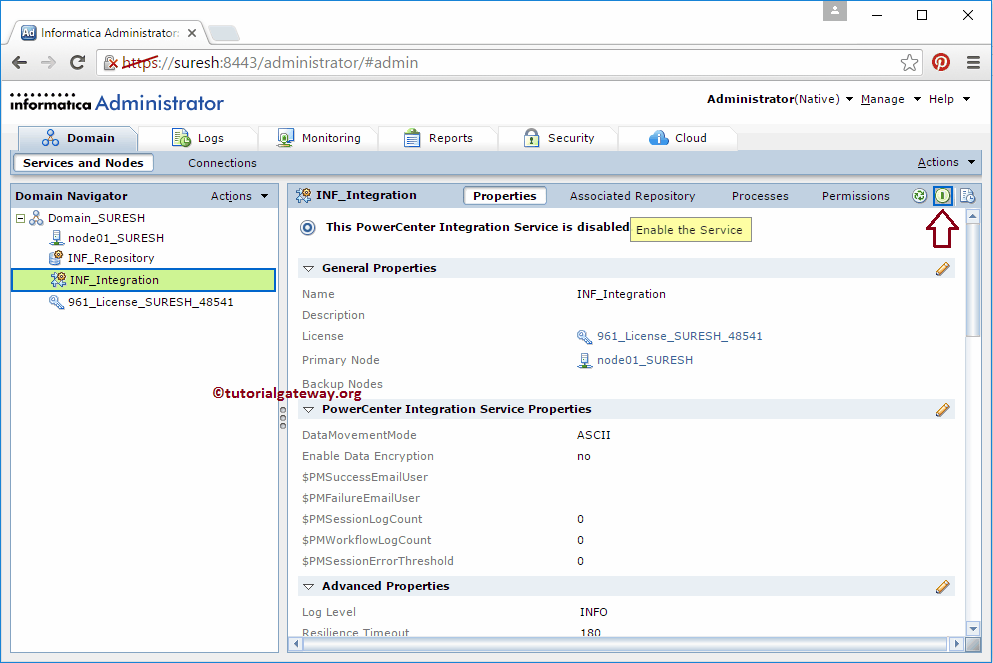
Well, we successfully configured the Informatica repository Service and Informatica Integration Service inside our Informatica Admin Console.
Informatica Repository
The Informatica Repository Manager is mainly used for two reasons:
- Used for Creating New Domains. This will help the Client tools like Informatica PowerCenter Designer to access the Informatica Server (Repository Services and Integration Services)
- This is mainly used for Administrative work such as migrating or deploying the mappings and workflows.
In this article, we will show you how to Create New Domains, How to connect with Informatica Repository Services and Steps involved in creating new folders.
Informatica Repository Manager
In order to open the Informatica Repository Manager, Please Go to the Start menu -> All Programs -> Informatica 9.6.1 -> PowerCenter Repository Manager. Once you click on that, following window will be opened
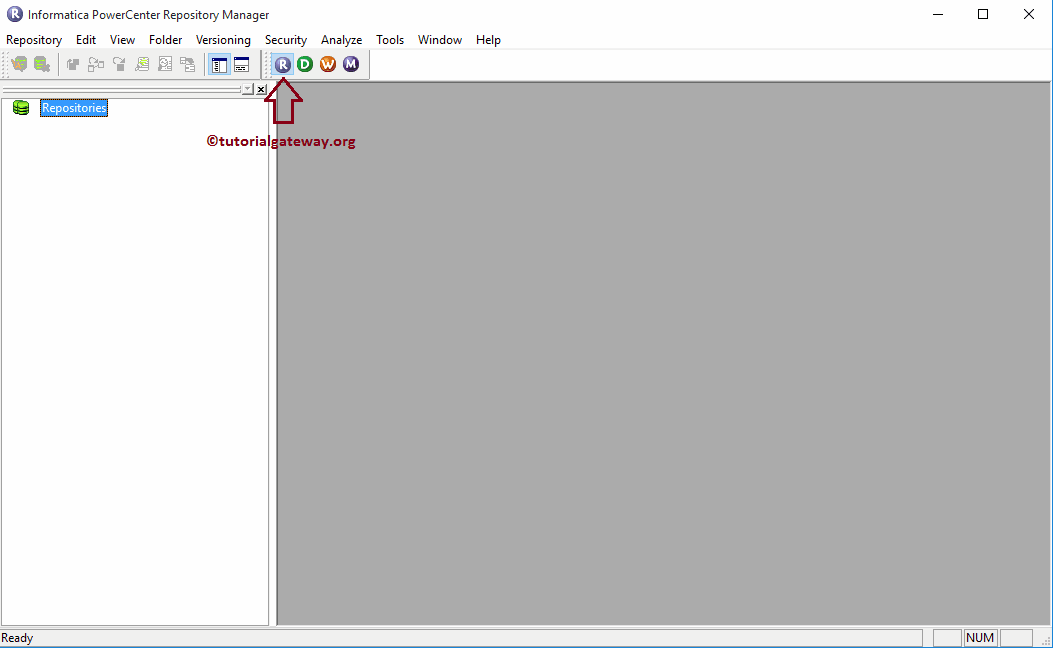
Within the Menu, Please navigate to Repository and then select Configure Domains.. option as shown below.

Once you select Configure Domains.. option, a new window opens up to configure the domains. If you closely observe the below screenshot, there are no Domains in our domains section because we haven’t added any. In order to add a new domain, Please click on the Add a new Domain button as shown below.
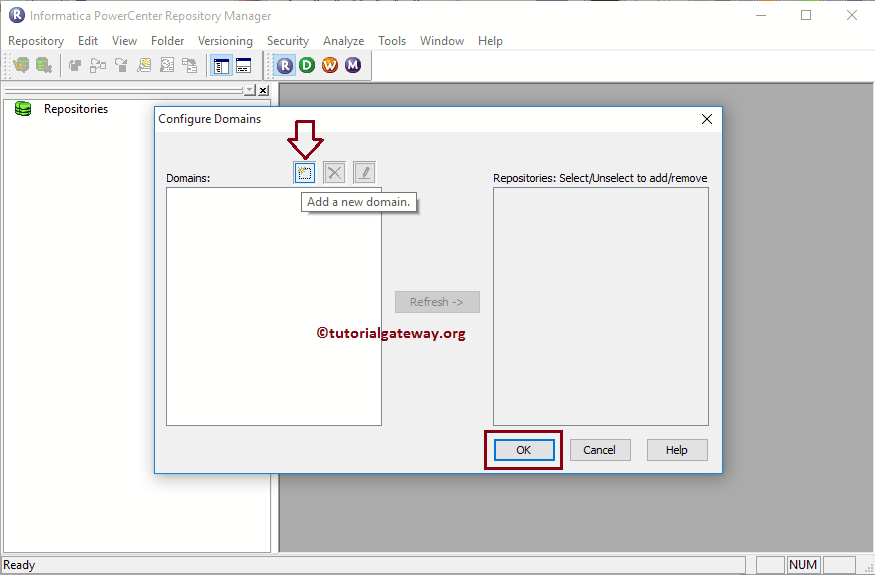
Once you click on the Add a new Domain button, a new window will be opened to add Domain. Here, we have to specify the Domain name, Hostname and the port number. If you don’t know your details then, Please refer Informatica Server installation Step 6 inside our How to install Informatica article
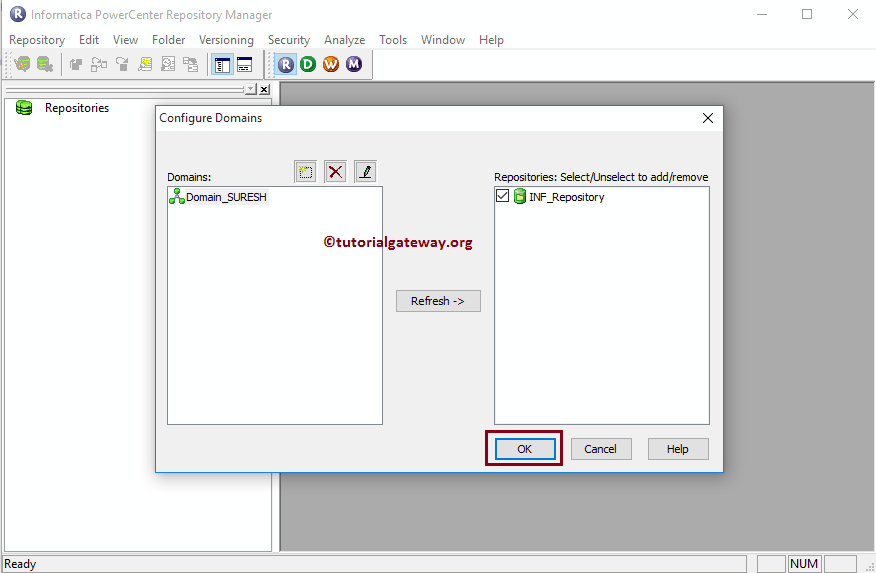
Please select the PowerCenter Repository Service and Click OK as shown below.
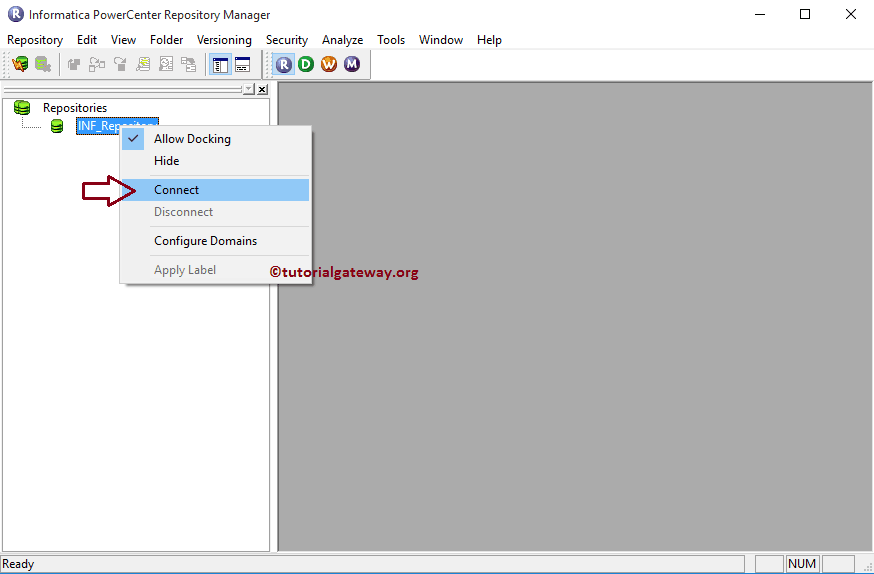
Once we finish the Domain configuration, Please select and right Click the newly added PowerCenter Repository Service (INF_Repository) and click on the Connectoption
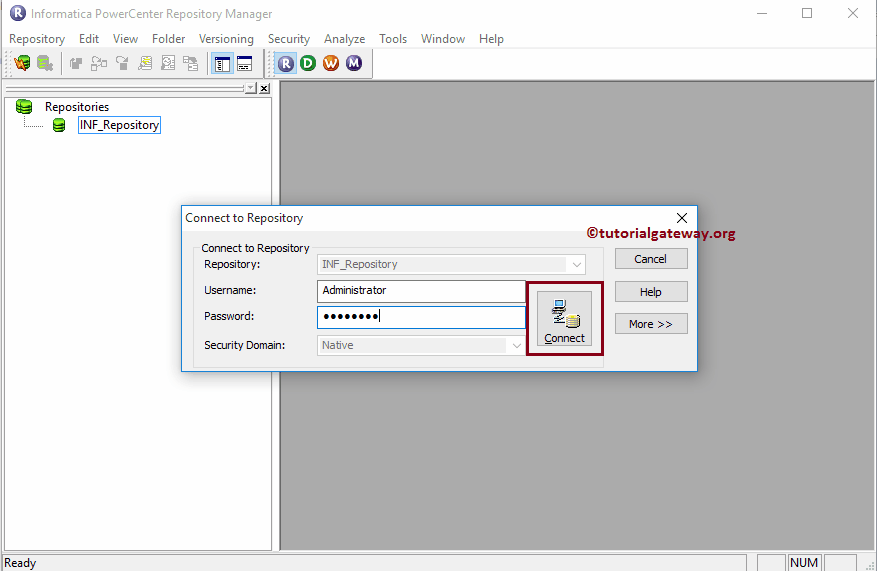
In order to connect with the PowerCenter Repository service, we have to provide the Admin Console credentials. So, Please provide the Username and Password.
TIP: Here you have to provide the Admin Username and password that you specified while installing the Informatica Server.
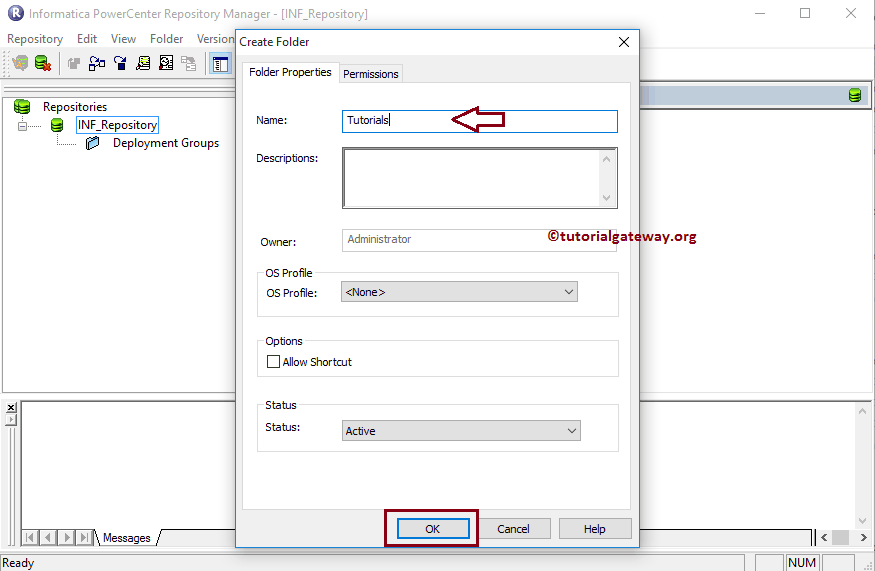
Once you connected successfully, Let us create one folder to perform Extraction Load and transformations. In order to create a new folder, Please navigate to Folder Menu and select the Create.. option. Selecting that option open the following window to create a new folder. Here, you can leave all the properties to default except name and Description.
- Name: Please specify the unique folder name. This folder will hold the Sources, Targets, Mappings, Maplets, Transformations and Functions.
- Description: Please specify a valid description of this folder. This will help the others to understand about the folder.
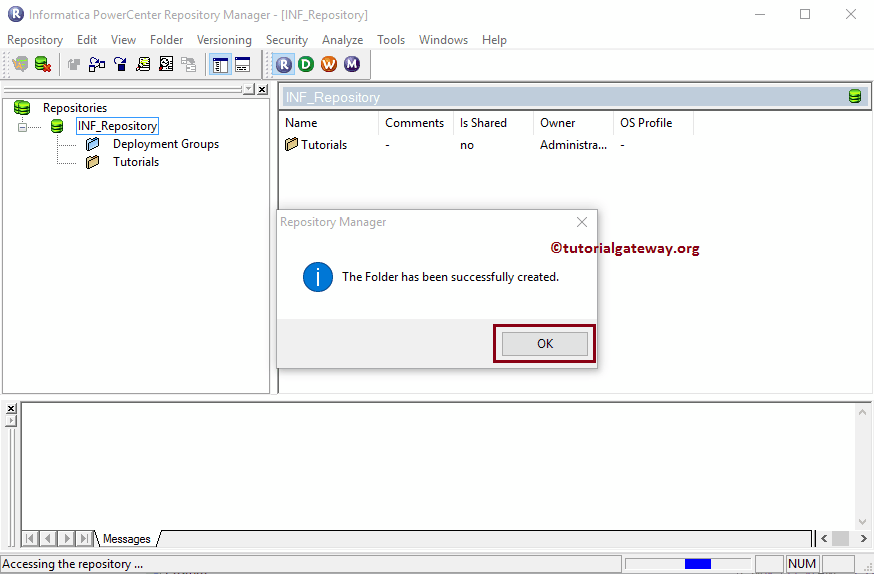
Clicking OK button opens a pop-up window. This displays the message saying that The folder has been successfully created as shown below
Informatica PowerCenter Designer
The Informatica PowerCenter Designer will help us to create or edit the PowerCenter objects such as: Source(s), Target(s), Transformation(s) and mapping(s). In this article we will explain you each and every component present in the PowerCenter Designer.
Informatica PowerCenter Designer
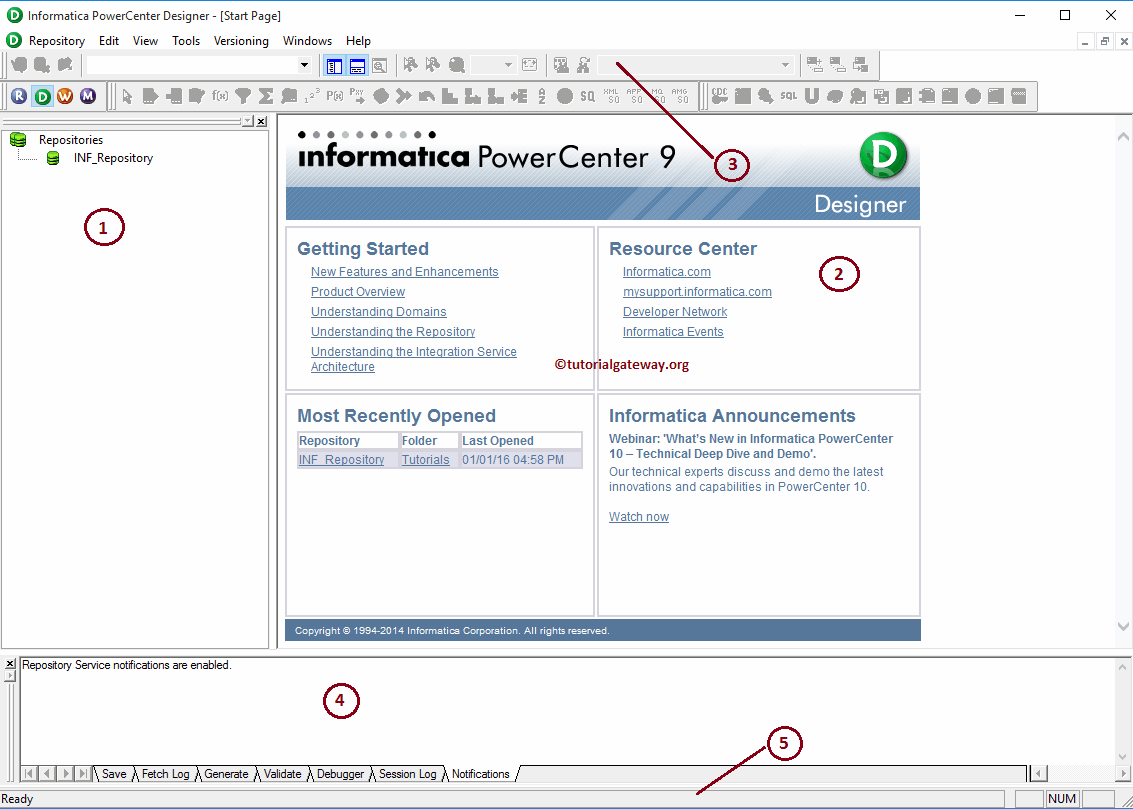
In order to open the Informatica PowerCenter Designer, Please Go to the Start menu -> All Programs -> Informatica 9.6.1 -> PowerCenter Designer. Once you click on that, following window will be opened.
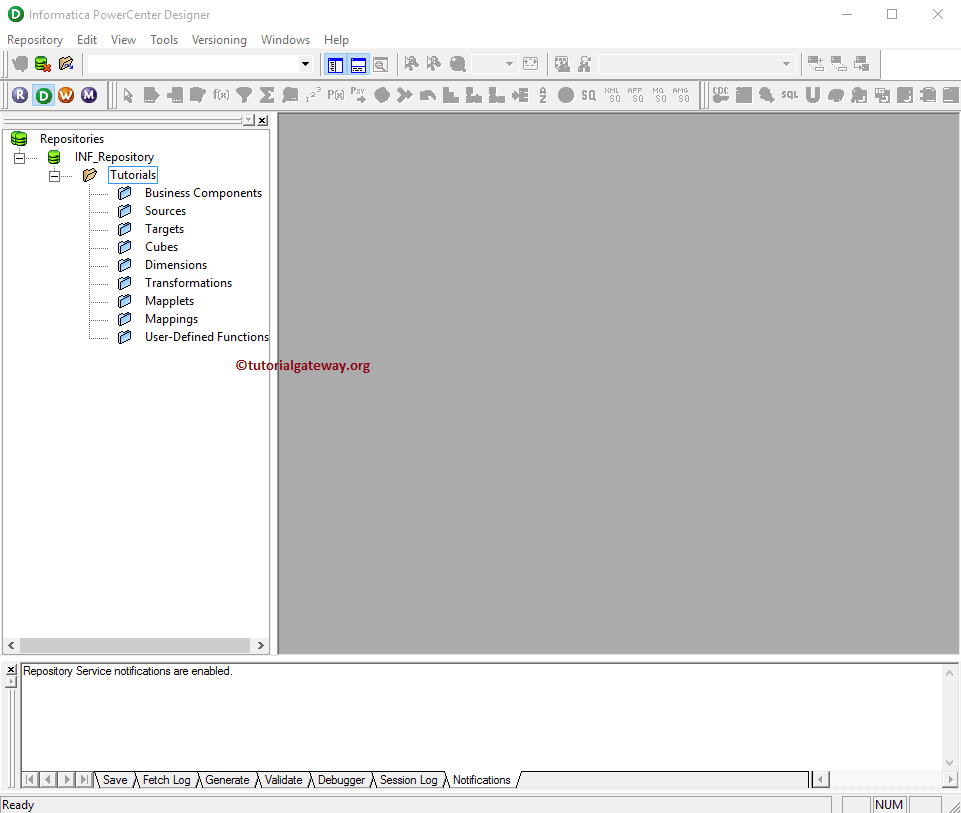
From the below screenshot you can observe that We divided the Informatica PowerCenter Designer screen into five sections to explain each section in details. Let us see them individually,
- Navigator: This section is will allow us to connect with the Informatica Repository services and navigate between Different Folders such as Source, Target, Transformation etc.
- Work space: This section is used to perform designing which includes creating or modifying Sources and targets, creating reusable transformation, grouping multiple transformations and performing mapping (Extraction, Transformation and Load)
- Toolbar: By default, it will show most commonly used components (such as transformations) while designing. We can edit this section as per our requirements.
- Output window: In this section, You can check whether the given code is Valid or not, find the Errors.
- Status bar: It will display the status of the current operation.
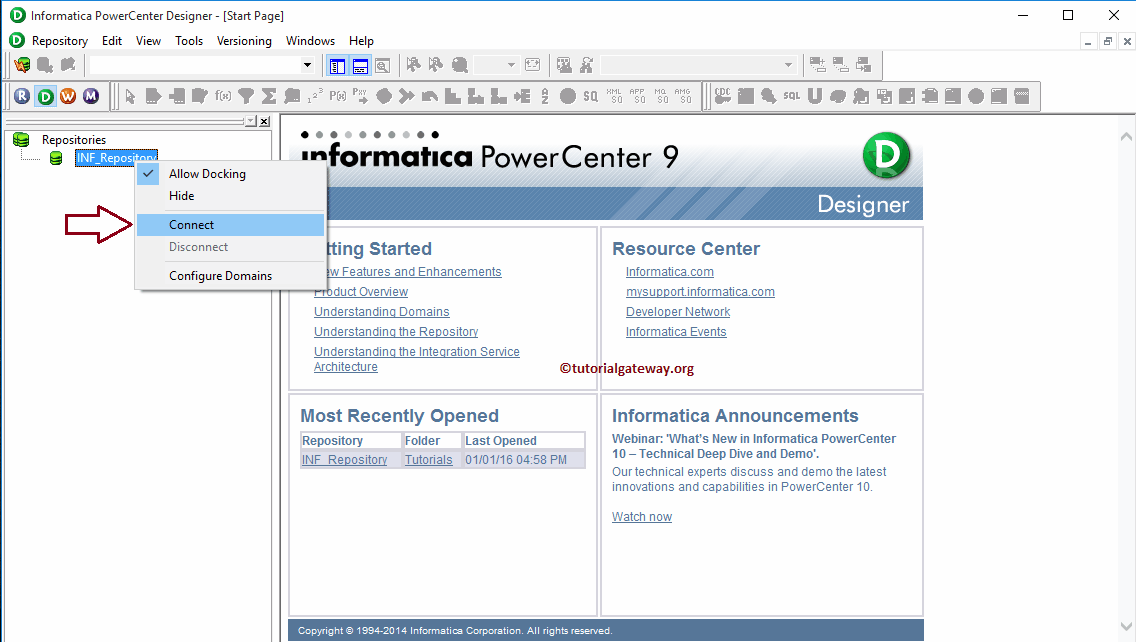
Before we start designing we have to connect with the Repository Service so, Please select and Right Click the PowerCenter Repository Service (INF_Repository) under the repository section and select the Connect option
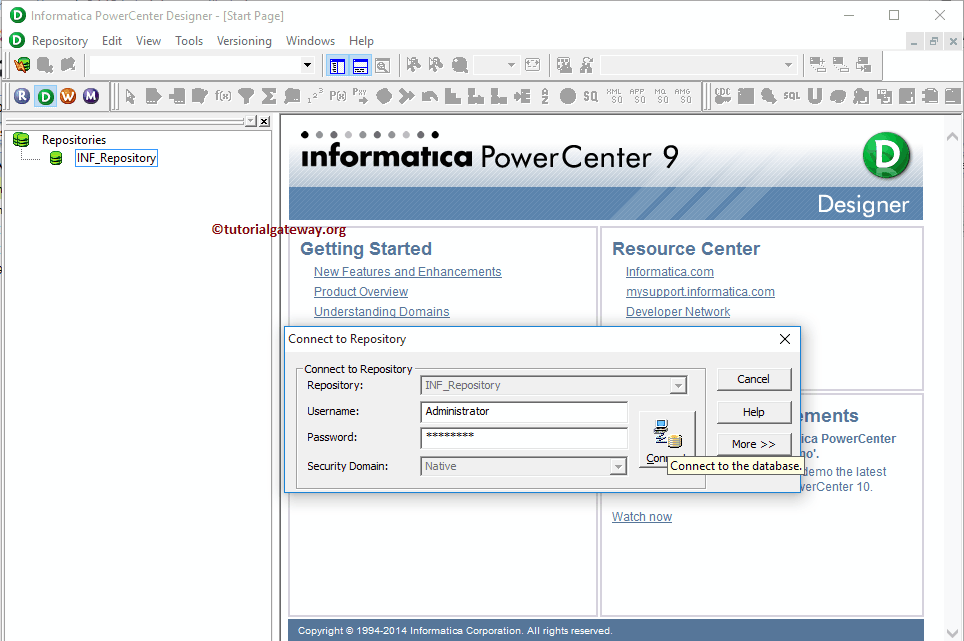
In order to connect with the PowerCenter Repository service we have to provide the Informatica Admin Console credentials. So, Please provide the Username and Password.
TIP: Here you have to provide the Admin Username and password that you specified while installing the Informatica Server.
Once you connected successfully, the following window will be displayed. If you observe the below screenshot, you can see the Subfolders inside our tutorials folder.
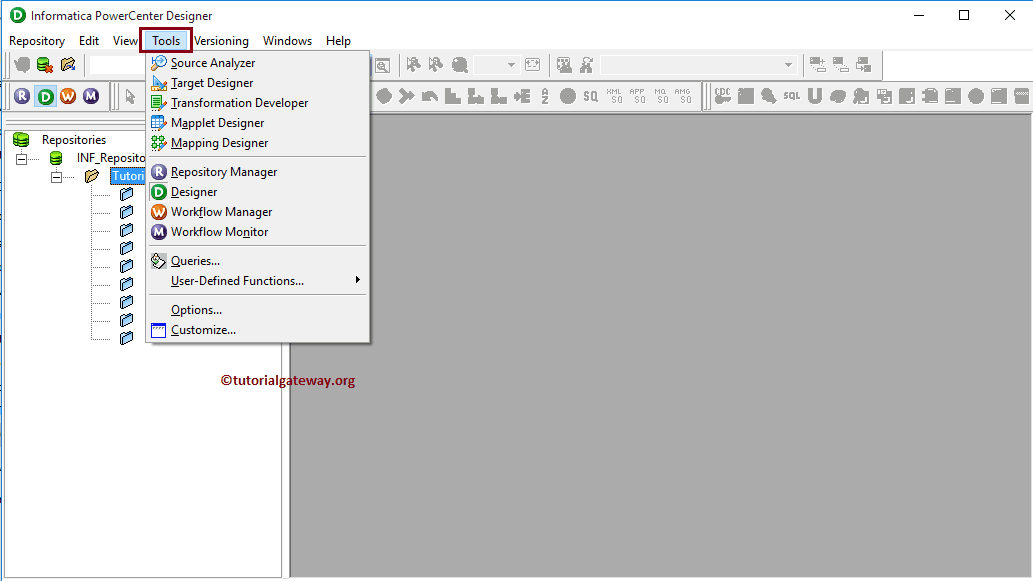
The following screenshot will show the list of available tools inside the Informatica PowerCenter Designer. These tools will help us to work with Source, Target and ETL operations.
- Source Analyzer: This will allow us to create source definitions, Modify existing source definitions and also allows us to Import data from various sources includes Flat Files, Relational Databases, XML definitions, Excel Worksheets etc
- Target Designer: This will allow us to create target definitions, Modify existing target definitions and Import target definition from various sources includes Flat Files, Relational Databases, XML definitions, Excel Worksheets etc
- Transformation Developer: This will allow us to create reusable transformations. It means, we can use the existing transformations to create more robust transformation.
- Mapplet Designer: This will allow us to create a group of transformations that can be reused in multiple mappings.
- Mapping Designer: This is the place where we are going to perform Extraction, transformation and Load. Mapping means Source -> Transformations (If Required) -> Target. It allows us to use One or more Sources, One or More transformations and One or more Target Designers.
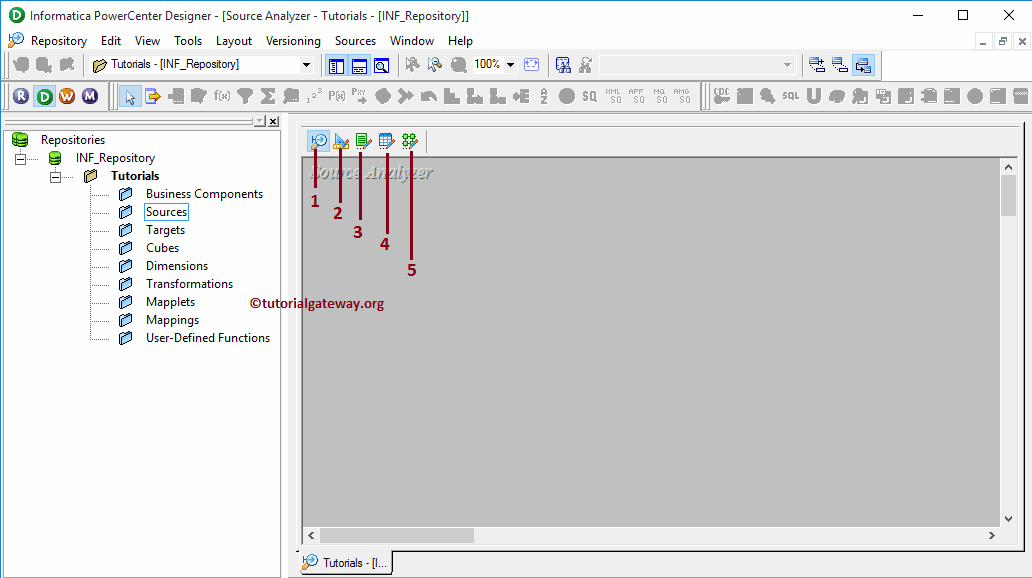
Instead of using the Tools Menu, We can use the following Images to navigate between the Source, Target and mapping. Each image belongs to one component and they are:
- Source Analyzer
- Target Designer
- Transformation Developer
- Mapplet Designer
- Mapping Designer
Th
Informatica Source Analyzer
In order to perform Extraction, Transformation and Load (ETL operations) we require Source Data, Target tables and Transformations (if required). Informatica Source Analyzer allows us to create our own source definitions, Modify already existing source definitions and also allows us to Import source data from various sources includes Flat Files, Relational Databases, XML definitions, Excel Worksheets etc
Available Sources in Informatica Source Analyzer
In order to connect with the Informatica Repository service, we have to provide the Informatica Admin Console credentials. So, Please provide the appropriate Username and Password and click on Connect button as shown below.
TIP: Here you have to provide the Admin Username and password that you specified while installing the Informatica Server.

Once you connected successfully, Please navigate to Tools menu in Menu Bar. Following screenshot will show the list of available tools inside the Informatica PowerCenter Designer. In this article we are explaining about the informatica Source Analyzer so please select the Source Analyzer option.

Once you select the Source Analyzer option, we will be in the Source Analyzer screen.
TIP: Source Menu in the Menu bar will be available only when you are in the Source Analyzer section otherwise, it will be hidden.
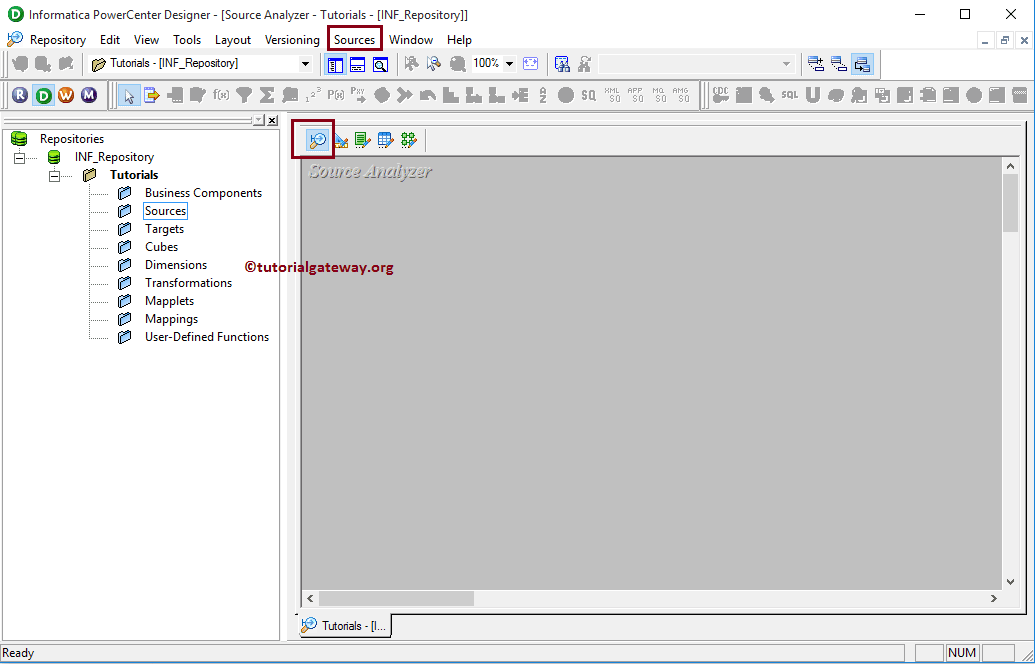
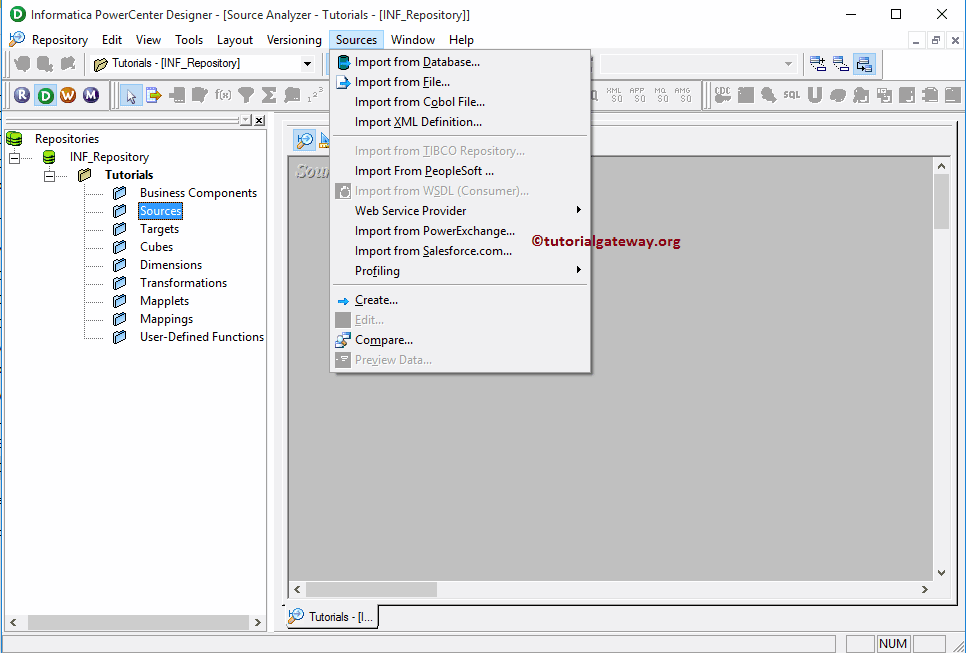
Next, Please navigate to Sources menu in Menu Bar. From the following screenshot, you can observe the list of available sources inside the Informatica PowerCenter Designer. They are
- Import from Database: This option allows us to import source data from the relational database. Informatica PowerCenter supports various relational databases such as Microsoft SQL Server, Oracle, SAP HANA, Sybase, Teradata etc.
- Import from File: This option allows us to import source data from flat files which are separated by Delimiter or fixed width.
- Import from COBOL File: This option allows us to import source data from COBOL files.
- Import XML Definition: This option allows us to import XML definition
- Import from PeopleSoft: This option allows us to import source data from peoplesoft.
- Web Service: Informatica PowerCenter helps us to import data from the web services
- Import from Salesforce.com: This option allows us to import source data from salesforce.com
- Create: This option allows us to create our own data source from scratch.
Informatica Workflow Manager
The Informatica Workflow Manager is used to create a Workflow. A workflow is nothing but a set of instructions to execute the Mappings that we designed in the PowerCenter Designer. Generally, a workflow contains a Session Task, Command Task, Event Wait Task, Email Task etc. It also helps you to schedule the Mappings.
Informatica PowerCenter Workflow Manager has an import option called Worklet designer, Which is used to combine (group) one or more task to make a Powerful task.
Informatica Workflow Manager
In order to open the Informatica Workflow Manager, Please Go to the Start menu -> All Programs -> Informatica -> PowerCenter Workflow Manager. Once you click on that, following window will be opened.
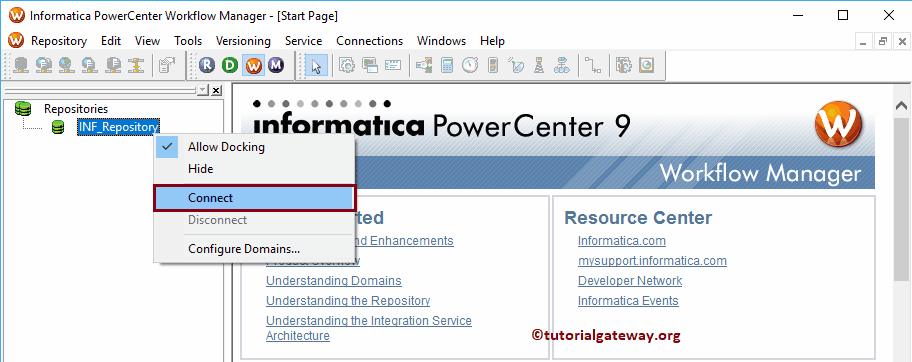
Before we start designing we have to connect with the Repository Service so, Please select and Right Click the PowerCenter Repository Service (INF_Repository) under the repository section and select the Connect option
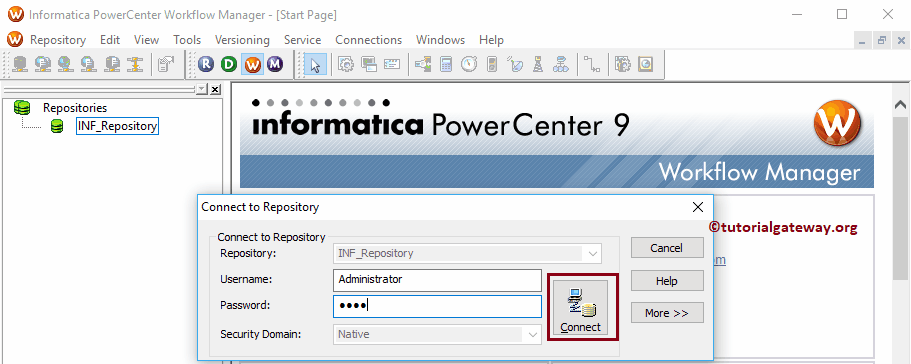
In order to connect with the PowerCenter Repository service we have to provide the Informatica Admin Console credentials so, Please provide the Username and Password.
TIP: Here you have to provide the Admin Username and password that you specified while installing the Informatica Server.
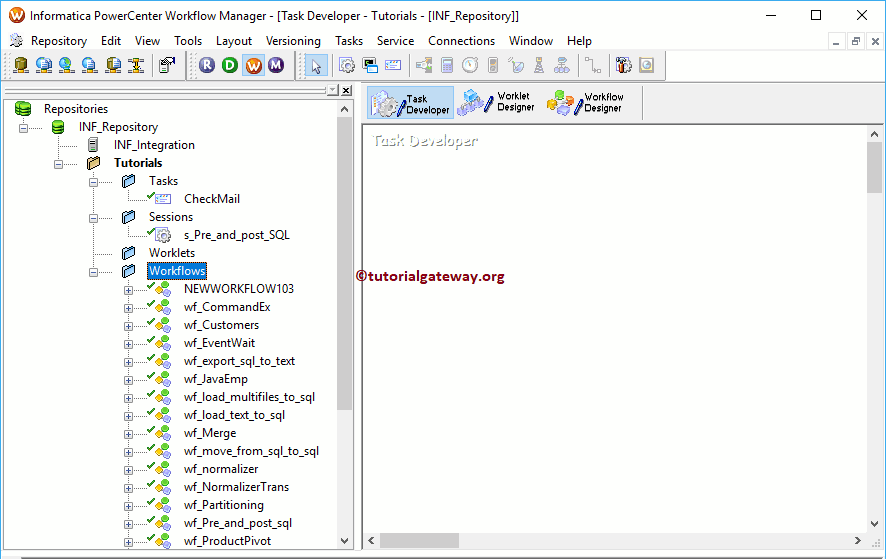
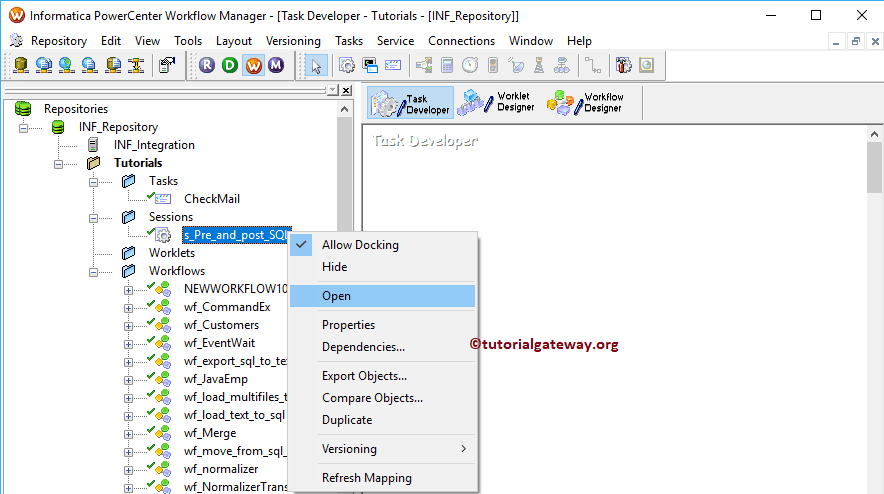
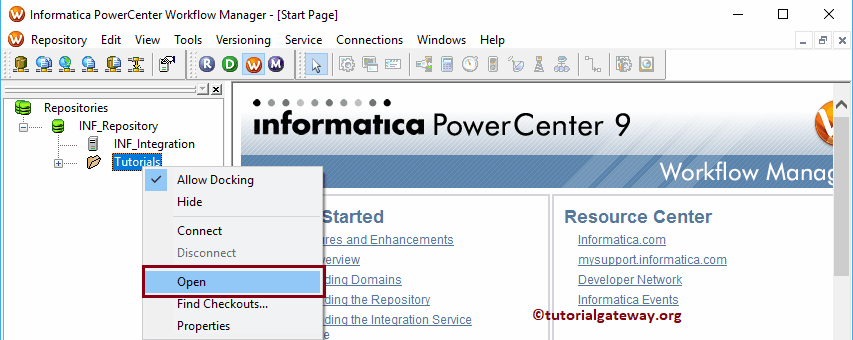
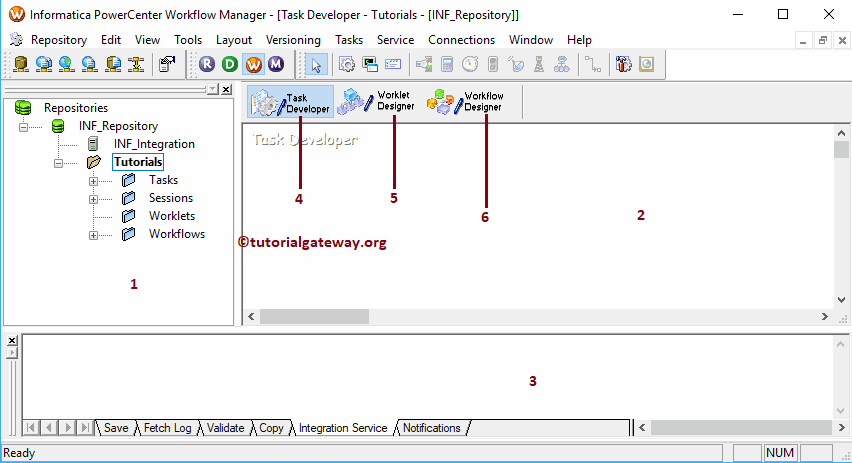
Once you connected successfully, the following window is displayed. If you observe the below screenshot, you can see the folders. In order to see the existing Tasks, Worklets, and Workflows or to create them please right-click on the folder and select Open from Context menu.
Clicking the Open will show the following window. The following screenshot will show the list of available tools inside the Informatica Workflow Manager.
- Navigator: This section is will allow us to connect with the Informatica Repository services and navigate between Different Folders such as Tasks, Sessions, Worklets, and Workflows.
- Work space: Use this section to create Tasks, Sessions, and Workflows.
- Output window: In this section, You can check whether the Task or Workflow is Valid or not. To find the Errors.
- Task Developer: This allows us to create Tasks such as Session Task, Email Task etc.
- Worklet Designer: This allows us to create Worklets
- Workflow Designer: Using this designer you can create a workflow by connecting the tasks. We already explained the Workflows in our previous article.
Expand the Workflows folder to see the existing Workflows
Informatica Workflow Monitor
The Informatica Workflow Monitor is used to monitor the execution of Workflows or Tasks assigned in the Workflow. Generally, Informatica PowerCenter helps you to track the Event Log information, list of executed Workflows, and their execution time in detail.
Informatica Workflow Monitor
To open the Informatica Workflow Monitor, Please Go to the Start menu -> All Programs -> Informatica -> PowerCenter Workflow Monitor. Once you click on that, the following window opened.
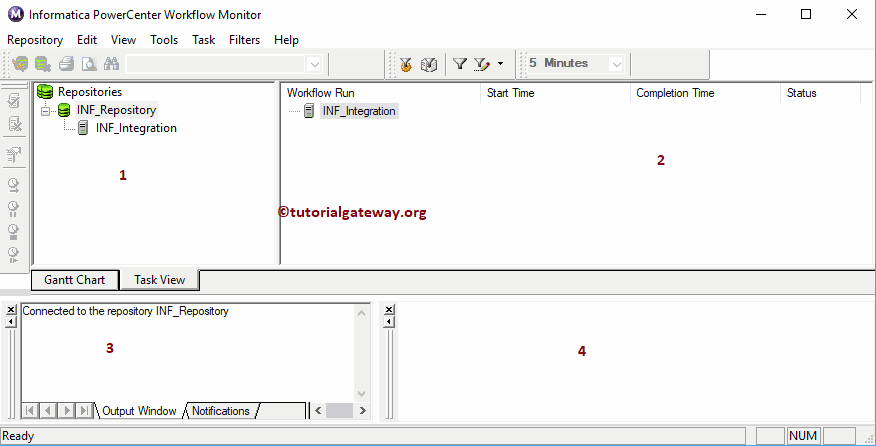
From the below screenshot, you can observe that We divided the Informatica PowerCenter Workflow Monitor screen into four sections to explain each section in detail. Let us see them individually,
- Navigator: It allows us to connect with the Repository services, and navigate between Different Workflows.
- Workflow Run: This section helps you to monitor the Workflow execution
- Output window: In this section, You can see the steps that we performed in this Workflow Monitor.
- Properties Window: It will display information about the current Informatica operation.
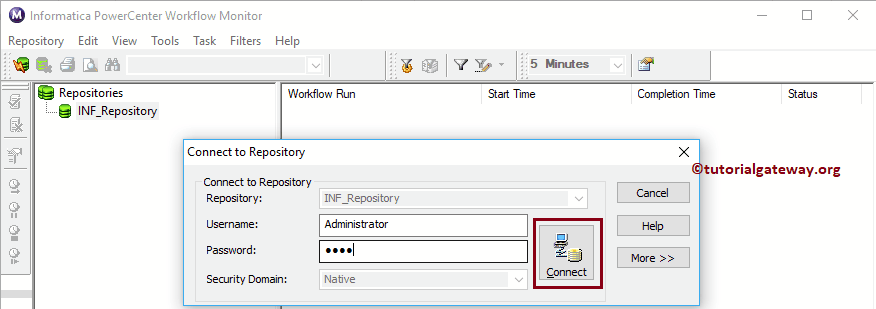
Before we start anything, we have to connect with the Repository Service. So, Please select and Right-click the PowerCenter Repository Service (INF_Repository) under the repository section and select the Connect option

To connect with the Informatica Workflow Monitor, provide the Admin Console credentials. So, Please provide the Username and Password.
TIP: Here, you have to provide the Admin Username and password that you specified while installing the Informatica Server.
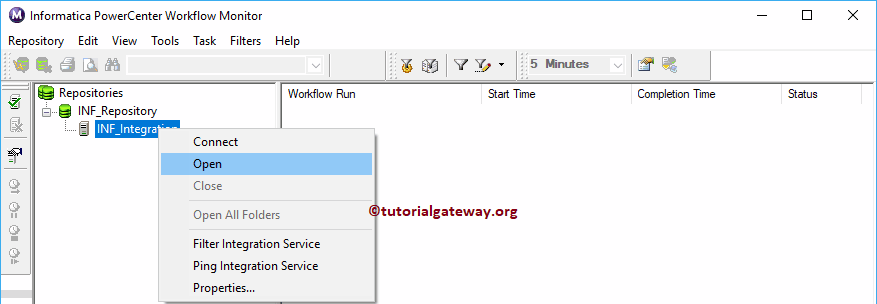
Once you connected successfully, the following window will display. If you observe the below screenshot, you can see the Integration Service. To see the existing Workflows, right-click on the Integration Service and select Open from Context menu.
Now you can see the folders in Informatica Workflow Monitor. To see the existing Workflows or to run them, right-click on the folder and select Open from menu.

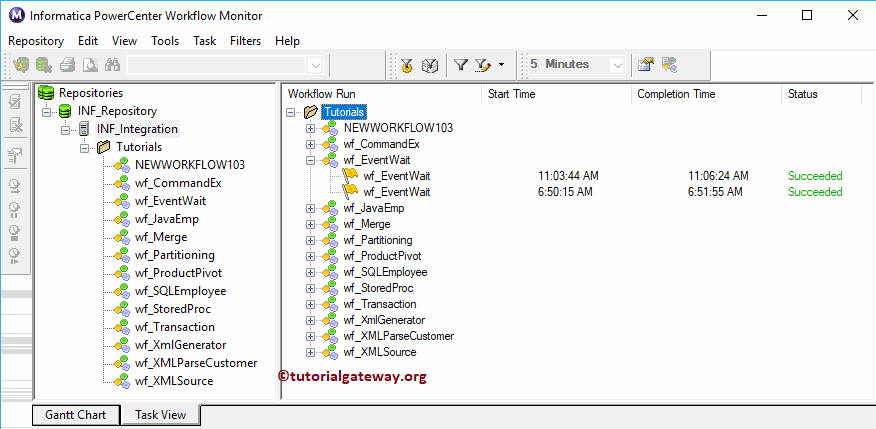
Expand the individual Workflows to see the previous execution details, i.e., Workflow Run start Time, Completion Time, and the Status of the run.
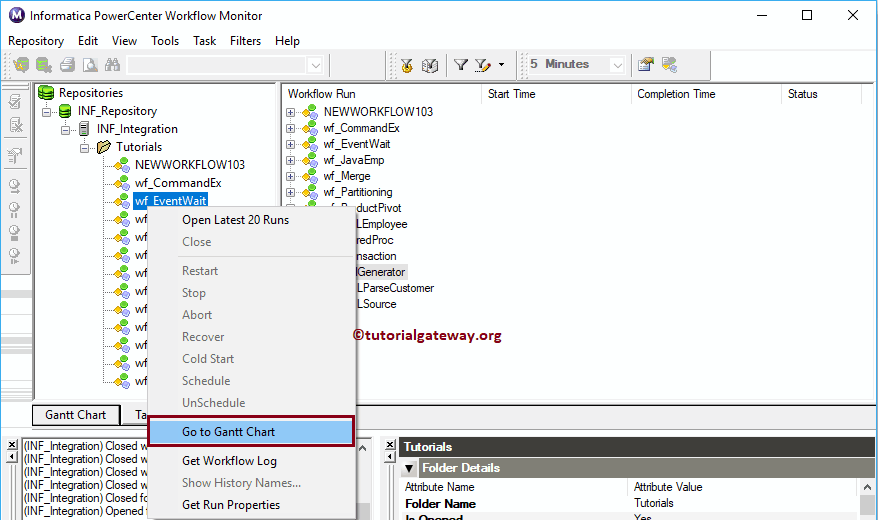
Informatica Workflow Monitor provides a Gantt Chart to see the execution in detail. To view, right-click on Workflow and select the Go to Gantt Chart from the context menu.
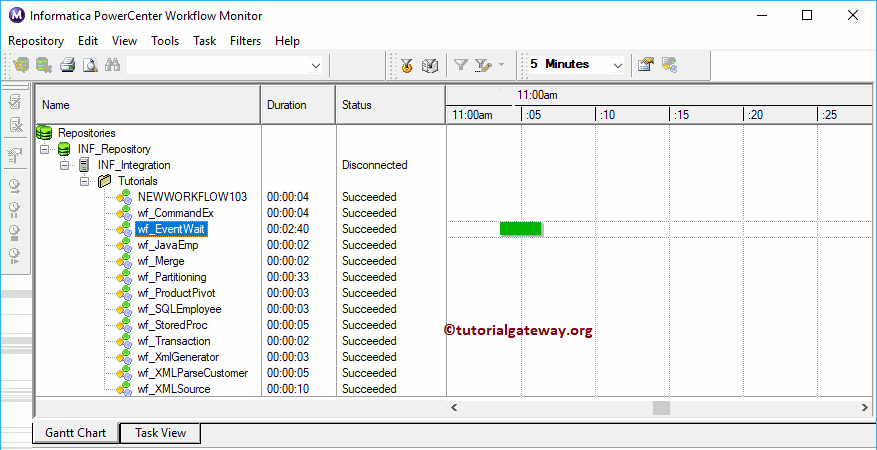
Now you can see the Informatica Workflow run in Gantt Chart
By simply selecting the Workflow you can see the information in the properties window
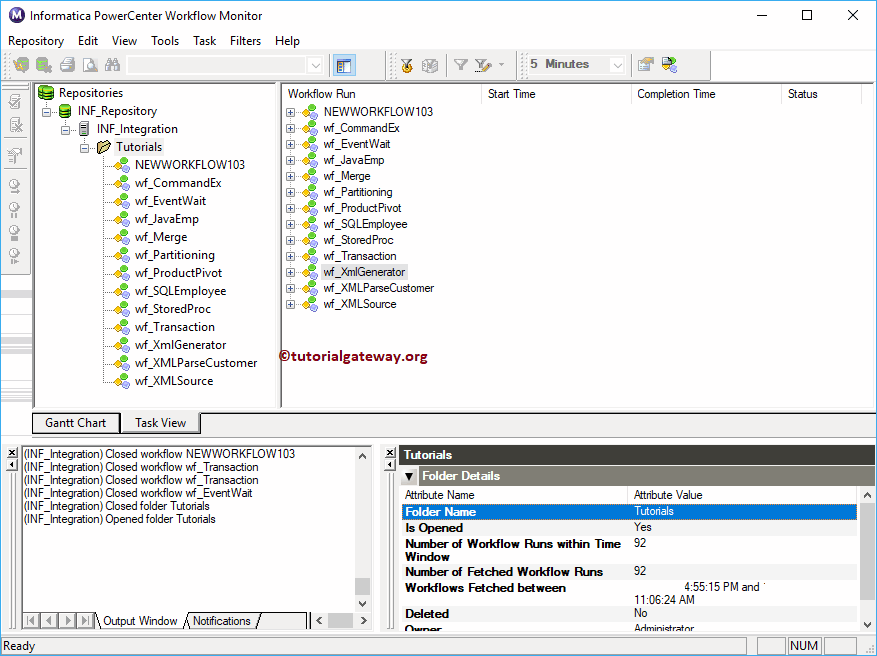
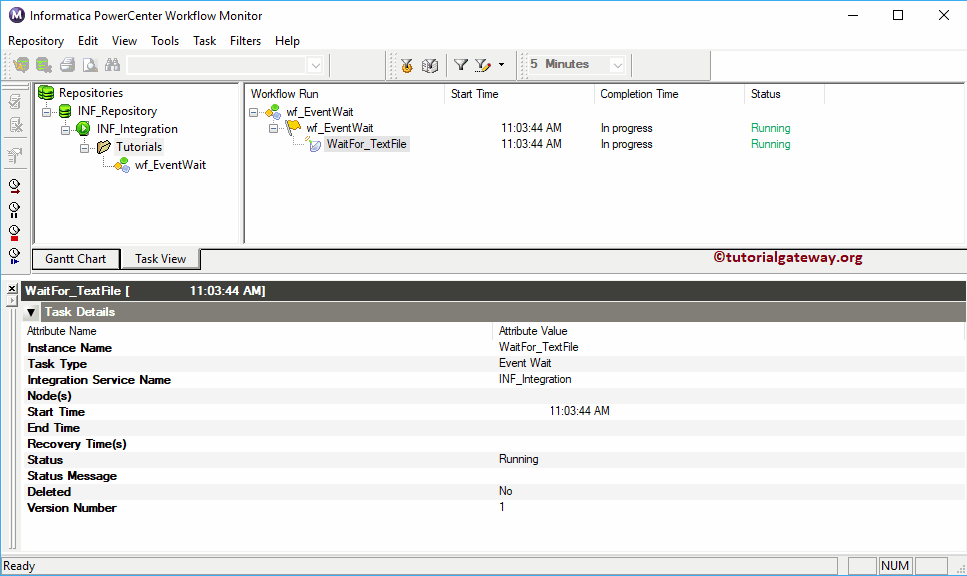
Let me remove the Output window to explore the Properties window information. Next, we are running the Event Wait Task workflow to show the Workflow run. From the below screenshot you can observe, Under the Task details tab you can see all the information about the task
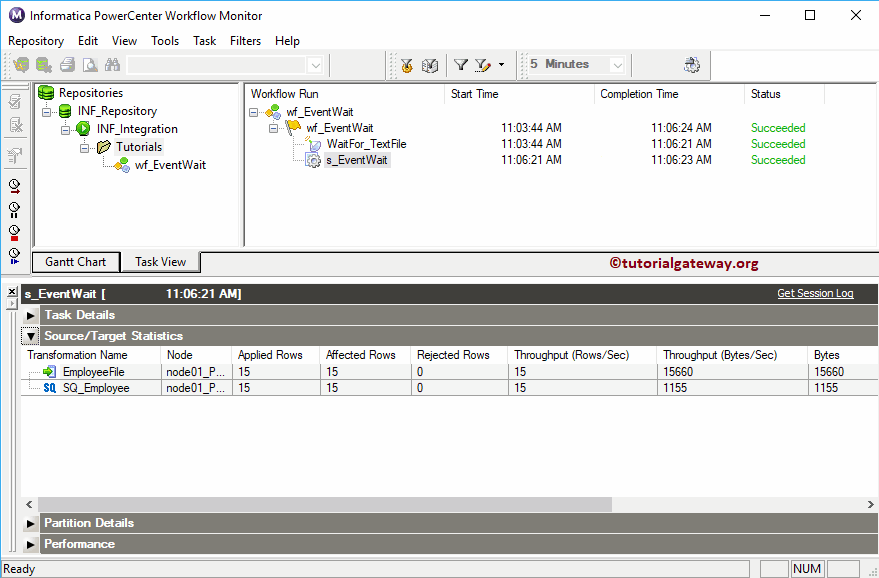
Under the Source or Target Statistics, you can see the Row flow. I mean, the number of rows passed, failed, etc.
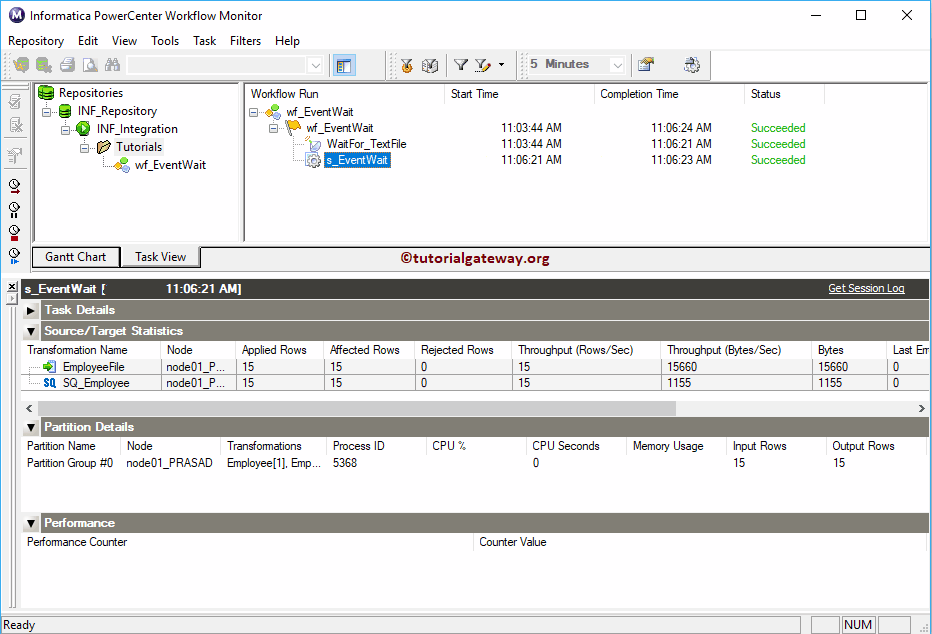
Under the partition tab, you can see the partition information (if any). And use the Performance tab to check the performance of any task
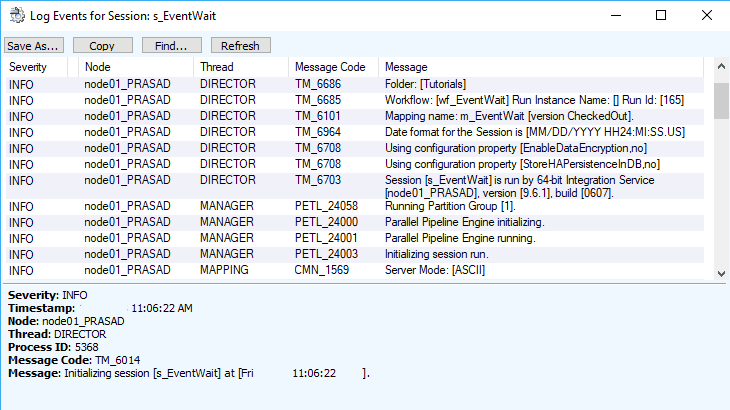
To see the details Event log of any task, right-click on the Task. Next, select the Get Session Log from the context menu.
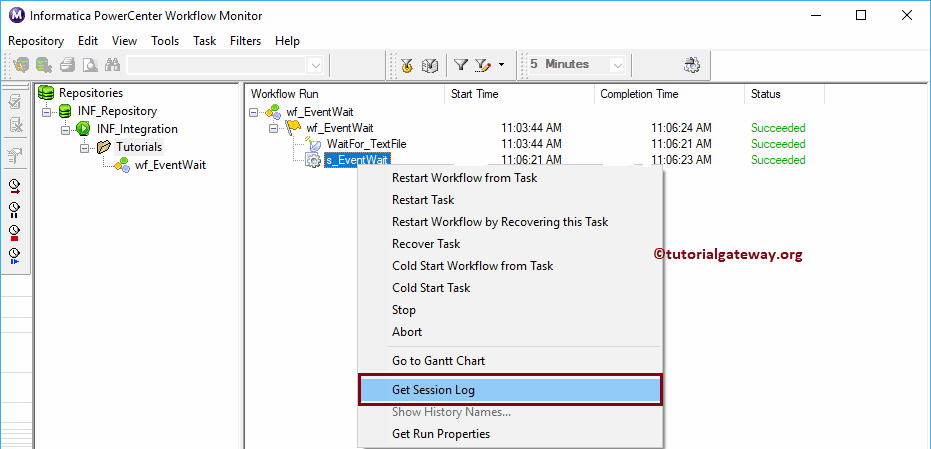
You can see the detailed event log. Generally, we used this Session log to check the error position. I mean, at what position error throws and the reason for it.
