Overview
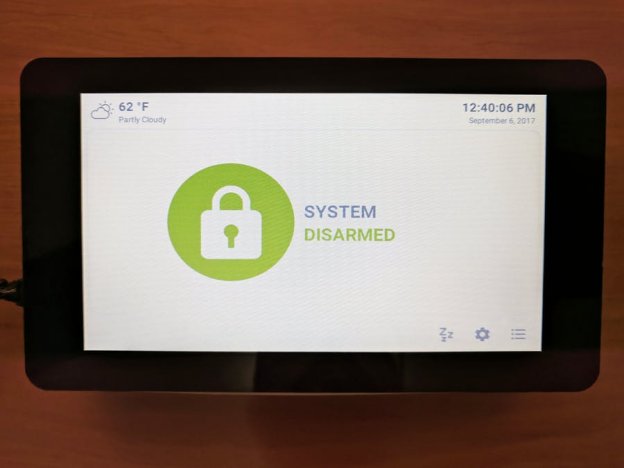
This project is a MQTT Alarm Control Panel for use with Home Assistant's Manual Alarm Control Panel component. This project was built using a Raspberry Pi 3 and a 7" touch screen display running Android Things.

Home Assistant
Home Assistant is an open source home automation platform with the ability to integrate with many hardware components as well as offer custom features for automation. Recently, contributor Colin O'Dell added a MQTT Manual Control Panel which allows for communication between a custom alarm panel and the manual alarm panel with MQTT.
I wanted an alarm panel which interfaces for Home Assistant's alarm control panel component and gives me the functionality to control my alarm as well as be mounted near the front door. Using Android Things allowed me to make a rich user interface and also add additional software features.
In my home I have several Z-Wave door sensors, a motion detector, and siren hooked up to Home Assistant. With the manual alarm control panel and some automation, I can activate the siren as well send a notification using IFTTT whenever the alarm is triggered. From my control panel I can arm/disarm the alarm through the interface as I enter or leave.
Hardware
Raspberry Pi (needs to be compatible with Android Things)
Touchscreen display, I used a 7" screen but any touch screen compatible with Android Things would work.
Micro SD card to burn the Android Things image
Micro USB cable for power.
Piezo Buzzer (optional if you want button sounds)
Home Assistant Setup
You should be using Home Assistant (v.0.50 or above) which adds the new MQTT Manual Control Panel as well as having a MQTT component setup and running. I won't go into detail about how to setup Home Assistant or MQTT because the documentation provided by Home Assistant is better than I could provide. Just be sure you have the the alarm control panel and MQTT running first, also connect any sensors you might need.
Raspberry Pi Setup
Make sure you properly setup the RPi3 with the 7" Touchscreen Display. You won't need any special software setup if you use the The Raspberry Pi Foundation 7" Touchscreen as it's compatible with Android Things. Other compatible touch screens may require additional configuration for Android Things.
There are two ways to setup Android Things and also load the alarm control panel application.
1) The first option is to download the latest build (zip file) from the project's Github release section which includes Android Things Preview 0.4.1 with the application already pre-installed. This option also allows you to receive future OTA updates.
Unzip the file to get the 'iot_rpi3.img'.
Burn image to an SD card using a tool like Etcher.
Insert the SD card into RPi3 and boot.
2) The second option is to setup your RPi3 to use Android Things 0.4.1-devpreview for Raspberry Pi 3 and then build and install the application manually using Android Studio.
Unzip the file to get the 'iot_rpi3.img'.
Burn image to an SD card using a tool like [Etcher](https://etcher.io/).
Insert the SD card into RPi3 and boot.
Clone the repository and compile the APK using Android Studio, then sideload the APK file onto your device using the ADB tool.
Be sure to set up network access either using WiFi or ethernet. If you setup WiFi be sure to unplug the Ethernet cable, at this time Android Things can't use both.
# Use the adb tool to connect over ethernet to the device
adb connect Android.local
# Then set your your WiFi SSID and password
adb shell am startservice \
-n com.google.wifisetup/.WifiSetupService \
-a WifiSetupService.Connect \
-e ssid <Network_SSID> \
-e passphrase <Network_Passcode>
You probably also want to set the time and timezone of the device:
# Reboot ADB into root mode
$ adb root
# Set the date to 2017/12/31 12:00:00
$ adb shell date 123112002017.00
# Set the time zone to US Mountain Time
$ adb shell setprop persist.sys.timezone "America/Denver"
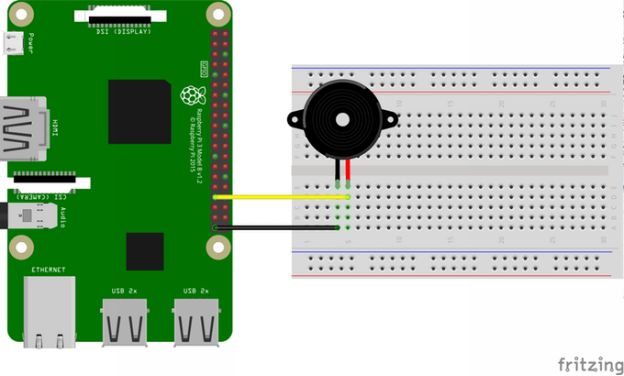
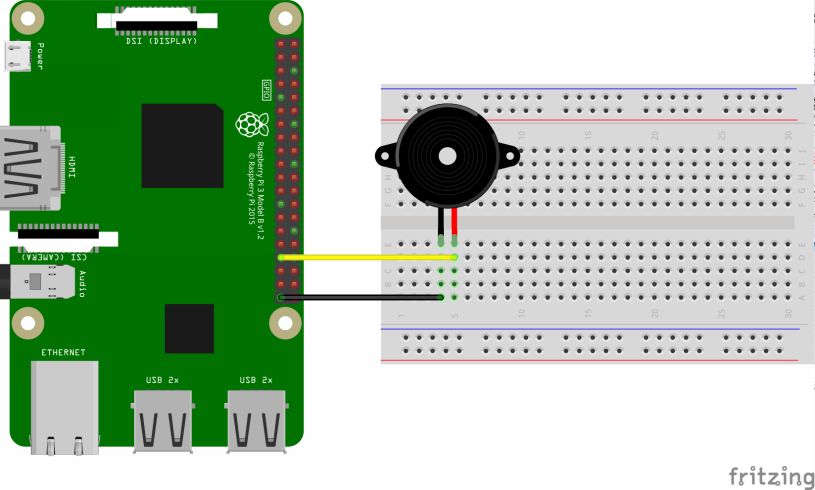
Now connect the buzzer as shown in the sample diagram from the Android Things drivers repository. This part is optional if you want to have sound feedback.
Alarm Application Setup
The complete code for the application running on Android Things can be found in my GitHub repository: https://github.com/thanksmister/androidthings-mqtt-alarm-panel.
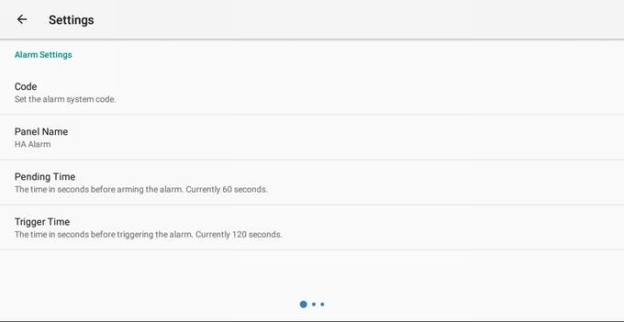
When you first start the application you will be asked to go to the setting screen and enter your pin code. You also need to enter the MQTT information that you configured in Home Assistant for your MQTT service. Be sure you adjust the time intervals to match those set in the Home Assistant MQTT alarm control panel.
The application should then connect to your MQTT broker and display the current state of the alarm control panel in Home Assistant.
Whenever the state of the alarm control panel in Home Assistant changes, the alarm control panel will reflect those changes via MQTT communication. In order to deactivate the alarm, you will need to enter you pin code within the time allowed.
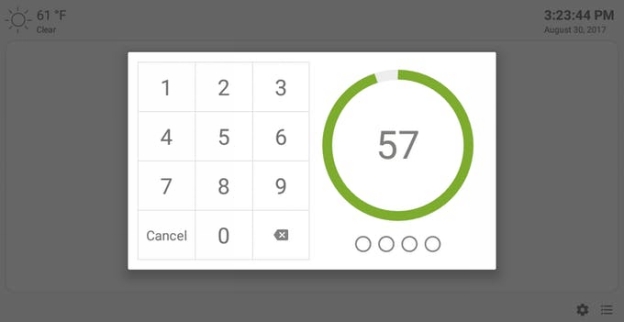
To set the alarm just select the main icon on the alarm screen and then select Arm Home or Arm Away options.
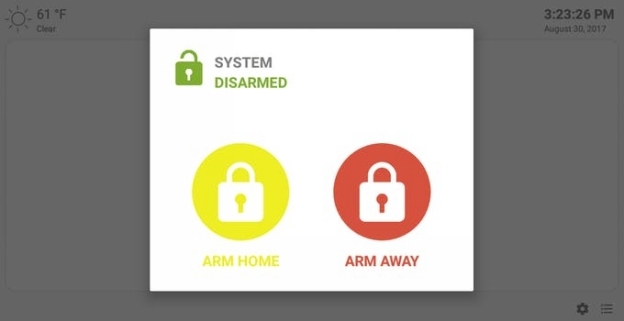
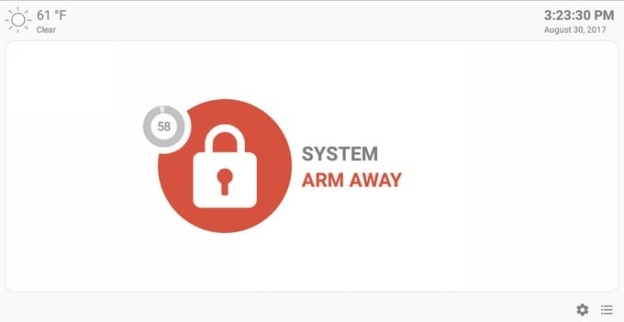
A small countdown will appear to indicate the time remaining before the alarm is activated.
If you choose to get weather updates, enter your DarkSky API key and current latitude and longitude in the weather setting screen. You can get your lat/lon by using maps.google.com and copy them from the url (they look like -34.6156624,-58.5035102)
To use a Instagram screensaver rather than the digital clock, turn this feature on using screen saver settings. You can load other Instagram images by changing the Instagram profile name in the settings.
Enclosure
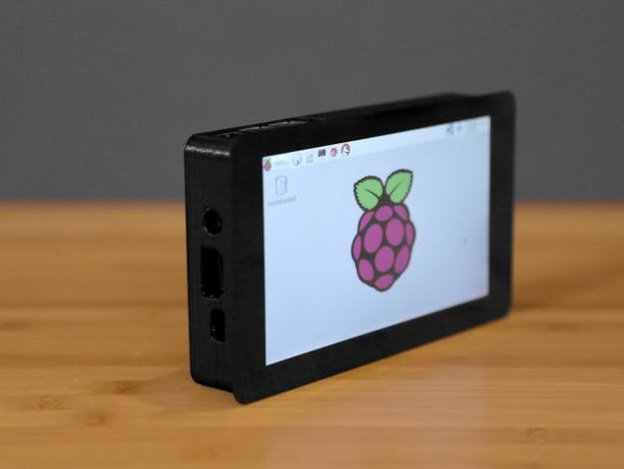
I used an enclosure to give the alarm a small profile and also to make it wall mountable: https://www.thingiverse.com/thing:1082431. However, be aware that this case may require extra screws as well as a longer flex cable. There are plenty of other case options for the RPi 3 / 7" Touchscreen option available. If you want to buy a case, the SmartPi Touch case is a good option.
Notes
At this time there is an issue dimming the brightness of the backlight for the display. So for now I have included a screen saver feature as a short-term fix until the bug is addressed by the Android Things development team. I will update the application once this feature is working.
There have been multiple display issues using Android Things 0.5.0 and 0.5.1, therefore this application runs best under Android Things 0.4.1.
It's important that the alarm control panel settings reflect the settings of those used in the alarm control panel component. Initially the hardware control panel is set to the default settings of the alarm control panel component.
One of the nice things about using Android Things is you can also port your project to Android devices. I created an Android tablet version of this same project that is available on Google Play and as a downloadable APK file for side loading.
Google Play: https://play.google.com/store/apps/details?id=com.thanksmister.iot.mqtt.alarmpanel
3D printable file to enclose the 7" Raspberry Pi Touchscreen and Raspberry Pi 3
Connecting your buzzer to the Raspberry Pi 3
This is a repository with the latest code and release APK and Android Things project files.