Django Tutorial
Posted by Superadmin on May 01 2023 14:43:34
Django Tutorial
Django is a Python Web development framework. It provides a complete library and attributes to develop complete web-based applications. Django allows the development of Web applications with a very less amount of code. It defines its set of rules, makings Web application code neat, clean, and faster in development. Django was Started In 2003 by Adrian Holovaty and Simon Willison for an internal community project at the Lawrence Journal-World newspaper. The good news is that Django is currently open-source, available for free, and thousands of contributors are there for it worldwide.
Why do we need to learn Django?
Django is a very high-level framework. Let’s look at a few features that make this Framework splendid.
- Speed: Django was developed to help developers with faster Web development. It is also very cost-effective if you see Web development in Django; its development, release, and all are very cost-efficient. So we can say Django is an ideal Web development framework.
- Full of Features: Many features like Sitemap, Seo-related Logic, cms work, and user Authentication like dozen features are already available inside the Django framework. And all these available components are very helpful in developing a better Web application.
- High Security: In Django, security has been taken care of at a great level .many times when we are developing any Web application, we need to take care of things like cross-site requests and cross-site scripting. Django has handled these things at its best.
- It’s Versatile: You can make your Web application for any purpose, like for CMS or E-commerce, for small or medium, or large ERP based. So for whatever purpose you want to use Django, you can use it.
- Python Language: Python will be used with Django, makings the Django framework more important, as all know that Python is the most popular programming language. Many scientific applications are developed using Python Only.
- Object-Oriented: Django is object-oriented, so if you are working with it, you will learn something common in all good frameworks and languages. Also, it allows you to reuse existing class features.
- Multilingual Support: So if you are developing any International Web application, this will be the best choice as it provides support for internationalization which means many languages.
- Administration GUI: For all general Admin activity, there is already a developed UI for developers to manage all admin activity, and also, you can scale it if you need.
Applications of Django
Many companies like Youtube, Instagram, and Dropbox use Django for Web development. In addition, Django Can be used for CMS development or any Web Application.
Pre-requisites
To start with Django, a little understanding of Objects and class is important. Also, if you have some idea of Python, it will be great, so before starting Django, go through these items.
Target Audience
ThFrameworkork is developed for developers; In thFrameworkork, developers can learn to write code quality for Web development. Moreover, it provides smart and efficient tools to create modules and components which we can extend or customize according to our uses.
|
|
What Is Django?

Introduction to Django
Django is a high-level Python framework for rapid web development. It follows the Model-Template-View (MTV) architecture, which makes it easier to develop complex, data-driven websites. Django simplifies the web development process and helps developers with vast documentation to guide them through the website creation process. Developers find it easy to create web pages with Django, as the framework provides tools to help neatly organize data and have repositories managed with high relevance. It is a free and open-source framework.
Why Use Django Framework?
Django provides fast, simple, and rapid web development. It has extensive documentation and follows the principle, DRY, i.e., Do not Repeat Yourself. Additionally, Django comes with built-in Object Relational Mapping (ORM) support. A database can be updated through the command-line interface using the following command:
Code:
`python manage.py migrate`
And migrations can be generated using:
Code:
`python manage.py makemigrations`
Django’s MVT Pattern
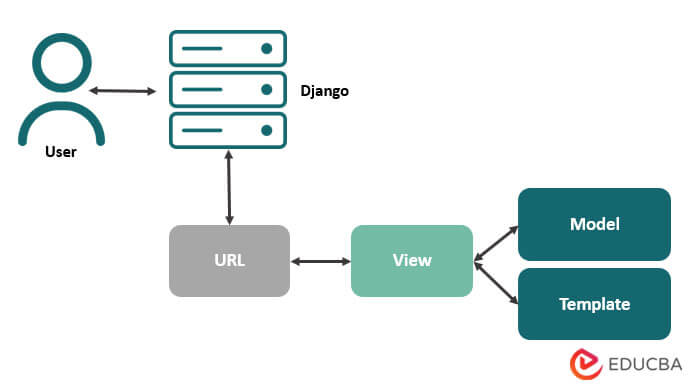
Django utilizes MVT (Model-View-Template) instead of the traditional MVC (Model-View-Controller) pattern used for user interaction in application development. The template consists of HTML code with Django Template Language (DTL), and Django handles the controller code to manage interactions between the Model and View.
When a user sends a request, Django acts as a controller by checking if the requested URL is available and maps it to the corresponding view. If the URL maps successfully, the view interacts with the model and generates a template, which then returns to the user as a response. With its built-in default controller implementation, Django provides a solid foundation for many applications.
Django Installation and Setup
Installing Django is relatively easy in comparison to other frameworks; however, it differs for operating systems. The latest version can be downloaded from their official website.
- Django can be installed on Linux or Mac OS using the package manager or pip install.
- For Windows, if Python already exists on the system, one should check if Python Path is set for the system variable. Then extract and install it.
Django supports many database engines and can be set as per requirements. It provides a built-in lightweight server for developing and testing the application.
Creating your Django Application
A Django project is a collection of settings that include database configuration, specific options, and default application-specific settings in the project.
Steps to create an application:
- Create a directory where you want to store your project.
- Navigate to the created directory using the command line interface and run the following command:
Code:
$ django-admin startproject my_app
If one looks at the directory, the following structure will be created:
mysite/
manage.py
mysite/
__init__.py
settings.py
urls.py
wsgi.py
- manage.py: Allows interaction with the Django project in different ways.
- __init__.py: Informs the Python interpreter that the directory must be considered a Python package. This file is mostly empty.
- settings.py: The configuration file.
- urls.py: Includes all URL declarations for the Django project and table of contents of the Django-powered site.
- wsgi.py: The entry point for WSGI-compatible web servers to serve the projects and deploy with WSGI.
If one wants to check whether the project is running, one can check it using the following command:
Code:
$ python manage.py runserver
How does Django make your Work Easy?
Django follows the “Simple is better than complex” approach, which is the Pythonic way of development. It is one of the Python packages that is stored inside the site-packages directory of the Python installation along with other important packages like Numpy, Scipy, Pillow, etc.
To verify whether Django is installed, one can try to import it into the project using the following code:
Code:
>>> import django
>>> print(django.get_version())
Django provides everything that is necessary to develop a full-fledged application, including built-in templating using HTML, URL routing, ORM (Object Relational Mapping), session management, etc.
It also offers a number of useful tools for SEO. The SEO framework allows the developers to reduce page loading time by using cached templates and compressing CSS and JavaScript. Additionally, there is also a tool to manage robots.txt. The capabilities of Django CMS exceed the expectations of professional SEO specialists.
Top Companies which use Django Framework
1. Instagram
Instagram is a Python-based photo and video-sharing social networking app that processes huge amounts of data and manages an even greater number of interactions between multiple users every second. Django helps Instagram to handle this workload by simplifying the process and avoiding reinventing the work.
2. Spotify
Spotify has taken the music industry to the next level by changing the way people listen to music and making it accessible to anyone on any device. It uses Python for both backend services and machine learning combined with the Django Framework.
3. YouTube
YouTube is one of the most popular content-sharing platforms. While YouTube was originally a PHP-based project, it moved to Django to improve its performance, and thereby run smoothly.
4. Dropbox
Dropbox is a renowned cloud storage service for documents, videos, and pictures. Both its desktop and server-client software are based on Python. Dropbox uses the Django Framework to enable storage, synchronization, and file-sharing options.
5. Mozilla
Mozilla is one of the most popular and recognizable browsers in the world, with millions of users worldwide. Although their old components were not written in Python, they have implemented new components using Django. For example, building support sites and add-ons. Mozilla shifted from PHP (CakePHP) to Python (Django Framework), which helped them deal with tens, hundreds, and millions of views per month and more API hits per day.
6. Disqus
This is one of the largest projects with Django. Disqus developers built the app from scratch using Django to scale it to handle millions of users per day. They have also used Django in one of their projects called Sentry, an error reporting tool that is popular among developers.
What can you do with Django?
Django enables the creation of web applications with features such as database connectivity, CRUD (create, read, update, and delete) operations, security, user management, and creating RestAPI using Django RESTful API.
Django is not PHP
It uses Python programming language, which makes things simple. It is a complete framework that uses templating language and has been crowd-tested by many big companies that have implemented their enterprise and mobile applications using Django. Django provides excellent documentation and they are the first-class citizens in the Django world. It has over 3,000 packages available for users, and it is one of the first frameworks to respond to new vulnerabilities.
Why do we Need Django?
Django facilitates rapid development with its clean and practical design, making it a preferred choice for building highly customizable applications. It covers the basic requirements by letting developers focus on experimenting with the important parts, such as the ability to share various types of media.
Django provides a solid user authentication model that allows for user configuration, thereby making it the first choice when security is the top priority. It utilizes separate Python components that are independent of each other.
When Not to Use Django?
While Django is a robust framework with a solid foundation for large projects, it may not always be the best choice. For smaller projects, especially those that do not require a database, Django can be overkill. In such cases, the Flask framework may be a better option as it is more suitable for smaller and simpler projects.
Advantages and Disadvantages of Django Framework
Advantages:
- It is a Python Language: Django is written in Python, which is simple to learn and easy to implement. Python manages much more in fewer lines with large libraries.
- Wide Usage: Django and Python are widely used by Fintech Companies in Silicon Valley, IT giants, Blue chip companies, and in the development of the Internet of Things.
- Administrative Interface: The administrative interface by Django is a powerful and customizable tool that allows developers to quickly create a fully-featured admin interface.
For e.g:
class Interface(models.Model):
interface_title = models.CharField(max_length=50)
some_other_text = models.CharField(max_length=100)
some_boolean_value = models.BooleanField()
admin.site.register(Interface)
- Extensive Support Libraries: Django provides libraries that include features such as string operations, web services, operating system interfaces, and standard protocols.
- Scalability: Django is scalable and can handle heavy traffic demands. It offers various options for scalability, such as running separate servers for the database and using clustering or load-balancing to distribute the application across multiple servers.
Disadvantages:
- Specifying URLs with regular expressions can be challenging for beginners. Additionally, when a template error occurs, it may fail silently, leading to a waste of time in trying to identify the problem.
- Django gives a monolithic feeling since it is a strongly opinionated framework.
- Handling multiple requests at the same time can be a challenge because Django does not empower individual procedures to manage multiple requests simultaneously. Developers may need to explore different approaches to enable a single procedure to control various requests simultaneously.
- Although ORM (Object Relation Mapping) system allows developers to work on different databases concurrently, it lacks some features provided by other ORM systems. Its design is such that it does not let programmers use SQLAlchemy entirely, which is python’s famous toolkit.
Prerequisites to Learn Django
- To learn Django, one should have a basic understanding of the Python programming language, especially its syntax and indentation rules.
- Familiarity with Python functions, such as passing arguments and setting default values, is also necessary.
- Since web application development often requires the use of external modules, understanding how to import external packages into your code is important.
- Regular Expressions (regex) play a vital role in URL mapping and string validation, especially when asking users to provide sensitive information like email IDs and passwords.
- Knowledge of RestAPI and JSON is also essential, as they are commonly used for storing and transferring data between different network entities.
How will it help in Career Growth?
- Certification in Python-Django can be valuable for beginners to enhance their career opportunities in their current organization. It is a highly-demanded skill for programmers and web developers.
- Large organizations often use Django to develop their projects, presenting opportunities for developers to work with top-tier clients.
- As one of the most popular frameworks globally, having experience in Django can lead to lucrative salaries and the chance to work on-site with clients from all over the world.
Conclusion
Although the Django framework may present some challenges, it also enables users to accomplish a huge number of tasks quickly and easily, making Python-based software development affordable and simple. While the ORM may have its limitations, the Django REST framework can mitigate its disadvantages and create an optimal interface for REST. A great advantage of the Django REST framework is that it has perfect interfacing models and can also work with the bare implementation of Data Mapper patterns. For those in the outsourcing business, Django can be advantageous, given the average short duration and budget constraints of such projects. Overall, it is one of the best frameworks available in the market.
|
What Is Django?

Introduction to Django
Django is a high-level Python framework for rapid web development. It follows the Model-Template-View (MTV) architecture, which makes it easier to develop complex, data-driven websites. Django simplifies the web development process and helps developers with vast documentation to guide them through the website creation process. Developers find it easy to create web pages with Django, as the framework provides tools to help neatly organize data and have repositories managed with high relevance. It is a free and open-source framework.
Why Use Django Framework?
Django provides fast, simple, and rapid web development. It has extensive documentation and follows the principle, DRY, i.e., Do not Repeat Yourself. Additionally, Django comes with built-in Object Relational Mapping (ORM) support. A database can be updated through the command-line interface using the following command:
Code:
`python manage.py migrate`
And migrations can be generated using:
Code:
`python manage.py makemigrations`
Django’s MVT Pattern

Django utilizes MVT (Model-View-Template) instead of the traditional MVC (Model-View-Controller) pattern used for user interaction in application development. The template consists of HTML code with Django Template Language (DTL), and Django handles the controller code to manage interactions between the Model and View.
When a user sends a request, Django acts as a controller by checking if the requested URL is available and maps it to the corresponding view. If the URL maps successfully, the view interacts with the model and generates a template, which then returns to the user as a response. With its built-in default controller implementation, Django provides a solid foundation for many applications.
Django Installation and Setup
Installing Django is relatively easy in comparison to other frameworks; however, it differs for operating systems. The latest version can be downloaded from their official website.
- Django can be installed on Linux or Mac OS using the package manager or pip install.
- For Windows, if Python already exists on the system, one should check if Python Path is set for the system variable. Then extract and install it.
Django supports many database engines and can be set as per requirements. It provides a built-in lightweight server for developing and testing the application.
Creating your Django Application
A Django project is a collection of settings that include database configuration, specific options, and default application-specific settings in the project.
Steps to create an application:
- Create a directory where you want to store your project.
- Navigate to the created directory using the command line interface and run the following command:
Code:
$ django-admin startproject my_app
If one looks at the directory, the following structure will be created:
mysite/
manage.py
mysite/
__init__.py
settings.py
urls.py
wsgi.py
- manage.py: Allows interaction with the Django project in different ways.
- __init__.py: Informs the Python interpreter that the directory must be considered a Python package. This file is mostly empty.
- settings.py: The configuration file.
- urls.py: Includes all URL declarations for the Django project and table of contents of the Django-powered site.
- wsgi.py: The entry point for WSGI-compatible web servers to serve the projects and deploy with WSGI.
If one wants to check whether the project is running, one can check it using the following command:
Code:
$ python manage.py runserver
How does Django make your Work Easy?
Django follows the “Simple is better than complex” approach, which is the Pythonic way of development. It is one of the Python packages that is stored inside the site-packages directory of the Python installation along with other important packages like Numpy, Scipy, Pillow, etc.
To verify whether Django is installed, one can try to import it into the project using the following code:
Code:
>>> import django
>>> print(django.get_version())
Django provides everything that is necessary to develop a full-fledged application, including built-in templating using HTML, URL routing, ORM (Object Relational Mapping), session management, etc.
It also offers a number of useful tools for SEO. The SEO framework allows the developers to reduce page loading time by using cached templates and compressing CSS and JavaScript. Additionally, there is also a tool to manage robots.txt. The capabilities of Django CMS exceed the expectations of professional SEO specialists.
Top Companies which use Django Framework
1. Instagram
Instagram is a Python-based photo and video-sharing social networking app that processes huge amounts of data and manages an even greater number of interactions between multiple users every second. Django helps Instagram to handle this workload by simplifying the process and avoiding reinventing the work.
2. Spotify
Spotify has taken the music industry to the next level by changing the way people listen to music and making it accessible to anyone on any device. It uses Python for both backend services and machine learning combined with the Django Framework.
3. YouTube
YouTube is one of the most popular content-sharing platforms. While YouTube was originally a PHP-based project, it moved to Django to improve its performance, and thereby run smoothly.
4. Dropbox
Dropbox is a renowned cloud storage service for documents, videos, and pictures. Both its desktop and server-client software are based on Python. Dropbox uses the Django Framework to enable storage, synchronization, and file-sharing options.
5. Mozilla
Mozilla is one of the most popular and recognizable browsers in the world, with millions of users worldwide. Although their old components were not written in Python, they have implemented new components using Django. For example, building support sites and add-ons. Mozilla shifted from PHP (CakePHP) to Python (Django Framework), which helped them deal with tens, hundreds, and millions of views per month and more API hits per day.
6. Disqus
This is one of the largest projects with Django. Disqus developers built the app from scratch using Django to scale it to handle millions of users per day. They have also used Django in one of their projects called Sentry, an error reporting tool that is popular among developers.
What can you do with Django?
Django enables the creation of web applications with features such as database connectivity, CRUD (create, read, update, and delete) operations, security, user management, and creating RestAPI using Django RESTful API.
Django is not PHP
It uses Python programming language, which makes things simple. It is a complete framework that uses templating language and has been crowd-tested by many big companies that have implemented their enterprise and mobile applications using Django. Django provides excellent documentation and they are the first-class citizens in the Django world. It has over 3,000 packages available for users, and it is one of the first frameworks to respond to new vulnerabilities.
Why do we Need Django?
Django facilitates rapid development with its clean and practical design, making it a preferred choice for building highly customizable applications. It covers the basic requirements by letting developers focus on experimenting with the important parts, such as the ability to share various types of media.
Django provides a solid user authentication model that allows for user configuration, thereby making it the first choice when security is the top priority. It utilizes separate Python components that are independent of each other.
When Not to Use Django?
While Django is a robust framework with a solid foundation for large projects, it may not always be the best choice. For smaller projects, especially those that do not require a database, Django can be overkill. In such cases, the Flask framework may be a better option as it is more suitable for smaller and simpler projects.
Advantages and Disadvantages of Django Framework
Advantages:
- It is a Python Language: Django is written in Python, which is simple to learn and easy to implement. Python manages much more in fewer lines with large libraries.
- Wide Usage: Django and Python are widely used by Fintech Companies in Silicon Valley, IT giants, Blue chip companies, and in the development of the Internet of Things.
- Administrative Interface: The administrative interface by Django is a powerful and customizable tool that allows developers to quickly create a fully-featured admin interface.
For e.g:
class Interface(models.Model):
interface_title = models.CharField(max_length=50)
some_other_text = models.CharField(max_length=100)
some_boolean_value = models.BooleanField()
admin.site.register(Interface)
- Extensive Support Libraries: Django provides libraries that include features such as string operations, web services, operating system interfaces, and standard protocols.
- Scalability: Django is scalable and can handle heavy traffic demands. It offers various options for scalability, such as running separate servers for the database and using clustering or load-balancing to distribute the application across multiple servers.
Disadvantages:
- Specifying URLs with regular expressions can be challenging for beginners. Additionally, when a template error occurs, it may fail silently, leading to a waste of time in trying to identify the problem.
- Django gives a monolithic feeling since it is a strongly opinionated framework.
- Handling multiple requests at the same time can be a challenge because Django does not empower individual procedures to manage multiple requests simultaneously. Developers may need to explore different approaches to enable a single procedure to control various requests simultaneously.
- Although ORM (Object Relation Mapping) system allows developers to work on different databases concurrently, it lacks some features provided by other ORM systems. Its design is such that it does not let programmers use SQLAlchemy entirely, which is python’s famous toolkit.
Prerequisites to Learn Django
- To learn Django, one should have a basic understanding of the Python programming language, especially its syntax and indentation rules.
- Familiarity with Python functions, such as passing arguments and setting default values, is also necessary.
- Since web application development often requires the use of external modules, understanding how to import external packages into your code is important.
- Regular Expressions (regex) play a vital role in URL mapping and string validation, especially when asking users to provide sensitive information like email IDs and passwords.
- Knowledge of RestAPI and JSON is also essential, as they are commonly used for storing and transferring data between different network entities.
How will it help in Career Growth?
- Certification in Python-Django can be valuable for beginners to enhance their career opportunities in their current organization. It is a highly-demanded skill for programmers and web developers.
- Large organizations often use Django to develop their projects, presenting opportunities for developers to work with top-tier clients.
- As one of the most popular frameworks globally, having experience in Django can lead to lucrative salaries and the chance to work on-site with clients from all over the world.
Conclusion
Although the Django framework may present some challenges, it also enables users to accomplish a huge number of tasks quickly and easily, making Python-based software development affordable and simple. While the ORM may have its limitations, the Django REST framework can mitigate its disadvantages and create an optimal interface for REST. A great advantage of the Django REST framework is that it has perfect interfacing models and can also work with the bare implementation of Data Mapper patterns. For those in the outsourcing business, Django can be advantageous, given the average short duration and budget constraints of such projects. Overall, it is one of the best frameworks available in the market.
Django Architecture

Introduction to Django Architecture
The Django is a free and open-source web application framework that is written in Python language. This framework is used in place of servlets, PHP, javascript to build web application backend part. The initial version of Django is released on 15th July 2005, which is developed by Django Software Foundation. The recent release of version 2.2.7 of the Django framework was done on 4th November 2019. Now we will learn about Django architecture with MVT.
The main advantages of Django is to make the creation of complicated database included web applications as easy as possible, it is fast, many components are available implicitly, scalability and good security. Now, getting into the architecture of Django; it follows MVT.
Django Architecture
As mentioned, Django follows the MVT framework for architecture.
- M stands for Model
- V stands for View
- T stands for Template
MVT is generally very similar to that of MVC which is a Model, View, and Controller. The difference between MVC and MVT here is the Django itself does the work done by the controller part in the MVC architecture. Django does this work of controller by using templates. Precisely, the template file is a mixture of HTML part and Django Template Language also known as DTL.
Below is an architecture diagram for MVT.
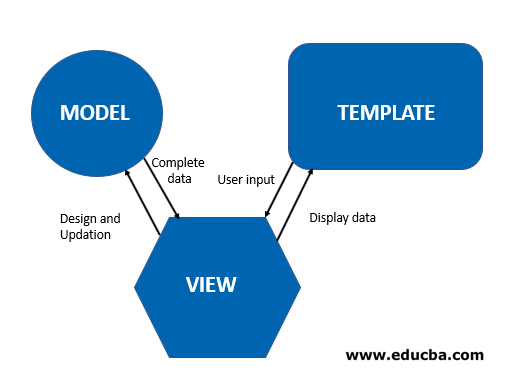
The Template handles the UI and architecture part of an application. The view does the logical part of the application and interacts with the Model to get the data and in turn modifies the template accordingly. Here as already mentioned, Django works as a controller and gets a URL that is linked to the view part of the application and thus transports the user responses to the application. This complete interaction is dealt with this Django MVT architecture. When we create a project, there would some default files that would be created.

I used the above command to create a new project in my my_projects folder. Now let me show you the files that got created in the empty folder once the above command has been executed. These are the files that got created under the project first that we created.

There is, in turn, one more folder and a manage.py file that has been created. Now going into the first folder, we can observe the below files.

So the above files are those that got created automatically once a new project has been created.
- urls.py: As we know that our web page has to deal with many links, all the mappings from one page to others can be done here.
- wsgi.py: This is used to deploy our project.
- manage.py: Gives us a URL where the project can be displayed.

After running this command, the output is as follows.
Output:
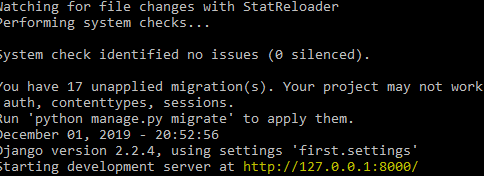
Check the output by using the URL in any web browser. We have learned about this, as there should be some start in learning how to create a project on your own and work on it to clearly understand how the MVT architecture runs using Django with Python.
Django Architecture Model
- In Django, the model does the linking to the database and each model gets mapped to a single table in the database. These fields and methods are declared under the file models.py
- With this linking to the database, we can actually each and every record or row from that particular table and can perform the DML operations on the table.
- Django.db.models.The model is the subclass that is used here. We can use the import statement by defining as from django.db import models.
- So after defining our database tables, columns and records; we are going to get the data linked to our application by defining the mapping in settings.py file under the INSTALLED_APPS.
Django View
- This is the part where actually we would be mentioning our logic. This coding is done through the python file views.py
- This view also sends responses to the user when the application is used, to understand briefly, we can say that this view.py can deal with HttpResponse.
- Now, after creating a view, how can we link it to our application? How do you think that the system is going to understand to display a particular view? This can be done by mapping the views.py in urls.py file. As already mentioned, urls.py keeps track of all those different pages that we created and hence map each of them.
Django Template
- This template helps us to create a dynamic website in an easy manner. The dynamic website deals with dynamic data. Dynamic data deals with a scenario where each user is displayed with their personalized data; as Facebook feeds, Instagram feeds, etc.
- The configuration of the template is done in settings.py file under INSTALLED_APPS. So python code would search for the files under the template subdirectory. We can create an HTML file or import any dynamic web page from the browser and place it under the template folder.
- And after that our usual linking of this file in urls.py and views.py to get a response is mandatory.
- In this way after linking all these together and running the server, we can get our web application ready.
Django Template Language
In short, it is called as DTL. Django template has its own syntax in rendering the data on to the web page. For displaying a dynamic variable, the variable name is written inside the curly braces; denoted by “{{variable_name}}”. And to write if conditions, the syntax would be defined as: {% if condition %}. The same would be followed for the end if syntax also. Django uses render function in DTL. This render function takes three parameters.
- Request
- Mentioning the path of template in settings.py
- Parameters that contain all variables and can create as many as possible.
By these render functions we can have our DTL to make dynamic web pages.
Conclusion
So, this is how the it works. The main python files are used to link with each other to display our web page are settings.py, view.py, and urls.py
Once we define our logic here respectively we can have a workflow linking the database, taking user inputs and responses and display dynamic web pages. After installing Django, go through the files and understand the linking between them.
How to Install Django

Introduction to Install Django
Django is an open-source web framework that is based on the Python programming language. It is maintained by an independent organization called Django Software Foundation. The primary goal of Django is to provide ease to complex and data have driven websites. This framework is used to focus on reusability and plug-ability of components where less code and low coupling with the rapid development is given preference. To install Django, first, you need to install Python on your local machine. So installing python is also covered in this document.
Steps to Install Django
For installing the Django, it needs a stable and good internet connection.
Let us discuss the steps required to install Django:
Step 1: First, visit the official site of Python, which is given below as:
https://www.python.org/
Step 2: After landing to the above web page, click on the downloads button shown below as and select your operating system installed in your local system.
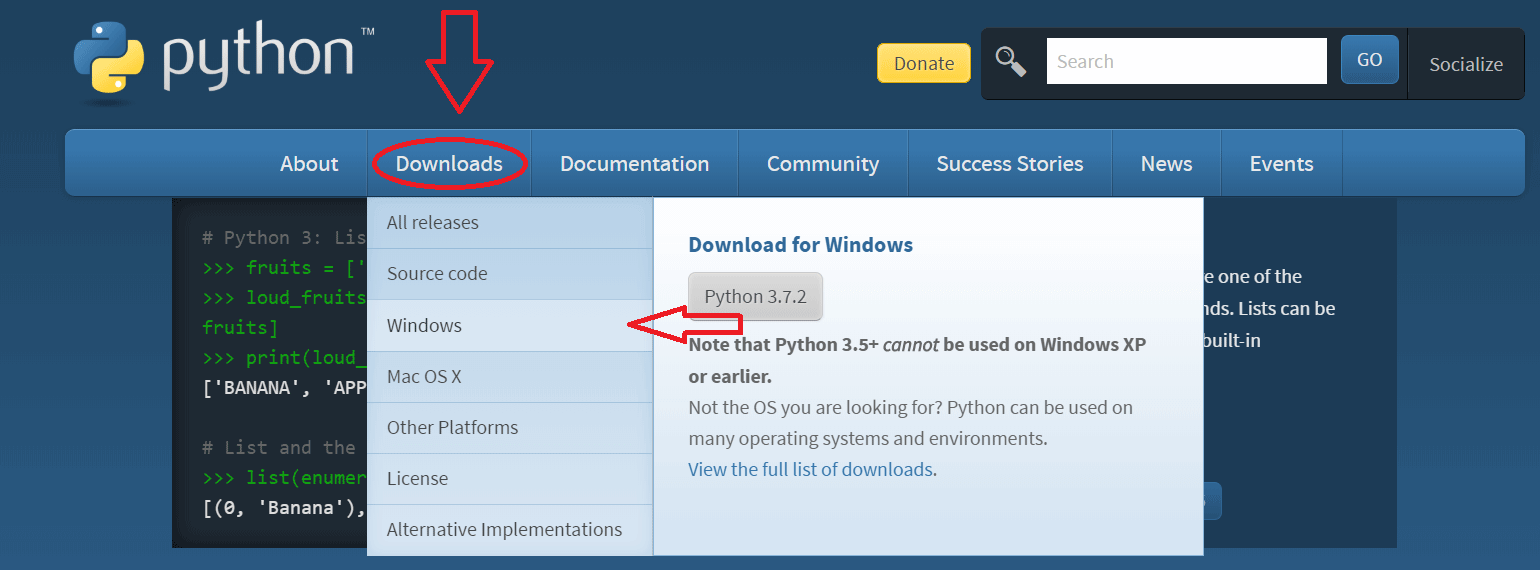
In my case, I have clicked on windows.
Step 3: It will redirect to another page where on the very top you will get the title Python Releases for Windows, and just below you will get the Latest python release which is shown below as:

Click the very first link, which is Latest Python 3 Release-Python 3.7.2. This is the latest version available now; for this time, you may get the higher version as well but always use the first link.
Note: If a user uses Windows XP or older windows like Vista, click on the second link, Latest Python 2 Release- Python 2.7.15.
Step 4: After clicking on the above link, it redirects to other pages where on the top it shows the latest version of the Python. Just scroll down you would get the title files under which multiple download options are available, as shown below:

For Windows 64-bit system, select the first Windows x86-64 web-based Installer marked in red and click on that, whereas for 32-bit system, select the last red-marked Windows x86 web-based installer.
Step 5: It will take some time to download the file; when it gets complete, save that installer file. Then, please click on the installer file, but for this, one should have a stable and good internet connection.
Step 6: When you click on the downloaded file, it will start a setup launch. The first step is to select the checkbox and click to tick the “Add Python 3.7 to PATH”, which shows at very extreme below marked in red. Then click on the Install Now as shown below. If one doesn’t select the Add Python 3.7 to PATH, it has to call Python manually each time, and it will take lots of time, so please tick the checkbox.
Next, you can refer to the below-provided image:

Step 7: When one clicks on the Install button, it will start a warning message “Do you want to make changes in your system” so please click on Yes. It shows for few systems, and for a few, it won’t; it depends upon the system.
Then Setup progress as installation will start and looks as below:
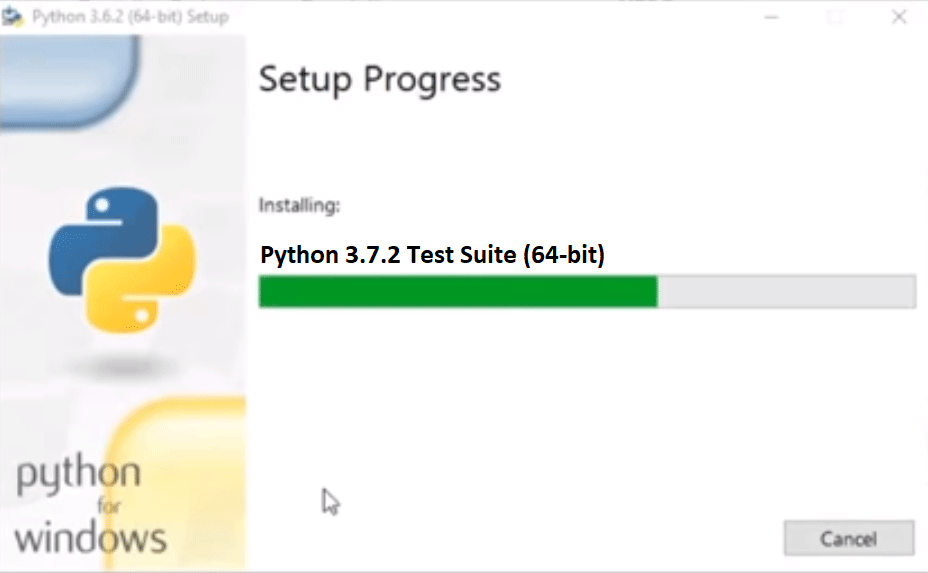
Step 8: And when it is done then it shows “Setup was successful” shown below:

Now click on the Close button.
Step 9: To check that Python installed successfully or not. Press Windows (Hold this button then) + R (button from keyboard), it will open the Run command. Type “cmd” and press on OK button.

Step 10: It will open the command prompt.
Code:
Python --version
Output:
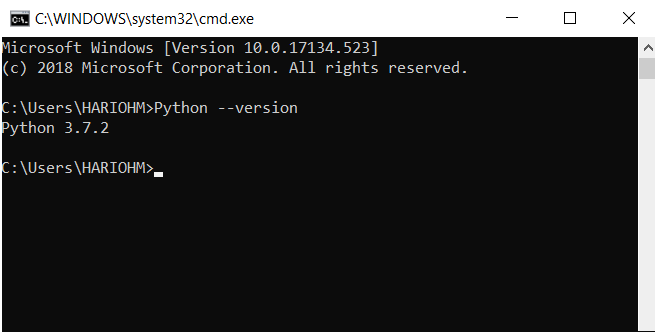
If Python is successfully installed, then it shows the version; otherwise, it shows an error. In this case, it shows Python 3.7.2, so Python installed in my system successfully.
Step 11: Then check the current version of pip. Pip is used to install the other packages in the python environment.
Code:
pip --version
It will show the installed version of the pip as shown below:
Output:

Step 12: Now we’re ready to install the Django because we have set up the environment to install Django. Please use the given URL to open other web pages for Django installation: https://docs.djangoproject.com/en/2.1/howto/windows/
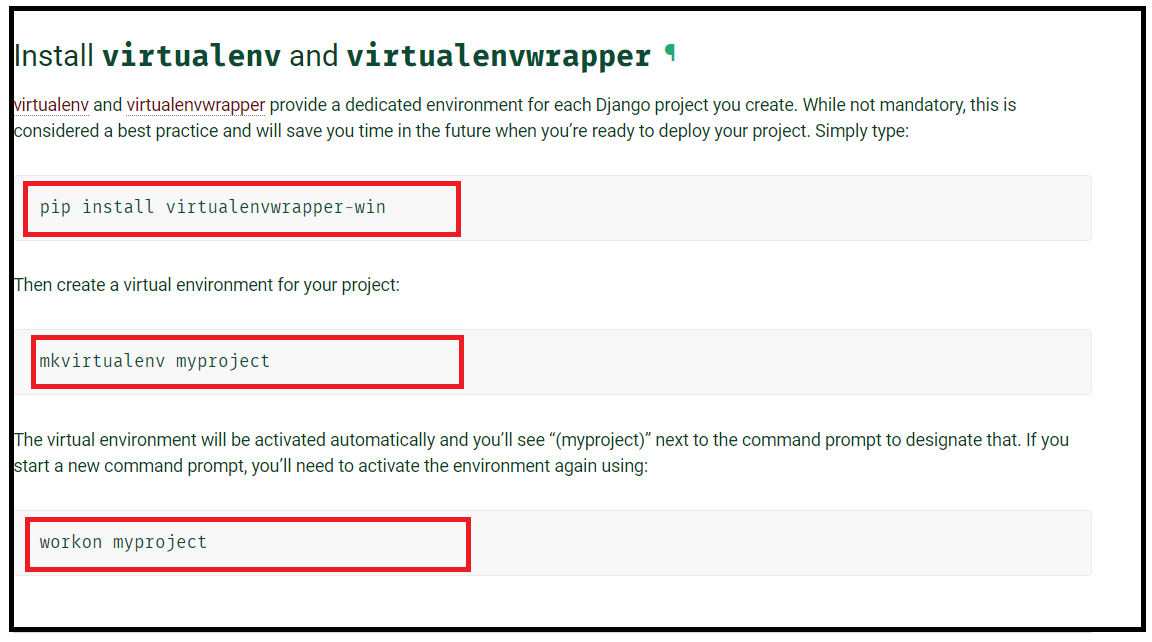
Step 13: When the web page opens, scroll down a little bit and stop where it shows “Install virtualenv and virtualenvwrapper title”, shown just above. One needs to use three commands which are marked in red. First, one needs to install the virtualenv and virtualenvwrapper to provide the virtual dedicated environment for Django. Just below this title, there is code available to install the virtual wrapper.
Code:
pip install virtualenvwrapper-win
Step 14: Type Powershell in windows search bar, and it gives the result Windows Powershell on top then right-click on Windows Powershell and click Run as administrator shown as:
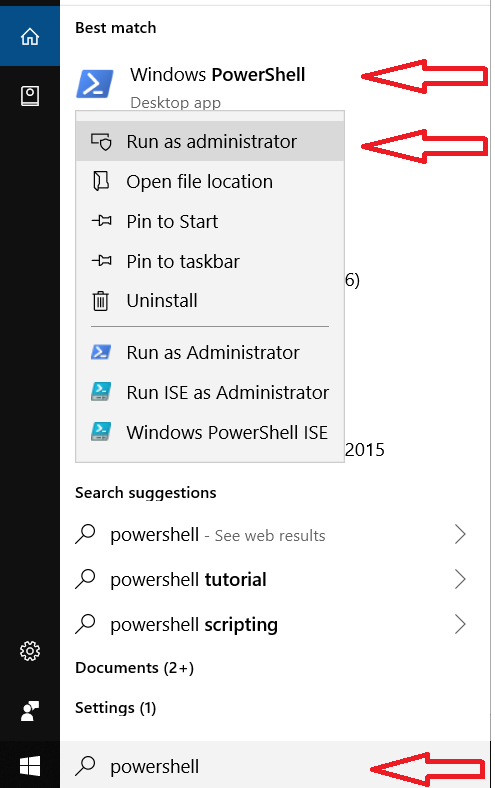
Step 15: It will open the power shell and then type the code pip install virtualenvwrapper-win given in the 13th step it will take some time to install the virtual wrapper environment in windows.
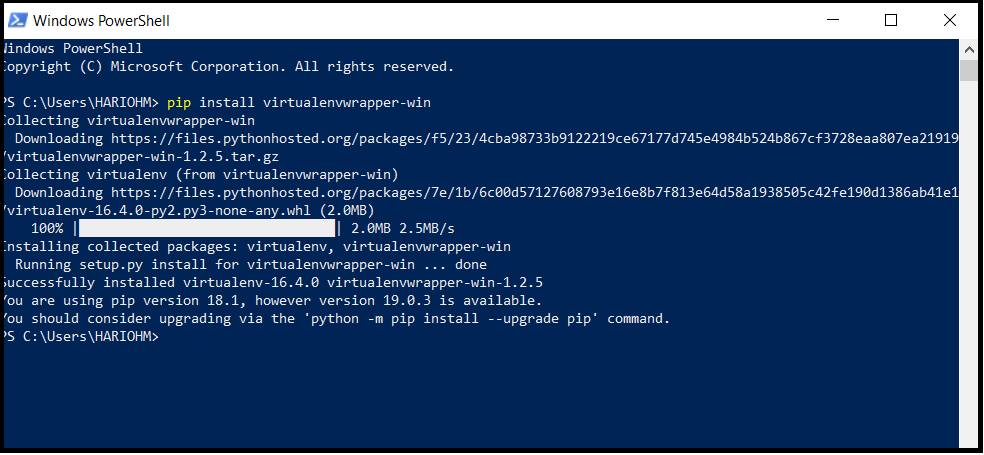
Virtual wrapper environment installed successfully.
Step 16: Then, create a virtual environment for a Django project. The code is available in URL: https://docs.djangoproject.com/en/2.1/howto/windows/
Type this code or copy the code from the webpage to the Windows Powershell, which is given as:
Code:
mkvirtualenv myproject
It will create a virtual environment and shown as:
Output:

Step 17: Now activate the virtual environment. So copy the code from the given URL or from below and type in Windows Powershell.
Code:
workon myproject
Output:

Now my virtual environment is ready for the installation of the Django.
Step 18: Now finally install the Django using the pip command as shown below:
Code:
pip install Django
Output:

It will take some time for installation, but before installation, makes sure that your virtual environment is ready, which is done in step 17.
Step 19: Now Django is installed successfully. To verify the Django installation, type the following code in Windows Powershell as given below:
Code:
django-admin --version
Output:

If it shows the version of Django, it means Django is installed successfully if not then please check the previous step. Here it shows 2.1.7 which is now the latest Django version.
Uses Of Django

Introduction to Uses Of Django
Django is an open-source python web framework used for rapid development, pragmatic, maintainable, clean design, and secures websites. A web application framework is a toolkit of all components need for application development. The main goal of the Django framework is to allow developers to focus on components of the application that are new instead of spending time on already developed components. It is fully featured than many other frameworks on the market. It takes care of a lot of hassle. involved in web development; enables users to focus on developing components needed for their application.
Top 10 Uses of Django
Below is the list of top 10 Uses are as follows:
1. Django is time-tested
It’s been 13 years since Django started developing its framework and the first release of open source commit as it was under development quite a long time before release. During these years, it had many releases; some of them have new features, other releases focuses on security enhancements etc. Django is the first framework to respond to new issues and vulnerabilities and alter other frameworks to make patches to frameworks. The latest release of it is focusing on new features and boundary case problems.
2. Application Development
Django was developed by the online news operation team with the aim to create web applications using the Python programming language. The framework has templates, libraries, and APIS, which work together. In general, applications developed using Django can be upgraded with minimal cost, changes, and additions, and it makes a lot of web development easier.
3. Easy to Use
Django uses Python programming language, which is a popular language in 2015, and now most choosing language by programmers who are learning to code and applications of Django framework is widely used as it is free and open-source, developed and maintained by a large community of developers. It means we can find answers to the problems easily using Google.
4. Operating System Dependent
Django framework runs on any platform like PC, Windows, Mac, Linux etc. It provides a layer between the developer and database called ORM (object-relational mapper), which makes it possible to move or migrate our applications to other major databases with few lines of code change.
5. Excellent Documentation for real-world application
Applications of Django has one of the best documentation for its framework to develop different kinds of real-world applications, whereas many other frameworks used an alphabetical list of modules, attributes, and methods. This is very useful for quick reference for developers when we had confusion between two methods or modules but not for fresher’s who are learning for the first time. It’s a difficult task for Django developers to maintain the documentation quality as it is one of the best open-source documentation for any framework.
6. Scalable and Reliable
As Django is a well-maintained web application framework and widely used across the industries, so cloud providers taking all measures to provide support to run Django applications easily and quickly on cloud platforms. It means, once Django applications deployed then they can be managed by an authorized developer with a single command in a cloud environment. As Django developers are working in the same development environment for a long time so they will grow and expertise in these areas which means applications developed, websites created are getting better day by day, more functional, efficient, and reliable.
7. Community Support
Django community is one of the best communities out there as it is governed by the Django software foundation, which had some rules like for event there is a code of conduct. Django communities will have IRC and mailing list most welcome; even it may have bad appeals, it will rectify immediately. Django offers stability, packages, documentation and a good community.
8. DRY – Don’t repeat yourself
Django framework follows the don’t repeat yourself principle as it concentrates on getting the most out of each and every line of code by which we can spend less time on debugging or code re-orientation etc. In general DRY code means all uses of data change simultaneously rather than a need to be replicated, and its fundamental reason to use of variables and functions in all programming.
9. Batteries of Django
Django framework has everything to build a robust framework with main features as below:
- Template layers,
- Forms, development process,
- Views layers, security,
- Model layers, python compatibility,
- Localization, performance, and optimization
- Geographic framework, common tools for web application development
- Other core functionalities required for websites.
As Django can be used to build any type of website with the help of its frameworks like content management, Wikipedia pages, social networking applications, chat applications, and websites like Mozilla, Instagram, Pinterest, BitBucket etc. Django can work with any client-server application and able to deliver content in any form (HTML, Text, JSON, XML, RSS etc.)
10. Django Benefits
With the uses of the Django framework, we can develop and deploy web applications within hours as it takes care of much of the hassle of web development. Django is very fast, fully loaded such as it takes care of user authentication, content administration, security as Django takes it very seriously and helps to avoid SQL injection, cross-site scripting etc. and scalable as applications can be scalable to meet high demands and used to build any type of applications that’s why we call it as a versatile framework. We can build different applications from content management to social networking websites using the Django framework. It offers lots of resources and good documentation, which helps new learners to learn and experience people for reference.
Conclusion
Finally, it’s an overview of Django, how we need to use it, and its uses in real-world application development as Django framework is versatile and allows developers to concentrate on business logic instead of writing common utilities which will be taken care of by Django itself. So choose Django if you need to complete your web application or website within a short time with full security and offers fast, reliable and scalable services based on traffic. Many good websites are developed using Django frameworks like Instagram, BitBucket, and Mozilla etc.
Applications of Django

What is Django?
Django is an open-source, free web framework written in Python. This Django helps us build an end to end complete web application. Django using python language, we can create a web page, through which users can send any requests and view the content of the web page.Thee responses between the back-end and user UI are also done by Django, as we have already seen in the Django architecture. Finally, any updates, select, insert statements into the database also can be done using Django integrated with different databases.
Uses of Django
Let us first understand why and in which scenarios Django is used:
- Usage of the Django framework is for a complete and fast development just like other programming languages like C, C#, Java, etc.
- This can be used to handle a large amount of data, heavy continuous traffic, and dynamic data handling.
- We can certify that the code development would be faster in Django, as it has a great feature of re-usability, which would reduce time and space in writing the same code many times.
- This framework can be easily customized.
- The designing technique is clean enough that it could be easily understandable and managed.
Applications of Django
Now, as we have seen why actually we can use the Django framework, now let us check up on what all applications it is used:

1. Instagram
This is one of the most used social networking applications which is used in sharing photos/videos within your network. In this application, when a user logs in, the news feed or the home page is definitely going to differ from other users. This feed is technically based on user-specific interest. This place is where a huge amount of data needs to be handled. This application must be able to easily update the existing features even without complete detailed knowledge of the backend database. Through which we can have fast updates and new features.
Handling this huge data must have to make sure that the security is nowhere to be compromised. Django here is resistant to SQL Injection. Instagram is completely based on the Django framework with extraordinary scalability availability.

2. Disqus
This application is the most used. But why? This is an application that hosts blog commenting globally. This application is being integrated with any social media platform. Using this application, any user would be able to comment under any article news, photos videos, etc. So obviously, this would require handling lots and lots of user details and maintain a large database. This, in turn, can be used in reviewing and performing analytics. This is done with the help of Django framework included with Postgre SQL, or MySql, which would also work.

3. Spotify
Many of us might be currently using this application. This is an app for music. It is mainly developed with Django technology with machine learning algorithms using python. We can create our playlists and based on the song which we like to hear there would many recommendations pouring in based on that. So, as understood, even this application also has its own feed differentiated between all the users. This is also available as a UI application. It requires large database storage to display each user’s choices and display them whenever they log in to their app.

4. YouTube
Yes, the Django application is used in this trending video sharing application as well. Previously this application has been using PHP, but now this is shifted to python for better scalability. Handling much data and delivering proper content to billions of millions of users, Django has been preferred in handling this. We cannot say that the total application is being used with Django but a certain part of it is done in Django. This application that Google has owned that Django would be a better framework that can handle rapid developments easily and perfectly.

5. DropBox
As you already know that this application is for the global accessing of your files anywhere you want. This application is developed using Python. In this scenario, our Django application will help store, share, and sync all these different types of files. In both UI level and mobile app level, the development is done using Python itself. Using Django made development fast and easy in many ways with respect to usage.

6. Bit Bucket
This is also a well-known repository that is launched around 2008, but it got more famous by 2017. This has been developed using Python with the Django framework. So any new feature developments would be easy as the coding from scratch has been done using python only. This is a place where developers put in their code so that anyone can use them and gain knowledge from it.

7. Mozilla
This is a well-known web browser, and do you believe that this application is running on python. Almost all the web browsers currently being developed now are using python, and Djangotto maintains the load on the servers. These browsers use this trending framework as Django is able to handle any number of views or the big number of hits on the website.

8. Prezi
This is a replacement to powerpoint there are many other features that are built-in here. The scalability of Django has made application development.
Conclusion
As we had already checked upon all these applications, we can definitely be sure that the Django framework completely withstands a large amount of data. This functionality of Django has all the scalability, which made many applications to prefer this web framework. Because of its flexible and easy deployment, nature made this framework to be chosen by all the upcoming applications. So, let’s learn and practice python with the Django framework.
Django Cookies

Introduction to Django Cookies
Django is a framework that gives us the option for handling cookies. Cookies provide an option which store and retrieve data which is stored in sessions. These cookies have an expiry date and those are lost after a certain period of time. We already know that, whenever we log in to any web page or application the site default would ask for storing of user id and password, auto-filling of few details with respect to the last logged in sessions are all the work done by cookies. Similarly, we can store our cookies on the client-side and help end-user making their work much easier.
Create Cookies
We can create Django cookie using function set_cookie() and forgetting the response we need to have get() function also.
Syntax:
set_cookie(name, value, max_age=None)
Here, the name would be the name of the cookie set, value is the data that we want to store in the cookie and max is the maximum time limit that cookie has to be expired. This is an optional field, so if no time is set, the cookie would exist till the browser is closed.
How to set Cookie Using Django?
Let us see a small example of how we can manually set up a cookie using Django:
1. view.py
Code:
from django.shortcuts import render
from django.http import HttpResponse
# Create your views here.
def home(request):
return HttpResponse("Welcome")
def setting_cookie(request):
response = HttpResponse("We are setting a cookie")
response.set_cookie('Learning', 'Django',5)
return response
def getting_cookie(request):
first_test  = request.COOKIES['Learning']
return HttpResponse("Practice: "+  first_test);
Explanation to the above code: Through the above code, we can observe that for displaying any output to the screen we are using the HttpResponse function. And, for displaying or obtaining the cookie which is set, we are defining it in a different function and then we are using the request function with variable/expression COOKIE added to it. We are henceforth setting a variable with the value of the cookie setting.
2. urls.py
Code:
from django.urls import path
from . import views
urlpatterns = [
path('', views.home, name='home'),
path('setc', views.setting_cookie, name='setc'),
path('getc', views.getting_cookie, name='getc')
]
Explanation to the above code: In the python file urls, we define all the paths that are to be linked with respect to each function that is being written in the views file.
After running the server through the command line: python manage.py runserver
Output:

Getting the Cookie Response:

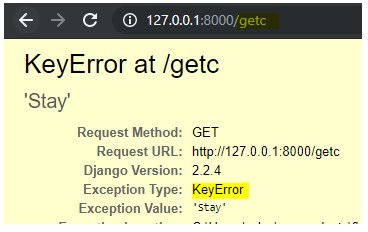
As highlighted above in views.py code, we had kept the maximum time that cookie has to be saved. Once the time limit is crossed we get the below error:

There is a large description of the error below, please try for yourself and check the total error that has been obtained.
Modify Cookie
Now let us see how we can modify a cookie.
1. view.py
from django.shortcuts import render
from django.http import HttpResponse
# Create your views here.
def home(request):
return HttpResponse("Welcome")
def setting_cookie(request):
response = HttpResponse("We are setting cookie")
response.set_cookie('Learning', 'Django')
return response
def updating_cookie(request):
response = HttpResponse("We are updating  the cookie which is set before")
response.set_cookie(Learning, 'Happy')
return response
def getting_cookie(request):
first_test  = request.COOKIES['Stay']
return HttpResponse("Always be: "+  first_test);
We can understand that we have written another function to set up a new cookie value which in turn updated the old one.
2. urls.py
from django.urls import path
from . import views
urlpatterns = [
path('', views.home, name='home'),
path('setc', views.setting_cookie, name='setc'),
path('updc', views.updating_cookie, name='updc'),
path('getc', views.getting_cookie, name='getc')
]
Explanation to the above code: In views.py we have added a new function that is updating our already set cookie. And then in our get function, we are returning the cookie which is set after the updating.
Output1:

Output2:

Output3:

Output4:

If you can observe here the value of the cookie has been updated for the previously set value to the updated value. In this way, we can modify or update the cookie value once set.
Update Django Cookies
We have another way of updating a cookie using the redirect function instead of Httpresponse. But still, we use the set_cookie function only. Below is the code for it, as we added a new function in
view.py
Code:
def updating_cookie1(request):
response = redirect(home)
response.set_cookie('Learning', 'Practising')
return response
Output1:

Output2:

Output3:

Delete Cookie
Here let us get into on how we can delete a cookie that is set.
We already know that there is an optional parameter for the set cookie function called max_age, which would delete the cookie session by default. To make it much simpler, we added the below-mentioned code to the above code.
1. view.py
Code:
def deleting_cookie(request):
response = HttpResponse("We are now finally deleting the cookie which is set")
response.delete_cookie('Learning')
return response
The above code is added in the views file and above the getting_cookie function.
2. urls.py
Code:
from django.urls import path
from . import views
urlpatterns = [
path('', views.home, name='home'),
path('setc', views.setting_cookie, name='setc'),
path('updc', views.updating_cookie, name='updc'),
path('getc', views.getting_cookie, name='getc'),
path('delc', views.deleting_cookie, name='delc')
]
Output1:

Output2:

Output3:
- We even have an attribute name ‘expires’ for handling the end session for a cookie.
- As an exercise try using the expire function and handle deleting a cookie.
- The code can be written as mentioned in the below format:
- response.cookies[‘cookie_name’][‘expires’] = datetime.today() + timedelta(days= number_of_days)
- So, this is how we can delete the cookie.
Enable and Disable Django Cookies
The cookies enable and disable are based on the settings python file. The session variables are present in the settings file which can handle session cookies. The enabling and disabling of cookies are done manually by setting, updating and deleting cookies. There are session-level cookies also, which can be set to true when required. They are set to FALSE by default. These session cookies are encrypted and make sure those are secured. By using different techniques we can use session cookies and update the number of counts whenever a particular website is visited.
Conclusion
Here we have learned on what cookie is and how to handle them. We created Django cookies, updated them and even deleted those cookies. We can have our cookie set with the login user id and password in the same way as many websites are now portraying of. These cookies can help in easy retrieval of data as whenever a user requests for data it does not always go, search in the database and then fetch details for the user. But at the same time, we must be beware of hackers while handling these cookies.
Django Framework
Introduction to Django Framework
Django is a Python-based server-side web framework used worldwide to make web applications. Some of the top companies using Django are:
- NASA
- Google (Youtube)
- Instagram
- MIT
Since Django employs Python, we can deploy regular websites and Machine Learning Models, such as for Speech Recognition, Fraud Detection, etc., over the web. Django has a very modular approach called MVT (Model-View-Template) architecture. Following this architecture makes the code very easy to develop, deploy and maintain.
Django also provides a built-in Admin module that can be used to store master values on the website. For example, for processing a Loan application, there may be a screen called “New Loan” then in this form, suppose there is a drop-down menu for Loan Types, Personal Loan, Car Loan, Home Loan, etc., then these values are maintained through the admin panel.
Understanding Django Framework
As we know that Django has an MVT architecture, we will go step by step in explaining each term.
The moment we install the Django framework and create a new project, the following files (the most important and frequent) are automatically created for us to write our code :
- models.py
- views.py
- settings.py
- urls.py
Each of these files is intended for code modularity. settings.py file stores all the custom configurations, such as database connection parameters, server details on which the application will be hosted, global variables that can be accessed throughout the application, etc.
urls.py file has a list of all the custom URLs which will be used in the application to access different pages. Let us look at the models, views, and templates.

Model
Model in Django refers to Database Tables created per the requirements to store data. For example, if we want to create a Bank website, then we need tables to store customer data such as Customer Name, Account Number, Bank Balance, etc. The code for writing these models is put into the models.py file.
Now you may wonder which database to use for creating Django Models. Relax! Django supports all major databases (Oracle, PostgreSQL, MS SQL Server, MySQL ), and you need not worry about different types of SQL for different databases. Because Django implicitly can translate your Python code into corresponding Database SQL.
View
View in Django refers to what needs to be done/processed over the requests received from the client to the server. These HTTP requests (GET, POST, etc.) can be for specific purposes such as Account Debit, Account Credit, Creating a new account, etc.
Views, in turn, interact with models to store/retrieve/delete data. The code for writing these views is put into views.py
Template
Templates refer to the HTML pages which the user sees. It contains the background images, TextBoxes, Buttons, etc., which are rendered in the client’s browser and gives the website a look and feel.
Templates don’t have a .py file because templates are HTML codes. Hence, we have to make a templates folder and keep all the .html files in this folder.
Why Use Django?
Django is popularly known as a “Web framework for perfectionists with deadlines.” This is a very apt saying because all the components you may require to build a web application come bundled with this framework viz., in-built web server and SQLite Database. Also, the admin panel prevents reinventing the whole wheel, and the developer can focus on writing the core application code rather than creating basic necessities.
The other most important feature of Django is “SECURITY.” Django forces the developer to implement security-related features into the application; otherwise, the code does not execute successfully. For example, csrf (Cross-Site Request Forgery). csrf is a random token generated every time we submit form data. The Django server validates this token on every HTTP POST Request it receives. If some hacker tries to attack, then this token becomes invalid and our application remains secure.
Another interesting feature of Django is – Template extensions and Tags. Django provides with tons of template tags that can be used directly in the templates (.html codes), thus preventing development effort and reducing the size of templates. One template (for ex: base.html) can be easily extended into another template, and as a result, this other template reduces to only a few lines of HTML code.
Importance of Django Framework
Until now, you must have got a fair idea of how Django can be so useful. The importance of Django can be realized from the fact that the world’s top companies use Django for their application. This includes Mozilla, NASA, Instagram, Pinterest, Dropbox, and many more. The market is full of Django opportunities, yet only a few people are available; hence Django people easily get the upper hand.
Moreover, cloud service providers such as AWS have a dedicated service to host Django applications called Elastic Beanstalk which provides managed Apache server, PostgreSQL, Load Balancer, and AutoScaling for Heavy Load applications. Django applications can also be exposed as APIs for consumption by Third Party Software. This is done by using the Django REST Framework.
Django Prerequisite
Python is the single most important prerequisite for learning Django. More specifically, Concepts related to Class, Inheritance, Functions, and Data Structures (Lists, Dictionaries, Tuples) should be very clear because the entire Django framework revolves around Classes and Functions.
Also, to develop the front-end (Templates section), knowledge of HTML, Javascript, and AJAX will greatly help. To install Django, you need your Computer with Linux/Windows with Python installed. Then with a single command (pip install Django), Django becomes your playground.
Conclusion
Django is extremely rapid in development, scalable and flexible in design, and highly secure and reliable. The vast Django community solves any problem you might face during Django development. If you practice and master the basic concepts of Django, then you can build Production-Ready web applications in a matter of a few days.
Django Views

Introduction to Django Views
All views for a Django application are placed in views.py file. Here a view is a python function that takes in a request and returns a response. The response can be an HTML-oriented web page or it could be an XML document even an error message or even an image. The view itself hold anything subjective in logic is essential to go back as a response. The code can be placed anywhere needed until it is associated with the python path. Every view is callable and holds the capability to take a request and response. It is more than a function.
How to Create a Plain Django View?
Below we learn how to create a plain Django View:
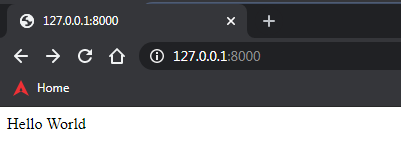
1. Declare the Function in views.py file of the Django Application
For Declaring the view in Django we need to have an HTTP request and a response. The HTTP request will be automatically created by the Django framework. the response for this request needs to be created by the programmer. This response will be placed in the HttpResponse() method of Django.http package. HttpResponse has subclasses counting Streaming HttpResponse , JsonResponse and FileResponse.
Every function created in this views.py file will be considered as a separate view for that application.
Code:
from Django.shortcuts import render
from Django.http import HttpResponse
def view1(request):
return HttpResponse ("Hello World")
2. Tag the view in urls.py File
This is the process of creating a url for the view. The url mentioned here will be used for reaching the web page which is been mentioned.
- Import the library from django.conf.urls import url.
- declare a url entry in the urlpatterns list
url(url_path , view_to_be_tagged , name_for_this_view)
Code:
from django.contrib import admin
from django.conf.urls import url
from Django_app1 import views
urlpatterns = [
url(r'^$',views.index,name='index'),
url(r'admin/', admin.site.urls), ]
3. Reload the server using python manage.py runserver command and verify the webpage.
4. On running the server the below-mentioned system message will be printed on to the console, from the given message we can notice the time at which the server was kickstarted, the version of the Django setup which is been used, and the HTTP link at which the server is kickstarted.
Code:
Watching for file changes with StatReloader
Performing system checks...
System check identified no issues (0 silenced).
June 07, 2020 - 10:13:00
Django version 3.0.7, using settings 'educba.settings'
Starting development server at http://127.0.0.1:8000/
Quit the server with CTRL-BREAK.
Output:

Django View Rendered from Templates
The Templates are very helpful in understanding how the functionality of Django works. these templates hold the static items in an HTML page. it could be the Skelton of the page. To render a view from a template the below steps are followed.
1. Create a Template Folder: All template related HTML code could be placed into this folder. The template folder has to be created under the primary project folder.
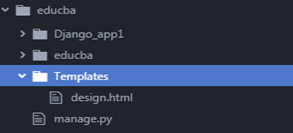
2. Tag the Template Folder in settings.py File: The created Template folder needs to be tagged in settings.py file. So Once tagged it allows every HTML file placed under the templates folder as accessible around the veiws.py file.
Code:
import os
# Build paths inside the project like this: os.path.join(BASE_DIR, ...)
BASE_DIR = os.path.dirname(os.path.dirname(os.path.abspath(__file__)))
Template_DIR = os.path.join(BASE_DIR,'Templates')
TEMPLATES = [
{
'BACKEND': 'django.template.backends.django.DjangoTemplates',
'DIRS': [Template_DIR,],
'APP_DIRS': True,
'OPTIONS': {
'context_processors': [
'django.template.context_processors.debug',
'django.template.context_processors.request',
'django.contrib.auth.context_processors.auth',
'django.contrib.messages.context_processors.messages',
],
},
},
]Template_DIR = os.path.join(BASE_DIR,'Templates')
3. Place an HTML file inside the Templates Folder
Code:
<!DOCTYPE html>
<html lang="en" dir="ltr">
<head>
<meta charset="utf-8">
<title>Django App1</title>
</head>
<body>
<h1> Hello world from HTML page <h1>
</body>
</html>
4. Render the HTML File in views.py using() Method: The render function of Django is used to give the newly created HTML content to The render method combines a template with the context dictionary to return a HttpResponse object.
Syntax:
render(request, template_name, context=None, content_type=None, status=None, using=None)
| arguments |
Description |
| Request |
This is used to generate a response. This is a mandatory argument. |
| Template Name |
Name of the template used for this view. This is a mandatory argument. |
| Context |
A context is a variable name and variable value mapping maintained as a dictionary. In default, this is an empty dictionary. So if the key is passed the corresponding value from the dictionary can be retrieved and rendered. This is an optional argument. |
| content_type |
MIME(Multipurpose Internet Mail Extensions) to be used. The default value is ‘text/html’. This is an optional argument. |
| Status |
The response code to be used. The default response code is 200. |
| Using |
This argument is used to represent the name of the template engine used for loading the template. This is an optional argument. |
Code:
from django.shortcuts import render
from django.http import HttpResponse
def index(request_iter):
return render(request_iter,'design.html')
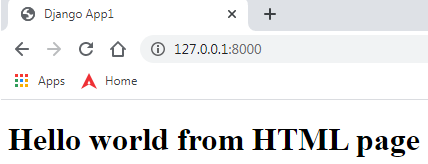
5. Reload the server using python manage.py runserver command and verify the webpage.
Output:

Django view Rendered from Template TAG
The template tags are used for injecting dynamically generated content to the Django views. This is among the key functionalities of the template tag. They could flexibly inject dynamic contents into the file.
Code:
<!DOCTYPE html>
<html lang="en" dir="ltr">
<head>
<meta charset="utf-8">
<title>Django App1</title>
</head>
<body>
<h1> Hello world from HTML page <h1>
{{ Key1 }}
</body>
2. Add a context template dictionary in the view and tag the dictionary to the context.
Code:
from django.shortcuts import render
from django.http import HttpResponse
def index(request_iter):
dict_Var = {"Key1" : "The Template tag value is rendered with reference to key1"}
return render(request_iter,'design.html',context=dict_Var)
Output:


Conclusion
Django being the most predominant method for web-based applications. the concept of views are very firmly implied in a Django framework such that these views could generate responses in the most flexible way possible. Concepts like templates and template tag processes in Django views add additional stability set up in making it as one among the most predominantly used web application framework.
Django Forms
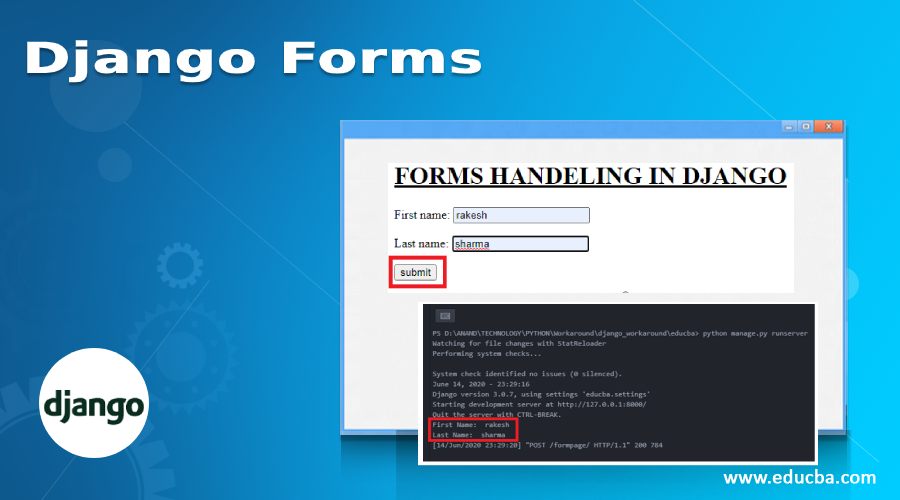
Introduction to Django Forms
For a web application creation forms is a critical capability, These forms act as the key source through which the user keyed in input enters into the application. This user keyed-in input could be further validated and processed in a precise manner. These are among the key capabilities in form processing. Django offers a classified set of methods for formulating the form entities.
How to Create a Django Form?
Create a Django form are explain below:
1. Create a forms.py file in the application
The forms.py file is similar to models.py, All fields used in the form will be declared here under a form class.
Example – forms.py
from django import forms
class Valueform(forms.Form):
user = forms.CharField(max_length = 100)
2. Create a View for The Form
A Django view method is created for the form in the views.py file. An object for the form class is created here. this object is used as a value for the context dictionary in the template rendering.
Example – views.py
from django.shortcuts import render
from django.http import  HttpResponse
from Django_app1.forms import Valueform
defform_view(request_iter):
form = Valueform()
return  render(request_iter,'Form_Handeling.html', {"form": form})
3. Formulate an HTML file for displaying the form
An HTML file needs to be created in the templates directory for displaying the form, here the file is template tagged using the below tag,
{{ form.as_p}}
here “as_p” is used for better designing of the form elements. the {% csrf_token %} line is used for attesting the internal security verification performed by django.
Example
<!DOCTYPE html>
<html lang="en" dir="ltr">
<head>
<meta charset="utf-8">
<title>Django App1</title>
</head>
<body>
<h1><u> FORMS HANDELING IN DJANGO </u></h1
<div style = "max-width:470px;">
{{ form.as_p }}
{% csrf_token %}
<input type="submit" class="btnbtn-primary" value="submit">
</div>
</body>
</html>
4. Tag the view in urls.py file
This is the process of creating a url for the view.
- Import the library from django.conf.urls import url
- declare a url entry in the urlpatterns list
url(url_path,view_to_be_tagged,name_for_this_view)
Example
from django.contrib import admin
from django.conf.urls import url
from Django_app1 import views
urlpatterns = [
url(r'^$',views.index,name='index'),
url(r'formpage/',views.form_view,name='form'),
url(r'admin/', admin.site.urls), ]
Output:


All Form Fields Available in Django Forms
Form fields available in django forms are as given below:
| Field type |
Django form field type |
HTML output |
Description |
Django Widget |
| Boolean |
forms.BooleanField() |
<input type=’checkbox’> |
Creates a Boolean field |
forms.widgets.CheckboxInput() |
| Boolean |
forms.NullBooleanField() |
<select>
<option value=”1″ selected=”selected”>
Unknown
</option>
<option value=”2″>
Yes
</option>
<option value=”3″>
No
</option>
</select> |
Very similar to Boolean fields but also allows unknown value |
forms.widgets.NullBooleanSelect() |
| Text |
forms.CharField() |
<input type=”text”> |
Creates a simple character field |
forms.widgets.TextInput() |
| Text |
forms.EmailField() |
<input type=”email”> |
Creates a field for email Input |
forms.widgets.EmailInput() |
| Text |
forms.GenericIPAddressField() |
<input type=”text”> |
Allows insertion of ip address |
forms.widgets.TextInput() |
| Text |
forms.RegexField( regex=’regular_expression’) |
<input type=”text”> |
A basic character field but here validation happens on the server side |
forms.widgets.TextInput() |
| Text |
forms.SlugField() |
<input type=”text”> |
A basic character field but allows only lowercase values to be entered |
forms.widgets.TextInput() |
| Text |
forms.URLField() |
<input type=”url”> |
Allows insertion of url |
forms.widgets.URLInput() |
| Text |
forms.UUIDField() |
<input type=”text”> |
A basic character field but server side the django validates whether the values is convertible to a UUID(Universal unique ID) |
forms.widgets.TextInput() |
| Text |
forms.ComboField(fields=[field_type#1,field_type#2]) |
<input type=”text”> |
Works just like CharField, Heredjango form fields are enforced with data pass rules on the server side. |
forms.widgets.TextInput() |
| Text |
forms.MultiValueField(fields=[field_type#1, field_type#1]) |
<input type=”text”> |
Allows creating form fields in custom manner. |
forms.widgets.TextInput() |
| Text / Files |
forms.FilePathField( path=’directory’) |
<select>
<option value=”directory/file_1″>
file_1
</option>
<option value=”directory/file_2″>
file_2
</option>
<option value=”directory/file_3″>
file_3
</option>
</select> |
This field is used for holding path of the directory |
forms.widgets.Select() |
| Files |
forms.FileField() |
<input type=”file”> |
Creates a field through which the user can attach a file to the form |
forms.widgets.ClearableFileInput() |
| Files |
forms.ImageField() |
<input type=”file”> |
Creates a field through which the user can attach an image to the form |
forms.widgets.ClearableFileInput() |
| Date/time |
forms.DateField() |
<input type=”text”> |
Works like a basic character field but on the server end the django setup validates whether the inserted value is of Date format. (e.g. 2020-11-23, 11/23/20). |
forms.widgets.DateInput() |
| Date/time |
forms.TimeField() |
<input type=”text”> |
Works like a basic character field but on the server end the django setup validates whether the inserted value is of time format. (e.g. 15:41:32, 11:44). |
forms.widgets.TextInput() |
| Date/time |
forms.DateTimeField() |
<input type=”text”> |
Works like a basic character field but on the server end the django setup validates whether the inserted value is of datetime format. (e.g. 2020-11-15 12:30:59, 11/15/20 13:30). |
forms.widgets.DateTimeInput() |
| Date/time |
forms.DurationField() |
<input type=”text”> |
Works like a basic character field but on the server end the django setup validates whether the inserted value to be converted to time delta. |
forms.widgets.TextInput() |
| Number |
forms.IntegerField() |
<input type=”number” |
In the server end django verifies whether the input field is a valid integer. |
forms.widgets.NumberInput() |
| Number |
forms.DecimalField() |
<input type=”number” |
In the server end django verifies whether the input field is a valid decimal. |
forms.widgets.NumberInput() |
| Number |
forms.FloatField() |
<input type=”number” |
In the server end django verifies whether the input field is of float type. |
forms.widgets.NumberInput() |
Example – forms.py
The forms.py file below contains several among the above-mentioned form fields declared and executed as an application.
#-*- coding: utf-8 -*-
from django import forms
class Valueform(forms.Form):
first_name = forms.CharField(max_length = 100)
last_name = forms.SlugField()
gender =  forms.BooleanField()
Ip = forms.GenericIPAddressField()
file =  forms.FileField()
department = forms.ChoiceField(choices = (('1','CSE'),('2','IT'),('3','ECE'),('4','EEE')))
Output:
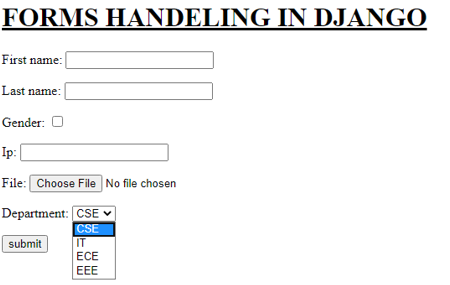
Processing Form Fields in View
The value entered in the form fields can be captured and processed using the below form handling code in the view method for the form
Example – views.py
from django.shortcuts import render
from django.http import  HttpResponse
from Django_app1.forms import Valueform
defform_view(request_iter):
form = Valueform()
if request_iter.method == "POST":
value = Valueform(request_iter.POST)
if value.is_valid():
print("First Name: ",value.cleaned_data['first_name'])
print("First Name: ",value.cleaned_data['last_name'])
return  render(request_iter,'Form_Handeling.html', {"form": form})
Here when a ‘POST’ is submitted from the form it is passed as a part of the request thread in the method argument, so this is verified in the below statement,
if request_iter.method == "POST":
So when a ‘POST’ is submitted then the value associated with the POST request is captured into an object by referring to the form class declared in forms.py. using the cleaned_data[] argument of this object and using the name of the corresponding field the value keyed from the field is captured. In this example, the captured value is printed onto the console. In real-time cases, further processing will be done to these values like DB storage or server validation, etc.
Output:

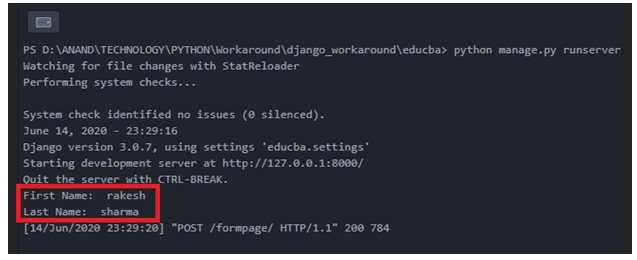
Django Response

Introduction to Django Response
The response is the outcome from the processing of a webpage, This outcome can be captured using the Http response class when a returned value is cached using the Http response class then that response will be assigned with response-oriented characteristics, As like a request framework these characteristics can be captured and verified using special attributes and methods, each of these attributes and methods displays the corresponding value associated to the response, More specifically these response methods and attributes are useful in verifying the various information related to the response. All these attributes and methods are discussed below briefly with suitable examples. In this topic, we are going to learn about Django Response.
Response Framework Attributes
The attributes of Django response framework are listed below,
| HttpResponse attribute |
Reason |
| HttpResponse.content |
This attribute is used to denote the content of the message |
| HttpResponse.charset |
A string value representing the character encoding of the response. |
| HttpResponse.status_code |
This represents the response status code |
| HttpResponse.reason_phrase |
This represents the reason phrase of the response |
| HttpResponse.streaming |
Mentions whether it is a streamed communication or not. |
| HttpResponse.closed |
When the formulated response is closed then this value is assigned as true |
Response Framework Methods
All methods associated with response framework are mentioned below,
| Httpresponse attribute |
Description |
| HttpResponse.__init__(content=”, content_type=None, status=200, reason=None, charset=None) |
The content page and content type is associated to the response object |
| HttpResponse.__setitem__(header, value) |
The value is associated with the header name |
| HttpResponse.__delitem__(header) |
Deletes a specific header |
| HttpResponse.__getitem__(header) |
Returns a value for the specific header name |
| HttpResponse.has_header(header) |
It returns either True or False based on a case-insensitive check for a header with the provided name. |
| HttpResponse.setdefault(header, value) |
Allows to formulate a default header value |
| HttpResponse.write(content) |
The response for a file-like object is created using this. |
| HttpResponse.flush() |
Allows the response object to get flushed |
| HttpResponse.tell() |
A file-like object will be created in the response |
| HttpResponse.getvalue() |
It is used to get the value of HttpResponse.content. |
| HttpResponse.readable() |
A stream-like object will be created in the response |
| HttpResponse.seekable() |
Makes the response object reachable |
Examples of Django Response
Here are the following examples mention below:
Example #1
1) Design the choiceField() in the forms.py with the values it needs to display and process in the choices attribute of the field.
views.py:
def email_sending(response):
email = emailform()
if response.method == 'POST':
email_id =  response.POST['email'] email_subject =  response.POST['email_subject'] email_message =  response.POST['email_message'] mail = send_mail(email_subject,email_message,'testmysmtpconnection@gmail.com',[email_id],fail_silently = False)
response = HttpResponse(mail)
print("Content of the resposne: ",response.content)
print("Charecterset of the response: ",response.charset)
print("Status code of the response: ",response.status_code)
print("Reason phrase of the response: ",response.reason_phrase)
print("Reason close status: ",response.closed)
return response
return render(response, 'emailpage.html',{"email":email})
2) Design the webpage in the corresponding template file for this page,
Response_methods_check.html:
<!DOCTYPE html>
<html lang="en" dir="ltr">
<head>
<meta charset="utf-8">
<title>Django App1</title>
{% load static %}
<link href="{% static 'admin/css/font.css' %}" rel="stylesheet">
<style>
body {
background-image: url("{% static 'admin/img/background.jpg' %}");
background-color: #acccbb;
}
.myDiv {
border: 5px outset red;
background-color: lightblue;
text-align: center;
font-family: "Comic Sans MS", cursive, sans-serif;
font-size: 14px;
letter-spacing: 2px;
word-spacing: 1.8px;
text-align: left;
color: #02071C;
font-weight: 200;
text-decoration: none;
font-style: normal;
font-variant: normal;
text-transform: capitalize;
}
</style>
</head>
<body>
<h1> <u> DJANGO HANDELING EMAILS </u> </h1>
<div class="myDiv" style = "max-width:470px;">
<form method =  'POST' ">
{{ email.as_p }}
{% csrf_token %}
<input type="submit" class="btn btn-primary" value="submit" style="text-align:center">
</form>
</div>
</body>
</html>
Output:
,
Example #2
1) Here the response values from a file upload page is been verified
views.py:
from django.shortcuts import render
from django.http import  HttpResponse
from Django_app1.forms import Valueform,fileform,emailform,responsecheckform
from django.core.exceptions import ViewDoesNotExist
from django.contrib.auth.models import User
from django.core.files.storage import FileSystemStorage
from django.contrib import messages
from django.core.mail import send_mail,EmailMessage
import responses
def file_upload(response):
file = fileform()
print(" File Values in File Dictionary:", response.FILES)
if response.method == 'POST' and response.FILES['Uploaded_File']:
uploaded_file = response.FILES['Uploaded_File'] fs = FileSystemStorage()
filename = fs.save(uploaded_file.name, uploaded_file)
uploaded_File_Size = 'Size of Uploaded file: ' + str(uploaded_file.size)
content_type_of_uploaded_file = 'Content type of uploaded file: ' + str(uploaded_file.content_type)
uploaded_file_name = 'Name of Uploaded file: ' + str(uploaded_file.name)
uploaded_file_url = fs.url(filename)
print("uploaded file url",uploaded_file_url)
messages.success(response, '!!! File upload successful !!!')
messages.success(response,uploaded_File_Size)
messages.success(response,uploaded_file_name)
messages.success(response,content_type_of_uploaded_file)
response = HttpResponse(filename)
print("Content of the resposne: ",response.content)
print("Charecterset of the response: ",response.charset)
print("Status code of the response: ",response.status_code)
print("Reason phrase of the response: ",response.reason_phrase)
print("Reason close status: ",response.closed)
return render(response, 'filehandeling.html', {"file":file})
return render(response, 'filehandeling.html',{"file":file})
Html file:
<!DOCTYPE html>
<html lang="en" dir="ltr">
<head>
<meta charset="utf-8">
<title>Django App1</title>
{% load static %}
<link href="{% static 'admin/css/font.css' %}" rel="stylesheet">
<style>
body {
background-image: url("{% static 'admin/img/background.jpg' %}");
background-color: #acccbb;
}
</style>
</head>
<body>
<h1> <u> FILE UPLOAD HANDELING IN DJANGO </u> </h1>
{% if messages %}
<ul>
{% for message in messages %}
<li>{{ message }}</li>
{% endfor %}
</ul>
{% endif %}
<div style = "max-width:470px;">
<form method =  'POST' enctype="multipart/form-data">
{{ file.as_p }}
{% csrf_token %}
<input type="submit" class="btn btn-primary" value="submit">
</form>
</div>
</body>
</html>
Output:
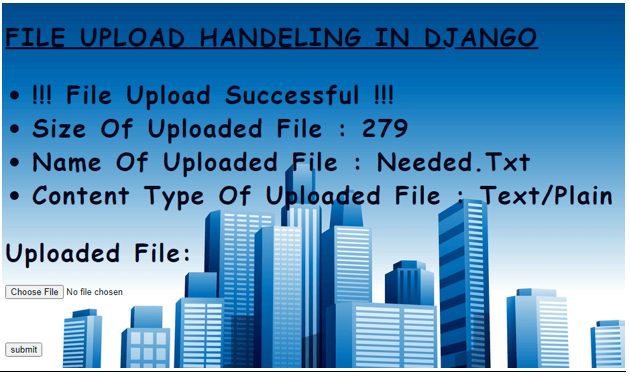
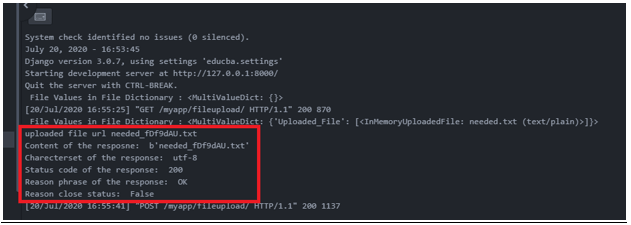
Example #3
1) Here the response values generated form a form page is been captured and verified,
views.py:
from django.shortcuts import render
from django.http import  HttpResponse
from Django_app1.forms import Valueform,fileform,emailform,responsecheckform
from django.core.exceptions import ViewDoesNotExist
from django.contrib.auth.models import User
from django.core.files.storage import FileSystemStorage
from django.contrib import messages
from django.core.mail import send_mail,EmailMessage
import responses
def formView(response_iter):
form = Valueform()
if response_iter.method == "POST":
value = Valueform(response_iter.POST)
if value.is_valid():
first_name = value.cleaned_data['first_name'] response = HttpResponse(first_name)
print("Content of the resposne: ",response.content)
print("Charecterset of the response: ",response.charset)
print("Status code of the response: ",response.status_code)
print("Reason phrase of the response: ",response.reason_phrase)
print("Reason close status: ",response.closed)
if response_iter.session.has_key(first_name):
print(response_iter.session.items())
return render(response_iter, 'Session.html' )
else:
response_iter.session[first_name] = first_name
return render(response_iter, 'Form_Handeling.html', {"form":form})
Html file:
<!DOCTYPE html>
<html lang="en" dir="ltr">
<head>
<meta charset="utf-8">
<title>Django App1</title>
{% load static %}
<link href="{% static 'admin/css/base.css' %}" rel="stylesheet">
<style>
body {
background-image: url("{% static 'admin/img/background1.jpg' %}");
background-color: #acccbb;
}
</style>
</head>
<body>
<h1> <u> FORMS HANDELING IN DJANGO </u> </h1>
<div style = "max-width:470px;">
<form method =  'GET'>
{{ emailform.as_p }}
{% csrf_token %}
<input type="submit" class="btn btn-primary" value="submit">
</form>
</div>
<ul class="messages">
{% for message in messages %}
<li{% if message.tags %} class="{{ message.tags }}"{% endif %}>{{ message }}</li>
{% endfor %}
</ul>
</body>
</html>
Output:

Conclusion
From the above-provided descriptions and examples, the key information related to the Httpresponse framework can be understood.
Django Session

Introduction to Django Session
Sessions are server side cookies. In every web application certain user-oriented inputs will be stored on both server and client(Web browser) end. This data when stored on the server end it is named as Sessions. The data stored on the client end is named as cookies. These sessions came into play in Django framework to ensure the security of the application. These sessions helps to attain the abstraction of how cookies are generated and sent and received. So based on the importance of the data considered for saving lot of security potholes can be successfully attested by implementing these sessions.
Methods to Catch Session Data
Django Sessions can be captured and stored on the server end by three ways.
- Store Sessions onto the connected middleware database.
- Store Sessions onto a file.
- Store Sessions onto a temporary cache.
1. Store Sessions onto the connected middleware database
This is the predominant method for catching session data. The below settings need to be inplace for triggering this setup.
Code:
INSTALLED_APPS = [
'django.contrib.admin',
'django.contrib.auth',
'django.contrib.contenttypes',
'django.contrib.sessions',
'django.contrib.messages',
'django.contrib.staticfiles',
'Django_app1',
] MIDDLEWARE = [
'django.middleware.security.SecurityMiddleware',
'django.contrib.sessions.middleware.SessionMiddleware',
'django.middleware.common.CommonMiddleware',
'django.middleware.csrf.CsrfViewMiddleware',
'django.contrib.auth.middleware.AuthenticationMiddleware',
'django.contrib.messages.middleware.MessageMiddleware',
'django.middleware.clickjacking.XFrameOptionsMiddleware',
]
2. Store Sessions onto a file
Here sessions are captured to an input file. The server id must have sufficient access specifications for capturing sessions through this technique.
3. Store Sessions onto a cache
In this technique Sessions are captured in temporary cache. All session data captured by will be erased if the application or the server is restarted. Persistent cache services can also be created.
The below settings parameters need to be in place for activating the cache oriented sessions.
Code:
SESSION_ENGINE = 'django.contrib.sessions.backends.cache'
CACHES = {
'default': {
'BACKEND': 'django.core.cache.backends.locmem.LocMemCache'
}
}
INSTALLED_APPS = [
'django.contrib.admin',
'django.contrib.auth',
'django.contrib.contenttypes',
'django.contrib.sessions',
'django.contrib.messages',
'django.contrib.staticfiles',
'Django_app1',
] MIDDLEWARE = [
'django.middleware.security.SecurityMiddleware',
'django.contrib.sessions.middleware.SessionMiddleware',
'django.middleware.common.CommonMiddleware',
'django.middleware.csrf.CsrfViewMiddleware',
'django.contrib.auth.middleware.AuthenticationMiddleware',
'django.contrib.messages.middleware.MessageMiddleware',
'django.middleware.clickjacking.XFrameOptionsMiddleware',
]
Creating a Session in Django
Given below shows creating a session:
1. SETTINGS.PY changes
We use cache based session capturing, so the lines are inserted into the SETTINGS.py file.
Example:
(SETTINGS.py)
Code:
SESSION_ENGINE = 'django.contrib.sessions.backends.cache'
CACHES = {
'default': {
'BACKEND': 'django.core.cache.backends.locmem.LocMemCache'
}
}
INSTALLED_APPS = [
'django.contrib.admin',
'django.contrib.auth',
'django.contrib.contenttypes',
'django.contrib.sessions',
'django.contrib.messages',
'django.contrib.staticfiles',
'Django_app1',
] MIDDLEWARE = [
'django.middleware.security.SecurityMiddleware',
'django.contrib.sessions.middleware.SessionMiddleware',
'django.middleware.common.CommonMiddleware',
'django.middleware.csrf.CsrfViewMiddleware',
'django.contrib.auth.middleware.AuthenticationMiddleware',
'django.contrib.messages.middleware.MessageMiddleware',
'django.middleware.clickjacking.XFrameOptionsMiddleware',
]
2. Create a forms.py file in the application
The forms.py file is similar to models.py. All fields used in the form will be declared here under a form class.
Example:
(forms.py)
Code:
from django import forms
class Valueform(forms.Form):
user = forms.CharField(max_length = 100)
last_name = forms.SlugField()
3. Create a view for the form
A Django view method is created for the form in the views.py file. An object for the form class is created here. This object is used as a value for the context dictionary in the template rendering.
- A post is performed in the rendered page.
- Through ValueForm class the data of the post is captured into a variable.
- The is_valid() is a mandatory check, which is used to verify whether the captured data is valid. The process of validation here will be performed internally by Django. Additionally if value.is_valid() is not performed then cleaned_data[] cannot be used.
- The session value of first name is captured in the below instance.
request_iter.session[first_name] = first_name
- In this example the sessions are logically assembled so that is the same first name is entered twice it will enter into the sessions page.
Example:
(views.py)
Code:
from django.shortcuts import render
from django.http import  HttpResponse
from Django_app1.forms import Valueform
defformView(request_iter):
form = Valueform()
if request_iter.method == "POST":
value = Valueform(request_iter.POST)
if value.is_valid():
first_name = value.cleaned_data['first_name'] if request_iter.session.has_key(first_name):
print(request_iter.session.items())
return render(request_iter, 'Session.html' )
else:
request_iter.session[first_name] = first_name
return render(request_iter, 'Form_Handeling.html', {"form":form})
return render(request_iter, 'Form_Handeling.html', {"form":form})
4. Formulate a HTML file for displaying the form
A HTML file needs to be created in the templates directory for displaying the form, here the file is template tagged using the below tag,
{{ form.as_p }}
Here “as_p” is used for better designing of the form elements.
{% csrf_token %} line is used for attesting the internal security verification performed by Django.
Example:
Code:
<!DOCTYPE html>
<html lang="en" dir="ltr">
<head>
<meta charset="utf-8">
<title>Django App1</title>
</head>
<body>
<h1><u> FORMS HANDELING IN DJANGO </u></h1
<div style = "max-width:470px;">
{{ form.as_p }}
{% csrf_token %}
<input type="submit" class="btnbtn-primary" value="submit">
</div>
</body>
</html>
5. Formulate a HTML file for displaying the page which is triggered when sessions are activated
A HTML file needs to be created in the templates directory for displaying the Session page.
Example:
Code:
<!DOCTYPE html>
<html lang="en" dir="ltr">
<head>
<meta charset="utf-8">
<title>Django App1</title>
</head>
<body>
<h1><u> SESSION PAGE IS TRIGGERED </u></h1>
</body>
</html>
6. Tag the view in urls.py file
This is the process of creating a url for the view.
- Import the library from django.conf.urls import url.
- Declare a url entry in the urlpatterns list.
url(url_path, view_to_be_tagged, name_for_this_view)
Example:
Code:
from django.contrib import admin
from django.conf.urls import url
from Django_app1 import views
urlpatterns = [
url(r'^$',views.index,name='index'),
url(r'formpage/',views.form_view,name='form'),
url(r'admin/', admin.site.urls), ]
Output:
Attempt 1:
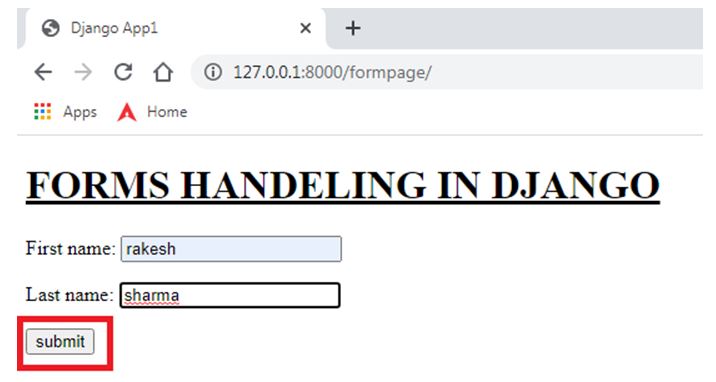
Attempt 2:
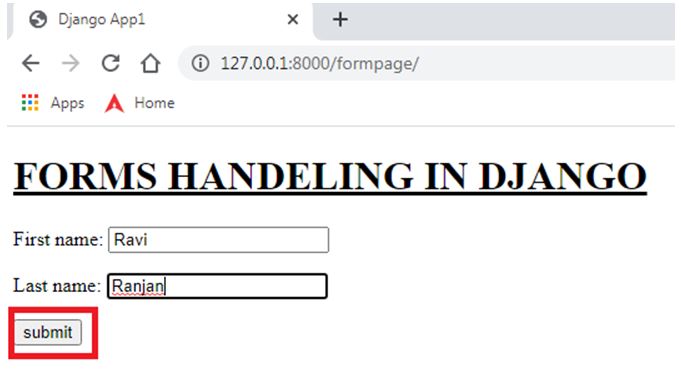

End result:


Output Explanation:
Here the first name and last name are submitted by the user, when the name Rakesh Sharma is submitted for the second time the session value is recollected and session page is triggered. The name raviranjan is triggered in between both these insertions. The server side data printed onto the console is also pasted as the last snapshot. In this last snapshot we can notice the value of the sessions captured.
We can notice the entered first name values by the user are captured as separate entries inside a dictionary with the identified first name itself as both the key and value for the dictionary values of each entry. More significantly the session page is rendered when the rakesh value in first name is entered for the second time. This precisely explains how session data are recollected and processed.
Conclusion
Sessions are always an impressive method for increasing the efficiency of the web application. It gives the flexibility for the user so that they could much smoothly traverse across the application. Django offers the most sophisticated method for handling these sessions in a very precise manner. The above examples show how efficiently cache based sessions help in capturing user data for efficient processing.
Django Static Files

Introduction of Django Static Files
Static files are images, CSS scripts in the application. Django offers flexible techniques to induce these static files into the application. This flexible way of managing these static files will help to maintain the application performance better. The django.contrib.staticfiles is responsible for maintaining the static files in Django. The django static files play a wide role in the content management of the items used. from a Django perspective, the framework offers convenient ways through which these file-oriented resources could be very effectively handled. serving these static files precisely in production is also among the key capabilities of the currently derived Django frameworks.
How Static Files Work in Django?
Let’s see how static files work in django?
1. Ensure django.contrib.staticfiles
First we need to ensure the django.contrib.staticfiles is added as a part of INSTALLED APPS in SETTINGS.py.
INSTALLED_APPS = [
'django.contrib.admin',
'django.contrib.auth',
'django.contrib.contenttypes',
'django.contrib.sessions',
'django.contrib.messages',
'django.contrib.staticfiles',
'django.contrib.postgres',
'Django_app1'
]
2. Ensure static url
Next, we need to ensure the static url is being set to ‘/static/’. All the static files will be served to the webpage using a url, and this url will have this /static/ appended to it. Basically, all the static files collected in STATICFILES_DIRS or STATIC_ROOT are accessed by the webpage using this url
SETTINGS.py:
STATIC_URL = '/static/'
3. Ensure STATICFILES_DIRS or STATIC_ROOT
The STATICFILES_DIRS or STATIC_ROOT variables are responsible for mentioning the path at which the static files are stored. the STATIC_ROOT is preferably used in PROD systems whereas the STATICFILES_DIRS are used in test systems. both these variables cannot be declared in the same SETTINGS.py file.
SETTINGS.py:
STATICFILES_DIRS = [os.path.join(BASE_DIR, 'static'), ] #STATIC_ROOT = os.path.join(BASE_DIR, 'static')
4. Python manage.py collect static command
This command is used for collecting all the static files in the system and get them associated with the static directory.
python manage.py collectstatic
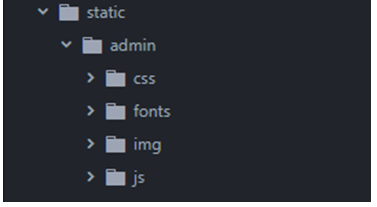
5. Template file changes
At last the below changes has to be made in the template file. these changes will load the static files in the template files during the rendering process.
- All these changes are associated with the header section of the html file.
- add the static files load command in the template head section.
{% load static %}
-
- set the static folder reference path in the item to be pulling the static files.
- CSS files: <link href=”{% static ‘admin/css/font.css’ %}” rel=”stylesheet”>
- Image files: <img src=”{% static ‘admin/css/font.css’ %}” ” alt=”My image” height=”300px” width=”700px”/>
- The above changes will successfully pull the static files from the static folder.
Examples of Django Static Files
Following are the examples are given below:
Example #1
css file:
STATICFILES_DIRS = [os.path.join(BASE_DIR, 'static'), ] #STATIC_ROOT = os.path.join(BASE_DIR, 'static') body {
font-family: "Comic Sans MS", cursive, sans-serif;
font-size: 36px;
letter-spacing: 2px;
word-spacing: 1.8px;
color: #02071C;
font-weight: 700;
text-decoration: none;
font-style: normal;
font-variant: normal;
text-transform: capitalize;
}
h1 {
font-family: "Comic Sans MS", cursive, sans-serif;
font-size: 34px;
letter-spacing: 2px;
word-spacing: 1.8px;
color: #02071C;
font-weight: 650;
text-decoration: none;
font-style: normal;
font-variant: normal;
text-transform: capitalize;
}
h2 {
font-family: "Comic Sans MS", cursive, sans-serif;
font-size: 32px;
letter-spacing: 1px;
word-spacing: 2.0px;
color: #02071C;
font-weight: 600;
text-decoration: none;
font-style: normal;
font-variant: normal;
text-transform: capitalize;
}
h3{
font-family: "Comic Sans MS", cursive, sans-serif;
font-size: 30px;
letter-spacing: 1px;
word-spacing: 2.1px;
color: #02071C;
font-weight: 400;
text-decoration: none;
font-style: normal;
font-variant: normal;
text-transform: capitalize;
}
Image Location:
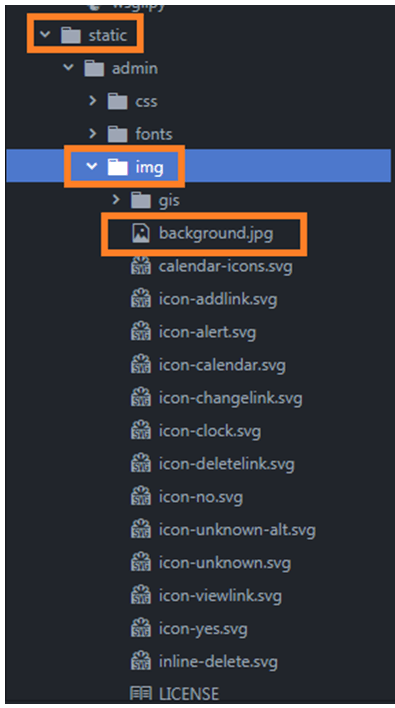
filehandeling.html:
<!DOCTYPE html>
<html lang="en" dir="ltr">
<head>
<meta charset="utf-8">
<title>Django App1</title>
{% load static %}
<link href="{% static 'admin/css/font.css' %}" rel="stylesheet">
<style>
body {
background-image: url("{% static 'admin/img/background.jpg' %}");
background-color: #acccbb;
}
</style>
</head>
<body>
<h1> <u> FILE UPLOAD HANDELING IN DJANGO </u> </h1>
{% if messages %}
<ul>
{% for message in messages %}
<li>{{ message }}</li>
{% endfor %}
</ul>
{% endif %}
<div style = "max-width:470px;">
<form method =  'POST' enctype="multipart/form-data">
{{ file.as_p }}
{% csrf_token %}
<input type="submit" class="btn btn-primary" value="submit">
</form>
</div>
</body>
</html>
Output:
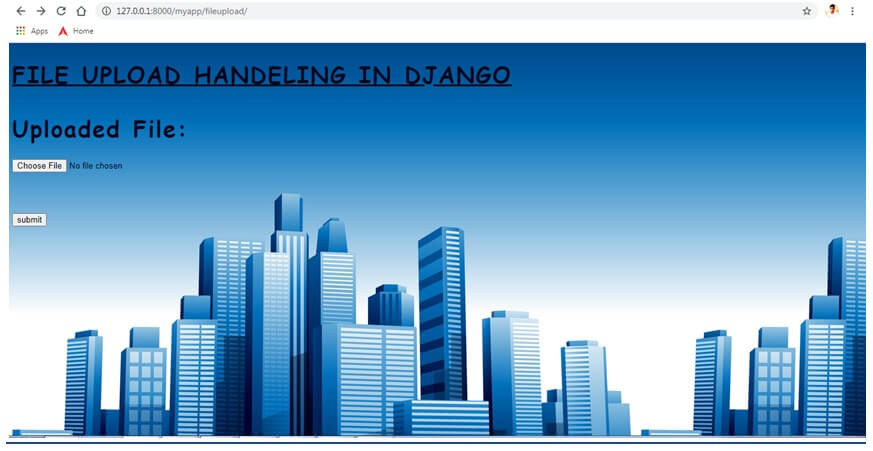
Example #2
css file:
@import url(fonts.css);
body {
margin: 0;
padding: 0;
font-size: 45px;
font-family: "Roboto","Lucida Grande","DejaVu Sans","Bitstream Vera Sans",Verdana,Arial,sans-serif;
color: grey;
background: #fff;
}
a:link, a:visited {
color: #447e9b;
text-decoration: none;
}
a:focus, a:hover {
color: #036;
}
a:focus {
text-decoration: underline;
}
a img {
border: none;
}
a.section:link, a.section:visited {
color: #fff;
text-decoration: none;
}
a.section:focus, a.section:hover {
text-decoration: underline;
}
/* GLOBAL DEFAULTS */
p, ol, ul, dl {
margin:.2em 0.8em 0;
}
p {
padding: 0;
line-height: 140%;
}
h1,h2,h3,h4,h5 {
font-weight: bold;
}
h1 {
margin: 0 0 20px;
font-weight: 300;
font-size: 20px;
color: #666;
}
h2 {
font-size: 16px;
margin: 1em 0.5em 0;
}
h2.subhead {
font-weight: normal;
margin-top: 0;
}
h3 {
font-size: 14px;
margin:.8em 0.3em 0;
color: #666;
font-weight: bold;
}
h4 {
font-size: 12px;
margin: 1em 0.8em 0;
padding-bottom: 3px;
}
h5 {
font-size: 10px;
margin: 1.5em 0.5em 0;
color: #666;
text-transform: uppercase;
letter-spacing: 1px;
}
ul li {
list-style-type: square;
padding: 1px 0;
}
li ul {
margin-bottom: 0;
}
li, dt, dd {
font-size: 13px;
line-height: 20px;
}
dt {
font-weight: bold;
margin-top: 4px;
}
dd {
margin-left: 0;
}
form {
margin: 0;
padding: 0;
}
fieldset {
margin: 0;
padding: 0;
border: none;
border-top: 1px solid #eee;
}
blockquote {
font-size: 11px;
color: #777;
margin-left: 2px;
padding-left: 10px;
border-left: 5px solid #ddd;
}
code, pre {
font-family: "Bitstream Vera Sans Mono", Monaco, "Courier New", Courier, monospace;
color: #666;
font-size: 12px;
}
pre.literal-block {
margin: 10px;
background: #eee;
padding: 6px 8px;
}
code strong {
color: #930;
}
formhandeling.html:
<!DOCTYPE html>
<html lang="en" dir="ltr">
<head>
<meta charset="utf-8">
<title>Django App1</title>
{% load static %}
<link href="{% static 'admin/css/base.css' %}" rel="stylesheet">
<style>
body {
background-image: url("{% static 'admin/img/background.jpg' %}");
background-color: #acccbb;
}
</style>
</head>
<body>
<h1> <u> FORMS HANDELING IN DJANGO </u> </h1>
<div style = "max-width:470px;">
<form method =  'GET'>
{{ form.as_p }}
{% csrf_token %}
<input type="submit" class="btn btn-primary" value="submit">
</form>
</div>
<ul class="messages">
{% for message in messages %}
<li{% if message.tags %} class="{{ message.tags }}"{% endif %}>{{ message }}</li>
{% endfor %}
</ul>
</body>
</html>
Output:
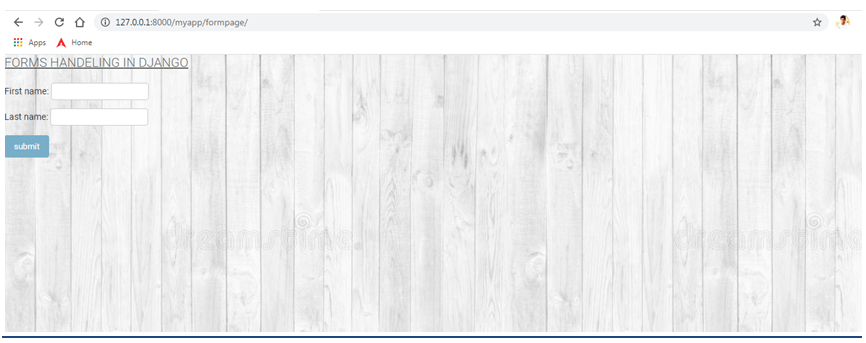
Django Mail

Introduction to Django Mail
Apart from the smtp mail connectivity offered by python Django also offers the django.core.mail library for handling the email requests. So any email oriented process can be handled by this library in a very flexible manner. We can use this library for sending emails to external users, website admins, website managers, also emails with attachments and even emails to bulk set of mass users can be triggered. It flexibly alterates the email delivery process in the Django based frameworks and the email delivery process is precisely accelerated.
How Django Mail works?
Given below shows how Django Mail works:
1. To connect the email setup to Django the below listed email configurations should be in place at SETTINGS.PY file.
- EMAIL_HOST − SMTP server.
- EMAIL_HOST_USER − SMTP server login credentials.
- EMAIL_HOST_PASSWORD − SMTP server password credentials
- EMAIL_PORT − port of SMTP server.
- EMAIL_USE_TLS or _SSL − True if secure connection.
Code:
#---------- EMAIL HANDELING ----------#
EMAIL_BACKEND = 'django.core.mail.backends.smtp.EmailBackend'
EMAIL_HOST = 'smtp.gmail.com'
EMAIL_PORT = 587
EMAIL_HOST_USER = 'testmysmtpconnection@gmail.com'
EMAIL_HOST_PASSWORD =  '*********'
EMAIL_USE_TLS = True
a. EMAIL_BACKEND
The email backend protocol used is referred in the EMAIL_BACKEND variable. Some among the protocols are SMTP, SMTPS, IMAP etc. By default django uses SMTP protocol, setting the variable to ‘django.core.mail.backends.smtp.EmailBackend’ represents nothing other than SMTP, only thing is it is explicitly mentioned here.
b. EMAIL_HOST
The email host refers the email provider which is expected to reach, it represents the smtp host name of that email provider.
Example:
smtp.mail.yahoo.com
c. EMAIL_PORT
The email port refers the email providers port which is opened for smtp connectivity.
Example:
for yahoo the port number is 465
d. EMAIL_USER
This represents the user name of the email account to be connected.
Example:
user1@gmail.com
e. EMAIL_PASSWORD
This represents the password of the corresponding email account.
f. EMAIL_USE_TLS
This parameter is used to mention whether TLS secure connection need to be turned on or not.
2. The next critical step is the use of django.core.mail.
The django.core.mail library has four methods for handling emails.
- send_mail()
- send_mass_mail()
- mail_admins()
- mail_managers()
a. send_mail()
Syntax:
send_mail(subject, message, from_email, recipient_list, fail_silently=False, auth_user=None, auth_password=None,connection=None, html_message=None)
Description:
This method sends the email and posts the number of messages delivered.
b. send_mass_mail()
Syntax:
send_mass_mail(datatuple, fail_silently=False, auth_user=None, auth_password=None, connection=None)
Description:
Sends mail to a wide set of people, the data tuple is a combination of below elements.
(subject, message, from_email, recipient_list)
c. mail_admins()
Syntax:
mail_admins(subject, message, fail_silently=False, connection=None, html_message=None)
Description:
Sends mail to side admins as the admin names are declared in the ADMIN settings.
d. mail_managers()
Syntax:
mail_managers(subject, message, fail_silently=False, connection=None, html_message=None)
Description:
Sends mail to side Mangers as the Manager names are declared in the MANAGER settings.
Example:
Code:
send_mail(
'Subject',
'Message.',
'from_email@example.com',
['end_email1@example.com', 'end-email2@example.com'],
)
Note: The major difference between send_mail() and send_mass_mail() is for send_mass_mail() the server connections remains permanent, whereas for send emails it is established for each and every send mail call.
3. Creating a temporary smptp server within the system for debugging purpose.
Code:
python -m smtpd -n -c DebuggingServer 127.0.0.1:8001
Output:

Examples of Django Mail
Given below are the examples mentioned :
Example #1
In the first example the email is captured in the temporary smtp server, the server is set up to hear at port 8001. Also the django server localhost id (127.0.0.1) is set as host name here.
a. Make the email configurations in SETTINGS.py file.
SETTINGS.py
Code:
#---------- EMAIL HANDELING ----------#
EMAIL_BACKEND = 'django.core.mail.backends.smtp.EmailBackend'
EMAIL_HOST = '127.0.0.1'
EMAIL_PORT = 8001
EMAIL_HOST_USER = ''
EMAIL_HOST_PASSWORD = ''
EMAIL_USE_TLS = True
b. Set the view for email processing. This view has three fields passed through the form and the fields are captured from the front end webpage and tagged to the send_email() method for triggering the email.
Views.py
Code:
def email_sending(request):
email = emailform()
if request.method == 'POST':
email_id =  request.POST['email'] email_subject =  request.POST['email_subject'] email_message =  request.POST['email_message'] res = send_mail(email_subject,email_message,'testmysmtpconnection@gmail.com',[email_id],fail_silently = False)
return HttpResponse('%s'%res)
return render(request, 'emailpage.html',{"email":email})
forms.py
Code:
from django import forms
class emailform(forms.Form):
email = forms.EmailField()
email_subject =  forms.CharField()
email_message =  forms.CharField(max_length = 2000)
c. Formulate the template for preparing the webpage.
Code:
<!DOCTYPE html>
<html lang="en" dir="ltr">
<head>
<meta charset="utf-8">
<title>Django App1</title>
{% load static %}
<link href="{% static 'admin/css/font.css' %}" rel="stylesheet">
<style>
body {
background-image: url("{% static 'admin/img/background.jpg' %}");
background-color: #acccbb;
}
.myDiv {
border: 5px outset red;
background-color: lightblue;
text-align: center;
font-family: "Comic Sans MS", cursive, sans-serif;
font-size: 14px;
letter-spacing: 2px;
word-spacing: 1.8px;
text-align: left;
color: #02071C;
font-weight: 200;
text-decoration: none;
font-style: normal;
font-variant: normal;
text-transform: capitalize;
}
</style>
</head>
<body>
<h1> <u> DJANGO HANDELING EMAILS </u> </h1>
<div class="myDiv" style = "max-width:470px;">
<form method =  'POST'>
{{ email.as_p }}
{% csrf_token %}
<input type="submit" class="btn btn-primary" value="submit" style="text-align:center">
</form>
</div>
</body>
</html>
d. Kickstart the email server in debugging mode. Once kickstarted the port of the server will be listening for receiving any messages posted to the port.

Output:
Webpage:
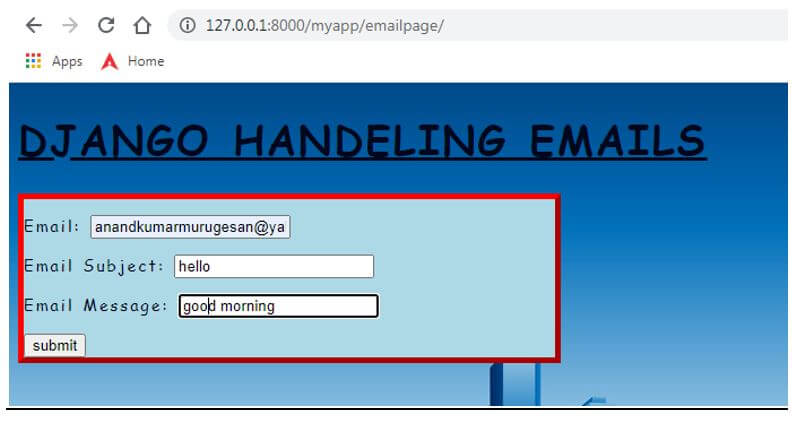
Server port:
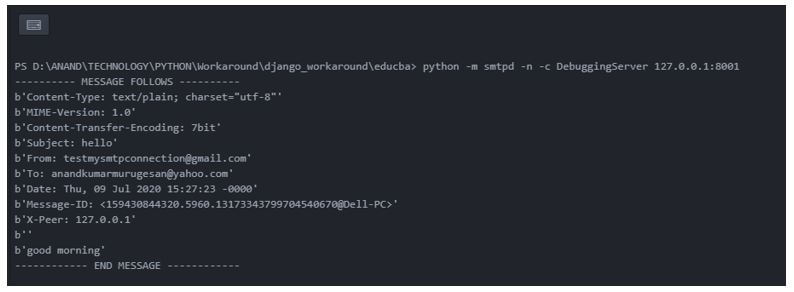
Example #2
In the Second example the email is triggered using a valid mail account.
a. Make the email configurations in SETTINGS.py file.
SETTINGS.py
Code:
#---------- EMAIL HANDELING ----------#
EMAIL_BACKEND = 'django.core.mail.backends.smtp.EmailBackend'
EMAIL_HOST = 'smtp.gmail.com'
EMAIL_PORT = 587
EMAIL_HOST_USER = 'testmysmtpconnection@gmail.com'
EMAIL_HOST_PASSWORD =  '*********'
EMAIL_USE_TLS = True
b. Formulate the template for preparing the webpage.
Code:
<!DOCTYPE html>
<html lang="en" dir="ltr">
<head>
<meta charset="utf-8">
<title>Django App1</title>
{% load static %}
<link href="{% static 'admin/css/font.css' %}" rel="stylesheet">
<style>
body {
background-image: url("{% static 'admin/img/background.jpg' %}");
background-color: #acccbb;
}
.myDiv {
border: 5px outset red;
background-color: lightblue;
text-align: center;
font-family: "Comic Sans MS", cursive, sans-serif;
font-size: 12px;
letter-spacing: 1px;
word-spacing: 1.7px;
text-align: left;
color: #02061C;
font-weight: 100;
text-decoration: none;
font-style: normal;
font-variant: normal;
}
</style>
</head>
<body>
<h1> <u> DJANGO HANDELING EMAILS </u> </h1>
<div class="myDiv" style = "max-width:470px;">
<form method =  'POST'>
{{ email.as_p }}
{% csrf_token %}
<input type="submit" class="btn btn-primary" value="submit" style="text-align:center">
</form>
</div>
</body>
</html>
Output:
Webpage:
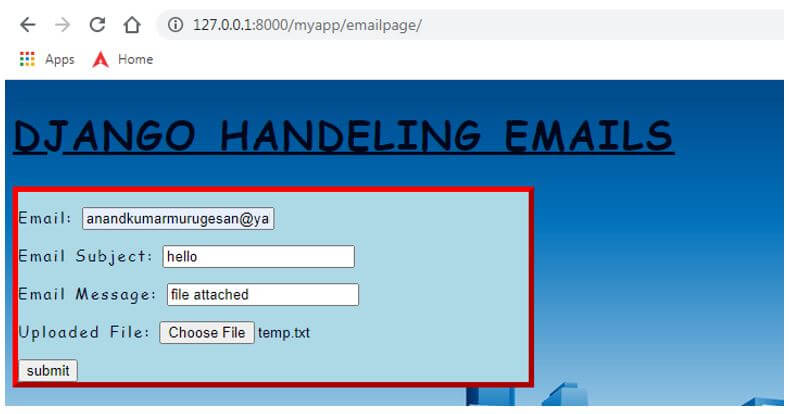
Email snaps:


Conclusion
The process of debugging oriented email setup and trigger email to a real time email SMTP are explained with suitable working examples in the above article.
Form Validation in Django

Introduction to Form Validation in Django
The following article provides an outline on Form Validation in Django. Django is a framework which provides built in methods to verify the data within in forms. And this verification can be done automatically using these Django methods. These can be only done by using and submitting CSRF tokens. There are functions that can be used to handle these validations. We can here take many inputs from user based on requirement and make our form validations accordingly.
Form Validations
For validating the forms, we first need to create a form and then use different validation techniques to validate the data written in the forms. For creating the form, each label would correspond to a data type with respect to the format of data that has to be loaded in.
Given few of them below:
- CharField
- EmailField
- BooleanField
- DateField
- DecimalField
- ChoiceField etc.
Example of Form Validation in Django
A small example of creating a form below:
forms.py
class MyForm(forms.Form):
Name=forms.CharField()
email=forms.EmailField(label='Email')
Gender=forms.ChoiceField(choices=[(' ','Choose'),('M','Male'),('F','Female')])
Description=forms.CharField(widget=forms.Textarea,required=False)
def __init__(self, *args, **kwargs):
super().__init__(*args, **kwargs)
self.helper=FormHelper
self.helper.form_method = 'post'
self.helper.layout = Layout(
'Name','email','Gender','Description', Submit('submit','Submit',css_class='btn-success')
)
views.py
from django.shortcuts import render
from django.http import HttpResponse
from .forms import MyForm
# Create your views here.
def first_form(request):
if request.method=='POST':
form=MyForm(request.POST)
if form.is_valid():
Name=form.cleaned_data['name'] Email=form.cleaned_data['email'] Gender=form.cleaned_data['gender'] Description=form.cleaned_data['description'] print(Name,Gender)
form=MyForm()
return render(request,'form.html',{'form':form})
form.html
{% load crispy_forms_tags %}
<!DOCTYPE html>
<html lang="en">
<head>
<meta charset="UTF-8">
<meta name="viewport" content="width-device-width, initial-scale=1.0">
<meta http-equiv="X-UA-Compatible" content="ie=edge">
<title>My Form </title>
</head>
<body style="padding: 20px;">
{% crispy form form.helper %}
</body>
</html>
Urls.py
from django.contrib import admin
from django.urls import path,include
from . import views
urlpatterns = [
path('first_form',views.first_form,name='first_form'),
]
In the main project of settings.py we need to add our new app name and in the urls.py file also, we need to have a link of our new app that is created. Below we are adding the code snippets of those files also.
Urls.py: Project level
from django.contrib import admin
from django.urls import path,include
urlpatterns = [
path('',include('Third.urls')),
path('admin/', admin.site.urls),
]
Settings.py :
We have added our app and the crispy forms module that we have used in forms.html for styling purpose. That library can be added into Django using pip install method.
INSTALLED_APPS = [
'django.contrib.admin',
'django.contrib.auth',
'django.contrib.contenttypes',
'django.contrib.sessions',
'django.contrib.messages',
'django.contrib.staticfiles',
'Third',
'crispy_forms'
]
Forms can be created using form models and the forms html files and at the same time with the models functionality also. Here we have done it using forms.
When observed, we can see that in views file that is written, there were form validator methods that we have used here.
cleaned_data[‘field_name’]
This is one of the important methods of validating. This would contain the cleaned data which are received from the form. This means that we are specifying a particular data type for a particular variable, which help in storing of the data. We can even raise customized errors.
The main part, in which cleaned data function, is incorporated under function is_valid.
Syntax:
form.is_valid()
This function is used to validate the whole form data. Whatever is uploaded in the form can be validated using this function that is declared above. This validation would be returning the Boolean expressions of validating the complete form data type.
Output of the above code:
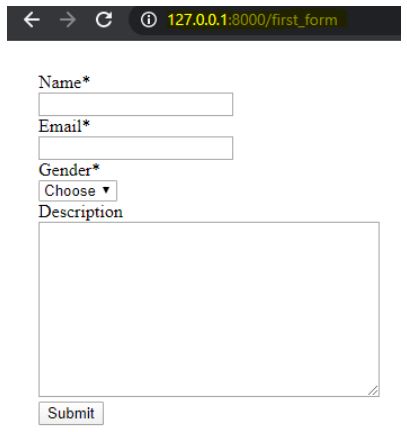
Let us check the different errors that are being raised in this simple form.
After giving the name, if we simply try to click on submit as shown below:
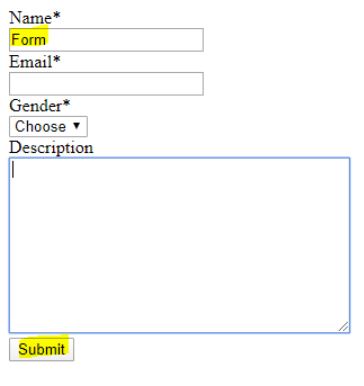
System is going to alert error like below:

As we have mentioned the above field mandatory we get that alert that those fields has to be filled.
Now with respect to the email functionality, if we give some random letters directly let us see what we get.
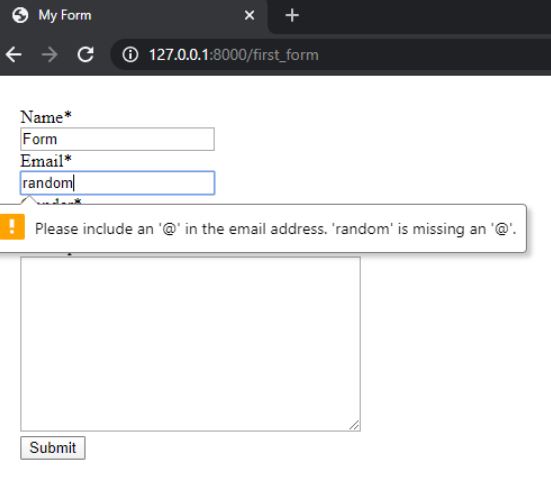
And now if we include the ‘@’ symbol also and if we do not specify any domain name(not necessarily the correct one), we can still get an error.
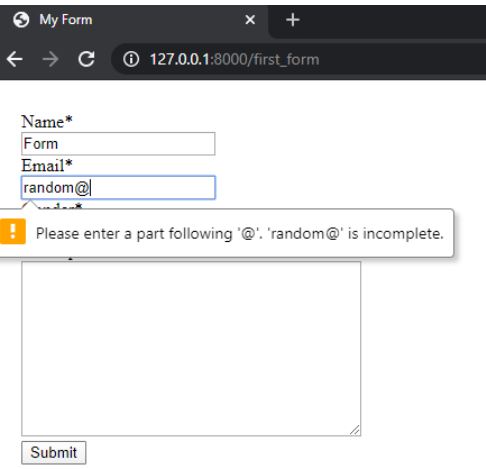
So, after giving all the details properly as below:
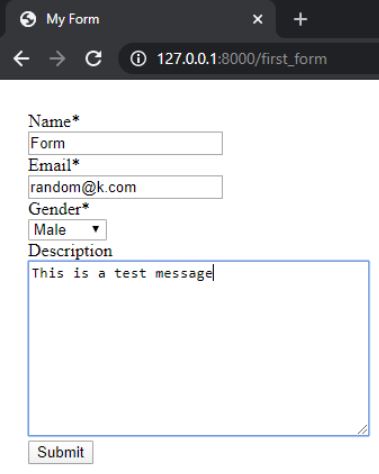
It is okay to either write anything or leave the description part empty as it is not the mandatory required field. After clicking on submit we can have the below output in our python module as written in the code.

As written the code, we wanted to print the name and gender – so that is what that got printed in our python development shell. We have link between all those python files. Form.py file has link with views.py file and in turn both are to be linked with the html file in the templates. As already known we must have the link with urls.py and views.py to display the UI level output through the http web URL. This is the basic flow for all those python files that are written in generating a form and performing it’s vaLidations.
For handling forms, we even have attributes like validators. These are used in case of model level changes to a form. And even with respect to raising a customized error can be done by raising a ValidationError function. These are the functions that are in default available in Django for different form validations. And with all these we can even have separate functions written to raise different validations with respect to forms.
Conclusion
This is how we can have different form validations in Django. We have in turn created a simple form added our in built validations using those respective python files and link each of them to create perfect form validations. There are many level validations that can be done. But here we have done by creating a form and making basic validations for it. We have covered two methods in the same example which is mentioned above. As already listed, we can create forms using Models by models.py python file and include all the customized validations that are required.
Django GROUP BY
Introduction to Django GROUP BY
The following article provides an outline for Django GROUP BY. This operation is a fairly common operation for who are more familiar with the SQL part. The Django ORM is said to be an Abstraction layer which let us work with the database (which is an object-oriented), where finally it’s just a relational database and actually all the operations are translated into SQL statements. The database is a powerful tool with which you can do the work much faster and directly in it. The interesting information, when you get through the GROUP BY Queries, you will be no longer interested in each model instances and table row details.
GROUP BY in Django with SQL (Using Django Querysets & SQL)
We use to have a chaos among GROUP BY and aggregate. As both are not the same one but they can’t work without one-another.
A GROUP BY in Django is used with the AGGREGATE functions or the built-ins. The GROUP BY statement and aggregate functions like COUNT, MAX, MIN, SUM, AVG are used in a combo to group the result – set by one or more columns.
Syntax:
SELECT column _ name(s)
FROM table _ name
WHERE condition
GROUP BY column _ name(s)
ORDER BY column _ name (s);
Understanding this clause using the DJANGO GROUP BY Cheat Sheet.
This is the model from Django’s built-in django. contrib. auth app.

Count Rows:
Counting rows is one of the Django functions on the Query Set. Number of rows in a table can be identified using the method of Count Rows. Here the key name is derived from the ‘Name of the field’ and the ‘Name of the aggregate’.
Example:
The following SQL statement lists the no. of customers from each country:
Sample Database:
| CustomerID |
CustomerName |
Address |
City |
PostalCode |
Country |
| 01 |
Anna Mary |
Obere Str.57 |
Berlin |
12209 |
Germany |
| 02 |
Brutto |
Avda. De la Constitucion
2222
|
Mexico |
05021 |
Mexico |
| 03 |
Catty Comb |
Mataderos 2312 |
Mexico |
05023 |
Mexico |
| 04 |
Drake |
120 Hanover Sq |
London |
WA1 1DP |
UK |
| 05 |
Mark Zucker |
Berguvsvagen 8 |
Lulea |
S-958 22 |
Sweden |
Code:
SELECT COUNT (CustomerID), Country
FROM Customers
GROUP BY Country;
Output:
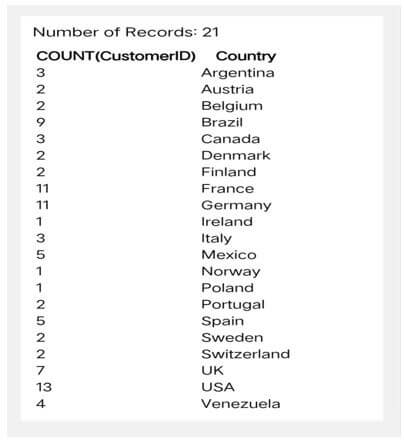
Example:
Count how many users we have.
Code:
SQL:
SELECT
COUNT(id) as total
FROM
auth_user;
Python:
from django.db.models import Count
queryset = (User.objects
.aggregate(
total=Count('id'),
)
)
Output:

Implementing the Process GROUP BY
When we use ‘aggregate’, the aggregate function is applied throughout the table (on the entire table). Eventhough this process makes work simple by applying applying the function on the entire table, the usual way is to apply ‘aggregation’ only on groups of rows.
Active users counting using GROUP BY:
Code:
SQL:
SELECT
is_active,
COUNT(id) AS total
FROM
auth_user
GROUP BY
is_active
Python:
queryset = (User.objects
.values(
'is_active',
)
.annotate(
total=Count('id'),
)
.order_by()
)
Output:
***A combination of ‘VALUES’ & ‘ANNOTATE’ should be used to produce a GROUP BY.

If we fail to call VALUES before annotate, then the aggregate results will not be produced. So, the ORDER is one of the most important things to keep in mind while doing GROUP BY function.
Using Filter in a Query Set:
When a particular or a precise column or row need to be counted, we should use ‘filter’. In the process of applying aggregation in a filtered query, we can use ‘filter’ anywhere in the query set.
Code:
SQL:
SELECT
is_active,
COUNT(id) AS total
FROM
auth_user
WHERE
is_staff = True
GROUP BY
is_active
Python:
queryset = (User.objects
.values(
'is_active',
)
.filter(
is_staff=True,
)
.annotate(
total=Count('id'),
)
)
Similar to filter, ‘order_by’ anywhere in the query to SORT a query set. and for our convenience, we can use both ‘ GROUP BY ‘ and the ‘aggregate’ field.
Code:
SQL:
SELECT
is_active,
COUNT(id) AS total
FROM
auth_user
WHERE
is_staff = True
GROUP BY
is_active
ORDER BY
is_active,
total
Python:
queryset = (User.objects
.values(
'is_active',
)
.filter(
is_staff=True,
)
.annotate(
total=Count('id'),
)
.order_by(
'is_staff',
'total',
)
)
Output:

Conditional Aggregation in GROUP BY
To aggregate a part of the group, we should use Conditional Aggregation.
Example:
To count the number of staff and non-staff users by the year they signed-upCode.
Code:
SELECT
EXTRACT(‘year’ FROM date_jointed),
COUNT(id) FILTER (
WHERE is_employee = True
) AS employee_users,
COUNT(id) FILTER (
WHERE is_employee = False
) AS non_employee_users
FROM
authentic_user
GROUP BY
EXTRACT(‘year’ FROM date_joined)
From Django.db.models import F, Q
(User.objects
.values(‘date_joined__year’)
.annotate(
employee_users=(
Count(‘id’, filter=Q(is_employee=True))
),
non_employee_users=(
Count(‘id’, filter=Q(is_employee=False))
),
))
Having Clause
In SQL WHERE keyword and the aggregate function should not be used together. Instead, the HAVING clause is added to the SQL.
Syntax:
SELECT column_name(s)
FROM table_name
WHERE condition
GROUP BY column_name(s)
HAVING condition
ORDER BY column_name(s);
Usage of Having GROUP BY
To filter out the required data from the result of an aggregate function, the HAVING clause is used.
Sample Case:
Code:
SELECT Employees.LastName, COUNT(Orders.OrderID) AS NumberOfOrders
FROM (Orders
INNER JOIN Employees ON Orders.EmployeeID = Employees.EmployeeID)
GROUP BY LastName
HAVING COUNT(Orders.OrderID) > 10;
Output:
| LastName |
NumberOfOrders |
| Buchanan |
11 |
| Callahan |
27 |
| Davolio |
29 |
| Fuller |
20 |
| King |
14 |
| Leverling |
31 |
| Peacock |
40 |
| Suyama |
18 |
GROUP BY – Distinct:
In a COUNT function, sometimes it would be desirable to only count the DISTINCT OCCURRENCES.
Sample:
To count the number of different last names being there per user active status.
Note: Use of distinct = True in the call is to Count.
Code:
SELECT
is_active,
COUNT(id) AS total,
COUNT(DISTINCT last_name) AS unique_names
FROM
auth_user
GROUP BY
is_active
(User.objects
.values(‘is_active’)
.annotate(
total=Count(‘id’),
unique_names=Count(‘last_name’ distinct=True),
))
Conclusion – Django GROUP BY
The AGGREGATE functions are a very very powerful tool to analyze the data and to gain the useful business insights. The rows that have the same values are grouped using the GROUP BY clause in a SQL command, and this clause is used in the SELECT statement. As we have seen in the intro summary, the GROUP BY clause is used in combo with the AGGREGATE functions to produce the summary report from the database. The grouping collapses multiple rows into a single row, based on certain criteria.
Django on_delete

Introduction to Django on_delete
The following article provides an outline for Django on_delete. One of the major advantage of Django is its capability to make changes to the databases. The backend of Django framework-based applications can be very flexibly handled, all processes like database addition, deletion, or even updates can be very flexibly performed by means of Django models. The changes in the databases can also be integrated with the models in an easy and simple manner. The on delete is one among the parameters to have control of this flexibility that Django offers. This is among the parameters which are placed when a relationship is established in Django, this means the on delete function allows to flexibly operate on foreign keys.
So whenever foreign key-like concepts come into place these on delete arguments are expected to be declared as one among the parameters used in the foreign keys. These ondelete arguments decide whether a deletion must happen or what needs to be followed when the referenced object or parent value is deleted. This means when a referenced foreignkey value is deleted what needs to be the impact on the table which refers to the primary key is the context mentioned in Django delete argument. Options like this offer a great extent of flexibility to database-oriented operations.
Syntax of Django on_delete
Given below is the syntax of Django on_delete:
Field Name = models.ForeignKey(WASD, on_delete = OPERATION TYPE)
- The left most value here represents the field which is going to be created in reference, this means the field which will be used to reference this operation on the background, so the field which is used to be the referential field or the field which will be acting to pull data from the parent field needs to be mentioned here. This will be the field which will be referenced further thought the framework. In database terms, the field which is given on the left end will act as the field inheriting the value of the foreignkey field.
- Next the models.Foreignkey is the function that mentions that this operation is a foreign key creation operation. This function call is a mandatory item to use. It mentions that a foreign key is expected to be created further in this section. The syntax means that the from the models program the foreign key function is called and used. Next to these function names the arguments have to be placed. From a Django perspective this function call is a predefined function call. Lets discuss on the arguments used further.
- After the models.Foreignkey function call the arguments of the function needs to be mentioned. This is where the on_delete method comes into play. First the WASD argument represents the foreign key which is expected to be inherited, next the on_delete function will be used. The on_delete function will be equaling it to the various options associated to it.
on_delete Options
The various options for the on_delete arguments are given below:
1. CASCADE
When the on_delete argument is set to cascade then deleting the referenced object will have substantial effect on the referred objects. This means when the referenced object is deleted from the database then all the entries of the object will also be deleted from the entire database. This is how the CASCADE option works in the background. So, there are some impacts on data integrity as far as the CASCADE options is concerned.
2. PROTECT
PROTECT is the direct opposite of cascade option, here if there is impact on the actual object then all instances of the data on the referenced object are not deleted. So, no deletion happens. This makes the data to be protected before delete processing on the referenced object.
3. RESTRICT
The RESTRICT is very similar to the PROTECT option, it does the same job just as like the deletion option. The only difference here is when deletion is targeted on the referenced object then the ON_DELETE will raise an error called the RestrictedError. But the RESTRICT will allow deletion to happen when the referencing object and the object which is referenced object is allotted with a reference to a different common object then the deletion is allowed to takes place.
4. SET_NULL
The option functions in the same way the name suggests, when a deletion happens to the referenced object then the value of the referencing object will be updated as NULL. So a NULL value will be placed for the referencing object. This is how the SET NULL will operate basically.
5. SET_DEFAULT
The option functions in the same way the name suggests, when a deletion happens to the referenced object then the value of the referencing object will be updated with a default value which it is allotted for, so all instances of the referencing object will be allotted with this default value. So a default value will be placed for the referencing object. This is how the SET DEFAULT will operate basically.
Create a Django on_delete Argument
Given below shows the creation of Django on_delete Argument:
Changes in Models.py file: The changes which are applied to the models.py file are depicted below; these changes will be reflected in the front end of the form used.
Here two different ondelete arguments are used, the RESTRICT and CASCADE options.
Example:
(models.py)
Code:
from django.db import models
from django.contrib.auth.models import User
# Model variables
# Create your models here.
class Bride(models.Model):
models.CharField(max_length=200,null=True)
…..
Example_Post_Graduation_college = models.CharField(max_length=400,null=True)
Example_Rasi = models.CharField(max_length=200,null=True)
Example_Nakshatra = models.ForeignKey(User, null=True, on_delete=models.RESTRICT)
Example_Creator = models.ForeignKey(User, null=True, on_delete=models.CASCADE)
def __str__(self):
return self.name
Output:

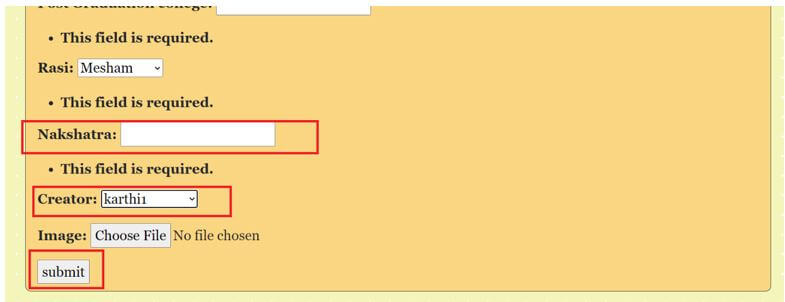

Explanation:
- We can notice when a deletion is called on the creator for the record karthi, it does not imply to the record being placed on the user table because of the RESTRICT parameter used.
Conclusion
This article mentions on how flexibly options like on_delete can be used to flexibly delete a record and to control the impact of the deletion to the referenced records involved. This is among the key advantages of the database operations associated to the Django applications.
Django Pagination
Introduction to Django Pagination
The pagination is used for setting the pages and display them. It helps to set the number of pages. django.core.paginator is used for declaring a paginator. The pagination helps to set the page details and the total number of pages used. So the process of pagination can be used. The pagination allows to declare the pages associated and the pages associated to it. Django’s capability to produce inbuilt pagination packages is a key advantage of designing the pages in Django setup. Pagination is among the effective ways to declare the items. The import code change section for pagination process is on the All-users section.
Syntax:
Table_object = Table_name.objects.all()
Paginator_object = Paginator(Table_object, page_number)
Page_object = paginator.page(paginator_object)
How does Pagination work?
- Retrieve the objects to be displayed into a variable. So all the objects will get retrieved into the assigned variable.
- Declare a paginator object and set the number of pages and the objects to be displayed in the object declaration.
- Assign the page details to a render variable and pass the render variable to the HTML template. This will have the page displayed in the web address. The retrieval of the object and set up the variable.
Examples of Django Pagination
Following are the examples of django pagination are:
1. (Forms.py)
The forms files will have all the fields to be declared. These fields associated to the forms.py file will have all the fields which needs to be a part of the table declaration. A column-like these will be responsible for display.
from django import forms
from. models import Bride
from django.contrib.auth.forms import UserCreationForm
from django.contrib.auth.models import User
from django.core.exceptions import ValidationError
# Create your forms here.
Rasi_CHOICES =(
("1", "Mesham"),
("2", "Rishabam"),
("3", "Mithunam"),
("4", "Kadakam"),
("5", "Simmam"),
("6", "Kanni"),
("7", "Thulam"),
("8", "Viruchikam"),
("9", "Thanusu"),
("10", "Makaram"),
("10", "Kumbam"),
("10", "Meenam"),
)
State_Choices = (
("1", "Mesham"),
("1", "Mesham"))
class Valueform(forms.ModelForm):
Rasi = forms.ChoiceField(choices = Rasi_CHOICES)
class Meta:
model = Bride
fields = "__all__"
class NewUserForm(UserCreationForm):
email = forms.EmailField(required=True,error_messages={'required': 'Please enter your name'})
def clean(self):
cleaned_data = super(NewUserForm, self).clean()
email_passed = cleaned_data.get("email")
if not "gmail.com" in email_passed:
print("came here")
raise forms.ValidationError("Sorry, the email submitted is invalid. All emails have to be registered on this domain only.")
return email_passed
class Meta:
model = User
fields = ("username", "email", "password1", "password2")
def save(self, commit=True):
user = super(NewUserForm, self).save(commit=False)
user.email = self.cleaned_data['email'] if commit:
user.save()
return user
2. (models.py)
The Models files will have all the fields to be declared. These fields associated to the models.py file will have all the fields which needs to be a part of the table declaration. The column like these will be responsible for display.
from django.db import models
from django.contrib.auth.models import User
# Model variables
# Create your models here.
class Bride(models.Model):
Django_Paginators_Example_name = models.CharField(max_length=200,null=True)
Django_Paginators_Example_thegai = models.CharField(max_length=200,null=True)
Django_Paginators_Example_State =  models.CharField(max_length=50,null=True)
Django_Paginators_Example_District = models.CharField(max_length=50,null=True)
Django_Paginators_Example_Address = models.TextField(null=True)
Django_Paginators_Example_Phone = models.BigInteger_Example_Field(null=True)
Django_Paginators_Example_profession = models.CharField(max_length=200,null=True)
Django_Paginators_Example_salary = models.BigInteger_Example_Field(null=True)
Django_Paginators_Example_Under_Graduation_Degree = models.CharField(max_length=200,null=True)
Django_Paginators_Example_Under_Graduation_college = models.CharField(max_length=400,null=True)
Django_Paginators_Example_Post_Graduation_Degree = models.CharField(max_length=200,null=True)
Django_Paginators_Example_Post_Graduation_college = models.CharField(max_length=400,null=True)
Django_Paginators_Example_Rasi = models.CharField(max_length=200,null=True)
Django_Paginators_Example_Nakshatra = models.CharField(max_length=200,null=True)
def __str__(self):
return self.name
3. Views.py
The import code change section for pagination process is on the All-users section. Here the contents of the table for which the objects or elements are expected to be displayed are retrieved into an object. So, all the object entries will be retrieved. Then the paginator object is created. The paginator object defines the page being used. so, a page object will be created. The page object will be associated with the table objects and the number of pages to be associated. So, the total number of pages and the table details will be declared in the paginator class. This is a very important section of the pagination process.
def All_users(request):
User_entries =  User.objects.all()
page = request.GET.get('page', 1)
paginator = Paginator(User_entries, 5)
users = paginator.page(page)
print(" Has other pages : ",users.has_other_pages())
print(" Has next page : ",users.has_next())
print(" Has previous page : ",users.has_previous())
print(" Has previous page : ",users.has_previous())
print(" Start Index : ",users.start_index())
print(" End Index : ",users.end_index())
if users.has_next():
print(" Next page Number: ",users.next_page_number())
elif users.has_previous():
print(" Has Previous page Number: ",users.previous_page_number())
print(paginator,users)
return render(request,"All_users.html",{'users':users})
4. HTML
The below are the HTML changes for pagination, the process involves declaring a table structure with username and email from the reference table. Next, the section of code for setting the pages as a movable object is listed. Here the second section allows flexible movement between the pages. The first section mentions the content of the pages.
<html style="font-size: 16px;">
<head>
<title>Home</title>
{% load static %}
<link rel="stylesheet" href="{% static 'admin/css/Formpage.css' %}" media="screen">
<meta name="viewport" content="width=device-width, initial-scale=1, maximum-scale=1, minimum-scale=1" . . . />
<link rel="stylesheet" href="https://stackpath.bootstrapcdn.com/bootstrap/4.4.1/css/bootstrap.min.css" integrity="sha384-Vkoo8x4CGsO3+Hhxv8T/Q5PaXtkKtu6ug5TOeNV6gBiFeWPGFN9MuhOf23Q9Ifjh" crossorigin="anonymous">
<!-- - - Script -- - - >
<script src="https://ajax.googleapis.com/ajax/libs/jquery/3.5.1/jquery.min.js"></script>
</head>
<body class="body">
<nav class='navbar'>
<div class='navbar_div'>
<a class="navbar" onclick="redirect2()" >Home! </a>
<a class="navbar" onclick="redirect2()" >Contact</a>
</div>
</nav>
<table class="table table-bordered">
<thead>
<tr>
<th>Username</th>
<th>Email</th>
</tr>
</thead>
<tbody>
{% for user in users %}
<tr>
<td>{{ user.username }}</td>
<td>{{ user.email }}</td>
</tr>
{% endfor %}
</tbody>
</table>
<body>
<script>
function readURL(input) {
if (input.files && input.files[0]) {
var reader = new FileReader();
reader.onload = function (e)
{
var image = document.getElementById('image');
image.src = URL.createObjectURL(input.files[0]);
}
reader.readAsDataURL(input.files[0]);
var download = document.getElementById('download');
download.src = URL.createObjectURL(input.files[0]);
download.setAttribute("download", 'sample.img');
download.click();
}
}
<script>
{% if users.has_other_pages %}
<ul class="pagination">
{% if users.has_previous %}
<li><a href="?page={{ users.previous_page_number }}">«</a></li>
{% else %}
<li class="disabled"><span>«</span></li>
{% endif %}
{% for i in users.paginator.page_range %}
{% if users.number == i %}
<li class="active"><span>{{ i }} <span class="sr-only">(current)</span></span></li>
{% else %}
<li><a href="?page={{ i }}">{{ i }}</a></li>
{% endif %}
{% endfor %}
{% if users.has_next %}
<li><a href="?page={{ users.next_page_number }}">»</a></li>
{% else %}
<li class="disabled"><span>»</span></li>
{% endif %}
</ul>
{% endif %}
<script>
function form1() {
window.location.href = "http://127.0.0.1:8000/form";
}
function redirect1() {
window.location.href = "http://127.0.0.1:8000/Mainpage";
}
function redirect2() {
window.location.href = "http://127.0.0.1:8000/";
}
</script>
<script src="https://code.jquery.com/jquery-3.4.1.slim.min.js" integrity="sha384-J6qa4849blE2+poT4WnyKhv5vZF5SrPo0iEjwBvKU7imGFAV0wwj1yYfoRSJoZ+n" crossorigin="anonymous"></script>
<script src="https://cdn.jsdelivr.net/npm/popper.js@1.16.0/dist/umd/popper.min.js" integrity="sha384-Q6E9RHvbIyZFJoft+2mJbHaEWldlvI9IOYy5n3zV9zzTtmI3UksdQRVvoxMfooAo" crossorigin="anonymous"></script>
<script src="https://stackpath.bootstrapcdn.com/bootstrap/4.4.1/js/bootstrap.min.js" integrity="sha384-wfSDF2E50Y2D1uUdj0O3uMBJnjuUD4Ih7YwaYd1iqfktj0Uod8GCExl3Og8ifwB6" crossorigin="anonymous"></script>
</body>
</html>
Output:

Conclusion
So, pagination is a process well allocated in Django. The pagination process of Django helps in the smooth declaration of pages in the Django setup. This helps to set and access pages in a very flexible manner. This is among a key advantages of Django process.
Django DateTimeField

Introduction to Django DateTimeField
As per Django is concerned there are several field types through which the date and time values can be injected for storage on the models. The difference between these fields arises on the format of the data being stored. There are options to store only date value, even time value alone can be capture. As per datetime field both date and time values will be captured. The user will be expected to place both the date and time value at the time of injecting the values for the storage. The stored value can again be retrieved back and displayed on to the console.
Ex: 10-07-2019 00:20
Syntax:
Name_of_field = models.DateTimeField(**options)
The above syntax corresponds to the Django DateTimeField example. The first column mentioned here is the name of the field involved. The first column will form the field name, next to it comes the models.DateTimeField extension. This extension means to export the DateTime field method from the model’s section. So the model’s section will now import the DateTimeField method to generate the expected field. Then the arguments of the DateTimeField() method has to be declared. The usual values here are the null argument which mentions what needs to be the value for the records in which the valid date-time is not in place. The next argument will be the blank argument.
Create a Django DateTimeField
1. Changes in Models.py file:
As mentioned in the syntax section the Date Time field needs to be declared in the models.py file. We can notice that the Date Time field is declared as the age field in the model.
(models.py)
from django.db import models
from django.contrib.auth.models import User
# Model variables
# Create your models here.
class Bride(models.Model):
DATE_TIME_name = models.CharField(max_length=200,null=True)
DATE_TIME_age = models.Date Time field_Example_Field(null=True)
DATE_TIME_DOB = models. DateTimeField (null=True)
DATE_TIME_thegai = models.CharField(max_length=200,null=True)
DATE_TIME_State = models.CharField(max_length=50,null=True)
DATE_TIME_District = models.CharField(max_length=50,null=True)
DATE_TIME_Address = models.TextField(null=True)
DATE_TIME_Phone = models.BigInteger(null=True)
DATE_TIME_profession = models.CharField(max_length=200,null=True)
DATE_TIME_salary = models.BigInteger(null=True)
DATE_TIME_Under_Graduation_Degree = models.CharField(max_length=200,null=True)
DATE_TIME_Under_Graduation_college = models.CharField(max_length=400,null=True)
DATE_TIME_Post_Graduation_Degree = models.CharField(max_length=200,null=True)
DATE_TIME_Post_Graduation_college = models.CharField(max_length=400,null=True)
DATE_TIME_Rasi = models.CharField(max_length=200,null=True)
DATE_TIME_Nakshatra = models.CharField(max_length=200,null=True)
def __str__(self):
return self.name
2. Changes in Settings.py file:
Ensure all of the values and the database connects are set nicely withinside the settings.py document in order that the venture may be kicked for execution flexibly. The middleware objects stated underneath needs to be declared nicely withinside the settings.py document, due to the fact those center wares are liable for functioning of the software even as processing GET and PUT messages. Additionally, the templates used has additionally want to crammed in order that the template processing occurs withinside the background.
(Settings.py):
MIDDLEWARE = [
'django.middleware.security.SecurityMiddleware',
'django.contrib.sessions.middleware.SessionMiddleware',
'django.middleware.common.CommonMiddleware',
'django.middleware.csrf.CsrfViewMiddleware',
'django.contrib.auth.middleware.AuthenticationMiddleware',
'django.contrib.messages.middleware.MessageMiddleware',
'django.middleware.clickjacking.XFrameOptionsMiddleware',
] ROOT_URLCONF = 'Matrimony.urls'
TEMPLATES = [
{
'BACKEND': 'django.template.backends.django.DjangoTemplates',
'DIRS': [Template_DIR,],
'APP_DIRS': True,
'OPTIONS': {
'render_dict_processors': [
'django.template.render_dict_processors.debug',
'django.template.render_dict_processors.request',
'django.contrib.auth.render_dict_processors.auth',
'django.contrib.messages.render_dict_processors.messages',
],
},
},
]
3. Changes in url.py file:
The Media root and document root variable need to be instantiated inside the url.py file as like below. The changes for the url.py file are mentioned below.
url.py:
from django.contrib import admin
from django.urls import path
from django.conf.urls import url
from matrimony_pages import views
from django.conf import settings
from django.conf.urls.static import static
urlpatterns = [
url(r'^$',views.Welcome_page,name='Welcome_page'),
url(r'Mainpage/',views.Main_page,name='Main_page'),
url(r'form/',views.form_view,name='form_view'),
url(r"signup/", views.Sign_up_request, name="register"),
url(r"login/", views.login_request, name="login"),
path(r'profile/<str:pk>/',views.DATE_TIME_page,name='profile'),
url(r'logout/',views.logout_request,name='logout'),
url(r'reg/',views.DATE_TIME_reg_user,name='reg'),
path(r'update/<str:pk>/',views.form_update,name='update'),
path('admin/', admin.site.urls),
]+ static(settings.MEDIA_URL,document_root=settings.MEDIA_ROOT)
4. Create a view for the form:
The Date Time field value when submitted has to be stored and when retrieved it has to be pulled from the database. This can be achieved by means of the object created for the model. The process of doing this is explained in the below given views.py section.
Ex: views.py
@login_required
def DATE_TIME_page(request,pk):
render_dict2 = {}
Key_details = Bride.objects.get(id=pk)
DATE_TIME_name = Key_details.name
DATE_TIME_Age = Key_details.age
DATE_TIME_DOB = Key_details.DOB
DATE_TIME_Thegai = Key_details.thegai
DATE_TIME_state = Key_details.State
DATE_TIME_district = Key_details.District
DATE_TIME_Address = Key_details.Address
DATE_TIME_Phone = Key_details.Phone
DATE_TIME_Profession = Key_details.profession
DATE_TIME_Salary = Key_details.salary
DATE_TIME_UG = Key_details.Under_Graduation_Degree
DATE_TIME_UGC = Key_details.Under_Graduation_college
DATE_TIME_PG = Key_details.Post_Graduation_Degree
DATE_TIME_PGC = Key_details.Post_Graduation_college
DATE_TIME_UG = Key_details.Under_Graduation_Degree
DATE_TIME_UGC = Key_details.Under_Graduation_college
DATE_TIME_PG = Key_details.Post_Graduation_Degree
DATE_TIME_PGC = Key_details.Post_Graduation_college
DATE_TIME_Rasi = Key_details.Rasi
DATE_TIME_Nakshatra = Key_details.Nakshatra
render_dict2['Age'] = DATE_TIME_Age
render_dict2['DOB'] = DATE_TIME_DOB
render_dict2['name'] = DATE_TIME_name
render_dict2['thegai'] = DATE_TIME_Thegai
render_dict2['State'] = DATE_TIME_state
render_dict2['district'] = DATE_TIME_district
render_dict2['Address'] = DATE_TIME_Address
render_dict2['Phone'] = DATE_TIME_Phone
render_dict2['profession'] = DATE_TIME_Profession
render_dict2['Under_Graduation_Degree'] = DATE_TIME_UG
render_dict2['Under_Graduation_college'] = DATE_TIME_UGC
render_dict2['Post_Graduation_Degree'] = DATE_TIME_PG
render_dict2['Post_Graduation_college'] = DATE_TIME_PGC
render_dict2['Rasi'] = DATE_TIME_Rasi
render_dict2['Nakshatra'] = DATE_TIME_Nakshatra
print(Key_details.Creator)
print(render_dict2)
return render(request,'Profilepage.html',render_dict2)
4) Formulate an HTML file for displaying the form: Corresponding changes to the HTML pages has to be performed.
Profilepage.html
<!DOCTYPE html>
<html style="font-size: 16px;">
<head>
<title>Profile</title>
{% load static %}
<link rel="stylesheet" href="{% static 'admin/css/Formpage.css' %}" media="screen">
<meta name="viewport" content="width=device-width, initial-scale=1, maximum-scale=1, minimum-scale=1" />
<!-- Script -->
<script src="https://ajax.googleapis.com/ajax/libs/jquery/3.5.1/jquery.min.js"></script>
</head>
<body class="body">
<nav class='navbar'>
<div class='navbar_div'>
<a class="navbar" onclick="redirect2()" >Home </a>
<a class="navbar" onclick="redirect2()" >Contact</a>
<a class="navbar" onclick="redirect1()" >Profiles</a>
</div>
</nav>
<div class="formarea">
<br>
{% block content %}
{% if Date Time field %}
<img src="{{Date Time field.url}}" align="right" alt="Date Time field" class="img-thumbnail" style="max-height:200px">
{% else %}
<img src="{% static 'admin/img/default.png' %}" align="right" alt="Date Time field" class="img-thumbnail" style="max-height:200px">
{% endif%}
<br></br>
<h6><strong>Name :    {{name}}</strong></h6>
<h6><strong>Age :    {{Age}}</strong></h6>
<h6><strong>DOB :    {{DOB}}</strong></h6>
<h6><strong>Thegai :    {{thegai}}</strong></h6>
<h6><strong>State :    {{State}}</strong></h6>
<h6><strong>district :    {{district}}</strong></h6>
<h6><strong>Address :    {{Address}}</strong></h6>
<h6><strong>Phone :    {{Phone}}</strong></h6>
<h6><strong>profession :    {{profession}}</strong></h6>
<h6><strong>Under Graduation Degree :    {{Under_Graduation_Degree}}</strong></h6>
<h6><strong>Post_Graduation_Degree :    {{Post_Graduation_Degree}}</strong></h6>
<h6><strong>Post_Graduation_college :    {{Post_Graduation_college}}</strong></h6>
<h6><strong>Rasi :    {{Rasi}}</strong></h6>
<h6><strong>Nakshatra :    {{Nakshatra}}</strong></h6>
{% endblock content %}
</div>
<script>
function form1() {
window.location.href = "http://127.0.0.1:8000/form";
}
function redirect1() {
window.location.href = "http://127.0.0.1:8000/Mainpage";
}
function redirect2() {
window.location.href = "http://127.0.0.1:8000/";
}
function redirect3() {
window.location.href = "http://127.0.0.1:8000/profile";
}
</script>
</body>
</html>
Output:


Conclusion
The above article displays the various details corresponding to the DateTimeField capability. The description of how the Datetimefield can be used, what type of values can be stored, the actual syntax of the field and a live example of picking and storing the value is also discussed. The snap of the output from the created example is also shared for reference.
Django OneToOneField

Introduction to Django OneToOneField
The Onetoonefield relationship will happen when there is a real necessity to connect two tables in a tightly coupled manner. So, for every record in the first table, there will be a corresponding record in the second table. Scenarios like these will invite a one-to-one relationship. Especially a common scenario of depicting one to one relationship is when the current table columns are too high and a large amount of columns could impact the retrieving speed of the records from the table then the table can be preferably split and made into two different tables and connectivity will be maintained between both the tables. This kind of split is called onetoone split from a table level. So here both tables will be closely coupled to one specific column. Basically, onetoonefield relationships are not very preferable.
Syntax:
OnetoOneField_name = models.OneToOneField(Table_name, null_argument, Ondelete_arguemnt)
Table call may be declared because of the first argument. So, the primary argument withinside the onetoonefield subject syntax may be similar to desk call. This desk call referred to withinside the first argument of the onetoonefield instance may be representing the desk from which the values may be inherited for the declared subject. So this could be the fee subject from which the OnetoOneField key fee is pulled over from may be related here. so being the primary argument of the technique statement and furthermore one a number of the prioritized argument used it performs a prime role. Next, the null argument is used to mention the fee null to be associated with the statistics coming in addition or already present withinside the desk. Mentioning this record as null allows the records already withinside the lower back of or new records delivered to be complete of Null rate at the same time as no rate is cited for it.
The ondelete argument has to be declared next, this is a very critical argument because this argument decides the impact between the parent table and the staging table at the instance of deletion. This means the removal of a parent table record will have a sustainable impact or no impact based on the value mentioned here. When a parent table records are removed those records will be deleted or held back from deletion based on the value associated here to this field. So the ondelete argument is also another very critical value or argument in the table.
Create a DJANGO OnetoOneField:
1) Changes in Models.py file:
First, the declaration for the onetoone Field has to be declared in the models.py file. Here the onetoonefild creator is declared to be the field that holds the onetoone relationship. This onetoone relationship exists because its field is pulled in from a different table, additionally, properties like associating the null value as True and the ondelete function is made with CASCADE.
Ex: (models.py)
from django.db import models
from django.contrib.auth.models import User
# Model variables
# Create your models here.
class Bride(models.Model):
OnetoOneField_name = models.CharField(max_length=200,null=True)
OnetoOneField_age = models.IntegerField(null=True)
OnetoOneField_thegai = models.CharField(max_length=200,null=True)
OnetoOneField_State = models.CharField(max_length=50,null=True)
OnetoOneField_District = models.CharField(max_length=50,null=True)
OnetoOneField_Address = models.TextField(null=True)
OnetoOneField_Phone = models.BigIntegerField(null=True)
OnetoOneField_profession = models.CharField(max_length=200,null=True)
OnetoOneField_salary = models.BigIntegerField(null=True)
OnetoOneField_Under_Graduation_Degree = models.CharField(max_length=200,null=True)
OnetoOneField_Under_Graduation_college = models.CharField(max_length=400,null=True)
OnetoOneField_Post_Graduation_Degree = models.CharField(max_length=200,null=True)
OnetoOneField_Post_Graduation_college = models.CharField(max_length=400,null=True)
OnetoOneField_Rasi = models.CharField(max_length=200,null=True)
OnetoOneField_Nakshatra = models.CharField(max_length=200,null=True)
OnetoOneField_Creator = models.OneToOneField(User, null=True, on_delete=models.CASCADE)
def __str__(self):
return self.name
2) Changes in Forms.py file:
Form level integration is performed on the forms.py file. The connectivity between the form declared and the model declared is created here. So this connectivity will associate each and every field in the form to be pleasantly connected with all the fields in the model declared. This brings in an interconnection established between the form declared and the models used.
Ex: (forms.py)
from django import forms
from .models import Bride
from django.contrib.auth.forms import UserCreationForm
from django.contrib.auth.models import User
class Valueform(forms.ModelForm):
# Rasi = forms.ChoiceField(choices = Rasi_CHOICES)
class Meta:
model = Bride
fields = "__all__"
3) Create a view for the form:
A Django view wants to be shaped to make the middleware for the shape via the OnetoOneField key Field registered in it to be rendered. Clicking the publish button will store the shape. The rendering characteristic is the primary imported object withinside the Django library. This import method will permit the HTML report to be rendered to the browser that is presented. After this uploading, the HTTP reaction might be achieved. In the perspectives technique, the predicted cost Form is instantiated which fatherly lets in the shape to be flexibly rendered. The instantiation might be achieved on a cost named as shape. The store method will take the region with the shape. Save() technique. Then the cutting-edge logged-in-person info might be fetched and saved onto the shape. This is how the shape garage will take region. After the shape is efficaciously saved it’ll be rendered directly to the browser with a rendering technique.
Ex: views.py
def form_view(request):
form = Valueform(request.POST or None)
if form.is_valid():
post = form.save()
post.Creator = request.user
print('Creator user stored',request.user)
post.save()
return render(request,'form.html', {"form": form})
def form_edit(request):
form = Valueform(request.POST or None)
if form.is_valid():
post = form.save()
post.Creator = request.user
print('Creator user updated',request.user)
post.save()
return render(request,'form_edit.html', {"form": form}
def form_update(request):
form = Valueform(request.POST or None)
if form.is_valid():
post = form.save()
post.Creator = request.user
print('Creator user updated',request.user)
post.save()
return render(request,'form_edit.html', {"form": form}
4) Formulate an HTML file for displaying the form: Corresponding changes to the HTML pages has to be performed.
Form.html
{% block content %}
<form method="POST" class='formarea'>
<div class='formdiv'>
{{ form.as_p }}
{% csrf_token %}
<input type="submit" class='button' value="submit">
</div>
</form>
{% endblock content %}
Output:
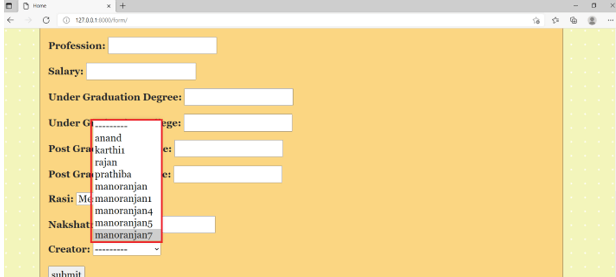
Conclusion
This article depicts how the OnetoOneField key may be flexibly declared in a Dango setup and the adjustments may be rendered to a shape object and the way the enter values may be surpassed from there on. There isn’t any restriction on the variety of OnetoOneField key connections created in an application. Moreover, the structure of a Django setup lets in to preserve those fields very sophisticatedly with no huge adjustments implemented withinside the database. This is the principal gain of Django setup.
Django Get_or_Create Field
Introduction of Django Get_or_Create Field
Sometimes there may be scenarios where the object or the value is not passed default. So in these instances, when the value is not passed from the user or upstream, there will be a need to get the value from the source; in case at the instance when the value is not derived from the source, then the value may need to be created. So, in these instances, when the value is expected to be retrieved, the get or create will be used. The get or create method will create the given values when a get does not return any value.
Syntax:
Object_Name = model_name.objects.Get_or_CreateField(values)
The object to be created is placed as the leftmost item. So the leftmost item will be the object. Then the model for which the object needs to be triggered on get or create is placed. The values for the get or create has to be associated in the arguments area. The methods like get or create provide a lot of flexibility in declaring the object and instantiating the value for the object. These are among the advantages of the GetorCreate function.
How Do Get_or_Create Field Works in Django?
The way through which we get or create works is exciting. The get or create involves a get call. The get process will be triggered based on this value. When the initial get() returns the expected value, a tuple will be returned with a Boolean value as false. Multipleobjects returned error will be raised when the call retunes more than one object. When the case of the object not found is raised, then the get_or_create will instantiate a save new object process, returning a tuple and a Boolean value of True. So the new value will be stored as expected, and the get or create will be instantiated.
Create a Django Get_Or_Create Field
Creating a Django Get_Or_Create Field is explained below:
1. Changes in Models.py file
As the syntax section mentions, the Get_or_Create field must be declared in the models.py file. We can notice that the Get_or_Create field is declared as the age field in the model.
(models.py)
from django.db import models
from django.contrib.auth.models import User
class Bride(models.Model):
Get_or_create_Example__Example_name = models.CharField(max_length=200,null=True)
Get_or_create_Example__Example_age = models.Get_or_create_Example_Field(null=True)
Get_or_create_Example__Example_thegai = models.CharField(max_length=200,null=True)
Get_or_create_Example__Example_State = models.CharField(max_length=50,null=True)
Get_or_create_Example__Example_District = models.CharField(max_length=50,null=True)
Get_or_create_Example__Example_Address = models.TextField(null=True)
Get_or_create_Example__Example_Phone = models.BigGet_or_create_Example_Field(null=True)
Get_or_create_Example__Example_profession = models.CharField(max_length=200,null=True)
Get_or_create_Example__Example_salary = models.BigGet_or_create_Example_Field(null=True)
Get_or_create_Example__Example_Under_Graduation_Degree = models.CharField(max_length=200,null=True)
Get_or_create_Example__Example_Under_Graduation_college = models.CharField(max_length=400,null=True)
Get_or_create_Example__Example_Post_Graduation_Degree = models.CharField(max_length=200,null=True)
Get_or_create_Example__Example_Post_Graduation_college = models.CharField(max_length=400,null=True)
Get_or_create_Example__Example_Rasi = models.CharField(max_length=200,null=True)
Get_or_create_Example__Example_Nakshatra = models.CharField(max_length=200,null=True)
def __str__(self):
return self.name
2. Changes in Settings.py file
Ensure all of the values and the database connects are set nicely within the settings.py record so the undertaking may be kicked for execution flexibly. The middleware objects stated under must be declared well within the settings.py record because those center wares are chargeable for the functioning of the software at the same time as processing GET and PUT messages. Additionally, the templates used want to cram so that the template processing takes place within the background.
(Settings.py):
MIDDLEWARE = [
'django.middleware.security.SecurityMiddleware',
'django.contrib.sessions.middleware.SessionMiddleware',
'django.middleware.common.CommonMiddleware',
'django.middleware.csrf.CsrfViewMiddleware',
'django.contrib.auth.middleware.AuthenticationMiddleware',
'django.contrib.messages.middleware.MessageMiddleware',
'django.middleware.clickjacking.XFrameOptionsMiddleware',
]
ROOT_URLCONF = 'Matrimony.urls'
TEMPLATES = [
{
'BACKEND': 'django.template.backends.django.DjangoTemplates',
'DIRS': [Template_DIR,],
'APP_DIRS': True,
'OPTIONS': {
'render_dict_processors': [
'django.template.render_dict_processors.debug',
'django.template.render_dict_processors.request',
'django.contrib.auth.render_dict_processors.auth',
'django.contrib.messages.render_dict_processors.messages',
],
},
},
]
3. Changes in url.py file
The Media root and document root variables must be instantiated inside the url.py file like below. The changes for the url.py file are mentioned below.
url.py:
from django.contrib import admin
from django.urls import path
from django.conf.urls import url
from matrimony_pages import views
from django.conf import settings
from django.conf.urls.static import static
urlpatterns = [
url(r'^$',views.Welcome_page,name='Welcome_page'),
url(r'Mainpage/',views.Main_page,name='Main_page'),
url(r'form/',views.form_view,name='form_view'),
url(r"signup/", views.Sign_up_request, name="register"),
url(r"login/", views.login_request, name="login"),
path(r'profile/<str:pk>/',views.Get_or_create_Example_page,name='profile'),
url(r'logout/',views.logout_request,name='logout'),
url(r'reg/',views.Get_or_create_Example_reg_user,name='reg'),
path(r'update/<str:pk>/',views.form_update,name='update'),
path('admin/', admin.site.urls),
]+ static(settings.MEDIA_URL,document_root=settings.MEDIA_ROOT)
3. Create a view for the form
The Get_or_Create fee, while submitted, must be saved, and while retrieved, it must be pulled from the database. This may be executed through the item created for the model. The manner of doing that is defined withinside the given views.py section.
Ex: views.py
@login_required
def Get_or_create_Example_page(request,pk):
dict_to_render = {}
Get_or_create_key_variable_ = Bride.objects.get(id=pk)
Get_or_create_Example_name = Get_or_create_key_variable_.name
Get_or_create_Example_Age = Bride.objects.get_or_create(first_name='Nalandan', last_name='Ranjan',defaults={'birthday': date(1990, 10, 9)})
Get_or_create_Example_Thegai = Get_or_create_key_variable_.thegai
Get_or_create_Example_state = Get_or_create_key_variable_.State
Get_or_create_Example_district = Get_or_create_key_variable_.District
Get_or_create_Example_Address = Get_or_create_key_variable_.Address
Get_or_create_Example_Phone = Get_or_create_key_variable_.Phone
Get_or_create_Example_Profession = Get_or_create_key_variable_.profession
Get_or_create_Example_Salary = Get_or_create_key_variable_.salary
Get_or_create_Example_UG = Get_or_create_key_variable_.Under_Graduation_Degree
Get_or_create_Example_UGC = Get_or_create_key_variable_.Under_Graduation_college
Get_or_create_Example_PG = Get_or_create_key_variable_.Post_Graduation_Degree
Get_or_create_Example_PGC = Get_or_create_key_variable_.Post_Graduation_college
Get_or_create_Example_Rasi = Get_or_create_key_variable_.Rasi
Get_or_create_Example_Nakshatra = Get_or_create_key_variable_.Nakshatra
dict_to_render['Age'] = Get_or_create_Example_Age
dict_to_render['name'] = Get_or_create_Example_name
dict_to_render['thegai'] = Get_or_create_Example_Thegai
dict_to_render['State'] = Get_or_create_Example_state
dict_to_render['district'] = Get_or_create_Example_district
dict_to_render['Address'] = Get_or_create_Example_Address
dict_to_render['Phone'] = Get_or_create_Example_Phone
dict_to_render['profession'] = Get_or_create_Example_Profession
dict_to_render['Under_Graduation_Degree'] = Get_or_create_Example_UG
dict_to_render['Under_Graduation_college'] = Get_or_create_Example_UGC
dict_to_render['Post_Graduation_Degree'] = Get_or_create_Example_PG
dict_to_render['Post_Graduation_college'] = Get_or_create_Example_PGC
dict_to_render['Rasi'] = Get_or_create_Example_Rasi
dict_to_render['Nakshatra'] = Get_or_create_Example_Nakshatra
print(Get_or_create_key_variable_.Creator)
print(dict_to_render)
return render(request,'Profilepage.html',dict_to_render)
4. Formulate an HTML file for displaying the form
Corresponding changes to the HTML pages have to be performed.
Profilepage.html
<!DOCTYPE html>
<html style="font-size: 16px;">
<head>
<title>Profile</title>
</head>
<body class="body">
<nav class='navbar'>
<div class='navbar_div'>
<a class="navbar" onclick="redirect2()" >Home </a>
<a class="navbar" onclick="redirect2()" >Contact</a>
<a class="navbar" onclick="redirect1()" >Profiles</a>
</div>
</nav>
<div class="formarea">
<br>
{% block content %}
{% if Get_or_Create %}
<img src="{{Get_or_Create.url}}" align="right" alt="Get_or_Create" class="img-thumbnail" style="max-height:200px">
{% else %}
<img src="{% static 'admin/img/default.png' %}" align="right" alt="Get_or_Create" class="img-thumbnail" style="max-height:200px">
{% endif%}
<br></br>
<h6><strong>Name :    {{name}}</strong></h6>
<h6><strong>Age :    {{Age}}</strong></h6>
<h6><strong>Thegai :    {{thegai}}</strong></h6>
<h6><strong>State :    {{State}}</strong></h6>
<h6><strong>district :    {{district}}</strong></h6>
<h6><strong>Address :    {{Address}}</strong></h6>
<h6><strong>Phone :    {{Phone}}</strong></h6>
<h6><strong>profession :    {{profession}}</strong></h6>
<h6><strong>Under Graduation Degree :    {{Under_Graduation_Degree}}</strong></h6>
<h6><strong>Post_Graduation_Degree :    {{Post_Graduation_Degree}}</strong></h6>
<h6><strong>Post_Graduation_college :    {{Post_Graduation_college}}</strong></h6>
<h6><strong>Rasi :    {{Rasi}}</strong></h6>
<h6><strong>Nakshatra :    {{Nakshatra}}</strong></h6>
{% endblock content %}
</div>
</script>
</body>
</html>
Output:


Conclusion
The process of how the get or create is instantiated, and the values set for the get or create are declared nicely above. The syntax and the coding changes involved in the get or create method are discussed deeply in the above article with suitable references. All code is produced in a detailed manner.
Django Templates

Introduction to Django Templates
To understand and operate the process of Django applications these templates play a major role, all static items in a web page designed with Django hold the templates for constructing the static entities. In other words it could be described that the templates are responsible for building the skeleton of a webpage. These templates make a Django setup a MVT oriented architecture. Where M stands for the models involved, V stands for the views designed and T refers to the templates. On Standard ways the templates used in a python setup are rendered using a Django view.
Using Templates to Render Django Views
Given below are the templates to render Django views:
1. Create a template folder
All template related HTML code could be placed into this folder. The template folder has to be created under the primary project folder.
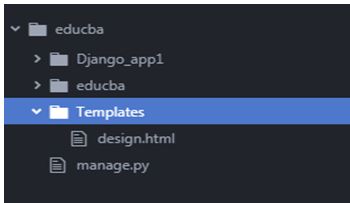
2. Tag the template folder in settings.py file
The settings.py file is used for tagging these templates to their associated views. When the tagging process is accomplished it allows all the HTML contents placed inside the folder to be falling under this template section.
Code:
import os
# Build paths inside the project like this: os.path.join(BASE_DIR,...)
BASE_DIR = os.path.dirname(os.path.dirname(os.path.abspath(__file__)))
Template_DIR = os.path.join(BASE_DIR,'Templates')
TEMPLATES = [
{
'BACKEND': 'django.template.backends.django.DjangoTemplates',
'DIRS': [Template_DIR,],
'APP_DIRS': True,
'OPTIONS': {
'context_processors': [
'django.template.context_processors.debug',
'django.template.context_processors.request',
'django.contrib.auth.context_processors.auth',
'django.contrib.messages.context_processors.messages',
,
},
},
]Template_DIR = os.path.join(BASE_DIR,'Templates')
For implementing the Django template’s API backend the python path in the BACKEND key is used. Some among the backends which are built in Django are django.template.backends.django.DjangoTemplates and django.template.backends.jinja2.Jinja2.
- The directory at which the template engine needs to locate the template related search files is placed in the DIRS directory.
- Whereas the APP_DIRS is helpful in mentioning the location at which the engine has to verify the templates within the installed applications. For every subdirectory inside the applications a conventional name is provided by each defined backend.
3. Place the HTML file inside the templates folder
Code:
<!DOCTYPE html>
<html lang="en" dir="ltr">
<head>
<meta charset="utf-8">
<title>Django App1</title>
</head>
<body>
<h1> Hello world from HTML page <h1>
</body>
</html>
Syntax:
render(request,template_name,context=None,content_type=None,status=None,using=None)
| .arguments |
Description |
| request |
This is used to generate a response. This is a mandatory argument. |
| template name |
Name of the template used for this view. This is a mandatory argument. |
| context |
A context is a variable name and variable value mapping maintained as a dictionary. In default,this is an empty dictionary. So if the key is passed the corresponding value from the dictionary can be retrieved and rendered. This is an optional argument. If nothing is provided for the context then render a empty context. |
| content_type |
MIME(Multipurpose Internet Mail Extensions) to be used. The default value is ‘text/html’. This is a optional argument. |
| status |
The response code to be used. The default response code is 200. |
| using |
This argument is used to represent the name of the template engine used for loading the template. This is a optional argument. |
Example:
Code:
from django.shortcuts import render
from django.http import  HttpResponse
def index(request_iter):
return  render(request_iter,'design.html')
4. Tag the view in urls.py file
This is the process of creating a url for the view. The url mentioned here will be used for reaching the web page which is been mentioned.
- Import the library from django.conf.urls import url.
- declare a url entry in the urlpatterns list.
url(url_path,view_to_be_tagged,name_for_this_view)
Example:
Code:
from django.contrib import admin
from django.conf.urls import url
from Django_app1 import views
urlpatterns = [
url(r'^$',views.index,name='index'),
url(r'admin/',admin.site.urls),]
5. Reload the server using python manage.py runserver command and verify webpage
The system message which is been placed below will be printed in the project console on loading the runserver. This message holds detailed information of when the server was started, the Django version which is been used and the http link at which the server is kickstarted.
Code:
Watching for file changes with StatReloader
Performing system checks...
System check identified no issues (0 silenced).
June 10, 2020 - 11:23:00
Django version 3.0.7, using settings 'educba.settings'
Starting development server at http://127.0.0.1:8000/
Quit the server with CTRL-BREAK.
Output:


Django View Rendered from Template Tag
Given below are the Django view rendered from template tag:
1. The template tags are used for injecting dynamically generated content to the Django views. This is among the key functionalities of template tag. They could flexibly inject dynamic contents into the file.
The template tag filters could use the below listed options:
| All Options in Template Filters |
| add |
addslashes |
capfirst |
| center |
cut |
date |
| default |
dictsort |
divisibleby |
| escape |
filesizeformat |
first |
| join |
last |
length |
| linenumbers |
lower |
make_list |
| random |
slice |
slugify |
| time |
timesince |
title |
| unordered_list |
upper |
wordcount |
2. In this example we have added the if tags and the filter tags to the template.
- Add a template tag in the HTML file.
Code:
<!DOCTYPE html>
<html lang="en" dir="ltr">
<head>
<meta charset="utf-8">
<title>Django App1</title>
</head>
<body>
<h1> <u> All valid Technical tutorials </u> </h1>
{% if Entity_type == 'tutorial' %}
{{ Entity_name }}
{% else %}
{{ Error_Message }}
{% endif %}
<h2> <u> Django filters Explained <u> </h2>
<p> Student Count: {{ Entity_students_count | add:"230"}}  <p>
<p> Entity Type: {{ Entity_type | capfirst}}  <p>
</body>
</html></html></html>
Example:
from django.shortcuts import render
from django.http import  HttpResponse
def index(request_iter):
dict_Var =  {
"Entity_name": "Educba",
"Entity_type": "tutorial",
"Entity_students_count": 345,
"Error_Message": "No Valid Entity found"
}
return  render(request_iter,'design.html',context=dict_Var)
3. Reload the server using python manage.py runserver command and verify the webpage.
Output:


Conclusion
The use of templates is on among the biggest capabilities of Django in web development framework. These templates allow the Django setup to flexibility transfer dynamic content between the front end and the middle stream.
Django URL

Introduction to Django URL
URL is a path through which a specific web-based application and one particular page in that web application can be reached. So for any web-oriented application setting these url paths is a very key necessity. The same applies to Django also, So from a Django perspective setting the necessary URL’s are handled in the urls.py section of the framework and there are several techniques through which the URL’s are maintained through the application. This information on how classifiable Django handles its URL’s and what are the techniques involved for keeping these URL’s assembled are described below.
How to Create a Django URL?
How to create a Django url is given below:
1. Creating a url USING PATH()
The path method allows returning of an element to be included in URL patterns tuple which will be used as an url pattern. This was introduced in Django version 2.0 along with the re_path() method.
Syntax:
path(route, view, kwargs=None, name=None)
Example
urls.py:
from django.contrib import admin
from django.conf.urls import url,include
from django.urls import path
from Django_app1 import views
admin.autodiscover()
urlpatterns = [
path('index/',views.template_view,name='template'),
url(r'^myapp/', include('Django_app1.urls')),
url(r'admin/', admin.site.urls),
]
Output:
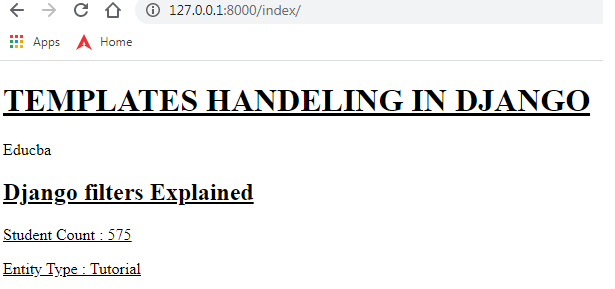
2. Creating a Django URL USING RE_PATH()
The re_path() method allows the use of python regular expressions in URLs. This was introduced in version 2.0 along with the path() method.
Syntax:
path(route, view, kwargs=None, name=None)
Example
urls.py:
rom django.contrib import admin
from django.conf.urls import url,include
from django.urls import path , re_path
from Django_app1 import views
admin.autodiscover()
urlpatterns = [
re_path('^indexs??/$',views.template_view,name='template'),
url(r'^myapp/', include('Django_app1.urls')),
url(r'admin/', admin.site.urls),
]
Output :
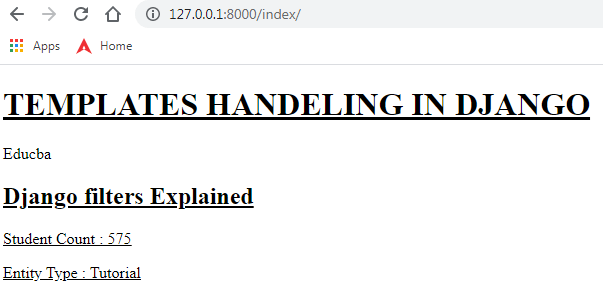
Note: The question mark in regex allows the indexes page to get loaded with only the index mentioned in it.
3. Creating a Django url Through INCLUDE
The technique involves creating url patterns within each app. This will bring more flexibility when the app needs to be plugged into a different application. Just making inclusion of these URL’s in the main project urls.py file will help to easily access the web pages associated with that Django application. Below are the steps related to making an include oriented Django urls.py in place.
Django app urls.py: First a urls.py file needs to be created within the application. So this means every Django application which was expected to be developed as a part of the Django project is considered to hold an individual urls.py file within it. This individual urls.py file will bring flexibility for the applications so that they can be easily plugged and plugged out from the main project.
As like usual urls.py, this file contains the import of the url class from the django.conf.URLs library, most importantly the views file for this application is expected to be imported here from the Django application mentioned. The view method which has been imported needs to be specified in the import of the views from the Django application. additionally as like mention in the URL declarations above here again a name s associated to the url mapping and the path of the mapping is also placed. So this section acts as the formulation of urls.py file inside the individual Django application.
from django.contrib import admin
from django.conf.urls import url
from Django_app1 import views
urlpatterns = [
url(r'formpage/',views.formView,name='form'),
]
Main project urls.py: This urls.py file will be acting as the premiere URLs linking the library for the entire application. here all the URLs from the Django application can be included which means every page addressed in those applications can be accessed here sophisticatedly. The first major element to be taken care is that the include method is imported from django.conf.urls library. This is the first key thing to be taken care of. Next, ensure the admin class is also imported. This admin class is useful in setting the auto-discover method. At last, it needs to be ensured that the urls.py file from the Django application is included as an item to the urlpatterns tuple. Making this include will automatically import all the urls from that corresponding application.
from django.contrib import admin
from django.conf.urls import url,include
from Django_app1 import views
admin.autodiscover()
urlpatterns = [
url(r'^$',views.template_view,name='template'),
url(r'^myapp/', include('Django_app1.urls')),
url(r'admin/', admin.site.urls),
]
Output:
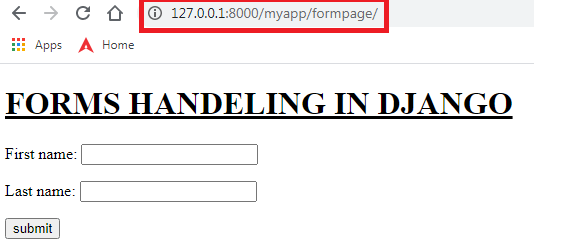
4. Setting Converters in URLS
The converters are responsible for converting a dynamic value in the URL to a needed value format.
Example
The below example shows how the url value can be converted to a string format and passed into its corresponding view.
urls.py:
from django.contrib import admin
from django.conf.urls import url,include
from django.urls import path , re_path,register_converter
from django.urls.converters import StringConverter
from Django_app1 import views
admin.autodiscover()
register_converter(StringConverter, 'username')
urlpatterns = [
path('index/<username:uname>/',views.template_view,name='template'),
#    url(r'formpage/',views.formView,name='form'),
url(r'^myapp/', include('Django_app1.urls')),
url(r'admin/', admin.site.urls),
]
Views.py:
from django.shortcuts import render
from django.http import  HttpResponse
from Django_app1.forms import Valueform
from django.core.exceptions import ViewDoesNotExist
from django.contrib.auth.models import User
def template_view(request_iter,uname):
template_Var =  {
"Entity_name" : "Educba",
"Entity_type"  : "tutorial",
"Entity_students_count" : 345,
"Error_Message" : "No Valid Entity found"
}
print("Username:",uname)
return  render(request_iter,'design.html',context=template_Var)
Output:
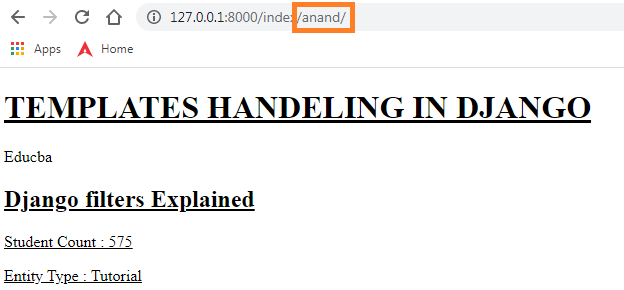
5. Creating a Django URL Through URL()
1. Create a Template folder: First to hold the html design for the web page the necessary templates are expected to be created. these templates are stored in the template folder, So for a Django project all the code associated. The template folder has to be created under the primary project folder.
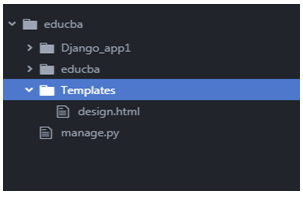
2. Tag the Template folder in settings.py file: The settings.py file needs to have the tag for the templates folder so that all templates are accessible for the entire Django project. This brings in the capability of accessing all the html files which are been placed as a part of the templates folder.
3. Place an HTML file inside the Templates folder: The HTML content for the web page is drafted.
<!DOCTYPE html>
<html lang="en" dir="ltr">
<head>
<meta charset="utf-8">
<title>Django App1</title>
</head>
<body>
<h1> Hello world from HTML page <h1>
</body>
</html>
4. Render the html file in views.py using render() method: For passing the newly created HTML content to the web page or in other words to connect the content to the webpage the render() method is used. The render method combines a template with the context dictionary to return a HttpResponse object.
from django.shortcuts import render
from django.http import  HttpRespons
def index(request_iter):
return  render(request_iter,'design.html')
- Import the library from django.conf.urls import url.
- declare a url entry in the urlpatterns list.
url(url_path, view_to_be_tagged, name_for_this_view)
from django.contrib import admin
from django.conf.urls import url
from Django_app1 import views
urlpatterns = [
url(r'^$',views.index,name='index'),
url(r'admin/', admin.site.urls), ]
- Reload the server using python manage.py runserver command and verify the webpage.
- The console will be pasted with the below listed server messages, So the time of the server to be kickstarted can be identified from this, also the http link and the version of the Django server which is been used will also be displayed.
Watching for file changes with StatReloader
Performing system checks...
System check identified no issues (0 silenced).
June 23, 2020 - 13:33:00
Django version 3.0.7, using settings 'educba.settings'
Starting development server at http://127.0.0.1:8000/
Quit the server with CTRL-BREAK.
- Reload the server using python manage.py runserver command and verify the webpage.
Output:


6. Django URL Error Codes
| Error Code |
Meaning |
| 400 |
Bad request |
| 403 |
Permission denied |
| 404 |
Page not found |
| 500 |
Server Error
|
Django Exceptions

Introduction to Django Exceptions
An exception can be defined as an event that will be deviating the normal execution of a program into an abnormal state. The try and exception blocks in the exception strategy are helpful in handling these exceptions. These python oriented exceptions are widely classified deep. From a django perspective, the django framework holds its own set of exceptions. All these exceptions which are tagged under django framework are considered to be created to be suitable to address the various possible exception scenarios which are generated in django framework. These classified set of django exceptions are mentioned below briefly along with their possible instance of occurrence.
Standard Django Exceptions List
Below are the list of overall standard exceptions which are been triggered in Django setup,
AppRegistryNotReady: There are two instances were this error could be triggered, First is when there is an attempt to use the models associated to django set up before the app is been successfully loaded. Second is placing an invalid app in the INSTALLED_APPS directory. So placing an application that cannot be successfully imported will also throw this error. This error is more related to the INSTALLED APPS section in the settings.py file.
SESSION_ENGINE = 'django.contrib.sessions.backends.cache'
CACHES = {
'default': {
'BACKEND': 'django.core.cache.backends.locmem.LocMemCache'
}
}
INSTALLED_APPS = [
'django.contrib.admin',
'django.contrib.auth',
'django.contrib.contenttypes',
'django.contrib.sessions',
'django.contrib.messages',
'django.contrib.staticfiles',
'django.contrib.postgres',
'Django_app1'
]
- ObjectDoesNotExist: When an object is not a part of the corresponding model then the error objectDoesNotExit gets triggered. This exception is a base class of the DoesNotExist exceptions.
- FieldDoesNotExist: The field does not exist an error is triggered when the attempted field is not a part of the database or the model referred. this means when the attempted field in the query triggered is not a part of the model produced in the models.py file then the FieldDoesNotExist error will be triggered by the django framework. This error is raised by the _meta.get_field() of a model when the attempted field is not a valid part of that model or the parents of the model.
- MultipleObjectsReturned: This exception is raised when there is a discrepancy on a number of objects being returned back by the query. So when querying the database if the query expects a response of one object to be returned but on execution case, if more than one object is delivered as output for the query then the multiple objects exception will be triggered by the django framework. The base version for this exception is inherited in the core. exceptions class, Basically every model class will be holding a subclassed version which will be helpful in determining the object type for which multiple objects are been returned.
- SuspiciousOperation: All identified operation which are considered to be suspicious by django framework will be tagged under the exception of the suspicious operation. More predominantly exceptions which fall under security bracket are considered to be suspicious operation exceptions. This suspicious operation exception is subdivided into subclass exceptions as listed below.
- DisallowedHost
- DisallowedModelAdminLookup
- DisallowedModelAdminToField
- DisallowedRedirect
- InvalidSessionKey
- RequestDataTooBig
- SuspiciousFileOperation
- SuspiciousMultipartForm
- SuspiciousSession
- TooManyFieldsSent
- PermissionDenied:The permission denied exception is raised when the user does not hold suitable access or authority for the attempted entity. This is an access oriented exception. At most instances, security oriented issues will be tagged under this exception and triggered as permission denied instance. This exception offers additional integrity in stabilizing the application.
- ViewDoesNotExist: This exception is predominantly raised by the url.py file. When an attempted view mentioned in the urls.py file is not present in the actual views.py file then the ViewDoesNotExist error will be raised. This exception could also be raised conditionally.
Example:

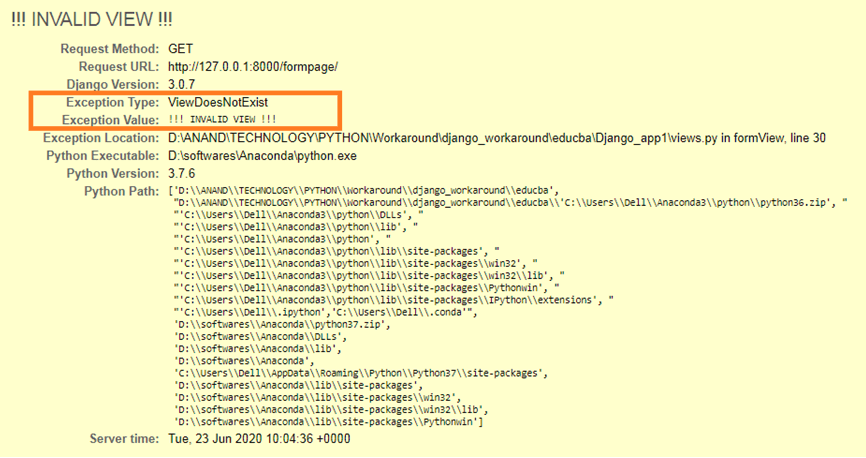
from django.shortcuts import render
from django.http import  HttpResponse
from Django_app1.forms import Valueform
from django.core.exceptions import ViewDoesNotExist
from django.contrib.auth.models import User
deftemplate_view(request_iter):
template_Var=  {
"Entity_name": "Educba",
"Entity_type" : "tutorial",
"Entity_students_count": 345,
"Error_Message": "No Valid Entity found"
}
return  render(request_iter,'design.html',context=template_Var)
defformView(request_iter):
form = Valueform()
if request_iter.method == "POST":
value = Valueform(request_iter.POST)
if value.is_valid():
first_name = value.cleaned_data['first_name'] if request_iter.session.has_key(first_name):
print(request_iter.session.items())
return render(request_iter, 'Session.html' )
else:
request_iter.session[first_name] = first_name
return render(request_iter, 'Form_Handeling.html', {"form":form})
else:
raise ViewDoesNotExist("!!! INVALID VIEW !!!")
return render(request_iter, 'Form_Handeling.html', {"form":form})
- ImproperlyConfigured:The improperly configured exception is raised when the database connected to Django is not been configured properly in the django framework. So when there are connectivity issues on the database are then this exception on improper configuration will be triggered.
Example:
Base.py (Source code from which the exception is raised):
def databases(self):
if self._databases is None:
self._databases = settings.DATABASES
if self._databases == {}:
self._databases = {
DEFAULT_DB_ALIAS: {
'ENGINE': 'django.db.backends.dummy',
},
}
if DEFAULT_DB_ALIAS not in self._databases:
raise ImproperlyConfigured("You must define a '%s' database." % DEFAULT_DB_ALIAS)
if self._databases[DEFAULT_DB_ALIAS] == {}:
self._databases[DEFAULT_DB_ALIAS]['ENGINE'] = 'django.db.backends.dummy'
return self._databases
Base.py (Framework source code which triggers the exception):
DATABASES = {
'default': {
'ENGINE': 'django.db.backends.sqlite3',
'NAME': os.path.join(BASE_DIR, 'db.sqlite3'),
}
}
Snap of The Exception:
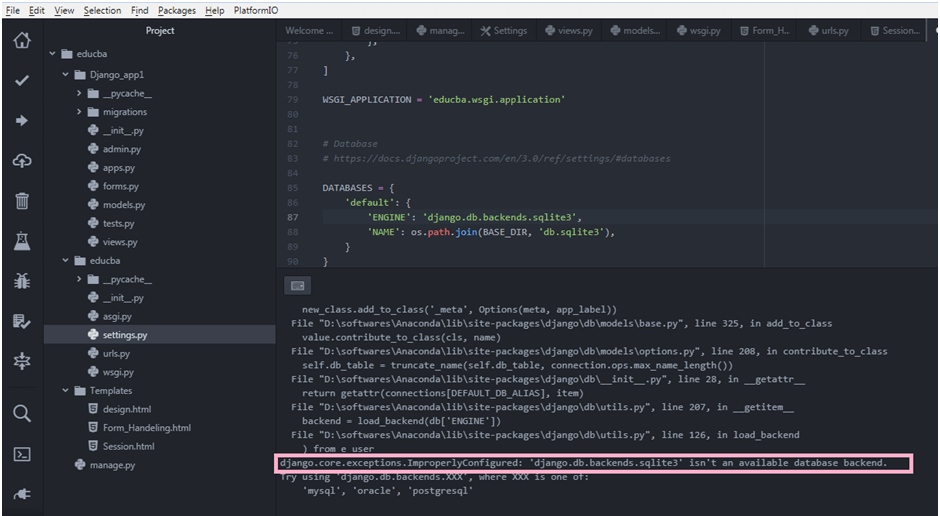
- MiddlewareNotUsed:This issue is raised if there is an issue with the middleware setup for the django project. On frequent instance of this issue is when the middleware mentioned is not properly configured in the SETTINGS.py file of the project. When there are valid issues in those middle ware configurations then those will be raised as an middleware configuration issue.
SETTINGS.py (Middleware configurations):
MIDDLEWARE = [
'django.middleware.security.SecurityMiddleware',
'django.contrib.sessions.middleware.SessionMiddleware',
'django.middleware.common.CommonMiddleware',
'django.middleware.csrf.CsrfViewMiddleware',
'django.contrib.auth.middleware.AuthenticationMiddleware',
'django.contrib.messages.middleware.MessageMiddleware',
'django.middleware.clickjacking.XFrameOptionsMiddleware',
]
- FieldError: With the databases holding a number of fields in it there are possibilities that a field mentioned in a database is not valid or it experiences some kind of issue on its existence or on its retrieval. these classified set of exceptions on the field level are mentioned by the field Error exception in Django.
- ValidationError: There are a number of ways the data in a field are expected to be validated so that they are needed consistency. These verifications can be achieved by means of custom and default validation entities. So an exception raised from these validations is tagged to be Validation Error exception.
Django File Upload

Introduction to Django File Upload
Every web application will have form processing within it, uploading files as a part of the form processing is a very common operation. the method through which these files uploaded as a part of form processing is critical. This file upload processing in Django discusses all methods involved as a part of the file level processing in Django. The files uploaded can be retrived, processed, stored, etc. libraries like storage and file system storage are very helpful in the file upload process for storage level necessities. These file fields used for file upload in Django are evolved from the forms processing section of the Django framework.
SETTING File Upload
When a file is uploaded in Django the file is tagged to the request through request.Files[]. Thes request. Files are responsible for capturing the file details being uploaded and keep them tagged within it. the uploaded file details and contents need to be retrieved from this request. Files[] section and then furtherly processed by mentioning the request.FILES with reference to the file name, this will be creating the object which is used to be acting more as like a file-based object in the file setup and storage process. All details regarding the file could be pulled from this file-based object.
How to Upload Django File?
Basically the file upload process consists of below major steps, The below-derived steps is a step by step process of how the file processing during the file upload is achieved in Django.
1. Declare the file field in the Forms.py file. This is the more critical part because this field will be used as a reference for representing the file in the template being used for processing the form. here the forms library is used for importing the FileField() class, the object created for these elements will be acting as the object for the file field. in the below example it is represented as ‘uploaded_File’.
#-*- coding: utf-8 -*-
from django import forms
class fileform(forms.Form):
Uploaded_File = forms.FileField()
2. Create the view for processing the file, This view is the most critical section in rendering and processing the file, here the above-created field will be While creating this view the below key points need to be taken into accountability.
3. The uploaded file will be tagged as a part of the request. Files, All details regarding the file and file itself can be processed using this request. Files section. The file can be captured into a file-based object by means of below line,
uploaded_file = request.FILES['Uploaded_File']
4. To access the file and details regarding the file the below methods can be used, So all operations on the file like the determination of file size, determination of name of the file, Also identifying the content type of the file which is tagged to the requested file and even reading the file can be accomplished by these methods, there are also methods named as chunks which are useful in reading the file as smaller chunks.
5. Methods of Django File Upload
Below are the methods and its description of Django File Upload:
| Method |
Description |
| UploadedFile.name |
Displays the name of the uploaded file. |
| UploadedFile.size |
Displays the size of the uploaded file. |
| UploadedFile.content_type |
Mentions the type of content being handled by the file. |
| UploadedFile.content_type_extra |
Mentions the additional headers associated to the content type. |
| UploadedFile.charset |
Mentions the character set supplied by the browser |
| UploadedFile.read() |
This method is used to read the entire data from the file. |
6. The FileSystemStorage class can be used for performing basic file storage operations on the filesystem of the local area.
Syntax:
FileSystemStorage(location, base_url, file_permissions_mode, directory_permissions_mode).
| Argument |
Description |
| Location |
This represents the directory in which the file is stored |
| base_url |
URL of the location at which the file is stored |
| file_permissions_mode |
permission associated to the file |
| directory_permissions_mode |
The file system permissions that the directory will receive when it is saved. |
7. The below view shows all file-level operations being performed on this file. the process involved in the view are explained below. First, the object for the form file is created. The model file field is used as a reference for retrieving the message from the request.files[] header. The request.FILES is assigned to an object. This object is used for all further operations on the file. So the process of identifying the file size, content header, filename, etc are achieved from this object associated to request.file method.
Code:
Views.py
from django.shortcuts import render
from django.http import HttpResponse
from Django_app1.forms import fileform
from django.contrib.auth.models import User
from django.core.files.storage import FileSystemStorage
from django.contrib import messages
def file_upload(request):
file = fileform()
print(" File Values in File Dictionary:", request.FILES)
if request.method == 'POST' and request.FILES['Uploaded_File']:
uploaded_file = request.FILES['Uploaded_File'] fs = FileSystemStorage()
filename = fs.save(uploaded_file.name, uploaded_file)
uploaded_File_Size = 'Size of Uploaded file: ' + str(uploaded_file.size)
content_type_of_uploaded_file = 'Content type of uploaded file: ' + str(uploaded_file.content_type)
uploaded_file_name = 'Name of Uploaded file: ' + str(uploaded_file.name)
uploaded_file_url = fs.url(filename)
print("uploaded file url",uploaded_file_url)
messages.success(request, '!!! File upload successful !!!')
messages.success(request,uploaded_File_Size)
messages.success(request,uploaded_file_name)
messages.success(request,content_type_of_uploaded_file)
return render(request, 'filehandeling.html', {"file":file})
return render(request, 'filehandeling.html',{"file":file})
8. The HTML template for the file needs to be formulated, in the below-shown code snippet, the file upload field is rendered from the forms.py section of the application. The HTML file additionally includes code for displaying the messages which are triggered as a part of the file upload process.
Message Framework Methods:
- messages.debug(request, ‘Intended message’)
- messages.info(request,’Intended message’)
- messages.success(request,’Intended message’)
- messages.warning(request, ‘Intended message’)
- messages.error(request, ‘Intended message’)
Code:
<!DOCTYPE html>
<html lang="en" dir="ltr">
<head>
<meta charset="utf-8">
<title>Django App1</title>
</head>
<body>
<h1> <u> FILE UPLOAD HANDELING IN DJANGO </u> </h1>
{% if messages %}
<ul>
{% for message in messages %}
<li>{{ message }}</li>
{% endfor %}
</ul>
{% endif %}
<div style = "max-width:470px;">
<form method = 'POST' enctype="multipart/form-data">
{{ file.as_p }}
{% csrf_token %}
<input type="submit" class="btn btn-primary" value="submit">
</form>
</div>
</body>
</html>
Output:


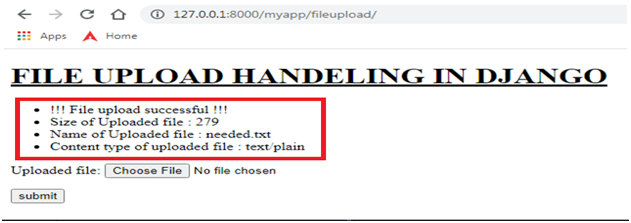
Conclusion
We can notice from the above-given examples that how flexibly the file level processing can be achieved from a Django framework from the available set of methods.
Django Filter Queryset

Introduction of Django Filter Queryset
When the database connectivity is been established in Django, there is always a need of extracting the needed columns alone from the database and their corresponding rows, basically, the filter query set in django model filters is used for achieving this. When a value is expected to be retrieved from the database then the filter queryset section of the queryset oriented extraction comes into play. Mentioning a filter of a specific column will help us to filter and pull those corresponding values alone from the queryset retrieved. This option in django helps us to achieve abstract level filtering of needed values.
Syntax:
The syntax of filter queryset is as like below,
model.objects.filter(condition)
Creating a Queryset
Lest discuss how to create a queryset.
1. Create a models.py file in the application: The schematic structure of an database needs to be mentioned here in the moedels.py file.
Examples: (models.py)
from django.db import models
# Create your models here.
class sample(models.Model):
name =  models.CharField(max_length=20,unique=True)
card_no =    models.IntegerField()
def _str_(Self):
return self.name, self.id
We can notice the schematic structure is created as an class referring to the models import. All the expected fields of the model need to be declared in this class. also ensure the database configurations are in place so that no issues are generated while reaching the database,
Example: (SETTINGS.py)
TEMPLATES = [
{
'BACKEND': 'django.template.backends.django.DjangoTemplates',
'DIRS': [Template_DIR,],
'APP_DIRS': True,
'OPTIONS': {
'context_processors': [
'django.template.context_processors.debug',
'django.template.context_processors.request',
'django.contrib.auth.context_processors.auth',
'django.contrib.messages.context_processors.messages',
],
},
},
] WSGI_APPLICATION = 'educba.wsgi.application'
DATABASES = {
'default': {
'ENGINE': 'django.db.backends.postgresql',
'NAME': 'postgres',
'USER': 'postgres',
'PASSWORD' : 'anand',
'HOST': '127.0.0.1',
'PORT': '5432',
}
}
2. Check for Migrations: After the models file is created verify the migrations expected using the make migrations command.
python manage.py makemigrations
3. Apply the Migrations: Next, apply all the needed migrations using the migrate command.
python manage.py migrate
4. Create the needed views in the views.py file: All needed views have to be generated.
views.py
from django.shortcuts import render
from django.http import  HttpResponse
from Django_app1.forms import Valueform,fileform,emailform,requestcheckform
from django.core.exceptions import ViewDoesNotExist
from django.contrib.auth.models import User
from django.core.files.storage import FileSystemStorage
from django.contrib import messages
from django.core.mail import send_mail,EmailMessage
from Django_app1.models import sample
import requests
def requestmethods(request):
form = requestcheckform()
if request.method == 'POST':
# REQUEST OBJECT ATTRIBUTES
if request.POST['request_attribute'] == 'Request Header':
data_content = "data content of request method : " + str(request.headers)
messages.success(request,data_content)
elif request.POST['request_attribute'] == 'Request POST':
post_content = "post content of request method : " + str(request.POST)
messages.success(request,post_content)
elif request.POST['request_attribute'] == 'Request Files':
FILES_content = "FILES in request method : " + str(request.FILES)
messages.success(request,FILES_content)
elif request.POST['request_attribute'] == 'Request GET':
GET_content = "GET Content in request method : " + str(request.GET)
messages.success(request,GET_content)
elif request.POST['request_attribute'] == 'Request User':
Request_User = "User Details : " + str(request.user)
messages.success(request,Request_User)
elif request.POST['request_attribute'] == 'Request Body':
Request_body = "Request Body : " + str(request.body)
messages.success(request,Request_body)
elif request.POST['request_attribute'] == 'Request Content Type':
Request_Content_Type = "Request Content type : " + str(request.content_type)
messages.success(request,Request_Content_Type)
elif request.POST['request_attribute'] == 'Request Encoding':
Request_Encoding = "Request Encoding Used : " + str(request.encoding)
messages.success(request,Request_Encoding )
elif request.POST['request_attribute'] == 'Request Method':
Request_method = "Request Method posted : " + str(request.method)
messages.success(request,Request_method )
elif request.POST['request_attribute'] == 'Request Path':
Request_path = "Path of the request : " + str(request.path)
messages.success(request,Request_path )
elif request.POST['request_attribute'] == 'Request Cookies':
Request_Cookies = "Cookies associated to the Request : " + str(request.COOKIES)
messages.success(request,Request_Cookies )
elif request.POST['request_attribute'] == 'Request META':
Request_META = "HTTP headers info : " + str(request.META)
messages.success(request,Request_META )
# REQUEST METHODS
elif request.POST['request_attribute'] == 'Request port':
Request_port =  "Request port number: " + str(request.get_port())
messages.success(request,Request_port )
elif request.POST['request_attribute'] == 'Request host':
Request_host =  "Requested Host: " + str(request.get_host())
messages.success(request,Request_host)
elif request.POST['request_attribute'] == 'Request is_secure':
Request_secure =  "Security level of the request: " + str(request.is_secure())
messages.success(request,Request_secure)
return  render(request,'Request_methods_check.html',{"form":form})
def file_upload(request):
file = fileform()
print(" File Values in File Dictionary :", request.FILES)
if request.method == 'POST' and request.FILES['Uploaded_File']:
uploaded_file = request.FILES['Uploaded_File'] fs = FileSystemStorage()
filename = fs.save(uploaded_file.name, uploaded_file)
uploaded_File_Size = 'Size of Uploaded file : ' + str(uploaded_file.size)
content_type_of_uploaded_file = 'Content type of uploaded file : ' + str(uploaded_file.content_type)
uploaded_file_name = 'Name of Uploaded file : ' + str(uploaded_file.name)
uploaded_file_url = fs.url(filename)
print("uploaded file url",uploaded_file_url)
messages.success(request, '!!! File upload successful !!!')
messages.success(request,uploaded_File_Size)
messages.success(request,uploaded_file_name)
messages.success(request,content_type_of_uploaded_file)
return render(request, 'filehandeling.html', {"file":file})
return render(request, 'filehandeling.html',{"file":file})
def email_sending(request):
email = emailform()
if request.method == 'POST':
email_id =  request.POST['email'] email_subject =  request.POST['email_subject'] email_message =  request.POST['email_message'] mail = send_mail(email_subject,email_message,'testmysmtpconnection@gmail.com',[email_id],fail_silently = False)
response = HttpResponse(mail)
print("Content of the resposne: ",response.content)
print("Charecterset of the response: ",response.charset)
print("Status code of the response: ",response.status_code)
print("Reason phrase of the response: ",response.reason_phrase)
print("Reason close status: ",response.closed)
return response
return render(request, 'emailpage.html',{"email":email})
def db_hit(request):
all_objects =  sample.objects.all()
for i in all_objects:
print(i.card_no)
print(sample.objects.filter(card_no = 102))
return render(request, 'model.html')
6. Generate the needed Templates: The templates mentioning the webpage has to be created.
model.html:
<!DOCTYPE html>
<html lang="en" dir="ltr">
<head>
<meta charset="utf-8">
<title>Django App1</title>
{% load static %}
<link href="{% static 'admin/css/font.css' %}" rel="stylesheet">
<style>
body {
background-image: url("{% static 'admin/img/background.jpg' %}");
background-color: #acccbb;
}
</style>
</head>
<body>
<h1> <u> MODEL HANDELING </u> </h1>
</body>
</html>
email_page.html:
<!DOCTYPE html>
<html lang="en" dir="ltr">
<head>
<meta charset="utf-8">
<title>Django App1</title>
{% load static %}
<link href="{% static 'admin/css/font.css' %}" rel="stylesheet">
<style>
body {
background-image: url("{% static 'admin/img/background.jpg' %}");
background-color: #acccbb;
}
.myDiv {
border: 5px outset red;
background-color: lightblue;
text-align: center;
font-family: "Comic Sans MS", cursive, sans-serif;
font-size: 14px;
letter-spacing: 2px;
word-spacing: 1.8px;
text-align: left;
color: #02071C;
font-weight: 200;
text-decoration: none;
font-style: normal;
font-variant: normal;
text-transform: capitalize;
}
</style>
</head>
<body>
<h1> <u> DJANGO HANDELING EMAILS </u> </h1>
<div class="myDiv" style = "max-width:470px;">
<form method =  'POST' ">
{{ email.as_p }}
{% csrf_token %}
<input type="submit" class="btn btn-primary" value="submit" style="text-align:center">
</form>
</div>
</body>
</html>
7. Tag the view in urls.py file: This is the process of creating a url for the view.
- Import the library from django.conf.urls import url
- declare a url entry in the urlpatterns list
url(url_path, view_to_be_tagged, name_for_this_view)
urls.py:
from django.contrib import admin
from django.conf.urls import url
from Django_app1 import views
urlpatterns = [
url(r'formpage/',views.formView,name='form'),
url(r'fileupload/',views.file_upload,name='file_upload'),
url(r'emailpage/',views.email_sending,name='email_sending'),
url(r'requests/',views.Httpmethods,name='Request_check'),
url(r'requestmethod/',views.requestmethods,name='request_method'),
url(r'model/',views.db_hit,name='db_hit'),
]
Output:

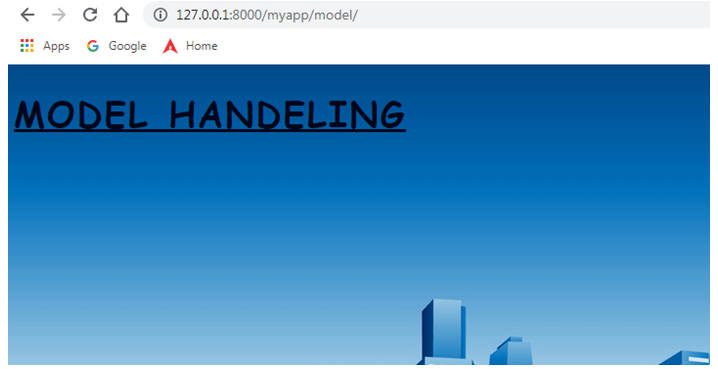
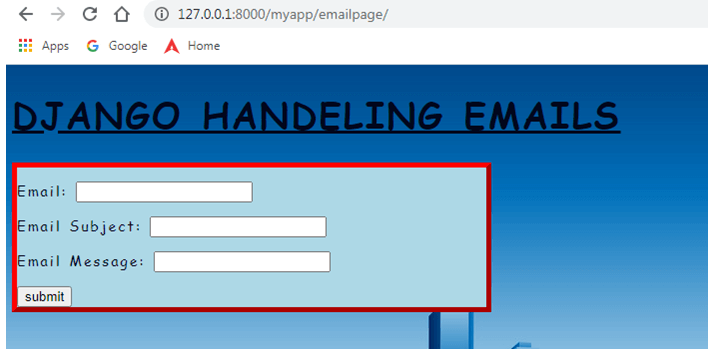
Django JsonResponse

Introduction to Django JsonResponse
JSON is a format very flexibly preferred nowadays, so support for JSON is extended across all technology formats. This is because of the easy capability to reference and parse data in JSON objects. This parsing capability offers a large extent of preference for JSON objects. So, like other platforms, Django also provides support for JSON, and support is offered by means of JSON response. So when data is rendered like an HTML page rendering, JSON objects can also be rendered. This rendering of JSON objects is depicted below.
Syntax:
from django.http import JsonResponse
JsonResponse(data,safe=TRUE/FALSE)
How JsonResponse works in Django?
Understanding how JSON objects receive data involves actively working with the JSON format. The first and most significant element to ensure is to import the JsonResponse class from Django. HTTP library. This is a very critical step, only if the Django. HTTP library shares the JsonRespose class, then the JSON-based rendering can be performed. The class will make the JSON response element to be available for the remaining of the program. Next, the data for rendering needs to be formulated. When formulating data, one must consider its source, whether it be from forms, random input, or databases. It is crucial to properly format the data to determine how it will be populated and which information will be involved in the process. After this comes the key part of data rendering. The data rendering is the critical section where the JSON response will be rendered. This process involves depicting the data on the console. Furthermore, you must ensure to add the URL entry for the data.
Create a Django JsonResponse:
1. Changes in Models.py file: The JsonResponse charge at the same time as submitted ought to be stored, and at the same time as retrieved, it ought to be pulled from the database. Use the object created for the model, as explained in the following section of views.py, to complete this task.
models.py
from django.db import models
from django.contrib.auth.models import User
class Bride(models.Model):
JsonResponse_Example_name = models.CharField(max_length=200,null=True)
JsonResponse_Example_thegai = models.CharField(max_length=200,null=True)
JsonResponse_Example_State = models.CharField(max_length=50,null=True)
JsonResponse_Example_District = models.CharField(max_length=50,null=True)
JsonResponse_Example_Address = models.TextField(null=True)
JsonResponse_Example_Phone = models.BigJsonResponse_Example_Field(null=True)
JsonResponse_Example_profession = models.CharField(max_length=200,null=True)
JsonResponse_Example_salary = models.BigJsonResponse_Example_Field(null=True)
JsonResponse_Example_Under_Graduation_Degree = models.CharField(max_length=200,null=True)
JsonResponse_Example_Under_Graduation_college = models.CharField(max_length=400,null=True)
JsonResponse_Example_Post_Graduation_Degree = models.CharField(max_length=200,null=True)
JsonResponse_Example_Post_Graduation_college = models.CharField(max_length=400,null=True)
JsonResponse_Example_Rasi = models.CharField(max_length=200,null=True)
JsonResponse_Example_Nakshatra = models.CharField(max_length=200,null=True)
JsonResponse_Example_Creator = models.ForeignKey(User, null=True, on_delete=models.CASCADE)
def _str_(self):
return self.name
2. Changes in Forms.py file:
We have made the following modifications to the forms.py file, which include adding the “bride” table and linking and declaring all of its fields within the forms.py file.
forms.py
from django import forms
from .models import Bride
from django.contrib.auth.forms import UserCreationForm
from django.contrib.auth.models import User
class Valueform(forms.ModelForm):
class Meta:
model = Bride
fields = "__all__"
3. Changes in Settings.py file:
Ensure that you properly configure the values and database connections in the settings.py file to ensure smooth and flexible execution of the project.
Settings.py:
MIDDLEWARE = [
    'django.middleware.security.SecurityMiddleware',
    'django.contrib.sessions.middleware.SessionMiddleware',
    'django.middleware.common.CommonMiddleware',
    'django.middleware.csrf.CsrfViewMiddleware',


    'django.contrib.auth.middleware.AuthenticationMiddleware',
    'django.contrib.messages.middleware.MessageMiddleware',
    'django.middleware.clickjacking.XFrameOptionsMiddleware',
]

ROOT_URLCONF = 'Matrimony.urls'
TEMPLATES = [
    {
        'BACKEND': 'django.template.backends.django.DjangoTemplates',
        'DIRS': [Template_DIR,],
        'APP_DIRS': True,
        'OPTIONS': {
            'render_dict_processors': [
                'django.template.render_dict_processors.debug',
                'django.template.render_dict_processors.request',
                'django.contrib.auth.render_dict_processors.auth',
                'django.contrib.messages.render_dict_processors.messages',
            ],
        },
    },
]
4. Changes in url.py file:
It’s crucial that you instantiate the Media root and document root variables within the url.py file to configure it correctly. Here are the steps you need to take to make the necessary adjustments to the url.py file.
url.py:
from django.contrib import admin
from django.urls import path
from django.conf.urls import url
from matrimony_pages import views
from django.conf import settings
from django.conf.urls.static import static
urlpatterns = [
    url(r'^$',views.Welcome_page,name='Welcome_page'),
    url(r'Mainpage/',views.Main_page,name='Main_page'),
    url(r'form/',views.form_view,name='form_view'),
    url(r"signup/", views.Sign_up_request, name="register"),
    url(r"login/", views.login_request, name="login"),
   path(r'profile//',views.JsonResponse_Example_page,name='profile'),
    url(r'logout/',views.logout_request,name='logout'),
    url(r'reg/',views.JsonResponse_Example_reg_user,name='reg'),
    path(r'update//',views.form_update,name='update'),
    path('admin/', admin.site.urls),
]+ static(settings.MEDIA_URL,document_root=settings.MEDIA_ROOT)
5. Create a view for the form: The JsonResponse rate while submitted must be stored, and it must be retrieved from the database. Use the object you created for the model to complete this task. Refer to the views.py section provided below for instructions on how to do this.
views.py
from django.shortcuts import render, redirect
from django.http import HttpResponse
from .models import *
from .forms import NewUserForm,Valueform
from django.contrib.auth import login,authenticate,logout
from django.contrib import messages
from django.contrib.auth.forms import AuthenticationForm
from django.contrib.auth.models import User
from django.contrib.auth.decorators import user_passes_test,login_required
from django.core.paginator import Paginator
from django.http import JsonResponse
def form_view(request):
form = Valueform(request.POST or None)
if form.is_valid():
post = form.save()
post.Creator = request.user
print('Creator user stored',request.user)
post.save()
return render(request,'form.html', {"form": form})
@login_required
def JsonResponse_Example_page(request,pk):
Json_dict = {}
JsonResponse_key_variable_ = Bride.objects.get(id=pk)
JsonResponse_Example_name = JsonResponse_key_variable_.name
JsonResponse_Example_Age = Bride.objects.JsonResponse(first_name='Nalandan', last_name='Ranjan',defaults={'birthday': date(1990, 10, 9)})
JsonResponse_Example_Thegai = JsonResponse_key_variable_.thegai
JsonResponse_Example_state = JsonResponse_key_variable_.State
JsonResponse_Example_district = JsonResponse_key_variable_.District
JsonResponse_Example_Address = JsonResponse_key_variable_.Address
JsonResponse_Example_Phone = JsonResponse_key_variable_.Phone
JsonResponse_Example_Profession = JsonResponse_key_variable_.profession
JsonResponse_Example_Salary = JsonResponse_key_variable_.salary
JsonResponse_Example_UG = JsonResponse_key_variable_.Under_Graduation_Degree
JsonResponse_Example_UGC = JsonResponse_key_variable_.Under_Graduation_college
JsonResponse_Example_PG = JsonResponse_key_variable_.Post_Graduation_Degree
JsonResponse_Example_PGC = JsonResponse_key_variable_.Post_Graduation_college
JsonResponse_Example_Rasi = JsonResponse_key_variable_.Rasi
JsonResponse_Example_Nakshatra = JsonResponse_key_variable_.Nakshatra
Json_dict['Age'] = JsonResponse_Example_Age
Json_dict['name'] = JsonResponse_Example_name
Json_dict['thegai'] = JsonResponse_Example_Thegai
Json_dict['State'] = JsonResponse_Example_state
Json_dict['district'] = JsonResponse_Example_district
Json_dict['Address'] = JsonResponse_Example_Address
Json_dict['Phone'] = JsonResponse_Example_Phone
Json_dict['profession'] = JsonResponse_Example_Profession
Json_dict['Under_Graduation_Degree'] = JsonResponse_Example_UG
Json_dict['Under_Graduation_college'] = JsonResponse_Example_UGC
Json_dict['Post_Graduation_Degree'] = JsonResponse_Example_PG
Json_dict['Post_Graduation_college'] = JsonResponse_Example_PGC
Json_dict['Rasi'] = JsonResponse_Example_Rasi
Json_dict['Nakshatra'] = JsonResponse_Example_Nakshatra
return render(request,'Profilepage.html',Json_dict)
+def Json_Response(request):
jsondata = [{'name': 'Name of bride'},
{'Age': 'Age of Bride'},
{'thegai': 'Thegai'},
{'state': 'state of bride'},
{'district': 'bride district'},
{'address': 'address details'},
{'phone': 'phone details'},
{'UGD': 'Degree details'},
{'UGC': 'College details'},
{'PGD': 'Post Degree details'},
{'PGC': 'post College details'},
{'Rasi': 'details of rasi'},
{'Nakshatra': 'Nakshatra details'}
]
return JsonResponse(jsondata, safe=False)
Output:

Conclusion
This guide explains how to claim JsonResponse area combos in Django, outlining the syntax and how JsonResponse relationships function in Django. Additionally, it provides a live website example, along with screenshots, and highlights any updates made to Django-related documents.
Django Cache

Introduction to Django Cache
When a page is requested in a web application several processes should be performed in the backend to bring the page to the requester. The process could be of hitting database queries, calling templates, performing several calculations, etc. performing these operations from scratch for every page call may become expensive for sites with heavy traffic. One way to tackle this is by setting a cache system. The cache system will save the outcome of an expensive operation so that the calculation can be omitted next instance.
Types of Django cache
As far as Django is concerned Django is classified into 5 major types, these five major types are the key classifications in the cache process of Django. Each of these types has its own way of caching the data. On the other hand, the intention is to store the data well and make cognitive processing. The various types of cache are discussed below:
- Memcached
- Filesystem caching
- Local memory cache
- Dummy cache
- Database cache
How did the cache work?
The process of caching can be performed in several ways, Through a database, memory, filesystem, etc. each method could be more efficient than the other. The various methods of caching are explained below,
1. Memcahed
Memcached is a daemon server that will do the process of caching. The Memcached will be running as a daemon with memory RAM allocated for it. There are several Memory cache’s in the market. Some of the popular ones are listed here,
1) pylibmc
2) pymemcache
3) memcachedcache
The below example shows the Django cache system based on memcachedcache,
1) Download the Memcached software and extract the software to a desktop location.
2) To view the various options of Memcached below command can be used. Ensure to shift to the Memcached directory before executing the command to view the options.
Cd C:\Users\ANAND\Downloads\memcached-win32-1.4.4-14
.\memcached.exe -h
3) Set the Memcached active using its commands, one sample command is given below.
.\memcached.exe -m 512 -vvv
slab class 32: chunk size 96256 perslab 10
slab class 33: chunk size 120320 perslab 8
slab class 34: chunk size 150400 perslab 6
slab class 35: chunk size 188000 perslab 5
slab class 36: chunk size 235000 perslab 4
slab class 37: chunk size 293752 perslab 3
slab class 38: chunk size 367192 perslab 2
slab class 39: chunk size 458992 perslab 2
slab class 40: chunk size 573744 perslab 1
slab class 41: chunk size 717184 perslab 1
slab class 42: chunk size 1048576 perslab 1
<624 server listening (auto-negotiate)
<652 server listening (auto-negotiate)
<656 send buffer was 65536, now 268435456
<656 server listening (udp)
<656 server listening (udp)
<656 server listening (udp)
<656 server listening (udp)
<660 send buffer was 65536, now 268435456
<660 server listening (udp)
<660 server listening (udp)
<660 server listening (udp)
<660 server listening (udp)
4) Install the Memcached client in Python
pip install python-memcached
6) In the Django project set cache values in the settings.py file,
CACHES = {
    'default': {
        'BACKEND': 'django.core.cache.backends.memcached.MemcachedCache',
        'LOCATION': '127.0.0.1:11211',
    }
}
Output:
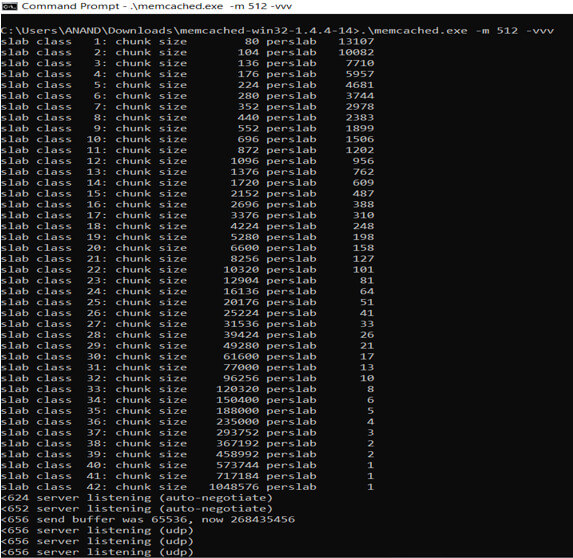
2. Filesystem caching
In file system caching the cache files will be cached in a file/folder location. To set a file system cache the below are the steps,
1) Make the below changes in the settings.py file, in the below change the location mentions the position where the changes are intended to be stored.
CACHES = {
    'default': {
        'BACKEND': 'django.core.cache.backends.filebased.FileBasedCache',
        'LOCATION': 'D:\sample',
    }
}
Here ensure the location is absolute, Since the location needs to be absolute it must be starting from a root directory.
2) Add the highlighted components to the middleware in the same order.
MIDDLEWARE = [
    'django.middleware.security.SecurityMiddleware',
    'django.contrib.sessions.middleware.SessionMiddleware',
    'django.middleware.cache.UpdateCacheMiddleware',
    'django.middleware.common.CommonMiddleware',
    'django.middleware.cache.FetchFromCacheMiddleware',
    'django.middleware.csrf.CsrfViewMiddleware',
    'django.contrib.auth.middleware.AuthenticationMiddleware',
    'django.contrib.messages.middleware.MessageMiddleware',
    'django.middleware.clickjacking.XFrameOptionsMiddleware',
]
3) Now accessing the website will trigger the cache files to be cached in the mentioned location.
Output:

3. Local-Memorycache
The local memory cache is the default cache service used by Django when no further cache services are explicitly defined.
CACHES = {
    'default': {
        'BACKEND': 'django.core.cache.backends.locmem.LocMemCache',
        'LOCATION': 'test',
    }
}
Here the location mentions the memory stores. It can be mentioned only when more than one memory store are used.
4. Dummy cache
If the web application doesn’t want any cache in the backend, then dummy caching can be initiated. The dummy cache will not cache anything instead the cache interface will be initiated without doing anything.
CACHES = { 'default': {
        'BACKEND': 'django.core.cache.backends.dummy.DummyCache',
    } }
5. Database cache
The database cache is a process where the cache values are captured in the database. Here the database cache class has to be referred then the table targeted is expected to be mentioned. First, the database cache class is placed in the Django library inside the core library and within the cache library at the backends section in db and in the database cache. From there on the table has to be mentioned in the location section of the cache services.
CACHES = { 'default': {
'BACKEND': 'django.core.cache.backends.db.DatabaseCache',
'LOCATION': 'cache_table',
} }
In the above code example the BACKEND value is set to the database-based library ‘django.core.cache.backends.db.DatabaseCache’, whereas the location value is set to the table for which the value is expected to be stored. The cache table needs to be created in the database. The cache table can be most probably created using the python manage.py cachetable command. The above command itself will create the table expected. More interestingly more than one table can be used for storing the cache. This means that at one instance of time more than one table can be used for cache services. This is another example of how the database cache works in Django. The database-level caching process is very similar to caching of the services in file and memory allocation levels.
Conclusion
The given article deals with how the values have to be handled in Django. It also explains on what are the various types of cache services associated with Django. All these types of Django services are compared and expressed with suitable examples along with their operation.
Django Reverse

Introduction to Django Reverse
Usually, all web applications involve a huge amount of url’s in them. Based on the web application, the number url’s can be thousands and even lakhs. With these many pages deployed, hardcoding the url’s in each page, or each view, or every template involved may become very hectic in the future. It may create many issues in the future when there are any changes to the url’s used. To overcome this, the reverse function can be used. The reverse function allows retrieving url details from the url’s.py file through the name value provided. This is the primary use of the reverse function in Django.
Syntax:
from django.urls import reverse
Redirect_Variable = reverse(redirect_url_name)
The redirect variable is the variable here that will have the reversed value. So the reversed url value will be placed here. So for the name of the url mentioned in the redirect_url_name, a url value will be allocated in the backend. This url value allocated in the backend will be associated with the redirect variable. Next, the actual reverse function is used. The actual reverse function is used for performing the reverse happens. This method will be responsible for getting the new url value reversed. With the reverse function, the name of the redirect url has to be specified. The name of url value specified here will be for the redirect url name from the url’s.py file.
How does the reverse function work in Django?
The reverse function can be considered very useful in url handling. It helps avoid any future breakdown in the application because of its capability to hold url values in it. The functioning of reverse function can be divided into three straightforward methods as like below,
1) Declare the url to be framed in the url’s.py file. This is the most critical section. All future references of the url will happen from here only.
2) Next, from the url’s.py file, go to the view, and in the new view, the reverse function has to be declared with the variable name of the url hardcoded in it. This section reverses the url field name into a valid url value.
3) The last section involves the actual redirect. Here the redirect will be triggered and processed. So when this section is called, the redirect will happen to the page insisted.
Create a DJANGO reverse function
1. Changes in url.py file
Below is the URL’s file. This will be the url.py file in which all the urls be declared, these url’s are encoded with the name argument in it. This name argument is responsible for calling the reverse function and returning the actual url value in place. We can notice from the below example that each of the urls declared is associated with a url value, which triggers a reverse-based store in the backend.
url.py:
from django.contrib import admin
from django.urls import path
from django.conf.urls import url
from matrimony_pages import views
from django.conf import settings
from django.conf.urls.static import static
urlpatterns = [
    url(r'Jsoncheck/',views.Json_Response,name='Json_Response'),
    url(r'^$',views.Entry_page,name='Entry_page'),
    url(r'Mainpage/',views.Main_page,name='Main_page'),
    url(r'all/',views.All_users,name='all'),
    url(r'form/',views.form_view,name='form_view'),
    url(r"signup/", views.Sign_up_Call, name="register"),
    url(r"login/", views.login_Call, name="login"),
    path(r'profile//',views.profile_page,name='profile'),
    url(r'logout/',views.logout_Call,name='logout'),
    url(r'reg/',views.profile_reg_user,name='reg'),
    path(r'update//',views.form_update,name='update'),
    path('admin/', admin.site.urls),
]+ static(settings.MEDIA_URL,document_root=settings.M
2. Create a view for the form
The integer value, when submitted, has to be stored, and when retrieved, it has to be pulled from the database. This can be achieved using the object created for the model. The process of doing this is explained in the below-given views.py section.
views.py
from django.shortcuts import render, redirect
from django.http import HttpResponse
from .models import *
from .forms import NewUserForm,Valueform
from django.contrib.auth import login,authenticate,logout
from django.contrib import messages
from django.contrib.auth.forms import AuthenticationForm
from django.contrib.auth.models import User
from django.contrib.auth.decorators import user_passes_test,login_required
from django.core.paginator import Paginator
from django.http import JsonResponse
from django.urls import reverse
def All_users(request):
User_entries = User.objects.all()
page = request.GET.get('page', 1)
paginator = Paginator(User_entries, 5)
users = paginator.page(page)
print(" Has other pages : ",users.has_other_pages())
print(" Has next page : ",users.has_next())
print(" Has previous page : ",users.has_previous())
print(" Has previous page : ",users.has_previous())
print(" Start Index : ",users.start_index())
print(" End Index : ",users.end_index())
if users.has_next():
print(" Next page Number: ",users.next_page_number())
elif users.has_previous():
print(" Has Previous page Number: ",users.previous_page_number())
print(paginator,users)
return render(request,"All_users.html",{'users':users})
def Sign_up_request(request):
if request.method == "POST":
form = NewUserForm(request.POST)
print(form.is_valid())
if form.is_valid():
user = form.save()
login(request, user)
print(User.objects.all())
messages.success(request, "Registration successful." )
named_redirect = reverse('Welcome_page')
return redirect(named_redirect)
messages.error(request, "Unsuccessful registration. Invalid information.")
form = NewUserForm
return render (request,template_name="Signup.html", context={"Sign_up_form":form})
def login_request(request):
if request.method == "POST":
username = request.POST.get('username', '')
password = request.POST.get('password', '')
user = authenticate(request,username=username, password=password)
if user is not None:
print('1',request.user.is_authenticated, request.user)
login(request, user)
print('1',request.user.is_authenticated, request.user)
messages.info(request, f"You are now logged in as {username}.")
named_redirect = reverse('Welcome_page')
return redirect(named_redirect)
else:
messages.error(request,"Invalid username or password.")
form = AuthenticationForm()
return render(request=request, template_name="login.html", context={"login_form":form})
def logout_request(request):
if request.user.is_authenticated:
logout(request)
print('2',request.user.is_authenticated, request.user)
messages.info(request, "Logged out successfully!")
named_redirect = reverse('Welcome_page')
return redirect(named_redirect)
@login_required
def Reverse_Redirect_Example_page(request,pk):
render_dict2 = {}
Key_details = Bride.objects.get(id=pk)
Reverse_Redirect_Example_name = Key_details.name
Reverse_Redirect_Example_Age = Key_details.age
Reverse_Redirect_Example_Thegai = Key_details.thegai
Reverse_Redirect_Example_state = Key_details.State
Reverse_Redirect_Example_district = Key_details.District
Reverse_Redirect_Example_Address = Key_details.Address
Reverse_Redirect_Example_Phone = Key_details.Phone
Reverse_Redirect_Example_Profession = Key_details.profession
Reverse_Redirect_Example_Salary = Key_details.salary
Reverse_Redirect_Example_UG = Key_details.Under_Graduation_Degree
Reverse_Redirect_Example_UGC = Key_details.Under_Graduation_college
Reverse_Redirect_Example_PG = Key_details.Post_Graduation_Degree
Reverse_Redirect_Example_PGC = Key_details.Post_Graduation_college
Reverse_Redirect_Example_UG = Key_details.Under_Graduation_Degree
Reverse_Redirect_Example_UGC = Key_details.Under_Graduation_college
Reverse_Redirect_Example_PG = Key_details.Post_Graduation_Degree
Reverse_Redirect_Example_PGC = Key_details.Post_Graduation_college
Reverse_Redirect_Example_Rasi = Key_details.Rasi
Reverse_Redirect_Example_Nakshatra = Key_details.Nakshatra
render_dict2['Age'] = Reverse_Redirect_Example_Age
render_dict2['name'] = Reverse_Redirect_Example_name
render_dict2['thegai'] = Reverse_Redirect_Example_Thegai
render_dict2['State'] = Reverse_Redirect_Example_state
render_dict2['district'] = Reverse_Redirect_Example_district
render_dict2['Address'] = Reverse_Redirect_Example_Address
render_dict2['Phone'] = Reverse_Redirect_Example_Phone
render_dict2['profession'] = Reverse_Redirect_Example_Profession
render_dict2['Under_Graduation_Degree'] = Reverse_Redirect_Example_UG
render_dict2['Under_Graduation_college'] = Reverse_Redirect_Example_UGC
render_dict2['Post_Graduation_Degree'] = Reverse_Redirect_Example_PG
render_dict2['Post_Graduation_college'] = Reverse_Redirect_Example_PGC
render_dict2['Rasi'] = Reverse_Redirect_Example_Rasi
render_dict2['Nakshatra'] = Reverse_Redirect_Example_Nakshatra
print(Key_details.Creator)
print(render_dict2)
return render(request,'Profilepage.html',render_dict2)
Output:


In the below example, output clicking the login button will redirect the user to the application’s main page. This redirect is achieved using the reverse function.
Conclusion
The above article mentions the use of the Django reverse function, how the reverse function can be used in Django to avoid hardcoding URLs, and suitable examples to explain the use and execution of the reverse function in Django.
Django create superuser

Introduction to Django create superuser
The following article provides an outline for Django to create a superuser. From the admin perspective, everything can be handled with ease in Django. Moreover, the Django framework itself provides an admin panel. This admin panel can be sophisticatedly handled to manage the admin and other users corresponding to the site. So there can be a process of setting superusers separately in Django. This process is achieved using Django create superuser process. This process involves the creation of the superuser table and then generating the super users within it. This is how the superuser creation process is handled in Django.
Syntax:
Python manage.py createsuperuser
The above command is used for setting the superuser creation process. The above panel will involve the creation of a superuser on the table database declared in the backend. The command shown above works like the one below. First, the python keyword is used for creating the python setup then the manage.py keyword allows us to initiate the superuser setting process for this current project in the superuser table in the backend. Lastly, the create superuser is the command to instantiate the creation.
Working with Django create superuser
- Execute the superuser creation command. The above command in the syntax is used for superuser creation.
Python manage.py runserver
- The superuser’s username will be requested; we need to set the superuser value here for this project. The username of the superuser will be the superuser value expected.
- Next, the email id needs to be mentioned. This is the mapping process between the user id and the email id that will be established in the backend. In other words, the user id will get tagged to the email id at this instance.
- Lastly, the password needs to be entered and confirmed with the user. This process allows you to enter the password and get the password to be confirmed with the user. This is how the superuser setup process is carried out in Django.
The below log shows the admin user setup process:
Code:
C:\Users\ANAND\Desktop\ANAND\Websites\Matrimony\Matrimony\matrimony_pages\admin.py changed, reloading.
Watching for file changes with StatReloader
Performing system checks...
System check identified no issues (0 silenced).
July 30, 2021 - 13:54:32
Django version 3.2.3, using settings 'Matrimony.settings'
Starting development server at http://127.0.0.1:8000/
Quit the server with CTRL-BREAK.
[30/Jul/2021 13:39:03] "GET /static/admin/img/Groom.jpg HTTP/1.1" 304 0
[30/Jul/2021 13:39:03] "GET /static/admin/img/Register.jpg HTTP/1.1" 304 0
[30/Jul/2021 13:39:08] "GET /admin/ HTTP/1.1" 302 0
[30/Jul/2021 13:39:08] "GET /admin/login/?next=/admin/ HTTP/1.1" 200 2615
[30/Jul/2021 13:39:08] "GET /static/admin/css/Formpage.css HTTP/1.1" 304 0
Creation snap:

Example of Django creates a superuser
Given below is the example mentioned:
Models.py file
a. (models.py):
Code:
from django.db import models
from django.contrib.auth.models import User
class Bride(models.Model):
Super_user_example_name = models.CharField(max_length=200,null=True)
Super_user_example_age = models.IntegerField(null=True)
Super_user_example_thegai = models.CharField(max_length=200,null=True)
Super_user_example_State = models.CharField(max_length=50,null=True)
Super_user_example_District = models.CharField(max_length=50,null=True)
Super_user_example_Address = models.TextField(null=True)
Super_user_example_Phone = models.BigIntegerField(null=True)
Super_user_example_profession = models.CharField(max_length=200,null=True)
Super_user_example_salary = models.BigIntegerField(null=True)
Super_user_example_Under_Graduation_Degree = models.CharField(max_length=200,null=True)
Super_user_example_Under_Graduation_college = models.CharField(max_length=400,null=True)
Super_user_example_Post_Graduation_Degree = models.CharField(max_length=200,null=True)
Super_user_example_Post_Graduation_college = models.CharField(max_length=400,null=True)
Super_user_example_Rasi = models.CharField(max_length=200,null=True)
Super_user_example_Nakshatra = models.CharField(max_length=200,null=True)
Image = models.ImageField(null=True,blank=True,upload_to="img/%y")
def __str__(self):
return self.name
b. (Settings.py):
Code:
MIDDLEWARE = [
    'django.middleware.security.SecurityMiddleware',
    'django.contrib.sessions.middleware.SessionMiddleware',
    'django.middleware.common.CommonMiddleware',
    'django.middleware.csrf.CsrfViewMiddleware',


    'django.contrib.auth.middleware.AuthenticationMiddleware',
    'django.contrib.messages.middleware.MessageMiddleware',
    'django.middleware.clickjacking.XFrameOptionsMiddleware',
]

ROOT_URLCONF = 'Matrimony.urls'
TEMPLATES = [
    {
        'BACKEND': 'django.template.backends.django.DjangoTemplates',
        'DIRS': [Template_DIR,],
        'APP_DIRS': True,
        'OPTIONS': {
            'context_processors': [
                'django.template.context_processors.debug',
                'django.template.context_processors.request',
                'django.contrib.auth.context_processors.auth',
                'django.contrib.messages.context_processors.messages',
            ],
        },
    },
]
DATABASES = {
    'default': {
        'ENGINE': 'django.db.backends.sqlite3',
        'NAME': BASE_DIR / 'db.sqlite3',
    }
}
STATIC_URL = '/static/'
MEDIA_URL = '/images/'
STATICFILES_DIRS = [os.path.join(BASE_DIR, 'static'), ]
print(STATICFILES_DIRS)
STATIC_ROOT = os.path.join(BASE_DIR, 'static')
MEDIA_ROOT = os.path.join(BASE_DIR, 'static/images')
print(STATIC_ROOT)
c. url.py:
Code:
from django.contrib import admin
from django.urls import path
from django.conf.urls import url
from matrimony_pages import views
from django.conf import settings
from django.conf.urls.static import static


urlpatterns = [
    url(r'Jsoncheck/',views.Json_Response,name='Json_Response'),
    url(r'^$',views.Welcome_page,name='Welcome_page'),
    url(r'Mainpage/',views.Main_page,name='Main_page'),
    url(r'all/',views.All_users,name='all'),
    url(r'form/',views.form_view,name='form_view'),
    url(r"signup/", views.Sign_up_request, name="register"),
    url(r"login/", views.login_request, name="login"),
    path(r'profile//',views.profile_page,name='profile'),
    url(r'logout/',views.logout_request,name='logout'),
    url(r'reg/',views.profile_reg_user,name='reg'),
    path(r'update//',views.form_update,name='update'),
    path('admin/', admin.site.urls),
    url(r'^$',views.Welcome_page,name='Welcome_page'),
    url(r'Mainpage/',views.Main_page,name='Main_page'),
    url(r'all/',views.All_users,name='all'),
    url(r'form/',views.form_view,name='form_view'),
    url(r"signup/", views.Sign_up_request, name="register"),
    url(r"login/", views.login_request, name="login"),
    path(r'profile//',views.profile_page,name='profile'),
    url(r'logout/',views.logout_request,name='logout'),
    url(r'reg/',views.profile_reg_user,name='reg'),
    path(r'update//',views.form_update,name='update'),
]
d. views.py:
Code:
@login_required
def Super_user_example_page(request,pk):
      Super_user_dict = {}
      Super_user_details = Bride.objects.get(id=pk)
      Super_user_example_name =  Super_user_details.name
      Super_user_example_Age =  Super_user_details.age
      Super_user_example_Thegai =  Super_user_details.thegai
      Super_user_example_state =  Super_user_details.State
      Super_user_example_district =  Super_user_details.District
      Super_user_example_Address =  Super_user_details.Address
      Super_user_example_Phone =  Super_user_details.Phone
      Super_user_example_Profession =  Super_user_details.profession
      Super_user_example_Salary =  Super_user_details.salary
      Super_user_example_UG =  Super_user_details.Under_Graduation_Degree
      Super_user_example_UGC =  Super_user_details.Under_Graduation_college
      Super_user_example_PG =  Super_user_details.Post_Graduation_Degree
      Super_user_example_PGC =  Super_user_details.Post_Graduation_college
      Super_user_example_UG =  Super_user_details.Under_Graduation_Degree
      Super_user_example_UGC =  Super_user_details.Under_Graduation_college
      Super_user_example_PG =  Super_user_details.Post_Graduation_Degree
      Super_user_example_PGC =  Super_user_details.Post_Graduation_college
      Super_user_example_Rasi =  Super_user_details.Rasi
      Super_user_example_Nakshatra =  Super_user_details.Nakshatra
      Super_user_example_Image =  Super_user_details.Image
      Super_user_dict['Age'] = Super_user_example_Age
      Super_user_dict['name'] = Super_user_example_name
      Super_user_dict['thegai'] = Super_user_example_Thegai
      Super_user_dict['State'] = Super_user_example_state
      Super_user_dict['district'] = Super_user_example_district
      Super_user_dict['Address'] = Super_user_example_Address
      Super_user_dict['Phone'] = Super_user_example_Phone
      Super_user_dict['profession'] = Super_user_example_Profession
      Super_user_dict['Under_Graduation_Degree'] = Super_user_example_UG
      Super_user_dict['Under_Graduation_college'] = Super_user_example_UGC
      Super_user_dict['Post_Graduation_Degree'] = Super_user_example_PG
      Super_user_dict['Post_Graduation_college'] = Super_user_example_PGC
      Super_user_dict['Rasi'] = Super_user_example_Rasi
      Super_user_dict['Nakshatra'] = Super_user_example_Nakshatra
      Super_user_dict['Image'] = Super_user_example_Image
      print(Super_user_details.Creator)
      print(Super_user_dict)
      return  render(request,'Profilepage.html',Super_user_dict)
e. Profilepage.html:
Code:
<!DOCTYPE html>
<html style="font-size: 16px;">
<head>
<title>Home</title>
{% load static %}
<link rel="stylesheet" href="{% static 'admin/css/Mainpage.css'%}" media="screen">
<meta name="viewport" content="width=device-width, initial-scale=1, maximum-scale=1, minimum-scale=1" />
<link rel="stylesheet" href="https://stackpath.bootstrapcdn.com/bootstrap/4.4.1/css/bootstrap.min.css" integrity="sha384-Vkoo8x4CGsO3+Hhxv8T/Q5PaXtkKtu6ug5TOeNV6gBiFeWPGFN9MuhOf23Q9Ifjh" crossorigin="anonymous">
<script src="https://ajax.googleapis.com/ajax/libs/jquery/3.5.1/jquery.min.js"> </script>
</head>
<body class="body">
<img class="img" src="{% static 'admin/img/Wedding1.jpg' %}" >
<nav class='navbar'>
<div class='navbar_div'>
<a class="navbar" onclick="redirect2()" >Home! </a>
<a class="navbar" onclick="redirect2()" >Contact</a>
</div>
</nav>
<form method="GET" action=".">
<div class="form-row">
<div class="form-group col-12">
<div class="input-group">
<input class="form-control py-2 border-right-0 border" type="search" name="thegai" placeholder="thegai..." />
<input class="form-control py-2 border-right-0 border" list="Rasi" type="search" name="Rasi" placeholder="Rasi..." />
<span class="input-group-append">
<div class="input-group-text bg-transparent">
<i class="fa fa-search"></i>
</div>
</span>
</div>
</div>
</div>
<button type="submit" class="btn btn-primary">Apply filters</button>
<button type="submit" onclick=redirect1() class="btn btn-primary">Remove All filters</button>
</form>
<div class="container">
<br>
{% block content %}
<div class="row">
{% for bride in brides %}
<div class="col-lg-4">
{% if bride.Image %}
<img src="{{bride.Image.url}}" align="right" alt="Image" class="img-thumbnail" style="max-height:92px">
{% else %}
<img src="{% static 'admin/img/default.png' %}" align="right" alt="Image" class="img-thumbnail" style="max-height:92px">
{% endif%}
<div class="box-element">
<h5><strong>{{bride.name}}</strong></h5>
<h6>{{bride.age}}, {{bride.thegai}}, {{bride.State}}</h6>
<form action="" method="POST">
{% csrf_token %}
<a class="btn btn-sm btn-info" href="{% url 'profile' bride.id %}" name="{{bride.id}}"><strong>View profile</strong></a>
</form>
</div>
<br></br>
</div>
<br>
{% endfor %}
{% endblock content %}
</div>
</body>
</html>
Output:
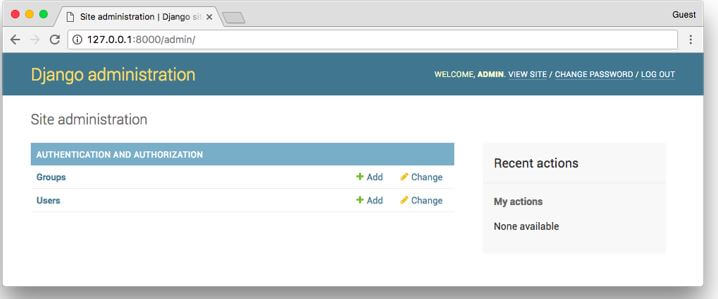
Conclusion
The article depicts how the superuser can be created efficiently in Django. Also, the changes are explained with suitable examples in each step of superuser creation. Moreover, the super users are created, and the page output is displayed.
Django HttpResponseRedirect

Introduction to Django HttpResponseRedirect
The final results from a procedure might be assigned as a reaction. This reaction can be of any object formulated and anticipated to be positioned as an output to the webpage. From there on, the response item is assigned to a variable. This variable will be used for setting up the responses. The reaction techniques and attributes are, in large part, useful. They are useful in putting in place the attributes and values for the attributes which might be used.
Syntax:
response = Httpresponseredirect(response item)
As per the above syntax, the response item, intended to be the response, is encapsulated within a Httpresponseredirect method. Once formulated, this output could be encapsulated into a httpresponseredirect approach for producing the reaction item. Once the reaction item is generated, it’s far assigned to a variable and dispatched as output.
Django HttpResponseRedirect Methods
| Httpresponse attribute |
Description |
| HttpResponse_redirect.__init__(content=”, content_type=None, status=200, reason=None, charset=None) |
The content page and content type are associated with the response object |
| HttpResponse_redirect.__setitem__(header, value) |
The value is associated with the header name |
| HttpResponse_redirect.__delitem__(header) |
Deletes a specific header |
| HttpResponse_redirect.__getitem__(header) |
Returns a value for the specific header name |
| HttpResponse_redirect.has_header(header) |
It returns True or False based on a case-insensitive check for a header with the provided name. |
| HttpResponse_redirect.setdefault(header, value) |
Allows to formulate a default header value |
| HttpResponse_redirect.write(content) |
The response for file-like objects is created using this. |
| HttpResponse_redirect.flush() |
Allows the response object to get flushed |
| HttpResponse_redirect.tell() |
A file-like object will be created in the response |
| HttpResponse_redirect.getvalue() |
It is used to get the value of HttpResponse_redirect.content. |
| HttpResponse_redirect.readable() |
A stream-like object will be created in the response |
| HttpResponse_redirect.seekable() |
It makes the response object reachable |
Changes in Models.py file:
from django.db import models
from django.contrib.auth.models import User
class Object(models.Model):
Django_response_redirect__Example_name = models.CharField(max_length=200,null=True)
Django_response_redirect__Example_thegai = models.CharField(max_length=200,null=True)
Django_response_redirect__Example_State = models.CharField(max_length=50,null=True)
Django_response_redirect__Example_District = models.CharField(max_length=50,null=True)
Django_response_redirect__Example_Address = models.TextField(null=True)
Django_response_redirect__Example_Phone = models.BigInteger_Example_Field(null=True)
Django_response_redirect__Example_profession = models.CharField(max_length=200,null=True)
Django_response_redirect__Example_salary = models.BigInteger_Example_Field(null=True)
Django_response_redirect__Example_Under_Graduation_Degree = models.CharField(max_length=200,null=True)
Django_response_redirect__Example_Under_Graduation_college = models.CharField(max_length=400,null=True)
Django_response_redirect__Example_Post_Graduation_Degree = models.CharField(max_length=200,null=True)
Django_response_redirect__Example_Post_Graduation_college = models.CharField(max_length=400,null=True)
Django_response_redirect__Example_Rasi = models.CharField(max_length=200,null=True)
Django_response_redirect__Example_Nakshatra = models.CharField(max_length=200,null=True)
Django_response_redirect__Example_Post_Graduation_Degree = models.CharField(max_length=200,null=True)
Django_response_redirect__Example_Post_Graduation_college = models.CharField(max_length=400,null=True)
Django_response_redirect__Example_Rasi = models.CharField(max_length=200,null=True)
def __str__(self):
return self.name
Create a view for the form:
The shop technique will take location with the shape.shop() method. Then the modern-day logged-in person info can be fetched and saved onto the shape. This is how the shape garage will take location. After the shape is effectively saved, it will likely be rendered directly to the browser with a render method.
def Main_page(request):
Post_keys = []
Object_id_str_list = []
Objects = Object.objects.all()
context = {'Objects':Objects}
if request.method == 'GET':
State = request.GET.get('state', '')
District = request.GET.get('district', '')
thegai = request.GET.get('thegai', '')
Rasi = request.GET.get('Rasi', '')
print(len(State),len(District),District, Rasi)
if len(State) > 0:
Filter_context = {}
Object = Object.objects.filter(State=str(State))
Filter_context = {'Objects':Object}
return render(request,'Mainpage.html',Filter_context)
if len(District) > 0:
Filter_context = {}
Object = Object.objects.filter(District=str(District))
print(Object)
Filter_context = {'Objects':Object}
return render(request,'Mainpage.html',Filter_context)
if len(thegai) > 0:
Filter_context = {}
Object = Object.objects.filter(thegai=str(thegai))
print(Object)
Filter_context = {'Objects':Object}
return render(request,'Mainpage.html',Filter_context)
if len(Rasi) > 0:
Filter_context = {}
Object = Object.objects.filter(Rasi=str(Rasi))
print(Object)
Filter_context = {'Objects':Object}
return render(request,'Mainpage.html',Filter_context)
print("Content of the resposne: ",responseredirect.content)
print("Charecterset of the response: ",responseredirect.charset)
print("Status code of the response: ",responseredirect.status_code)
print("Reason phrase of the response: ",responseredirect.reason_phrase)
print("Reason close status: ",responseredirect.closed)
return render(request,'Mainpage.html',context)
@login_required
def profile_reg_user(request):
Filter_context = {}
current_user = request.user
Object = Object.objects.filter(Creator=current_user)
Filter_context = {'Objects':Object}
print("Content of the resposne: ",responseredirect.content)
print("Charecterset of the response: ",responseredirect.charset)
print("Status code of the response: ",responseredirect.status_code)
print("Reason phrase of the response: ",responseredirect.reason_phrase)
print("Reason close status: ",responseredirect.closed)
return render(request,'Profiles_reg_user.html',Filter_context)
@login_required
def form_update(request,pk):
update_profile = Object.objects.get(id=pk)
form = Valueform(instance=update_profile)
context = {'form':form}
if request.method == 'POST':
form = Valueform(request.POST,instance=update_profile,files=request.FILES)
print(form)
if form.is_valid():
post = form.save()
post.Creator = request.user
print('Creator user stored',request.user)
post.save()
obj = form.instance
return render(request,'form.html', {"obj": obj,"form": form})
print("Content of the resposne: ",responseredirect.content)
print("Charecterset of the response: ",responseredirect.charset)
print("Status code of the response: ",responseredirect.status_code)
print("Reason phrase of the response: ",responseredirect.reason_phrase)
print("Reason close status: ",responseredirect.closed)
return render(request,'form.html', {"form": form})
url.py:
from django.contrib import admin
from django.urls import path
from django.conf.urls import url
from matrimony_pages import views
from django.conf import settings
from django.conf.urls.static import static

urlpatterns = [
    url(r'Jsoncheck/',views.Json_Response,name='Json_Response'),
    url(r'^$',views.Welcome_page,name='Welcome_page'),
    url(r'Mainpage/',views.Main_page,name='Main_page'),
    url(r'all/',views.All_users,name='all'),
    url(r'form/',views.form_view,name='form_view'),
    url(r"signup/", views.Sign_up_request, name="register"),
    url(r"login/", views.login_request, name="login"),
    path(r'profile//',views.profile_page,name='profile'),
    url(r'logout/',views.logout_request,name='logout'),
    url(r'reg/',views.profile_reg_user,name='reg'),
    path(r'update//',views.form_update,name='update'),
    path('admin/', admin.site.urls),
]+ static(settings.MEDIA_URL,document_root=settings.MEDIA_ROOT)
Form.html:
<!DOCTYPE html>
<html lang="en" dir="ltr">
<head>
<meta charset="utf-8">
<title>Django App1</title>
{% load static %}
<link href="{% static 'admin/css/font.css' %}" rel="stylesheet">
<style>
body {
background-image: url("{% static 'admin/img/background.jpg' %}");
background-color: #acccbb;
}
.myDiv {
border: 5px outset red;
background-color: lightblue;
text-align: center;
font-family: "Comic Sans MS", cursive, sans-serif;
font-size: 14px;
letter-spacing: 2px;
word-spacing: 1.8px;
text-align: left;
color: #02071C;
font-weight: 200;
text-decoration: none;
font-style: normal;
font-variant: normal;
text-transform: capitalize;
}
</style>
</head>
<body>
<h1> <u> DJANGO HANDELING EMAILS </u> </h1>
<nav class='navbar'>
<div class='navbar_div'>
<a class="navbar" onclick="redirect2()" >Home! </a>
<a class="navbar" onclick="redirect2()" >Contact</a>
</div>
</nav>
<div class="tablediv">
<script>
function form1() {
window.location.href = "http://127.0.0.1:8000/form";
}
function redirect1() {
window.location.href = "http://127.0.0.1:8000/Mainpage";
}
function redirect2() {
window.location.href = "http://127.0.0.1:8000/";
}
function redirect3() {
window.location.href = "http://127.0.0.1:8000/login";
}
function redirect4() {
window.location.href = "http://127.0.0.1:8000/signup";
}
function redirect5() {
window.location.href = "http://127.0.0.1:8000/";
}
function redirect6() {
window.location.href = "http://127.0.0.1:8000/logout";
}
function openNav() {
document.getElementById("myNav").style.width = "100%";
}
function closeNav() {
document.getElementById("myNav").style.width = "0%";
}
</script>
<div class="body">
<br>
{% block content %}
<form method="PUT" class='formarea' enctype="multipart/form-data">
<div class='formdiv'>
{{ form.as_p }}
{% csrf_token %}
<input type="submit" class='button' value="Update">
</div>
</form>
{% endblock content %}
<div class="myDiv" style = "max-width:470px;">
<form method = 'POST' ">
{{ email.as_p }}
{% csrf_token %}
<input type="submit" class="btn btn-primary" value="submit" style="text-align:center">
</form>
</div>
</body>
</html>
Output:

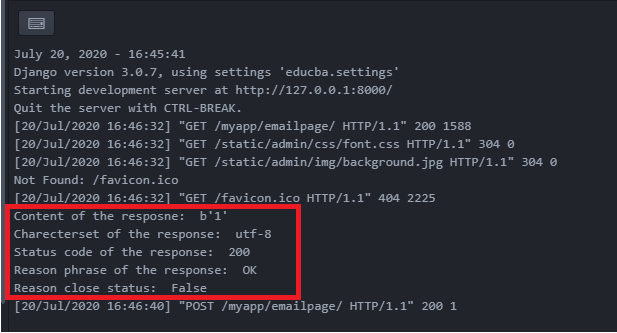
Conclusion
The article mentions how the HTTP responseredirect object is created in the Django framework. Furthermore, the thing explains the method of printing the reaction cost again withinside the console. The values are displayed withinside the console.
Django Environment Variables

Introduction to Django Environment Variables
Environment variables allow setting the Django application configurations. So, when configuration level values need to be updated, the environment level variable plays a significant role. The key aspect of these environment variables is their capability to set the configurations for the elements. Moreover, these configurations are developed so that values can be well hidden. Hence, this helps to hide the values and secure the variable and associated configuration items. Some key environment-level variables are discussed below in the upcoming sections of the article.
How do Environment variables work?
Below are the environment variables in the Django application,
1. DATABASE_URL: The database url variable is useful in supplying the database connection information.
DATABASE_URL= postgres://user:%2311pass@127.0.0.1:3306/dbname
2. EMAIL_CONFIG: The database url variable is useful in supplying the database connection information.
EMAIL_BACKEND = 'django.core.mail.backends.smtp.EmailBackend'
EMAIL_HOST = 'smtp.gmail.com'
EMAIL_USE_TLS = True
EMAIL_PORT = 597
EMAIL_HOST_USER =
EMAIL_HOST_PASSWORD =
3. SQLite URLs: This is another exciting aspect to be discussed and considered for the open discussion of how environment-level variables help set the values. File-oriented database connectivity can be established through SQLITE URLS; from the database perspective, the corresponding format of the URL can be used for not considering the hostname and mentioning the portion of the “file” as the name of the database.
4. Nested lists: Nested lists are useful in applications that involve DJANGO ADMINS entries; these entries can be sophisticatedly managed using the nested lists section.
ADMINS = [x_value.split(':') for x_value in env.list('DJANGO_ADMINS')]
from email.utils import getaddresses
ADMINS = getaddresses([env('DJANGO_ADMINS')])
5. Multiline value: It allows the set of variable values in more than one line. This is another exciting aspect to be discussed and considered for the open discussion of how environment-level variables are useful for setting the values. So this makes the setting of variable values to be extended for more than a single line involved. Hence multiple lines will be associated and used. This allows various lines to be placed as a part of the process.
6. proxy value: This is an exciting aspect; applications allow prefixing the variable value. This means that the value of a specific variable can be prefixed in Django. This is another exciting aspect to be discussed and considered for the open discussion of how the Django environment-level variables are useful for setting the values.
Examples
1. Settings.py:
Code:
from pathlib import Path
import os
BASE_DIR = Path(__file__).resolve().parent.parent
Template_DIR = os.path.join(BASE_DIR,'Templates/Mainpage')
SECRET_KEY = 'django-insecure-3w2sc%ysj3y-v4&kdl7@o$fz_f5(-d0b(cra_rdk*m7n$+w^8s'
DEBUG = True
ALLOWED_HOSTS = []
INSTALLED_APPS = [
'django.contrib.admin',
'django.contrib.auth',
'django.contrib.contenttypes',
'django.contrib.sessions',
'django.contrib.messages',
'django.contrib.staticfiles',
'matrimony_pages',
]
MIDDLEWARE = [
'django.middleware.security.SecurityMiddleware',
'django.contrib.sessions.middleware.SessionMiddleware',
'django.middleware.cache.UpdateCacheMiddleware',
'django.middleware.common.CommonMiddleware',
'django.middleware.cache.FetchFromCacheMiddleware',
'django.middleware.csrf.CsrfViewMiddleware',
'django.contrib.auth.middleware.AuthenticationMiddleware',
'django.contrib.messages.middleware.MessageMiddleware',
'django.middleware.clickjacking.XFrameOptionsMiddleware',
]
ROOT_URLCONF = 'Matrimony.urls'
TEMPLATES = [
{
'BACKEND': 'django.template.backends.django.DjangoTemplates',
'DIRS': [Template_DIR,],
'APP_DIRS': True,
'OPTIONS': {
'context_processors': [
'django.template.context_processors.debug',
'django.template.context_processors.request',
'django.contrib.auth.context_processors.auth',
'django.contrib.messages.context_processors.messages',
],
},
},
]
WSGI_APPLICATION = 'Matrimony.wsgi.application'
DATABASES = {
'default': {
'ENGINE': 'django.db.backends.sqlite3',
'NAME': BASE_DIR / 'db.sqlite3',
}
}
CACHES = { 'default': {
'BACKEND': 'django.core.cache.backends.dummy.DummyCache',
} }
AUTH_PASSWORD_VALIDATORS = [
{
'NAME': 'django.contrib.auth.password_validation.UserAttributeSimilarityValidator',
},
{
'NAME': 'django.contrib.auth.password_validation.MinimumLengthValidator',
},
{
'NAME': 'django.contrib.auth.password_validation.CommonPasswordValidator',
},
{
'NAME': 'django.contrib.auth.password_validation.NumericPasswordValidator',
},
]
LANGUAGE_CODE = 'en-us'
TIME_ZONE = 'UTC'
USE_I18N = True
USE_L10N = True
USE_TZ = True
STATIC_URL = '/static/'
MEDIA_URL = '/images/'
STATIC_ROOT = os.path.join(BASE_DIR, 'static')
MEDIA_ROOT = os.path.join(BASE_DIR, 'static/images')
DEFAULT_AUTO_FIELD = 'django.db.models.BigAutoField'
2. Changes in Models.py file:
Code:
from django.db import models
class Object(models.Model):
Environment_Variable_Example_name = models.CharField(max_length=200,null=True)
Environment_Variable_Example_thegai = models.CharField(max_length=200,null=True)
Environment_Variable_Example_State = models.CharField(max_length=50,null=True)
Environment_Variable_Example_District = models.CharField(max_length=50,null=True)
Environment_Variable_Example_Address = models.TextField(null=True)
Environment_Variable_Example_Phone = models.BigInteger_Example_Field(null=True)
Environment_Variable_Example_profession = models.CharField(max_length=200,null=True)
Environment_Variable_Example_salary = models.BigInteger_Example_Field(null=True)
Environment_Variable_Example_Under_Graduation_Degree = models.CharField(max_length=200,null=True)
Environment_Variable_Example_Under_Graduation_college = models.CharField(max_length=400,null=True)
Environment_Variable_Example_Post_Graduation_Degree = models.CharField(max_length=200,null=True)
Environment_Variable_Example_Post_Graduation_college = models.CharField(max_length=400,null=True)
Environment_Variable_Example_Rasi = models.CharField(max_length=200,null=True)
Environment_Variable_Example_Nakshatra = models.CharField(max_length=200,null=True)
Environment_Variable_Example_Post_Graduation_Degree = models.CharField(max_length=200,null=True)
Environment_Variable_Example_Post_Graduation_college = models.CharField(max_length=400,null=True)
Environment_Variable_Example_Rasi = models.CharField(max_length=200,null=True)
def __str__(self):
return self.name
]
Ex: views.py
@login_required
def Environ_var_page(request,pk):
dict_var_ = {}
Environ_var_name = Key_details.name
Environ_var_Age = Key_details.age
Environ_var_Thegai = Key_details.thegai
Environ_var_state = Key_details.State
Environ_var_district = Key_details.District
Environ_var_Address = Key_details.Address
Environ_var_Phone = Key_details.Phone
Environ_var_Profession = Key_details.profession
Environ_var_Salary = Key_details.salary
Environ_var_UG = Key_details.Under_Graduation_Degree
Environ_var_UGC = Key_details.Under_Graduation_college
Environ_var_PG = Key_details.Post_Graduation_Degree
Environ_var_PGC = Key_details.Post_Graduation_college
Environ_var_UG = Key_details.Under_Graduation_Degree
Environ_var_UGC = Key_details.Under_Graduation_college
Environ_var_PG = Key_details.Post_Graduation_Degree
Environ_var_PGC = Key_details.Post_Graduation_college
Environ_var_Rasi = Key_details.Rasi
Environ_var_Nakshatra = Key_details.Nakshatra
dict_var_['Age'] = Environ_var_Age
dict_var_['name'] = Environ_var_name
dict_var_['thegai'] = Environ_var_Thegai
dict_var_['State'] = Environ_var_state
dict_var_['district'] = Environ_var_district
dict_var_['Address'] = Environ_var_Address
dict_var_['Phone'] = Environ_var_Phone
dict_var_['profession'] = Environ_var_Profession
dict_var_['Under_Graduation_Degree'] = Environ_var_UG
dict_var_['Under_Graduation_college'] = Environ_var_UGC
dict_var_['Post_Graduation_Degree'] = Environ_var_PG
dict_var_['Post_Graduation_college'] = Environ_var_PGC
dict_var_['Rasi'] = Environ_var_Rasi
dict_var_['Nakshatra'] = Environ_var_Nakshatra
print(Key_details.Creator)
print(dict_var_)
return render(request,'Profilepage.html',dict_var_)
Output:

Conclusion
The above article depicts a clear idea of what environment variables are and how the environment variables work. More specifically, the use of Django Environ. It also mentions the different environment variables involved and how they can be used in Django, which are also explained with suitable examples.
Django Foreign Key

Introduction to Django Foreign Key
A foreign key is a process through which one table’s fields can be used flexibly in another table. So, two different tables can be easily linked using the foreign key. This linking of the two tables can be easily achieved using foreign key processes. It will be enforced to allow links between two tables using the keys involved. The foreign key is also mentioned as a reference key in some cases. The Foreign key allows the match between a primary key of a different table. From the kind of relationship generated, the foreign key field will allow many to one relationship. so more than one table could be flexibly connected with one table on the other end. So this sought of many fields to one single field can be effectively raised using foreign keys. The arguments of the foreign key field can be assigned within it. So as per the assignation of these field attributes, the foreign key field will operate like this.
Syntax:
Foreignkey name = models.ForeignKey(Table_name, null_argument, Ondelete_arguemnt)
Here the first argument represents a table name. So the name of the table assigned as the first argument of the Foreign key model allows mentioning the table from which the respective key is borrowed. So the table from which the foreign key value is taken will be mentioned here. This is the first argument of the method. Next, the null argument mentions the value null associated with the records coming further or already present in the table. Mentioning this record as null allows the records already behind or new records added to be filled with a Null value when no value is mentioned for it.
The following argument is the most important argument. This argument decides how the impact of deletion on the staging table needs to impact the parent table. So, when a parent table record is removed, the corresponding record here should bear the impact, or the impact can be omitted in the determination here. So based on this determination, the change to the parent table will be accordingly reflected here. Additionally, on the left side of the equation is the name of the foreign key column. This name mentions the name of the column which is newly created. So the name-value given here will be the name of the column further.
Create a Django Jsonfield
How to Create a Django Jsonfield is explained below:
1. Changes in Models.py file
The foreign key has to be declared in the modelys.py file, IN the below example, we can notice the foreign key is mentioned as example_creator. Moreover, this field is declared as a foreignkey because its values are integrated from the original table User. Additionally, properties like associating the null value as True and the ondelete function are made with CASCADE.
Example:
from django.db import models
from django.contrib.auth.models import User
class Bride(models.Model):
Example_name = models.CharField(max_length=200,null=True)
Example_age = models.IntegerField(null=True)
Example_thegai = models.CharField(max_length=200,null=True)
Example_State = models.CharField(max_length=50,null=True)
Example_District = models.CharField(max_length=50,null=True)
Example_Address = models.TextField(null=True)
Example_Phone = models.BigIntegerField(null=True)
Example_profession = models.CharField(max_length=200,null=True)
Example_salary = models.BigIntegerField(null=True)
Example_Under_Graduation_Degree = models.CharField(max_length=200,null=True)
Example_Under_Graduation_college = models.CharField(max_length=400,null=True)
Example_Post_Graduation_Degree = models.CharField(max_length=200,null=True)
Example_Post_Graduation_college = models.CharField(max_length=400,null=True)
Example_Rasi = models.CharField(max_length=200,null=True)
Example_Nakshatra = models.CharField(max_length=200,null=True)
Example_Creator = models.ForeignKey(User, null=True, on_delete=models.CASCADE)
def __str__(self):
return self.name
2. Changes in Forms.py file
The records of the model are integrated to a form in the forms.py file. Here the integration of the model Bride is performed. So making this inheritance here of the bride model will allow the records of the bride model to be associated to this form page.
Example:
from django import forms
from .models import Bride
from django.contrib.auth.forms import UserCreationForm
from django.contrib.auth.models import User
class Valueform(forms.ModelForm):
class Meta:
model = Bride
fields = "__all__"
3. Create a View for The Form
A Django view desires to be formed to make the middleware for the form through the Foreign key Field registered in it to be rendered. Clicking the submit button will save the form. The render function is the first imported item in the Django library. This import process will allow the HTML file to be rendered to the browser which is presented. After this importing, the HTTP response will be performed. The expected value Form is instantiated in the views method, which fatherly allows the form to be flexibly rendered. The instantiation will be performed on a value-named form. The save process will take place with the form. Save() method. Then the currently logged-in user details will be fetched and stored on the form. This is how the form storage will take place. After the form is successfully stored, it will be rendered onto the browser with a render method.
Example:
def form_view(request):
    form = Valueform(request.POST or None)
    if form.is_valid():
        post = form.save()
        post.Creator = request.user
        print('Creator user stored',request.user)
        post.save()
    return  render(request,'form.html', {"form": form})
def form_edit(request):
    form = Valueform(request.POST or None)
    if form.is_valid():
        post = form.save()
        post.Creator = request.user
        print('Creator user updated',request.user)
        post.save()
    return  render(request,'form_edit.html', {"form": form}
def form_update(request):
    form = Valueform(request.POST or None)
    if form.is_valid():
        post = form.save()
        post.Creator = request.user
        print('Creator user updated',request.user)
        post.save()
    return  render(request,'form_edit.html', {"form": form}
4. Formulate an HTML File for Displaying the Form
Corresponding changes to the HTML pages have to be performed.
Form.html
{% block content %}
<form method="POST" class='formarea'>
<div class='formdiv'>
{{ form.as_p }}
{% csrf_token %}
<input type="submit" class='button' value="submit">
</div>
</form>
{% endblock content %}
Output:

Conclusion
This article depicts how the foreign key can be flexibly declared in a Django setup, how the changes can be rendered to a form item, and how the input values can be passed from there on. There is no limit on the number of foreign key connections created in an application. Moreover, the models of a Django setup allow maintaining these fields very sophisticatedly without any vast changes applied in the database. This is the major advantage of the Django setup.
Django IntegerField

Introduction to Django IntegerField
The Integer_Example_ field is also one among the field types in Django. This Integer_Example_ type field allows covering all the Integer_Example_ values associated. So the instance considered here is int. it allows to store Integer_Example_ numbers in the database. The default value for these is a number kind of inputs, so all the inputs passed to the Integer_Example_ field needs to be of the number format. if supports a large range for values from the negative to positive values, the range is -2147483648 to 2147483647. The minValueValidators and the maxValueValidators are used here for validating the inputs used based on the input values supported by the default database which is been used. the Integer_Example_ field brings in a large amount of flexibility in operating the numeric values. Here will discuss Django IntegerField.
Syntax:
Name_of_field = models.IntegerField(**options)
The below is the syntax for Integer fields declaration, here the left-most item is the field that is actually declared. So, the name of the field will be constituted here. Next, the model’s library is referenced for extracting the Integer field. So, the model’s library has a field called IntegerField class and this IntegerField class is responsible for declaring the IntegerField. Next, the options associated to the IntegerField have also needed to be declared. So, the options like null, blank, or choices can be declared in the options section. The null options mention whether the field can be a null field or not, next the blank field mentions what should be the value of the blank field value and at last, the choices mention the range of choices which can be associated to this field.
How to Create a Django IntegerField?
The various steps to create Django IntegerField are as follows:
1. Changes in Models.py file
As mentioned in the syntax section the integer field needs to be declared in the models.py file. We can notice that the integer field is declared as the age field in the model.
models.py:
from django.db import models
from django.contrib.auth.models import User
class Bride(models.Model):
Example_name = models.CharField(max_length=200,null=True)
Example_age = models.IntegerField(null=True)
Example_thegai = models.CharField(max_length=200,null=True)
Example_State = models.CharField(max_length=50,null=True)
Example_District = models.CharField(max_length=50,null=True)
Example_Address = models.TextField(null=True)
Example_Phone = models.BigIntegerField(null=True)
Example_profession = models.CharField(max_length=200,null=True)
Example_salary = models.BigIntegerField(null=True)
Example_Under_Graduation_Degree = models.CharField(max_length=200,null=True)
Example_Under_Graduation_college = models.CharField(max_length=400,null=True)
Example_Post_Graduation_Degree = models.CharField(max_length=200,null=True)
Example_Post_Graduation_college = models.CharField(max_length=400,null=True)
Example_Rasi = models.CharField(max_length=200,null=True)
Example_Nakshatra = models.CharField(max_length=200,null=True)
Image = models.ImageField(null=True,blank=True,upload_to="img/%y")
def __str__(self):
return self.name
2. Changes in Settings.py file
Ensure all the values and the database connects are set properly in the settings.py file so that the project can be kicked for execution flexibly. The middleware items mentioned below have to be declared properly in the settings.py file because these middlewares are responsible for the functioning of the application while processing GET and PUT messages. Additionally, the templates used has also need to fill so that the template processing happens in the background.
Settings.py:
MIDDLEWARE = [
    'django.middleware.security.SecurityMiddleware',
    'django.contrib.sessions.middleware.SessionMiddleware',
    'django.middleware.common.CommonMiddleware',
    'django.middleware.csrf.CsrfViewMiddleware',
    'django.contrib.auth.middleware.AuthenticationMiddleware',
    'django.contrib.messages.middleware.MessageMiddleware',
    'django.middleware.clickjacking.XFrameOptionsMiddleware',
]
ROOT_URLCONF = 'Matrimony.urls'
TEMPLATES = [
    {
        'BACKEND': 'django.template.backends.django.DjangoTemplates',
        'DIRS': [Template_DIR,],
        'APP_DIRS': True,
        'OPTIONS': {
            'context_processors': [
                'django.template.context_processors.debug',
                'django.template.context_processors.request',
                'django.contrib.auth.context_processors.auth',
                'django.contrib.messages.context_processors.messages',
            ],
        },
    },
]
DATABASES = {
    'default': {
        'ENGINE': 'django.db.backends.sqlite3',
        'NAME': BASE_DIR / 'db.sqlite3',
    }
}
STATIC_URL = '/static/'
MEDIA_URL = '/images/'
STATICFILES_DIRS = [os.path.join(BASE_DIR, 'static'), ]
print(STATICFILES_DIRS)
STATIC_ROOT = os.path.join(BASE_DIR, 'static')
MEDIA_ROOT = os.path.join(BASE_DIR, 'static/images')
print(STATIC_ROOT)
3. Changes in url.py file
The Media root and document root variable need to be instantiated inside the url.py file as below. The changes for the url.py file are mentioned below.
url.py:
from django.contrib import admin
from django.urls import path
from django.conf.urls import url
from matrimony_pages import views
from django.conf import settings
from django.conf.urls.static import static
urlpatterns = [
    url(r'^$',views.Welcome_page,name='Welcome_page'),
    url(r'Mainpage/',views.Main_page,name='Main_page'),
    url(r'form/',views.form_view,name='form_view'),
    url(r"signup/", views.Sign_up_request, name="register"),
    url(r"login/", views.login_request, name="login"),
    path(r'profile//',views.profile_page,name='profile'),
    url(r'logout/',views.logout_request,name='logout'),
    url(r'reg/',views.profile_reg_user,name='reg'),
    path(r'update//',views.form_update,name='update'),
    path('admin/', admin.site.urls),
]+ static(settings.MEDIA_URL,document_root=settings.MEDIA_ROOT)
4. Create a view for the form
The integer value when submitted has to be stored and when retrieved it has to be pulled from the database. This can be achieved by means of the object created for the model. The process of doing this is explained in the below given views.py section.
views.py
@login_required
def profile_page(request,pk):
      context2 = {}
      Key_details = Bride.objects.get(id=pk)
      Profile_name =  Key_details.name
      Profile_Age =  Key_details.age
      Profile_Thegai =  Key_details.thegai
      Profile_state =  Key_details.State
      Profile_district =  Key_details.District
      Profile_Address =  Key_details.Address
      Profile_Phone =  Key_details.Phone
      Profile_Profession =  Key_details.profession
      Profile_Salary =  Key_details.salary
      Profile_UG =  Key_details.Under_Graduation_Degree
      Profile_UGC =  Key_details.Under_Graduation_college
      Profile_PG =  Key_details.Post_Graduation_Degree
      Profile_PGC =  Key_details.Post_Graduation_college
      Profile_UG =  Key_details.Under_Graduation_Degree
      Profile_UGC =  Key_details.Under_Graduation_college
      Profile_PG =  Key_details.Post_Graduation_Degree
      Profile_PGC =  Key_details.Post_Graduation_college
      Profile_Rasi =  Key_details.Rasi
      Profile_Nakshatra =  Key_details.Nakshatra
      Profile_Image =  Key_details.Image
      context2['Age'] = Profile_Age
      context2['name'] = Profile_name
      context2['thegai'] = Profile_Thegai
      context2['State'] = Profile_state
      context2['district'] = Profile_district
      context2['Address'] = Profile_Address
      context2['Phone'] = Profile_Phone
      context2['profession'] = Profile_Profession
      context2['Under_Graduation_Degree'] = Profile_UG
      context2['Under_Graduation_college'] = Profile_UGC
      context2['Post_Graduation_Degree'] = Profile_PG
      context2['Post_Graduation_college'] = Profile_PGC
      context2['Rasi'] = Profile_Rasi
      context2['Nakshatra'] = Profile_Nakshatra
      context2['Image'] = Profile_Image
      print(Key_details.Creator)
      print(context2)
      return  render(request,'Profilepage.html',context2)
5. Formulate an HTML file for displaying the form
Corresponding changes to the HTML pages have to be performed.
Profilepage.html
<!DOCTYPE html>
<html style="font-size: 16px;">
<head>
<title>Profile</title>
{% load static %}
<link rel="stylesheet" href="{% static 'admin/css/Formpage.css' %}" media="screen">
<meta name="viewport" content="width=device-width, initial-scale=1, maximum-scale=1, minimum-scale=1" />
<script src="https://ajax.googleapis.com/ajax/libs/jquery/3.5.1/jquery.min.js"> </script>
</head>
<body class="body">
<nav class='navbar'>
<div class='navbar_div'>
<a class="navbar" onclick="redirect2()" >Home </a>
<a class="navbar" onclick="redirect2()" >Contact</a>
<a class="navbar" onclick="redirect1()" >Profiles</a>
</div>
</nav>
<div class="formarea">
<br>
{% block content %}
{% if Integer %}
<img src="{{Integer.url}}" align="right" alt="Integer" class="img-thumbnail" style="max-height:200px">
{% else %}
<img src="{% static 'admin/img/default.png' %}" align="right" alt="Integer" class="img-thumbnail" style="max-height:200px">
{% endif%}
<br></br>
<h6><strong>Name :    {{name}}</strong></h6>
<h6><strong>Age :    {{Age}}</strong></h6>
<h6><strong>Thegai :    {{thegai}}</strong></h6>
<h6><strong>State :    {{State}}</strong></h6>
<h6><strong>district :    {{district}}</strong></h6>
<h6><strong>Address :    {{Address}}</strong></h6>
<h6><strong>Phone :    {{Phone}}</strong></h6>
<h6><strong>profession :    {{profession}}</strong></h6>
<h6><strong>Under Graduation Degree :    {{Under_Graduation_Degree}}</strong></h6>
<h6><strong>Post_Graduation_Degree :    {{Post_Graduation_Degree}}</strong></h6>
<h6><strong>Post_Graduation_college :    {{Post_Graduation_college}}</strong></h6>
<h6><strong>Rasi :    {{Rasi}}</strong></h6>
<h6><strong>Nakshatra :    {{Nakshatra}}</strong></h6>
{% endblock content %}
</div>
<script>
function form1() {
window.location.href = "http://127.0.0.1:8000/form";
}
function redirect1() {
window.location.href = "http://127.0.0.1:8000/Mainpage";
}
function redirect2() {
window.location.href = "http://127.0.0.1:8000/";
}
function redirect3() {
window.location.href = "http://127.0.0.1:8000/profile";
}
</script>
</body>
</html>
Output:


Conclusion
This article portrays in what way the Integer field can be docilely professed in a Django setup and the variations can be rendered to an html page with the integer value getting displayed onto the page at the needed position. The process also mentions the settings.py file changes and the other changes which are needed to render these integer fields.
Django Version

Introduction to Django Version
A free framework based on Python that has a pattern of a model to the template to view that helps in developing websites is called the Django framework. It acts as a toolkit for all levels of application development. Perfect websites can be created with the help of Python libraries, and the codes can be used for both the frontend and backend. Object-oriented concepts are really important in Django; hence, the base knowledge of Python is necessary to work in Django. Custom applications can be created easily without much code, making the websites perfect for users.
Top Django Versions
- Django was developed in 2003 as a web application to create websites with the help of Python. Adrian Holovaty, Simon Willison, and Jacob Kaplan-Moss were involved in the development, which was released to the market in 2005. The name Django was given after the guitarist Django Reinhardt. A web server is available for developing web applications and testing the same, along with a template system that works based on the OOPs concept. The template has inheritance built within itself. It can be used along with other applications as well. Also, a framework is available to collect geographic data that help predict the weather.
- The initial release of 0.90 was made public on 16 Nov 2005. The next version, 0.91 was released in January 2006 with few changes, such as adding new admins to the application. The next version, 0.95 was in July, which helped the users to remove templates or any other features added to the website faster than ever. Testing tools were provided inside the application in the next version 0.96, released in March 2007. In 2008, Django Software Foundation was formed to undertake all the version releases and questions related to Django.
- Version 1.0 was released in September 2008 with API support and multiple admin support. Also, Unicode can be used in this version. 1.1 was released after a year which helps in doing tests based on transactions and helps in the aggregation of codes for adding more features to the web application being developed by the user. 1.2 version was released in May 2010, which helps connect with different databases and helps in validating any web model. More security was provided to the website during this version with the help of CSRF or cross-site request forgery. March 2011 saw the release of the 1.3 version, which helps maintain static files and helps users view the web application based on classes.
- The first Long Term Support version 1.4 was released in March 2021 with different time zones that help users to set their application for users from other countries. This version also supported testing web applications within the browser itself and managing the application templates within the web application. Python 3 was developed by then, so the next version, 1.5 released after a year, saw Python 3 support in the framework. Also, a custom model can be created in this version configured in Python 2 and 3.
- 6 version of November 2013 helped users in database transactions and connections with different databases. This version and many others had Malcolm Tredinnick’s signature; thus, the 1.6 version is dedicated to him. 1.7 version, which was released in September 2014, helped in configuring other applications in Django and migrating Django to other platforms. The 1.8 version was released in April 2015 with long-term support that ended in 2018. Different template engines were supported in 1.8. The 1.9 version of December 2015 saw a new user interface and automated validation of passwords. August 2016 saw the release of the 1.10 version, which helped in new style middleware formation and automated search of PostgreSQL. By 2017 Python 3 version could be found everywhere; hence, the next version, 1.11 released in April 2017 was the last supported version of Python 2. Soon after, users saw the release of version 2.0 in December 2017 with Python 3 support which was welcomed by mobile users more. It had mobile-friendly syntax and an admin setup. The URL is simplified in version 2.0, which helps users know the web applications model differently. 2.1 was released in August 2018, with model and view permissions within the application.
- All the above versions discussed are no longer supported now as Django has seen many newer versions.
- 2 version was released in April 2019, which is Long Term Support till April 2022. It saw more security and friendly features in the release. There was no ASGI support for all the above versions, which we can see in version 3.0 released in December 2019. Also, the 3.1 release happened in August 2020 with middleware support and different views asynchronously. 2.2,3.0,3.1 versions, even though old is still maintained by the foundation with extended support.
- 2 version was released in Apr 2021, which be supported till April 2024. The changes can be seen in the user interface and minor changes in the coding pattern. All these version releases helped make Django a preferable application for users for web development. Other versions till 2023 are planned with the changes to be made.
- Codes are present in Django itself, and users can update the same code using any text editor and customize the same for their personal usage. It is better to use IDE as we can transfer the codes easily, and if it is based on Python, it will be more beneficial. Community support is huge for Django as developers directly saw a necessary change in Django as a web application.
Conclusion – Django Version
Though Django prefers using Python, it can be ported to other programming languages such as Ruby, Perl, JavaScript, and Erlang. Cross-platforms work for Python, but users must be careful while converting all the codes used in Django. Also, management of entire content, as well as database transactions, can be done by Django easily.
Django jsonfield

Introduction to Django jsonfield
JSON has now become a very common datatype across software platforms. The flexibility of JSON fields helps to easily fetch and depict the data, and processing can also be performed in a sophisticated manner with JSON fields. These JSON fields are used even in outputs of large applications like amazon textract for fetching the output. These are among the critical needs of JSON fields. So these fields are largely used in today’s market, and Django also produces them for forms and models. Almost all the database backends supported by Django can have these jsonfields in them. The syntax and the process of getting these JSON fields added to the model are discussed below. The parameter of setting the fields as all allows the model to inherit all the fields used in the model described. In this topic, we are going to learn about Django jsonfield.
Syntax:
Jsonfield = models.JSONField()
The above-given syntax allows to create of a model field sophisticatedly. The models class is inherited, and the JSONField()method is used within the models class. This JSONField() method can be associated with arguments such as Null and Null based values and etc. The Created class is mapped onto a variable. From there on, the mapped variable will be a responsible field for this Json field model.
Create a Django jsonfield
Below are the steps to create a Django jsonfield:
1. Changes in Models.py file
The models.py file is generated with a JSON field declared in it along with the other fields present. We can notice the model has a large variety of fields. This model schema will be associated with a form on top of it. The form will be integrated with it all the fields of this corresponding model through a JSONFIELD import. This is how the import process works for the models. Very importantly, the JSON field is allocated with a nullable value which allows all the non-value records for this field to hold a default value of Null. Removing this argument from the field may throw an error on the migrations process.
Ex: (models.py)
from django.db import models
from django.contrib.auth.models import User
class Bride(models.Model):
name = models.CharField(max_length=200,null=True)
age = models.IntegerField(null=True)
thegai = models.CharField(max_length=200,null=True)
State = models.CharField(max_length=50,null=True)
District = models.CharField(max_length=50,null=True)
Address = models.TextField(null=True)
Phone = models.BigIntegerField(null=True)
profession = models.CharField(max_length=200,null=True)
salary = models.BigIntegerField(null=True)
Under_Graduation_Degree = models.CharField(max_length=200,null=True)
Under_Graduation_college = models.CharField(max_length=400,null=True)
Post_Graduation_Degree = models.CharField(max_length=200,null=True)
Post_Graduation_college = models.CharField(max_length=400,null=True)
Rasi = models.CharField(max_length=200,null=True)
Nakshatra = models.CharField(max_length=200,null=True)
Jsonfield = models. JSONField(null=True)
def __str__(self):
return self.name
2. Changes in Forms.py file
The forms.py file is created with the model from the models.py imported here. In these examples case, the form will be imported with the model details, and then from there on, the model will be allocated here. The model allocation will be taking place within the class Meta: statement. For example, here model = Bride will allow the Bride class to be associated here. The parameter of setting the fields as all allows the model to inherits all the fields used in the model described.
Ex: (forms.py)
from django import forms
from .models import Bride
from django.contrib.auth.forms import UserCreationForm
from django.contrib.auth.models import User
class Valueform(forms.ModelForm):
class Meta:
model = Bride
fields = "__all__"
3. Create a view for the form
A Django view needs to be created to make the middleware for the form with the JSON field listed in it be rendered. Here the form is saved when the submit button is clicked. We can notice from the below code of views that the views.py first imports render from the shortcuts of the Django library. This renders import will be very useful in getting the html file rendered onto the browser. Then the HTTP response is imported. The Value form will be instantiated here in the views method. The instantiation will be performed on a variable called form. On top of the instantiation, the value of the form returned is verified for validity. If the value of the form is valid, then the save process of the form will be performed. The save process will take place with the form.save() method. Then the currently logged-in user details will be fetched and stored on the form. This is how the form storage will take place. After the form is successfully stored, it will be rendered onto the browser with a render method.
Ex: (views.py)
from django.shortcuts import render
from django.http import  HttpResponse
from Django_app1.forms import Valueform
def form_view(request):
    form = Valueform(request.POST or None)
    if form.is_valid():
        post = form.save()
        post.Creator = request.user
        print('Creator user stored',request.user)
        post.save()
    return  render(request,'form.html', {"form": form})
4. Formulate an HTML file for displaying the form
An HTML record desires to be created withinside the template listing for showing the shape; right here, the record is template tagged with the use of the under the tag,
{{ form.as_p }}
right here, “as_p” is used for higher designing of the shape elements. The line is used for testifying the inner safety verification achieved through Django.
Form.html:
<!DOCTYPE html>
<html style="font-size: 16px;">
<head>
<title>form</title>
{% load static %}
<link rel="stylesheet" href="{% static 'admin/css/Formpage.css' %}" media="screen">
</head>
<body class="body">
<nav class='navbar'>
<div class='navbar_div'>
<a class="navbar" onclick="redirect2()" >Home! </a>
<a class="navbar" onclick="redirect2()" >Contact</a>
</div>
</nav>
<div class="body">
<br>
{% block content %}
<form method="POST" class='formarea'>
<div class='formdiv'>
{{ form.as_p }}
{% csrf_token %}
<input type="submit" class='button' value="submit">
</div>
</form>
{% endblock content %}
</div>
<script>
function form1() {
window.location.href = "http://127.0.0.1:8000/form";
}
function redirect1() {
window.location.href = "http://127.0.0.1:8000/Mainpage";
}
function redirect2() {
window.location.href = "http://127.0.0.1:8000/";
}
</script>
<script src="https://code.jquery.com/jquery-3.4.1.slim.min.js" integrity="sha384-J6qa4849blE2+poT4WnyKhv5vZF5SrPo0iEjwBvKU7imGFAV0wwj1yYfoRSJoZ+n" crossorigin="anonymous"> </script>
<script src="https://cdn.jsdelivr.net/npm/popper.js@1.16.0/dist/umd/popper.min.js" integrity="sha384-Q6E9RHvbIyZFJoft+2mJbHaEWldlvI9IOYy5n3zV9zzTtmI3UksdQRVvoxMfooAo" crossorigin="anonymous"></script>
<script src="https://stackpath.bootstrapcdn.com/bootstrap/4.4.1/js/bootstrap.min.js" integrity="sha384-wfSDF2E50Y2D1uUdj0O3uMBJnjuUD4Ih7YwaYd1iqfktj0Uod8GCExl3Og8ifwB6" crossorigin="anonymous"></script>
</body>
</html>
Output:

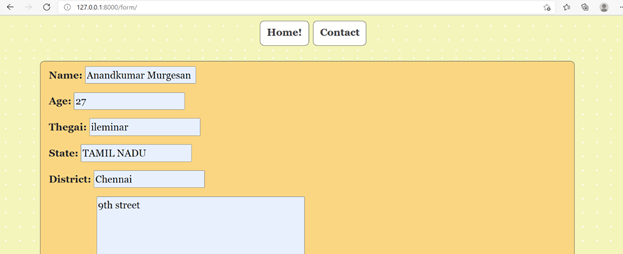
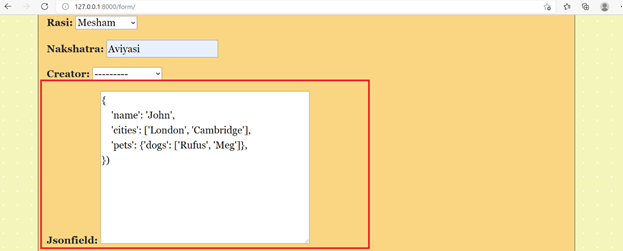
Conclusion
From the above-mentioned article, we can understand the process of creating a JSON field in Django, and additionally, we can furtherly verify how this field is mapped onto a form and form the form setup how this specific field gets processed in the view associated to the model. Additionally, the HTML code linked to these forms are also produced, and from there on, the site placed on port 8000 is brought live in a browser.
Django ImageField

Introduction to Django ImageField
The following article provides an outline for Django ImageField. There is a need to store and process images in web applications; the same necessity also stays with Django-based image applications. So, the image fields can be flexibly declared and processed in Django. The process of declaring the image-based fields and retrieving the images is comparatively very easy in Django applications. The field declared as an image field needs to be associated with an URL location in the background, and the specific file will be brought back when a retrieval request is raised. This is how the image-level field storage and retrieval occur in the background. Additionally, this null value will be considered for whichever records the image is not uploaded.
Syntax of Django ImageField
Given below is the syntax mentioned:
Foreignkey name = models.ImageField(null_argument,blank_argument ,uploadto_argument)
Here the first argument represents a null argument. So this means the value which needs to be maintained for the records for which the records are not updated yet. So this null value will be considered for whichever records the image is not uploaded. Next, the blank argument corresponds to the value when a blank is associated with the image field argument.
The last argument is the upload to the argument. This is a very critical argument. This argument determines the location of storage. It means the location where the loaded documents must be stored will be considered here. So, from there on, the path of the documents which is given here will be considered, and the reports will get stored at the location mentioned at this location. This is how the document storage location is carried out.
Creation of Django ImageField
Given below shows the creation of Django ImageField:
1. Changes in Models.py file
As the syntax section mentions, the image field must be declared in the models.py file. We notice that the image field is declared the last field in the model.
models.py:
from django.db import models
from django.contrib.auth.models import User
class Bride(models.Model):
Example_name = models.CharField(max_length=200,null=True)
Example_age = models.IntegerField(null=True)
Example_thegai = models.CharField(max_length=200,null=True)
Example_State = models.CharField(max_length=50,null=True)
Example_District = models.CharField(max_length=50,null=True)
Example_Address = models.TextField(null=True)
Example_Phone = models.BigIntegerField(null=True)
Example_profession = models.CharField(max_length=200,null=True)
Example_salary = models.BigIntegerField(null=True)
Example_Under_Graduation_Degree = models.CharField(max_length=200,null=True)
Example_Under_Graduation_college = models.CharField(max_length=400,null=True)
Example_Post_Graduation_Degree = models.CharField(max_length=200,null=True)
Example_Post_Graduation_college = models.CharField(max_length=400,null=True)
Example_Rasi = models.CharField(max_length=200,null=True)
Example_Nakshatra = models.CharField(max_length=200,null=True)
Image = models.ImageField(null=True,blank=True,upload_to="img/%y")
def __str__(self):
return self.name
2. Changes in Settings.py file
The media root and URL files must be updated to the Settings.py file. In addition, the path of the media files needs to be mentioned here for these variables.
Settings.py:
MIDDLEWARE = [
    'django.middleware.security.SecurityMiddleware',
    'django.contrib.sessions.middleware.SessionMiddleware',
    'django.middleware.common.CommonMiddleware',
    'django.middleware.csrf.CsrfViewMiddleware',
    'django.contrib.auth.middleware.AuthenticationMiddleware',
    'django.contrib.messages.middleware.MessageMiddleware',
    'django.middleware.clickjacking.XFrameOptionsMiddleware',
]
ROOT_URLCONF = 'Matrimony.urls'
TEMPLATES = [
    {
        'BACKEND': 'django.template.backends.django.DjangoTemplates',
        'DIRS': [Template_DIR,],
        'APP_DIRS': True,
        'OPTIONS': {
            'context_processors': [
                'django.template.context_processors.debug',
                'django.template.context_processors.request',
                'django.contrib.auth.context_processors.auth',
                'django.contrib.messages.context_processors.messages',
            ],
        },
    },
]
DATABASES = {
    'default': {
        'ENGINE': 'django.db.backends.sqlite3',
        'NAME': BASE_DIR / 'db.sqlite3',
    }
}
STATIC_URL = '/static/'
MEDIA_URL = '/images/'
STATICFILES_DIRS = [os.path.join(BASE_DIR, 'static'), ]
print(STATICFILES_DIRS)
STATIC_ROOT = os.path.join(BASE_DIR, 'static')
MEDIA_ROOT = os.path.join(BASE_DIR, 'static/images')
print(STATIC_ROOT)
3. Changes in the url.py file
The media root and document root variable must be instantiated inside the url.py file like below.
The changes for the url.py file are mentioned below.
url.py:
from django.contrib import admin
from django.urls import path
from django.conf.urls import url
from matrimony_pages import views
from django.conf import settings
from django.conf.urls.static import static
urlpatterns = [
    url(r'^$',views.Welcome_page,name='Welcome_page'),
    url(r'Mainpage/',views.Main_page,name='Main_page'),
    url(r'form/',views.form_view,name='form_view'),
    url(r"signup/", views.Sign_up_request, name="register"),
    url(r"login/", views.login_request, name="login"),
    path(r'profile//',views.profile_page,name='profile'),
    url(r'logout/',views.logout_request,name='logout'),
    url(r'reg/',views.profile_reg_user,name='reg'),
    path(r'update//',views.form_update,name='update'),
    path('admin/', admin.site.urls),
]+ static(settings.MEDIA_URL,document_root=settings.MEDIA_ROOT)
4. Create a view for the form
The image value, when submitted, has to be stored, and when retrieved, it has to be pulled from the database. This can be achieved using the object created for the model. The process of doing this is given in the below-given views.py section.
views.py:
@login_required
def profile_page(request,pk):
      context2 = {}
      Key_details = Bride.objects.get(id=pk)
      Profile_name =  Key_details.name
      Profile_Age =  Key_details.age
      Profile_Thegai =  Key_details.thegai
      Profile_state =  Key_details.State
      Profile_district =  Key_details.District
      Profile_Address =  Key_details.Address
      Profile_Phone =  Key_details.Phone
      Profile_Profession =  Key_details.profession
      Profile_Salary =  Key_details.salary
      Profile_UG =  Key_details.Under_Graduation_Degree
      Profile_UGC =  Key_details.Under_Graduation_college
      Profile_PG =  Key_details.Post_Graduation_Degree
      Profile_PGC =  Key_details.Post_Graduation_college
      Profile_UG =  Key_details.Under_Graduation_Degree
      Profile_UGC =  Key_details.Under_Graduation_college
      Profile_PG =  Key_details.Post_Graduation_Degree
      Profile_PGC =  Key_details.Post_Graduation_college
      Profile_Rasi =  Key_details.Rasi
      Profile_Nakshatra =  Key_details.Nakshatra
      Profile_Image =  Key_details.Image
      context2['Age'] = Profile_Age
      context2['name'] = Profile_name
      context2['thegai'] = Profile_Thegai
      context2['State'] = Profile_state
      context2['district'] = Profile_district
      context2['Address'] = Profile_Address
      context2['Phone'] = Profile_Phone
      context2['profession'] = Profile_Profession
      context2['Under_Graduation_Degree'] = Profile_UG
      context2['Under_Graduation_college'] = Profile_UGC
      context2['Post_Graduation_Degree'] = Profile_PG
      context2['Post_Graduation_college'] = Profile_PGC
      context2['Rasi'] = Profile_Rasi
      context2['Nakshatra'] = Profile_Nakshatra
      context2['Image'] = Profile_Image
      print(Key_details.Creator)
      print(context2)
      return  render(request,'Profilepage.html',context2)
5. Formulate an HTML file for displaying the form
Corresponding changes to the HTML pages have to be performed.
Profilepage.html:
<!DOCTYPE html>
<html style="font-size: 16px;">
<head>
<title>Profile</title>
{% load static %}
<link rel="stylesheet" href="{% static 'admin/css/Formpage.css' %}" media="screen">
<meta name="viewport" content="width=device-width, initial-scale=1, maximum-scale=1, minimum-scale=1" />
<script src="https://ajax.googleapis.com/ajax/libs/jquery/3.5.1/jquery.min.js"> </script>
</head>
<body class="body">
<nav class='navbar'>
<div class='navbar_div'>
<a class="navbar" onclick="redirect2()" >Home </a>
<a class="navbar" onclick="redirect2()" >Contact</a>
<a class="navbar" onclick="redirect1()" >Profiles</a>
</div>
</nav>
<div class="formarea">
<br>
{% block content %}
{% if Image %}
<img src="{{Image.url}}" align="right" alt="Image" class="img-thumbnail" style="max-height:200px">
{% else %}
<img src="{% static 'admin/img/default.png' %}" align="right" alt="Image" class="img-thumbnail" style="max-height:200px">
{% endif%}
<br></br>
<h6><strong>Name :    {{name}}</strong></h6>
<h6><strong>Age :    {{Age}}</strong></h6>
<h6><strong>Thegai :    {{thegai}}</strong></h6>
<h6><strong>State :    {{State}}</strong></h6>
<h6><strong>district :    {{district}}</strong></h6>
<h6><strong>Address :    {{Address}}</strong></h6>
<h6><strong>Phone :    {{Phone}}</strong></h6>
<h6><strong>profession :    {{profession}}</strong></h6>
<h6><strong>Under Graduation Degree :    {{Under_Graduation_Degree}}</strong></h6>
<h6><strong>Post_Graduation_Degree :    {{Post_Graduation_Degree}}</strong></h6>
<h6><strong>Post_Graduation_college :    {{Post_Graduation_college}}</strong></h6>
<h6><strong>Rasi :    {{Rasi}}</strong></h6>
<h6><strong>Nakshatra :    {{Nakshatra}}</strong></h6>
{% endblock content %}
</div>
<script>
function form1() {
window.location.href = "http://127.0.0.1:8000/form";
}
function redirect1() {
window.location.href = "http://127.0.0.1:8000/Mainpage";
}
function redirect2() {
window.location.href = "http://127.0.0.1:8000/";
}
function redirect3() {
window.location.href = "http://127.0.0.1:8000/profile";
}
</script>
</body>
</html>
Output:
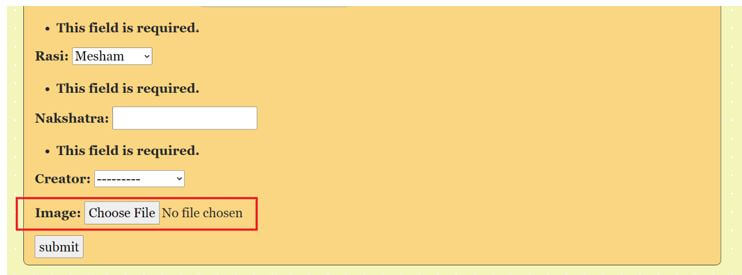
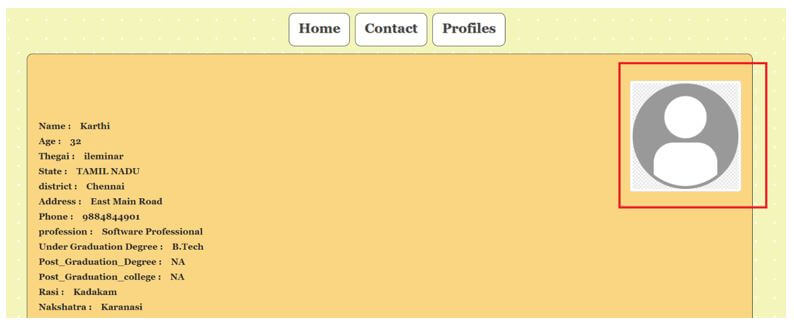
Conclusion
This article depicts how the Image field can be flexibly declared in a Django setup, and the changes can be rendered to an html page with the image getting displayed on the page at the needed position. This process of padding the image can be controlled using the division used in the HTML of the page.
Django Template Tags

Introduction to Django Template Tags
The template tags are tags in the template files. These tags help to set dynamic values in the templates. In addition, the template tags are very useful in the type of value it is expected to be populated. These are the key considerations for setting the template tags in Django. The template tags can be set by both a predefined manner and a built-in manner. Both these techniques allow the setup of template tags in the Django framework within the templates. There are several template tags used.
Syntax:
{% Tag_Name %}
To declare the template tags in HTML, the template tag name must be encapsulated within the open and close braces. So, the content encapsulated within these two tags forms the template tag content. Then the tag expects modulo symbols adjacent to the open and close braces used. This is how the template tags are initiated in Django-based applications.
Types of Template Tags
Given below are the types of template tags:
1. cycle Tag
The cycle tag iterates through all the cycle elements and performs the intended operation.
Example:
Views.py:
def Main_view(request):
    list_Var = [1,2]
    return  render(request,'Main.html',{'list_Var':list_Var})
Main.html:
{% for i in list_Var %}
hello All.............
{% endfor %}
Output:

2. firstof Tag
The firstof the tag prints the first variable with a valid value from a group of variables.
Example:
Views.py:
from django.shortcuts import render, redirect
from django.http import HttpResponse
from .models import *
from .forms import NewUserForm,Valueform
from  django.contrib.auth import login,authenticate,logout
from django.contrib import messages
from django.contrib.auth.forms import AuthenticationForm
from django.contrib.auth.models import User
from django.contrib.auth.decorators import user_passes_test,login_required
from django.core.paginator import Paginator
from django.http import JsonResponse
from django.urls import reverse
def All_users(request):
    User_entries =  User.objects.all()
    page = request.GET.get('page', 1)
    paginator = Paginator(User_entries, 5)
    users = paginator.page(page)
    print(" Has other pages : ",users.has_other_pages())
    print(" Has next page : ",users.has_next())
    print(" Has previous page : ",users.has_previous())
    print(" Has previous page : ",users.has_previous())
    print(" Start Index : ",users.start_index())
    print(" End Index : ",users.end_index())
    if users.has_next():
        print(" Next page Number: ",users.next_page_number())
    elif users.has_previous():
        print(" Has Previous page Number: ",users.previous_page_number())
    print(paginator,users)
    return render(request,"All_users.html",{'users':users})
def Main_view(request):
    var1 = ''
    var2 = 'Value found in var2'
    return  render(request,'Main.html',{'var1':var1,'var2':var2})
Main.html:
{% firstof var1 var2 %}
Output:

3. comment Tag
The comment tag ignores all content placed between the tag items.
Example:
Views.py:
from django.shortcuts import render, redirect
from django.http import HttpResponse
from .models import *
from .forms import NewUserForm,Valueform
from django.contrib.auth import login,authenticate,logout
from django.contrib import messages
from django.contrib.auth.forms import AuthenticationForm
from django.contrib.auth.models import User
from django.contrib.auth.decorators import user_passes_test,login_required
from django.core.paginator import Paginator
from django.http import JsonResponse
from django.urls import reverse
def All_users(request):
User_entries = User.objects.all()
page = request.GET.get('page', 1)
paginator = Paginator(User_entries, 5)
users = paginator.page(page)
print(" Has other pages : ",users.has_other_pages())
print(" Has next page : ",users.has_next())
print(" Has previous page : ",users.has_previous())
print(" Has previous page : ",users.has_previous())
print(" Start Index : ",users.start_index())
print(" End Index : ",users.end_index())
if users.has_next():
print(" Next page Number: ",users.next_page_number())
elif users.has_previous():
print(" Has Previous page Number: ",users.previous_page_number())
print(paginator,users)
return render(request,"All_users.html",{'users':users})
def Sign_up_request(request):
if request.method == "POST":
form = NewUserForm(request.POST)
print(form.is_valid())
if form.is_valid():
user = form.save()
login(request, user)
print(User.objects.all())
messages.success(request, "Registration successful." )
return redirect("http://127.0.0.1:8000/")
messages.error(request, "Unsuccessful registration. Invalid information.")
form = NewUserForm
return render (request,template_name="Signup.html", context={"Sign_up_form":form})
{% comment "Hello world" %}
hello All users
{% endcomment %}
def login_request(request):
if request.method == "POST":
username = request.POST.get('username', '')
password = request.POST.get('password', '')
user = authenticate(request,username=username, password=password)
if user is not None:
print('1',request.user.is_authenticated, request.user)
login(request, user)
print('1',request.user.is_authenticated, request.user)
messages.info(request, f"You are now logged in as {username}.")
return redirect("http://127.0.0.1:8000/")
else:
messages.error(request,"Invalid username or password.")
form = AuthenticationForm()
return render(request=request, template_name="login.html", context={"login_form":form})
{% comment "Hello world" %}
hello All users
{% endcomment %}
def logout_request(request):
if request.user.is_authenticated:
logout(request)
print('2',request.user.is_authenticated, request.user)
messages.info(request, "Logged out successfully!")
named_redirect = reverse('Welcome_page')
print(named_redirect)
return redirect(named_redirect)
def Welcome_page(request):
return render(request,'Welcomepage.html')
@login_required
def form_view(request):
form = Valueform(request.POST or None,files=request.FILES)
if form.is_valid():
post = form.save()
post.Creator = request.user
print('Creator user stored',request.user)
post.save()
return render(request,'form.html', {"form": form})
{% comment "Hello world" %}
hello All users
{% endcomment %}
4. include Tag
The include tag allows embedding a different HTML page into the current HTML page.
Example:
Main.html:
{% include "test.html" %}
Test.html:
<!doctype html>
<html lang="en">
<head>
<meta charset="utf-8">
<meta name="viewport" content="width=device-width, initial-scale=1, shrink-to-fit=no">
<link rel="stylesheet" href="https://cdn.jsdelivr.net/npm/bootstrap@4.5.3/dist/css/bootstrap.min.css" integrity="sha384-TX8t27EcRE3e/ihU7zmQxVncDAy5uIKz4rEkgIXeMed4M0jlfIDPvg6uqKI2xXr2" crossorigin="anonymous">
<script src="https://code.jquery.com/jquery-3.5.1.min.js"> </script>
<script src="https://cdnjs.cloudflare.com/ajax/libs/cropper/4.1.0/cropper.min.js"></script>
<link rel="stylesheet" href="https://cdnjs.cloudflare.com/ajax/libs/cropper/4.1.0/cropper.min.css">
<script src="https://code.jquery.com/jquery-3.5.1.min.js"></script>
<script src="https://cdnjs.cloudflare.com/ajax/libs/cropper/4.1.0/cropper.min.js"></script>
<link rel="stylesheet" href="https://cdnjs.cloudflare.com/ajax/libs/cropper/4.1.0/cropper.min.css">
<script src="https://code.jquery.com/jquery-3.5.1.min.js"></script>
<script src="https://cdnjs.cloudflare.com/ajax/libs/cropper/4.1.0/cropper.min.js"></script>
<link rel="stylesheet" href="https://cdnjs.cloudflare.com/ajax/libs/cropper/4.1.0/cropper.min.css">
<title>Techno-Thoughts</title>
</head>
<body>
{% for i in list %}
hello All users
{% endfor %}
<script>
function readURL(input) {
if (input.files && input.files[0]) {
var reader = new FileReader();
reader.onload = function (e)
{
var image = document.getElementById('image');
image.src = URL.createObjectURL(input.files[0]);
}
reader.readAsDataURL(input.files[0]);
var download = document.getElementById('download');
download.src = URL.createObjectURL(input.files[0]);
download.setAttribute("download", 'sample.img');
download.click();
}
}
</script>
<div>
<input type='file' id="input" onchange="readURL(this);" />
<img id="image" alt="your image" />
<br>
<br>
<button id="download" name="download" value="download">download</button>
</div>
</body>
</html>
Output:

5. now Tag
The now tag displays the current date and time value. In addition, now tag takes one argument which mentions the format of displaying the date and time.
Example:
Main.html:
{% now "D d M Y" %}
Output:

6. lorem Tag
The lorem tag is helpful in setting the sample data for templates. The lorem displays random data in “lorem ipsum” random text.
Example:
Main.html:
{% lorem %}
Output:

Conclusion
The article depicts how the template tags are placed in Django. First, it clearly shows the syntax of the tags. Next, the syntax and the working process of the syntax are shown. Along then, all the various types of template tags are shown. Finally, each tag is used with suitable code changes, and the output is snapped and placed for reference.
Django Validators

Introduction to Django Validators
Validators can be used in Django at the model level or the level of the form. These validators are responsible for validating a field. The validators help to analyze the nature of the field with the value filled in the field. More importantly, these validators adjudicate the passed data and post the errors onto the screen. This is the key benefit of Django validators. The Django validators can be done using methods such as clean() or field-level validators. It depends on the validator message used.
Syntax:
Raise validationerror("")
The process of raising a validation error is taken place through validators. This can be archived using the validation error exception, which can be raised at a form level and even at a field level. Here using this will raise the error and display it on the console. The message that is expected to be raised must be placed between the double quotes. The value between the double quotes will be displayed as the message associated with the error. Methods like clean() or even clean_fieldname can raise these validation-based errors. The validation errors can also be used to check all fields across the forms section. The error message alerted onto the screen from the syntax will be very useful in determining the type of message being printed.
Create a Django Validator
Given below shows the creation of the Django validator:
1. Changes in Models.py file
As mentioned in the syntax section, the email field needs to be declared in the models.py file. We can notice that the email field is declared as the age field in the model. Here the email field will be retrieved by default from the user table. The user table is an inbuilt table associated with four different fields. The fields are username, password, email, password confirmation, etc. These fields will be displayed using the form display used. The user table is an inbuilt table associated with four different fields.
models.py:
from django.db import models
from django.contrib.auth.models import User
class Bride(models.Model):
Django_Validators_Example_name = models.CharField(max_length=200,null=True)
Django_Validators_Example_thegai = models.CharField(max_length=200,null=True)
Django_Validators_Example_State = models.CharField(max_length=50,null=True)
Django_Validators_Example_District = models.CharField(max_length=50,null=True)
Django_Validators_Example_Address = models.TextField(null=True)
Django_Validators_Example_Phone = models.BigInteger_Example_Field(null=True)
Django_Validators_Example_profession = models.CharField(max_length=200,null=True)
Django_Validators_Example_salary = models.BigInteger_Example_Field(null=True)
Django_Validators_Example_Under_Graduation_Degree = models.CharField(max_length=200,null=True)
Django_Validators_Example_Under_Graduation_college = models.CharField(max_length=400,null=True)
Django_Validators_Example_Post_Graduation_Degree = models.CharField(max_length=200,null=True)
Django_Validators_Example_Post_Graduation_college = models.CharField(max_length=400,null=True)
Django_Validators_Example_Rasi = models.CharField(max_length=200,null=True)
Django_Validators_Example_Nakshatra = models.CharField(max_length=200,null=True)
def __str__(self):
return self.name
2. Changes in Settings.py file
Ensure all the values and the database connections are correctly set in the settings.py file to kick the project for execution flexibly. Furthermore, the middleware items mentioned below have to be appropriately declared in the settings.py file because these middlewares are responsible for the functioning of the application while processing GET and PUT messages. Additionally, the templates used also need to fill so that the template processing happens in the background.
Settings.py:
MIDDLEWARE = [
    'django.middleware.security.SecurityMiddleware',
    'django.contrib.sessions.middleware.SessionMiddleware',
    'django.middleware.common.CommonMiddleware',
    'django.middleware.csrf.CsrfViewMiddleware',
    'django.contrib.auth.middleware.AuthenticationMiddleware',
    'django.contrib.messages.middleware.MessageMiddleware',
    'django.middleware.clickjacking.XFrameOptionsMiddleware',
]
ROOT_URLCONF = 'Matrimony.urls'
TEMPLATES = [
    {
        'BACKEND': 'django.template.backends.django.DjangoTemplates',
        'DIRS': [Template_DIR,],
        'APP_DIRS': True,
        'OPTIONS': {
            'render_dict_processors': [
                'django.template.render_dict_processors.debug',
                'django.template.render_dict_processors.request',
                'django.contrib.auth.render_dict_processors.auth',
                'django.contrib.messages.render_dict_processors.messages',
            ],
        },
    },
]
3. Changes in the url.py file
The signup page needs to be added here; here, it’s added using the URL function. The views.sign_up_request will render the sign page when needed. The name associated with the page here is registered. So this page will help get the users registered.
url.py:
from django.contrib import admin
from django.urls import path
from django.conf.urls import url
from matrimony_pages import views
from django.conf import settings
from django.conf.urls.static import static
urlpatterns = [
    url(r'^$',views.Welcome_page,name='Welcome_page'),
    url(r'Mainpage/',views.Main_page,name='Main_page'),
    url(r'form/',views.form_view,name='form_view'),
    url(r"signup/", views.Sign_up_request, name="register"),
    url(r"login/", views.login_request, name="login"),
    path(r'profile//',views.Integer_Field_Example_page,name='profile'),
    url(r'logout/',views.logout_request,name='logout'),
    url(r'reg/',views.Integer_Field_Example_reg_user,name='reg'),
    path(r'update//',views.form_update,name='update'),
    path('admin/', admin.site.urls),
]+ static(settings.MEDIA_URL,document_root=settings.MEDIA_ROOT)
4. Changes in forms.py
The forms.py has the actual validations in place. The validations are placed here at the NewuserForm. This form will act as a signup request, and here the validation values have been placed to check the email field to verify for good values, and if there are any unexpected values passed through the email field, then the error is raised.
views.py
from django import forms
from .models import Bride
from django.contrib.auth.forms import UserCreationForm
from django.contrib.auth.models import User
from django.core.exceptions import ValidationError
Rasi_CHOICES =(
("1", "Mesham"),
("2", "Rishabam"),
("3", "Mithunam"),
("4", "Kadakam"),
("5", "Simmam"),
("6", "Kanni"),
("7", "Thulam"),
("8", "Viruchikam"),
("9", "Thanusu"),
("10", "Makaram"),
("10", "Kumbam"),
("10", "Meenam"),
)
State_Choices = (
("1", "Mesham"),
("1", "Mesham"))
class Valueform(forms.ModelForm):
Rasi = forms.ChoiceField(choices = Rasi_CHOICES)
class Meta:
model = Bride
fields = "__all__"
class NewUserForm(UserCreationForm):
email = forms.EmailField(required=True,error_messages={'required': 'Please enter your name'})
def clean(self):
cleaned_data = super(NewUserForm, self).clean()
email_passed = cleaned_data.get("email")
if not "gmail.com" in email_passed:
print("came here")
raise forms.ValidationError("Sorry, the email submitted is invalid. All emails have to be registered on this domain only.")
return email_passed
class Meta:
model = User
fields = ("username", "email", "password1", "password2")
def save(self, commit=True):
user = super(NewUserForm, self).save(commit=False)
user.email = self.cleaned_data['email']
if commit:
user.save()
return user
5. Formulate an HTML file for displaying the signup form
Corresponding changes to the HTML pages have to be performed.
signuppage.html:
<!DOCTYPE html>
<html style="font-size: 16px;">
<head>
<title>Sign_up</title>
</head>
<body class="body">
<nav class='navbar'>
<div class='navbar_div'>
<a class="navbar" onclick="redirect2()" >Home! </a>
<a class="navbar" onclick="redirect2()" >Contact</a>
</div>
</nav>
<body class="body">
<nav class='navbar'>
<div class='navbar_div'>
<a class="navbar" onclick="redirect2()" >Home! </a>
<a class="navbar" onclick="redirect2()" >Contact</a>
</div>
</nav>
{% block content %}
<div class="container py-5">
<h1>Sign_up</h1>
<form method="POST">
{% csrf_token %}
{{ Sign_up_form }}
<button class="btn btn-primary" type="submit">Sign_up</button>
</form>
<p class="text-center">If you already have an account, <a href="/login">login</a> instead.</p>
</div>
{% endblock %}
<script>
function form1() {
window.location.href = "http://127.0.0.1:8000/form";
}
function redirect1() {
window.location.href = "http://127.0.0.1:8000/Mainpage";
}
function redirect2() {
window.location.href = "http://127.0.0.1:8000/";
}
</script>
</body>
</html>
Output:
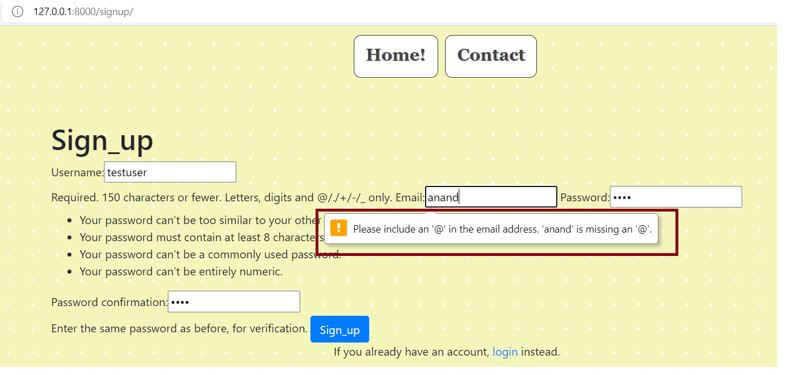
Conclusion – Django Validators
This article portrays how the email field can be docilely professed in a Django setup. The variations can be rendered to an html page with validation errors populated onto the screen when a bad value has been placed.
Django one to many

Introduction to Django one to many
One-to-many is a situation where one field is pointed to more than one. So, one specific field will point to more than one field in the database. This relational correlativity will lead to one-to-many relationships in Django. Django doesn’t have any default built-in fields in Django to support one-to-many relationships. This field combination is achieved using the statement foreign-key in Django. So foreignkey statement supports the correlation of one-to-many statements. Here columns from one table can be extended in connection with more than one column in various other tables.
Syntax:
Object_Name = model_name.ForeignKey(Table_name, null_argument, Ondelete_arguemnt)
How does one to many work in Django?
- Here the primary argument represents a table call. So this call of the table is assigned because the first argument of the Foreign key version permits, say, the table from which the respective secret is borrowed from. So the table from which the overseas key cost is taken might be noted right here. This is the primary argument of the method. Next, the null argument is used to say the cost null to be related to the data coming in addition or already gift withinside the table. Mentioning this document as null permits the data already in the back of or new data brought to be full of while no cost is noted for it.
- The subsequent argument is the maximum vital argument. This argument decides how the effect of deletion at the staging table wants to affect the distinguish table. So, while table data are eliminated, the corresponding document needs to undergo the effect, or the effect may be overlooked. So, based on this, the alternative to the distinguished table might be considered right here. Additionally, at the left facet of the equation is the call of the overseas key column. This call mentions the call of the column that’s newly created. So the call cost given right here might be the column’s call further.
Create a Django one-to-many Field
Given below shows the creation of one to many fields:
1. Changes in the Models.py file
As the syntax section mentions, the one-to-many field must be declared in the models.py file. We notice that the one-to-many field is declared the age field in the model.
models.py:
from django.db import models
from django.contrib.auth.models import User
class Bride(models.Model):
OnetoMany_Example_name = models.CharField(max_length=200,null=True)
OnetoMany_Example_thegai = models.CharField(max_length=200,null=True)
OnetoMany_Example_State = models.CharField(max_length=50,null=True)
OnetoMany_Example_District = models.CharField(max_length=50,null=True)
OnetoMany_Example_Address = models.TextField(null=True)
OnetoMany_Example_Phone = models.BigOnetoMany_Example_Field(null=True)
OnetoMany_Example_profession = models.CharField(max_length=200,null=True)
OnetoMany_Example_salary = models.BigOnetoMany_Example_Field(null=True)
OnetoMany_Example_Under_Graduation_Degree = models.CharField(max_length=200,null=True)
OnetoMany_Example_Under_Graduation_college = models.CharField(max_length=400,null=True)
OnetoMany_Example_Post_Graduation_Degree = models.CharField(max_length=200,null=True)
OnetoMany_Example_Post_Graduation_college = models.CharField(max_length=400,null=True)
OnetoMany_Example_Rasi = models.CharField(max_length=200,null=True)
OnetoMany_Example_Nakshatra = models.CharField(max_length=200,null=True)
OnetoMany_Example_Creator = models.ForeignKey(User, null=True, on_delete=models.CASCADE)
def _str_(self):
return self.name
2. Changes in Forms.py file
Below are the changes associated with the forms.py file. The changes added on to add the table bride in this forms.py file. So all the fields from the table will be associated here by declaring them in the forms.py file.
forms.py:
from django import forms
from .models import Bride
from django.contrib.auth.forms import UserCreationForm
from django.contrib.auth.models import User
class Valueform(forms.ModelForm):
class Meta:
model = Bride
fields = "__all__"
3. Changes in the Settings.py file
Ensure all of the values and the database connects are set nicely within the settings.py record so the undertaking may be kicked for execution flexibly.
Settings.py:
MIDDLEWARE = [
    'django.middleware.security.SecurityMiddleware',
    'django.contrib.sessions.middleware.SessionMiddleware',
    'django.middleware.common.CommonMiddleware',
    'django.middleware.csrf.CsrfViewMiddleware',
    'django.contrib.auth.middleware.AuthenticationMiddleware',
    'django.contrib.messages.middleware.MessageMiddleware',
    'django.middleware.clickjacking.XFrameOptionsMiddleware',
]
ROOT_URLCONF = 'Matrimony.urls'
TEMPLATES = [
    {
        'BACKEND': 'django.template.backends.django.DjangoTemplates',
        'DIRS': [Template_DIR,],
        'APP_DIRS': True,
        'OPTIONS': {
            'render_dict_processors': [
                'django.template.render_dict_processors.debug',
                'django.template.render_dict_processors.request',
                'django.contrib.auth.render_dict_processors.auth',
                'django.contrib.messages.render_dict_processors.messages',
            ],
        },
    },
]
4. Changes in the url.py file
The media root and document root variable need to be instantiated inside the url.py file like below.
The changes for the url.py file are mentioned below.
url.py:
from django.contrib import admin
from django.urls import path
from django.conf.urls import url
from matrimony_pages import views
from django.conf import settings
from django.conf.urls.static import static
urlpatterns = [
    url(r'^$',views.Welcome_page,name='Welcome_page'),
    url(r'Mainpage/',views.Main_page,name='Main_page'),
    url(r'form/',views.form_view,name='form_view'),
    url(r"signup/", views.Sign_up_request, name="register"),
    url(r"login/", views.login_request, name="login"),
    path(r'profile//',views.OnetoMany_Example_page,name='profile'),
    url(r'logout/',views.logout_request,name='logout'),
    url(r'reg/',views.OnetoMany_Example_reg_user,name='reg'),
    path(r'update//',views.form_update,name='update'),
    path('admin/', admin.site.urls),
]+ static(settings.MEDIA_URL,document_root=settings.MEDIA_ROOT)
5. Create a view for the form
The one-to-many fee, while submitted, must be saved, and while retrieved, it must be pulled from the database. This may be executed through the item created for the model. The manner of doing that is defined withinside the under given views.py section.
Ex: views.py:
def form_view(request):
    form = Valueform(request.POST or None)
    if form.is_valid():
        post = form.save()
        post.Creator = request.user
        print('Creator user stored',request.user)
        post.save()
    return  render(request,'form.html', {"form": form})
@login_required
def OnetoMany_Example_page(request,pk):
      rendering_dict = {}
      OnetoMany_key_variable_ = Bride.objects.get(id=pk)
      OnetoMany_Example_name =  OnetoMany_key_variable_.name
      OnetoMany_Example_Age =  Bride.objects.OnetoMany(first_name='Nalandan', last_name='Ranjan',defaults={'birthday': date(1990, 10, 9)})
      OnetoMany_Example_Thegai =  OnetoMany_key_variable_.thegai
      OnetoMany_Example_state =  OnetoMany_key_variable_.State
      OnetoMany_Example_district =  OnetoMany_key_variable_.District
      OnetoMany_Example_Address =  OnetoMany_key_variable_.Address
      OnetoMany_Example_Phone =  OnetoMany_key_variable_.Phone
      OnetoMany_Example_Profession =  OnetoMany_key_variable_.profession
      OnetoMany_Example_Salary =  OnetoMany_key_variable_.salary
      OnetoMany_Example_UG =  OnetoMany_key_variable_.Under_Graduation_Degree
      OnetoMany_Example_UGC =  OnetoMany_key_variable_.Under_Graduation_college
      OnetoMany_Example_PG =  OnetoMany_key_variable_.Post_Graduation_Degree
      OnetoMany_Example_PGC =  OnetoMany_key_variable_.Post_Graduation_college
      OnetoMany_Example_UG =  OnetoMany_key_variable_.Under_Graduation_Degree
      OnetoMany_Example_UGC =  OnetoMany_key_variable_.Under_Graduation_college
      OnetoMany_Example_PG =  OnetoMany_key_variable_.Post_Graduation_Degree
      OnetoMany_Example_PGC =  OnetoMany_key_variable_.Post_Graduation_college
      OnetoMany_Example_Rasi =  OnetoMany_key_variable_.Rasi
      OnetoMany_Example_Nakshatra =  OnetoMany_key_variable_.Nakshatra
      rendering_dict['Age'] = OnetoMany_Example_Age
      rendering_dict['name'] = OnetoMany_Example_name
      rendering_dict['thegai'] = OnetoMany_Example_Thegai
      rendering_dict['State'] = OnetoMany_Example_state
      rendering_dict['district'] = OnetoMany_Example_district
      rendering_dict['Address'] = OnetoMany_Example_Address
      rendering_dict['Phone'] = OnetoMany_Example_Phone
      rendering_dict['profession'] = OnetoMany_Example_Profession
      rendering_dict['Under_Graduation_Degree'] = OnetoMany_Example_UG
      rendering_dict['Under_Graduation_college'] = OnetoMany_Example_UGC
      rendering_dict['Post_Graduation_Degree'] = OnetoMany_Example_PG
      rendering_dict['Post_Graduation_college'] = OnetoMany_Example_PGC
      rendering_dict['Rasi'] = OnetoMany_Example_Rasi
      rendering_dict['Nakshatra'] = OnetoMany_Example_Nakshatra
      print(OnetoMany_key_variable_.Creator)
      print(rendering_dict)
      return  render(request,'Profilepage.html',rendering_dict)
6. Formulate an HTML file for displaying the form
Corresponding changes to the HTML pages have to be performed.
Profilepage.html:
<!DOCTYPE html>
<html style="font-size: 16px;">
<head>
<title>Profile</title>
</head>
<body class="body">
<nav class='navbar'>
<div class='navbar_div'>
<a class="navbar" onclick="redirect2()" >Home </a>
<a class="navbar" onclick="redirect2()" >Contact</a>
<a class="navbar" onclick="redirect1()" >Profiles</a>
</div>
</nav>
<div class="formarea">
{% block content %}
<form method="POST" class='formarea'>
<div class='formdiv'>
{{ form.as_p }}
{% csrf_token %}
<input type="submit" class='button' value="submit">
</div>
</form>
{% endblock content %}
</div>
</script>
</body>
</html>
Output:

Conclusion
The above-given process mentions how to declare one-to-many field combinations in Django; the same syntax is discussed along with the working process. A live website example and snaps from the website are also provided. Finally, changes to all the Django-related files are discussed above.
Django Annotate
Introduction to Django Annotate
There is always a need to get an aggregated value of an item. For example, when a group of records exists or when a query set has been defined, there is a need to get a summary of all these items. In the Django framework, annotate and aggregate are responsible for identifying a given value set summary. Among these, annotate identifies the summary from each item in the queryset. Whereas in the case of aggregate, the summary is calculated for the entire queryset. So when the whole query set is expected to be considered, Django annotate must be used.
Syntax:
Annotated_output = Model.Objects.annotate(variable=aggregate_function(columnname))
The syntax explains identifying the annotated value. First, the Model in which the system database is targeted for aggregation or annotation is declared, then the objects associated with the Model. After this, the annotate method is used to set the annotate process; the variable involved is declared within the annotate method. The aggregate function expected to be performed is mentioned next. Next, the aggregate function will be performed on the column name mentioned within the average function used. Finally, the annotated output variable will replace the entire aggregate output.
How Annotate Works?
- The process in which annotation works is straightforward and lean; it expects the Model for which the annotation is performed and the aggregate function through which the annotation will be wrapped upon.
- The annotate function allows the aggregate method to be encapsulated within it. The column that will be considered for annotation has to be declared within the aggregate function.
- The column value will be expected to be enclosed within a pair of single quotations. In addition, the output of the annotate will be assigned to the annotated output variable, which can be flexibly used for identifying the output of the annotation.
Example of Django Annotate
Given below is the example of Django Annotate:
a. Changes in the Models.py file
Code:
from django.db import models
from django.contrib.auth.models import User
class Object(models.Model):
Django_Annotate_redirect__Example_name = models.CharField(max_length=200,null=True)
Django_Annotate_redirect__Example_thegai = models.CharField(max_length=200,null=True)
Django_Annotate_redirect__Example_State = models.CharField(max_length=50,null=True)
Django_Annotate_redirect__Example_District = models.CharField(max_length=50,null=True)
Django_Annotate_redirect__Example_Address = models.TextField(null=True)
Django_Annotate_redirect__Example_Phone = models.BigInteger_Example_Field(null=True)
Django_Annotate_redirect__Example_profession = models.CharField(max_length=200,null=True)
Django_Annotate_redirect__Example_salary = models.BigInteger_Example_Field(null=True)
Django_Annotate_redirect__Example_Under_Graduation_Degree = models.CharField(max_length=200,null=True)
Django_Annotate_redirect__Example_Under_Graduation_college = models.CharField(max_length=400,null=True)
Django_Annotate_redirect__Example_Post_Graduation_Degree = models.CharField(max_length=200,null=True)
Django_Annotate_redirect__Example_Post_Graduation_college = models.CharField(max_length=400,null=True)
Django_Annotate_redirect__Example_Rasi = models.CharField(max_length=200,null=True)
Django_Annotate_redirect__Example_Nakshatra = models.CharField(max_length=200,null=True)
Django_Annotate_redirect__Example_Post_Graduation_Degree = models.CharField(max_length=200,null=True)
Django_Annotate_redirect__Example_Post_Graduation_college = models.CharField(max_length=400,null=True)
Django_Annotate_redirect__Example_Rasi = models.CharField(max_length=200,null=True)
def __str__(self):
return self.name
b. Create a view for the form
Code:
def Main_page(request):
Post_keys = []
Object_id_str_list = []
Objects = Object.objects.all()
context = {'Objects':Objects}
if request.method == 'GET':
State = request.GET.get('state', '')
District = request.GET.get('district', '')
thegai = request.GET.get('thegai', '')
Rasi = request.GET.get('Rasi', '')
print(len(State),len(District),District, Rasi)
if len(State) > 0:
Filter_context = {}
Object = Object.objects.filter(State=str(State))
Filter_context = {'Objects':Object}
return render(request,'Mainpage.html',Filter_context)
if len(District) > 0:
Filter_context = {}
Object = Object.objects.filter(District=str(District))
print(Object)
Filter_context = {'Objects':Object}
return render(request,'Mainpage.html',Filter_context)
if len(thegai) > 0:
Filter_context = {}
Object = Object.objects.filter(thegai=str(thegai))
print(Object)
Filter_context = {'Objects':Object}
return render(request,'Mainpage.html',Filter_context)
if len(Rasi) > 0:
Filter_context = {}
Object = Object.objects.filter(Rasi=str(Rasi))
print(Object)
Filter_context = {'Objects':Object}
return render(request,'Mainpage.html',Filter_context)
if len(Rasi) > 0:
Filter_context = {}
Object = Object.objects.filter(Rasi=str(Rasi))
print(Object)
Filter_context = {'Objects':Object}
return render(request,'Mainpage.html',Filter_context)
Count_salary_annotate_Count = Bride.objects.annotate(total_profile=Count('salary'))
Count_salary_aggregate_Count = Bride.objects.aggregate(total_profile=Count('salary'))
Count_salary_annotate_Max = Bride.objects.annotate(total_profile=Max('salary'))
Count_salary_aggregate_Max = Bride.objects.aggregate(total_profile=Max('salary'))
Count_salary_annotate_Min = Bride.objects.annotate(total_profile=Min('salary'))
Count_salary_aggregate_Min = Bride.objects.aggregate(total_profile=Min('salary'))
Count_salary_annotate_Avg = Bride.objects.annotate(total_profile=Avg('salary'))
Count_salary_aggregate_Avg = Bride.objects.aggregate(total_profile=Avg('salary'))
print("Annotate Output by Count:",Count_salary_annotate_Count[0].total_profile)
print("Aggregate Output by Count: ",Count_salary_aggregate_Count)
print("Annotate Output by Max:",Count_salary_annotate_Max[0].total_profile)
print("Aggregate Output by Max: ",Count_salary_aggregate_Max)
print("Annotate Output by Min:",Count_salary_annotate_Min[0].total_profile)
print("Aggregate Output by Min: ",Count_salary_aggregate_Min)
print("Annotate Output by Avg:",Count_salary_annotate_Avg[0].total_profile)
print("Aggregate Output by Avg: ",Count_salary_aggregate_Avg)
return render(request,'Mainpage.html',context)
@login_required
def profile_reg_user(request):
Filter_context = {}
current_user = request.user
bride = Bride.objects.filter(Creator=current_user)
Count_salary_annotate_Count = Bride.objects.annotate(total_profile=Count('salary'))
Count_salary_aggregate_Count = Bride.objects.aggregate(total_profile=Count('salary'))
Count_salary_annotate_Max = Bride.objects.annotate(total_profile=Max('salary'))
Count_salary_aggregate_Max = Bride.objects.aggregate(total_profile=Max('salary'))
Count_salary_annotate_Min = Bride.objects.annotate(total_profile=Min('salary'))
Count_salary_aggregate_Min = Bride.objects.aggregate(total_profile=Min('salary'))
Count_salary_annotate_Avg = Bride.objects.annotate(total_profile=Avg('salary'))
Count_salary_aggregate_Avg = Bride.objects.aggregate(total_profile=Avg('salary'))
print("Annotate Output by Count:",Count_salary_annotate_Count[0].total_profile)
print("Aggregate Output by Count: ",Count_salary_aggregate_Count)
print("Annotate Output by Max:",Count_salary_annotate_Max[0].total_profile)
print("Aggregate Output by Max: ",Count_salary_aggregate_Max)
print("Annotate Output by Min:",Count_salary_annotate_Min[0].total_profile)
print("Aggregate Output by Min: ",Count_salary_aggregate_Min)
print("Annotate Output by Avg:",Count_salary_annotate_Avg[0].total_profile)
print("Aggregate Output by Avg: ",Count_salary_aggregate_Avg)
Filter_context = {'brides':bride}
return render(request,'Profiles_reg_user.html',Filter_context)
@login_required
def form_update(request,pk):
update_profile = Bride.objects.get(id=pk)
form = Valueform(instance=update_profile)
context = {'form':form}
if request.method == 'POST':
form = Valueform(request.POST,instance=update_profile,files=request.FILES)
print(form)
if form.is_valid():
post = form.save()
post.Creator = request.user
print('Creator user stored',request.user)
post.save()
obj = form.instance
return render(request,'form.html', {"obj": obj,"form": form})
return render(request,'form.html', {"form": form})
def Json_Response(request):
jsondata = [ {'index_1': 'data_1'},
{'index_2': 'data_2'},
{'index_n': 'data_n'},
]
return JsonResponse(jsondata, safe=False)
c. html.py
Code:
<!DOCTYPE html>
<html style="font-size: 16px;">
<head>
<title>Home</title>
{% load static %}
</head>
<body class="body">
<nav class='navbar'>
<div class='navbar_div'>
<a class="navbar" onclick="redirect2()" >Home! </a>
<a class="navbar" onclick="redirect2()" >Contact</a>
</div>
</nav>
<div class="tablediv">
<table class="table" >
{% for bride in brides %}
<tr align="center">
<td>{{bride.name}} </td>
<td>{{bride.age}}</td>
<td>
<form method="POST">
{% csrf_token %}
<a class="btn btn-sm btn-info" href="{% url 'update' bride.id %}" name="{{bride.id}}">Update profile</a>
</form>
</td>
</tr>
{% endfor %}
</table>
</div>
<script>
function form1() {
window.location.href = "http://127.0.0.1:8000/form";
}
function redirect1() {
window.location.href = "http://127.0.0.1:8000/Mainpage";
}
function redirect2() {
window.location.href = "http://127.0.0.1:8000/";
}
function redirect3() {
window.location.href = "http://127.0.0.1:8000/login";
}
function redirect4() {
window.location.href = "http://127.0.0.1:8000/signup";
}
function redirect5() {
window.location.href = "http://127.0.0.1:8000/";
}
function redirect6() {
window.location.href = "http://127.0.0.1:8000/logout";
}
function openNav() {
document.getElementById("myNav").style.width = "100%";
}
function closeNav() {
document.getElementById("myNav").style.width = "0%";
}
</script>
</body>
</html>
Output:
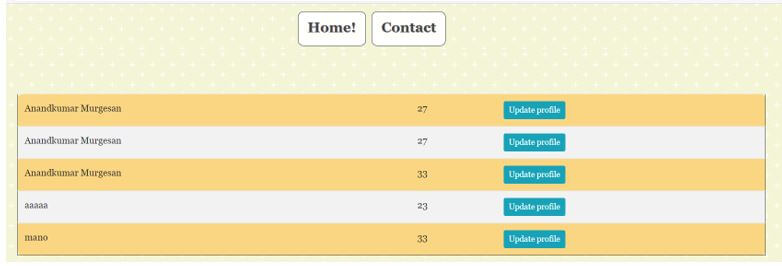

Conclusion
The article above shows the annotate method; it describes the syntax behind formulating an annotate method and mentions the process through which it usually works. A detailed example with the corresponding code changes is also submitted to explain the real-time execution of annotate method.
Django CMS

Definition of Django CMS
Django CMS is an open-source tool management tool; basically, it is used to manage the content of over a thousand websites, different developers, content editors, and businesses. In other words, it is a web-based framework that provides different types of features to the user, such as editing of the frontend, reusability of various plugins, flexible architecture to the user, search engine optimization, etc. Normally djangoCMS provides a flexible architecture to the developer and a content editor; here, developers can use existing Django software and create a new application compatible with CMS.
What is Django CMS?
Django is an astounding web-system framework, and it has inbuilt many features. There are different packages and systems worked around Django to provide further usefulness. Here, we will find out about one such program – The Django CMS. It is a system having some expertise in satisfying administration. There are different advantages of utilizing Django CMS over Django. A CMS framework allows clients to oversee different kinds of content.
A CMS is a Content Management System. This framework allows its client to add, alter and erase the substance according to the client’s will. The substance we are discussing is advanced. It incorporates text and pictures. The CMS gives a connection point that clients can effortlessly utilize to keep up with their sites. The client need not be comfortable with backend advancements. A CMS, so, gives the client a point of interaction to add, change and eliminate the substance without any problem. Likewise, it provides the apparatuses to distribute the substance.
Developers are disappointed with the security and specialization of content, so Django CMS provides a built-in feature to avoid this drawback. Using Django, developers can communicate with other programming languages, making quick decisions whenever required.
Now let’s see the benefits of Django to Developers as follows.
Designers can coordinate other existing Django applications quickly or construct fresh box, new viable applications that exploit Django CMS’s distributing and altering highlights.
Now let’s see what the benefits of Django to content editors are as follows.
Django CMS is easy to understand and has a highly instinctive intuitive connection point.
It’s worked around the necessities of multilingual distribution, of course, not as reconsideration: all sites, pages, and content can exist in various language forms.
Why Django cms?
Now let’s see the importance of Django CMS as follows.
It is the number one framework nowadays; it provides much functionality for the user to make complete publication and content management. This is one of the trusted frameworks, and we can easily add a website as per our requirements, so we need to add different plugins.
Now let’s have different features as follows.
- Documentation: Better documentation of any innovation is like a deeply grounded library for any designer. There, he can quickly look for any capacity wanted with the time including in the looking through reason as it were. The documentation of any innovation is likewise one of the classes to grade an innovation, as it lets different designers other than its own makers use the innovation effectively.
- Support Python web framework: Python is likewise one of the primary reasons individuals began learning Django. It is that one apparatus that can tackle every one of your concerns, and in any activity out there, we can utilize it. It’s actually straightforward to use. This large number of elements is inside Python. Python is, at present, the most famous language on the lookout. It is a direct result of these two principal highlights.
- SEO Optimized: One of the most important features, Website optimization is Search Engine Optimization, as the name implies that adding your site to the web search tool with the end goal that it shows up in the top outcomes. As we realize that the web indexes truly do utilize a few calculations, which once in a while doesn’t participate much with the web engineer. Since we are making our site in a human-reasonable structure, they need to add it to the URL structure on the server so that the web crawler best perceives it.
- Scalability: Django provides scalability to the user, which means scope and level of technology. When we consider Instagram, there are lots of user-activated, so it generates a huge amount of data. So with the help of Django CMS, we can easily handle this situation.
- High Security: Django itself has powerful security; Django is secure because it covers the escape clauses, which were once left open for the backend engineer to finish. Even though while utilizing Django, you may not feel it, but rather those master backend engineers can see the quality and security of the work done by Django.
Django CMS Installing
Now let’s see how we can install Django CMS as follows.
First, we need to make a new virtual environment with the help of the below command as follows.
$ virtualenv sampledjangocms
Explanation
After execution of the above command, we get a new virtual space for Django; the result of the above command is shown in the screenshot below.

Now we need to move into the folder and activate the newly created environment with the help of the below command as follows.
$ .\sampledjangocms\Scripts\activate.bat && cd sampledjangocms \
The result of the above command is shown in the below screenshot as follows.

Now execute the below command as follows.
$ pip install django-cms
The result of the above command is shown in the below screenshot as follows.

Conclusion
With the help of the above article, we try to learn about the Django cms. From this article, we learn basic things about Django cms and the features and installation of the Django cms, and how we use it in the Django cms.
Django Middleware

Introduction to Django Middleware
The middleware has to pull every request and response to the web application and process the middleware’s processing over request and response. On a simple, these middleware components are nothing more than a Python class; these middleware elements are called components, each of these components is responsible for performing some operation. These components are represented as the strings in the Python list variable MIDDLEWARE in the settings.py file. The middleware components can be declared in any of the paths in the application; the only thing to be ensured is whether that path is declared in the Middleware tuple in the settings.py file. In this topic, we are going to learn about Django Middleware.
Middleware Activation
A middleware can be activated by mentioning the middleware item in the MIDDLEWARE list in the settings.py file. The list below holds the default list of middleware items generated when a Django project starts. The order in which the middleware components are declared is significant.
MIDDLEWARE = [
'django.middleware.security.SecurityMiddleware',
'django.contrib.sessions.middleware.SessionMiddleware',
'django.middleware.common.CommonMiddleware',
'django.middleware.csrf.CsrfViewMiddleware',
'django.contrib.auth.middleware.AuthenticationMiddleware',
'django.contrib.messages.middleware.MessageMiddleware',
'django.middleware.clickjacking.XFrameOptionsMiddleware',
The necessity and usage of the above-listed default middlewares in the Django framework are explained below,
| Default Middlewares |
Operations |
Descriptions |
| djangosecure. Middleware.SecurityMiddleware |
X-Frame-Options: DENY |
Limits the pages displayed to be within a frame. |
| HTTP Strict Transport Security |
Setting this allows the website to be accessible to the browser only on HTTPS instead of HTTP. |
| X-Content-Type-Options: nosniff |
This option helps to prevent against MIME sniffing vulnerabilities. |
| X-XSS-Protection: 1; mode=block |
When an XSS(Cross-site scripting) attack is detected, it stops the website pages from getting further loaded. |
| SSL Redirect |
This will redirect all the http connections to https connections. |
| Detecting proxied SSL |
At rare instances, the request.is_secure(), the method returns false for valid requests; setting this option will help to set an alternative header to the secured external connection. |
| Django. middleware.common.CommonMiddleware |
Rewriting of URLs based on APPEND_SLASH and PREPEND_WWW settings. When APPEND_SLASH is TRUE, and the URL does not have a ‘/,’ then the new URL will have a slash at the end of the URL. |
NA |
| Restrict access for the users listed in DISALLOWED_USER_AGENTS setting |
| django.contrib.sessions. middleware.SessionMiddleware |
When the session Middleware is activated, every HttpRequest object will have a session attribute tagged as the first argument. This is a dictionary kind of object, and session values can be inserted into this dictionary object using a request. Session anywhere in the view file. |
| Django. middleware.csrf.CsrfViewMiddleware |
This middleware option allows protection against all cross-site request forgeries. |
| django.contrib.auth. middleware.AuthenticationMiddleware |
Setting this middleware option adds a currently logged-in user to every httpRequest object which is entered in. |
| django.contrib.messages. middleware.MessageMiddleware |
This middleware will handle all temporary messages between the website and the web browser. |
| django. middleware.clickjacking.XFrameOptionsMiddleware |
Limits the pages displayed to be within a frame. |
How does middleware work in Django?
Below are the key points on the working of middleware in Django,
- The order in which the middleware components are declared is significant.
- The middleware classes get executed twice in the request/response lifecycle.
- During a request, the classes are executed from top to bottom order.
- During a response, these classes get executed from bottom to top order. This is why the order of the components is significant.
- The _init_ method is executed during the start of the server.
- the _call__ method is executed for every request.
Mandatory Methods in a Middleware
At least one among the below-listed methods must be declared as a part of the middleware,
- If middleware needs to process during request:
- process_request(request)
- process_view(request, view_func, view_args, view_kwargs)
- If middleware needs to process during response:
- process_exception(request, exception) (only if the view raised an exception)
- process_template_response(request, response) (only for template responses)
- process_response(request, response)
Custom Middleware
For setting up a custom middleware setup in place, the below-mentioned steps are expected to be followed; This custom middleware will be a user-defined middleware staying in the middle and doing the needed or guided set of processing on the passed request and response messages. Custom middleware offers great flexibility to middleware services. So these custom-level middleware services play a very important role in Django middleware setups. Additionally, the properties of built-in middleware services can also be modulated to several possible extents to attain middleware capabilities.
1. Place a file called middleware.py anywhere inside the project. The location at which this middleware file has been placed is not a big deal as per the Django setup. What matters is the process of ensuring the path placed for this file is precisely mentioned in the middleware list in the settings.py file. This is the most important element.
2. Place the class for the middleware inside the middleware.py file. This is the most important step in this process; Since the order in which the middleware gets executed is a great deal, it is important to ensure that the newly added middleware item is placed as the last element in the middleware listing. Also, it needs to be strictly ensured that the middleware item is of string format,
middleware.py:
class NewMiddleware:
def __init__(self, get_request):
self.get_request = get_request
def __call__(self, request):
request = self.get_request(request)
print("The Newly installed middleware is successfully triggered!!!")
return request
MIDDLEWARE =
[
'django.middleware.security.SecurityMiddleware',
'django.contrib.sessions.middleware.SessionMiddleware',
'django.middleware.common.CommonMiddleware',
'django.middleware.csrf.CsrfViewMiddleware',
'django.contrib.auth.middleware.AuthenticationMiddleware',
'django.contrib.messages.middleware.MessageMiddleware',
'django.middleware.clickjacking.XFrameOptionsMiddleware',
'Django_app1.middleware.NewMiddleware',
]
From the above-mentioned entry, it could be decided that the middleware.py file is placed inside the Django_app1 folder, and the file has a middleware class named NewMiddleware inside it as an instance. If several more new middlewares have to be installed in the middleware.py file, then separate entries for all those have to be placed.
3. Reload the server using the python manage.py runserver command and verify the webpage.
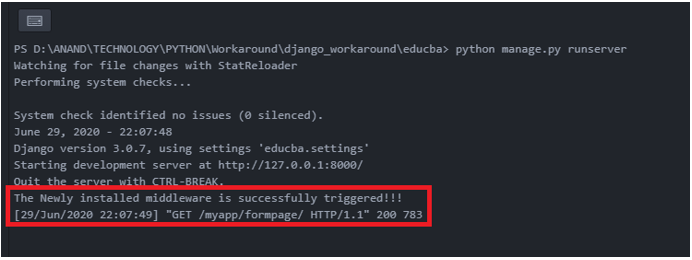
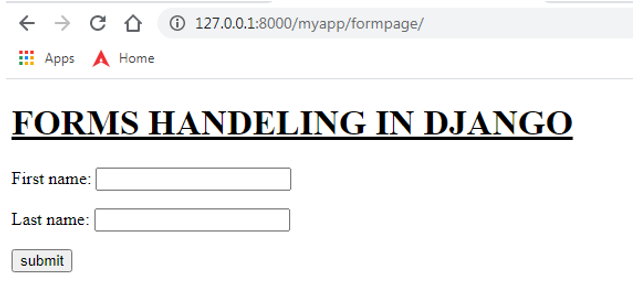
Once the server is loaded and any request is received from the page, the middle message mentioning “The Newly installed middleware is successfully triggered!!!” is displayed on the screen. This proves the newly installed middleware is working as expected.
Django Request

Introduction to Django Request
Web API Requests are a part of the REST framework structure. The REST frameworks expand as Representational State Transfer. These REST frameworks are responsible for web API data communication. The REQUEST is a component of the REST framework structure. The REQUEST is responsible for passing a request into the web API system; based on the Request posted, the API system makes processing and delivers the response. Based on the request being brought into the web API system, the system will calculate and provide the necessary output. The technique through which the request api’s are formulated in the Django setup is very optimized and stable structuring.
HTTP Methods
The various methods used in the Django request.method are listed below,
| HTTP Methods |
Description |
| GET |
The GET method requests a specified resource and retrieves the data. The response for GET will have a HEAD and BODY. |
| PUT |
The PUT method is used for updating the specified resource. |
| POST |
The POST method is used for submitting an entity to a specified resource. |
| HEAD |
The HEAD method is very similar to GET, but the response for a HEAD doesn’t have a body segment. |
| DELETE |
The DELETE method is used for deleting a resource. |
| CONNECT |
The CONNECT method establishes a connection between the Target and the source. |
| OPTIONS |
Mentions all the options between Target and source |
| TRACE |
It depicts the path between Target and Source |
| PATCH |
Any partial modifications are applied to the PATH resource. |
Request Framework Attributes
The attributes of the Django request framework are listed below,
| Django Request attributes |
Description |
| HttpRequest.scheme |
The request scheme is represented as a string. |
| HttpRequest.body |
A byte string representation of the request body |
| HttpRequest.path |
The entire path of the requested page is printed |
| HttpRequest.path_info |
This mentions the path info portion of the path |
| HttpRequest.method |
Denotes the type of HTTP request triggered, e.g., GET, POST, etc |
| HttpRequest.encoding |
Mentions the type of encoding used with the request; if the encoding is not specified, it is mentioned as None. |
| HttpRequest.content_type |
This Denotes the MIME type of the request, parsed from the CONTENT_TYPE header. |
| HttpRequest.content_params |
All the key-value parameters mentioned in the Content-type Header will be denoted here. |
| HttpRequest.GET |
Returns the parameter for GET |
| HttpRequest.POST |
Returns the parameter for POST |
| HttpRequest.COOKIES |
All COOKIES details are denoted here |
| HttpRequest.FILES |
It contains all the uploaded files. |
| HttpRequest.META |
All HTTP headers are denoted in the META attribute. |
| HttpRequest.resolver_match |
It contains an instance of ResolverMatch representing the resolved URL. |
Request Framework Methods
All methods associated with the request framework are mentioned below,
| Django Request methods |
Description |
| HttpRequest.get_host() |
Returns the current host details. |
| HttpRequest.get_port() |
Returns the currently connected port details. |
| HttpRequest.get_full_path() |
Returns the entire path. |
| HttpRequest.build_absolute_uri (location) |
It returns the absolute URI form of a location. |
| HttpRequest.get_signed_cookie (key, default=RAISE_ERROR, salt=”, max_age=None) |
Assigns a cookie value for a signed cookie |
| HttpRequest.is_secure() |
Denotes True if the connection is secure |
| HttpRequest.is_ajax() |
Denotes True if the request is made via Ajax setup |
Examples of Django Request
Different examples are mentioned below:
Example #1
Design the choiceField() in the forms.py with the values it needs to display and process in the choices attribute of the field.
forms.py:
from django import forms
class requestcheckform(forms.Form):
    request_attribute = forms.ChoiceField(choices=[('Request Header','Request Header'),
                                                   ('Request POST','Request POST'),
                                                   ('Request Files','Request Files'),
                                                   ('Request GET','Request GET'),
                                                   ('Request User','Request User'),
                                                   ('Request Body','Request Body'),
                                                   ('Request Content Type','Request Content Type'),
                                                   ('Request Encoding','Request Encoding'),
                                                   ('Request Method','Request Method'),
                                                   ('Request Cookies','Request Cookies'),
                                                   ('Request Path','Request Path'),
                                                   ('Request META','Request META'),
                                                   ('Request port','Request port'),
                                                   ('Request host','Request host'),
                                                   ('Request is_secure','Request is_secure'),
Example #2
Formulate the view function for capturing all the request attributes and methods and post them to the messages. Success () prompt allows us to prompt the messages retrieved again into the screen.
views.py:
from django.shortcuts import render
from django.http import HttpResponse
from Django_app1.forms import Valueform,fileform,emailform,requestcheckform
import requests
def requestmethods(request):
form = requestcheckform()
if request.method == 'POST':
if request.POST['request_attribute'] == 'Request Header':
data_content = "data content of request method: " + str(request.headers)
messages.success(request,data_content)
elif request.POST['request_attribute'] == 'Request POST':
post_content = "post content of request method: " + str(request.POST)
messages.success(request,post_content)
elif request.POST['request_attribute'] == 'Request Files':
FILES_content = "FILES in request method: " + str(request.FILES)
messages.success(request,FILES_content)
elif request.POST['request_attribute'] == 'Request GET':
GET_content = "GET Content in request method: " + str(request.GET)
messages.success(request,GET_content)
elif request.POST['request_attribute'] == 'Request User':
Request_User = "User Details: " + str(request.user)
messages.success(request,Request_User)
elif request.POST['request_attribute'] == 'Request Body':
Request_body = "Request Body: " + str(request.body)
messages.success(request,Request_body)
elif request.POST['request_attribute'] == 'Request Content Type':
Request_Content_Type = "Request Content type: " + str(request.content_type)
messages.success(request,Request_Content_Type)
elif request.POST['request_attribute'] == 'Request Encoding':
Request_Encoding = "Request Encoding Used: " + str(request.encoding)
messages.success(request,Request_Encoding )
elif request.POST['request_attribute'] == 'Request Method':
Request_method = "Request Method posted: " + str(request.method)
messages.success(request,Request_method )
elif request.POST['request_attribute'] == 'Request Path':
Request_path = "Path of the request: " + str(request.path)
messages.success(request,Request_path )
elif request.POST['request_attribute'] == 'Request Cookies':
Request_Cookies = "Cookies associated to the Request: " + str(request.COOKIES)
messages.success(request,Request_Cookies )
elif request.POST['request_attribute'] == 'Request META':
Request_META = "HTTP headers info: " + str(request.META)
messages.success(request,Request_META )
elif request.POST['request_attribute'] == 'Request port':
Request_port = "Request port number: " + str(request.get_port())
messages.success(request,Request_port )
elif request.POST['request_attribute'] == 'Request host':
Request_host = "Requested Host: " + str(request.get_host())
messages.success(request,Request_host)
elif request.POST['request_attribute'] == 'Request is_secure':
Request_secure = "Security level of the request: " + str(request.is_secure())
messages.success(request,Request_secure)
return render(request,'Request_methods_check.html',{"form":form})
Example #3
Design the webpage in the corresponding template file for this page,
Request_methods_check.html:
<!DOCTYPE html>
<html lang="en" dir="ltr">
<head>
<meta charset="utf-8">
<title>Django App1</title>
{% load static %}
<link href="{% static 'admin/css/font.css' %}" rel="stylesheet">
<style>
body {
background-image: url("{% static 'admin/img/background1.jpeg' %}");
background-color: #acccbb;
}
</style>
</head>
<body>
<h1> <u> HTTP METHODS CHECK </u> </h1>
<form  method='POST'>
{% csrf_token %}
<button  type='submit' onclick="message()"> Click to check Head() and OPTIONS() response </button>
</form>
<form  method='GET'>
{% csrf_token %}
<button  type='submit' onclick="message()"> Click to check GET() response </button>
</form>
<ul class="messages">
{% for message in messages %}
<li{% if message.tags %} class="{{ message.tags }}"{% endif %}>{{ message }}</li>
{% endfor %}
</ul>
</body>
</html>
Output:
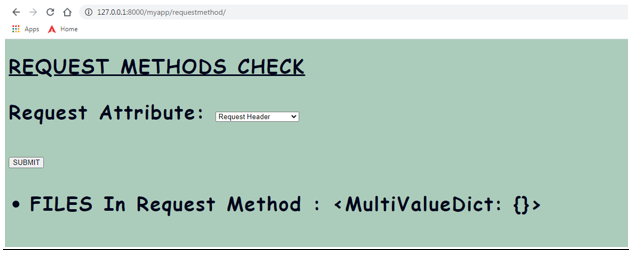
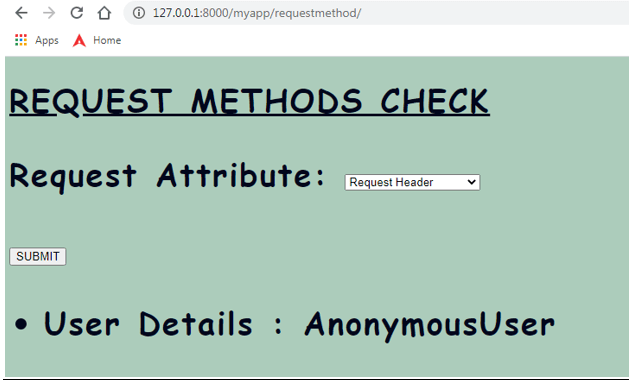
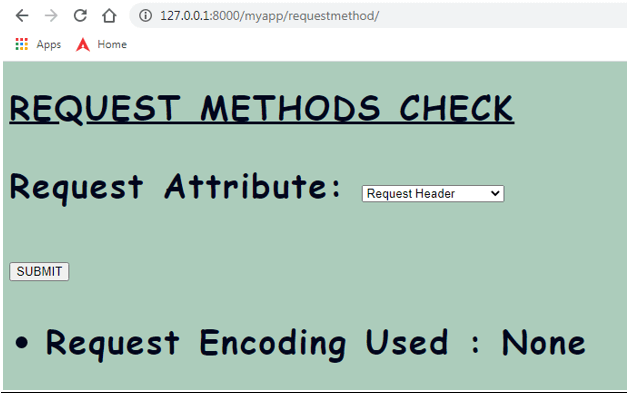
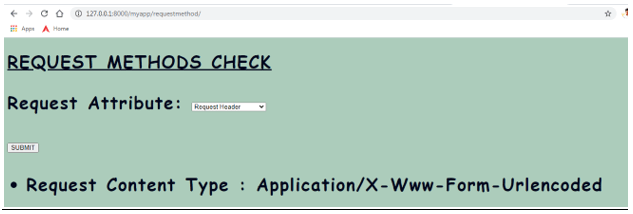

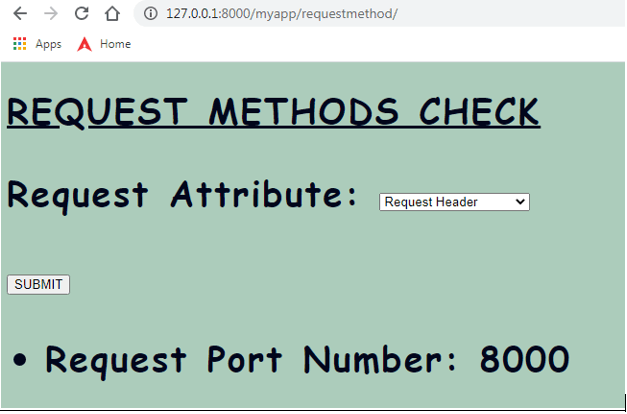
Conclusion – Django Request
All methods, attributes, and elements of the request API structure are briefly explained with suitable examples for every request item triggered.
Django Filter

Definition of Django Filter
Django is an open-source tool that provides different features to the user; that filter is one of the features that Django provides. It is a generic filter; with the help of the filter, we can make a reusable application, or we can say that we can view code as per our requirement. The Django filter is used to filter query sets that are based on the fields of models. Suppose we have n number of fields and we want to search users based on their names, we can apply the filter.
Overview of Django Filter
- Django-channel is a reusable Django application permitting clients to add dynamic QuerySet sifting from URL boundaries definitively.
- Django-Filter is a full-grown and stable bundle. It utilizes a two-section CalVer forming plan, for example. The primary number is the year. The second is the delivery number soon.
On an ongoing premise, Django-Filter plans to help all ongoing Django renditions, the matching current Python variants, and the most recent form of Django REST Framework.
The default conduct of the REST system’s nonexclusive rundown sees it is to return the whole query set for a model director. You will frequently believe your API should limit the things returned by the queryset.
The least complex method for separating the queryset of any view that subclasses GenericAPIView is to abrogate the .get_queryset() technique.
Superseding this technique permits you to tweak the queryset returned by the view in various ways. It supports the Python system,
- filter (): This technique returns another QuerySet with objects that match the given boundary. What’s more, it will likewise return a QuerySet in any event when there is just a single item that matches the condition. In such cases, the QuerySet will contain just a single component.
How to use the Django filter?
Now let’s see how we can use the Django filter as follows. First, we need to install the Django filter with the help of the below command as follows.
pip install django-filter
After installing the Django filter, we need to add django_filter inside the application. Now let’s see the usage of filters as follows.
Here we use a generic interface that is similar to the admin of Dango, which is the list_filter interface. It uses the same API very similar to the ModelForm of Django.
Let’s suppose we have a student model, and we need to filter data with the different parameters. At that time we can use the following code.
import django_filters
class StudentFilter(django_filters.FilterSet):
    class Meta:
        model = Student
        fields = ['studname', 'class', 'city']
Explanation
In the above example, we can see that here we have a student model, and it has different fields as shown. If we need to view that code, then we need to use the following code.
def student_list(request):
    filter = StudentFilter(request.GET, queryset = Student.objects.all())
    return render(request, 'project/home.html',{'filter':filter})
Now let’s see how we can use the Django REST framework.
If we want to filter the backend for the REST framework, then we can use this structure. Basically, it provides the custom option to the filter set.
from django_filters import rest_framework as filters
class StudentFilter(filters.FilterSet):
    class Meta:
        model = Student
        fields = ('Marks', 'table_result')
Explanation
In the above example, first, we need to import the
django_filters.rest_framework.FilterSet, and here we also need to specify the fields as per our requirement as shown.
Examples
Now let’s see different examples to understand filters as follows.
Suppose we have a database of students, and we need to filter students whose names start with Jenny. Then we need to use the following code as follows.
First, we must create a Python file and write the code below as follows.
from django.http import HttpResponse
from django.template import loader
from .models import Members
def sample(request):
mdata = Members.objects.filter(studname='Jenny').values()
template = loader.get_template('home.html')
context = {
'm_members': mdata,
}
return HttpResponse(template.render(context, request))
Explanation
In the above code, we write a queryset to filter the student name with Jenny. So here, first we need to import the different packages, and after that, we create a definition. Here we called the home.html file, so we need to write the following code to see the result.
So create a home.html file and write the following code as follows.
!DOCTYPE html>
<html>
<body>
<p>Final Result of query set is:</p>
{
{{List of students whose name start with Jenny}}
<p>Result of filter with loop:</p>
<table border='2'>
<tr>
<th>roll_no</th>
<th>studname</th>
<th>studname</th>
</tr>
{% for i in m_members %}
<tr>
<td>{{ i.roll_no }}</td>
<td>{{ i.studname }}</td>
<td>{{ i.studname }}</td>
</tr>
{% endfor %}
</table>
</body>
</html>
Explanation
In the HTML file, we can try to display the result of filterset; here we created a table to see the result with field names that are roll_no, surname, and studlastname as shown. The result of the above implementation we can see in the below screenshot is as follows.
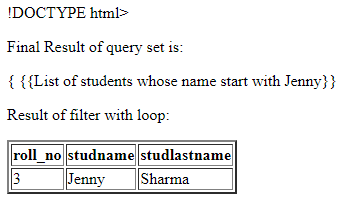
Django Filter Chaining
In the above example, we see the sample can be a common case of filter, but chaining is another concept that we need to fetch the records from the different tables that we can join and use the ForeignKeys concept. Now let’s see an example as follows.
First, let’s see by using Django:
student.object.filter(studname = 'Jenny').filter(studage = 25)
The above statement is equivalent to the following statement as follows.
select "student"."roll_no",
"student"."studname",
"student"."studage"
from "student"
where("student"."studname" = Jenny AND "student"."studage" = 25)
Explanation
Now create a model to see the result of the above implementation as follows.
Class student(Model):
studname = CharFiled(max_length = 255)
studage = PositiveIntegerField()
We need to create an HTML file to see the result, here, I directly displayed the result, but we need to create an HTML file like the above example. The result of the above implementation can be seen in the below screenshot as follows.

Now let’s filter chaining by using Q expressions as follows.
Student.objects.filter(
Q(stud_stand = 'Class' )&
Q(studname = 'Jenny'))
Now let’s filter chaining by using kwargs as follows.
Student.objects.filter(
stud_stand = 'Class'
studname = 'Jenny'
)
Now let’s filter chain as follows.
Student.objects.f\
.filter(stud_stand = 'Class')\
.filter(studname = 'Jenny')
Conclusion
With the help of the above article, we try to learn about the Django filter. From this article, we learn basic things about the Django filter, and we also see the features and examples of the Django filter and how we use it in the Django filter.
Django Logging

Definition of Django Logging
Django CMS is an open-source tool management tool; basically, it is used to manage the content of over a thousand websites, different developers, content editors, and businesses. Logging provides different techniques to configure the logging and ranging, which means interface to configuration files. We have a logging library in Python, but Django uses by default configuration format that is nothing but the dictConfig. The main advantage of logging is to provide an excellent structure to the developer, so they can easily debug and log. In Django, we need to implement the Python library to perform the logging.
Overview of Django Logging
Python developers frequently use print() as a speedy and helpful troubleshooting device. Utilizing the logging system is just somewhat more exertion than that, yet at the same, it’s substantially more exquisite and adaptable. As well as being helpful for troubleshooting, logging can likewise furnish you with more – and better organized – data about the state and strength of your application.
Here we consider Python logging configuration; four parts are as follows.
1. Loggers
The logger is nothing but the entry point of the logging system, each logger has a specific name, and that name contains the message.
A handler is designed to have a log level. This log level portrays the seriousness of the messages that the handler will deal with. Python characterizes the accompanying log levels:
- Debug level: Low-level framework data for investigating
- Data: General framework data
- Caution: Information depicting a minor issue that has happened.
- Blunder: Information describing a significant problem that has occurred.
- Basic: Information defining a basic point that has happened.
Each message that is set up to the handler is a Log Account. Each log record likewise has a log level demonstrating the seriousness of that particular message. A log record can likewise contain helpful metadata depicting the event being logged. This can incorporate subtleties, for example, a stack follow or a blunder code.
2. Handlers
A handler can have numerous overseers, and every controller can have an alternate log level. Along these lines, it is feasible to give various types of warnings relying upon the significance of a message. For instance, you could introduce one controller that advances ERROR and CRITICAL messages to a paging administration. A subsequent overseer logs all messages (counting ERROR and CRITICAL messages) to a document for later examination.
3. Filters
By using filters, we can provide additional control over the log. As a matter of course, any log message that meets log-level necessities will be taken care of. In any case, introducing a channel can put extra measures on the logging system. For instance, you could introduce a channel that permits ERROR messages from a specific source to be discharged.
4. Formatters
Eventually, a log record should be delivered as text. Formatters depict the specific configuration of that text. A formatted typically comprises a Python designing string containing LogRecord credits; notwithstanding, you can likewise compose custom formatters to execute explicit organizing conduct.
How to configure Django logging?
Now let’s see how we can configure Django logging as follows.
In the first step, we need to make a basic logging call which means we need to send a log message from our code. SO first import Python logging, then create a logger instance with a specific logger name as shown below.
import logging
logger = logging.getLogger(Specified Name)
Now we need to call this module into the function shown in the code below.
def sampleview(request):
...
if riskstate:
logger.warning('Specified Message')
When this code is executed, a LogRecord containing that message will be shipped off the lumberjack. Assuming you’re utilizing Django’s default logging arrangement, the message will show up in the control center.
In the configuration, we can also customize the logging configuration; here, we need to consider some additional settings as follows.
- Logger mappings to figure out which records are shipped off which controllers.
- Handler, to figure out how they manage the records they get.
- Filters, to give extra command over the exchange of records and even alter records set up.
- Formatters, to change over LogRecord objects to a string or other structure for people or another framework utilization.
How to Create Django Logging?
Now let’s see how we can create Django logging as follows.
First, we need to confirm the prerequisites as follows.
- Installation of Python
- IDE set up
- Installation of Django in the specified project
- Project created.
In the first step, we need to use loggers; by using loggers, we can indicate the message over the log level, such as debug, data, warning, and error.
Now create logger
import logging
logger = logging.getLogger(Specified Name)
Explanation
In the above code, getLoger is used to create the logger instance; before that, we import the logging packages as shown.
For example
logge.error('Error message')
Root logger
Here we can configure the setting.py file and edit the root logger as follows.
LOGGING = {
'version': 2,
'disable_existing_loggers': False,
'loggers': {
'sampledemologger': {
'level': os.getenv('DJANGO_LOG_LEVEL', 'Data'),
'propagate': False,
},
},
}
We can create a logger by using handler and logging extensions as per our requirement.
Django logging file
In the above point, we already see what a logger is and the different levels of a logger; now, let’s understand the logging file. Now let’s see an example for better understanding as follows.
import logging
logging.basicConfig(filename="newfile.log",
format='%(Pastime)s %(msg)s', filemode='w')
logger = logging.getLogger()
logger.setLevel(logging.DEBUG)
logger.debug("Sample text message one")
logger.info("Sample text message two")
logger.warning("Sample text message three")
logger.error("Sample text message four")
logger.critical("Sample text message five")
Explanation
In the above example, we create a sample logger file and try to fetch different error messages over the different levels. The result of the above implementation can be seen in the below screenshot as follows.
Conclusion
With the help of the above article, we try to learn about Django logging. From this article, we learn basic things about Django logging and we also see the features and installation of Django logging and how we use it in Django logging.
Django Include Template

Definition of Django Include Template
We know that Django provides different types of features to the user, including one of the features that Django provides. With the help of an include template, we can generate dynamic web pages. The template contains static and dynamic pages. Normally include is one of the tags we can use inside the template. We can load the template using the include tag and render it with the currently available context. That means it allows us to include another template within the specified template as per our requirement. We can use a variable name as a template for the naming convention.
What is Django Include Template?
A Django design is a text record, or a Python string expanded using the Django design language. Django, an area of strength for a remembered structure, gives solace to conveying data for a configuration. Django designs not simply grant passing data from view to design but give a couple of confined programming components like variables for circles, comments, extends, consolidate, etc.
Here we endeavor to examine how to use a recall tag for Templates. Consolidate mark stacks in a design and deliver them with a continuous setting. This is a way to deal with “counting” various organizational designs. The format name can either be a variable or a hard-coded (referred to) string in single or twofold explanations.
Sentence structure
{% incorporate "Specified template_name.html" %}
A capacity that takes a complete Python import way to one more URLconf module that ought to be “included” here. Alternatively, the application and case namespace where the passages will be incorporated can be determined.
Normally, the application namespace ought to be indicated by the included module. If an application namespace is set, the namespace contention can be utilized to set an alternate occurrence namespace.
incorporate() likewise acknowledges as a contention either an iterable that profits URL designs or a 2-tuple containing such iterable in addition to the names of the application namespaces.
Different parameters:
- Module – URLconf module (or module name)
- Namespace (str) – Instance namespace for the URL sections being incorporated
- pattern_list – Iterable of way() as well as re_path() occurrences.
- app_namespace (str) – Application namespace for the URL sections being incorporated.
How to use Django include template?
Now let’s see how we can use the Django include template as follows.
Being a web system, Django needs a helpful method for producing HTML progressively. The most widely recognized approach depends on layouts. A layout contains the static pieces of the ideal HTML yield as well as some extraordinary linguistic structure portraying how dynamic substance will be embedded.
Django include tag
Now let’s include the tag in Django as follows.
When we want to implement programming logic like if statement and for loop, we need to include a tag in the template. In Django template tag is nothing but if and for a keyword. For implementation, we need to use the % symbol surrounding them as per our requirement.
We have different types of tag references as follows:
- autoescape: It is used on or off autoescape as per our requirement.
- block: It is used to specify the block section.
- comment: We can provide comments over the section.
- cycle: It is used to determine the content of each cycle of the loop and it also depends on the user.
- debug: It is used to show debugging information.
- extends: It is used to specify the parent template.
- filter: We can filter all content before the execution.
- for: It is nothing but conditional for a loop.
- if: It is nothing but a conditional if statement.
It also provides the other different tags such as firstof, ifchanged, include, load, lorem, now, regroup, resetcycle, spaceless, templatetag, etc.
Example
Let’s assume we have already created a project, so first, we need to configure the setting.py file, and here we need to provide the directory path and name as per our requirement.
After configuration, we need to create an HTML file and write the following code.
<!DOCTYPE html>
<html lang="en">
<head>
<meta charset="UTF-8">
<title>HOME</title>
</head>
<body>
<h2>This is first Django project</h2>
</body>
</html>
Now load the template and see the below screenshot.

Now we have another variable, the student’s name, so first, we need to change the view.py file as follows.
from django.shortcuts import render
from django.template import loader
from django.http import HttpResponse
def home(request):
template = loader.get_template('home.html')
name_of_student = {
'studname':'Sachin'
}
return HttpResponse(template.render(name_of_student))
After that, we also need to change the html file as follows.
<!DOCTYPE html>
<html lang="en">
<head>
<meta charset="UTF-8">
<title>HOME</title>
</head>
<body>
<h2>This is first Django project</h2>
<h2>Name of Student :{{ 'studname }}</h2>
</body>
</html>
Now see the output below screenshot as follows.
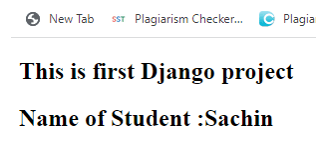
Django Include Template Examples
Now let’s see different examples of tags as follows.
First, we create a sample html file name first.html as follows.
<!DOCTYPE html>
<html>
<body>
<h1>My First HTML Web Page</h1>
<p>Hi Welcome thanks for visit.</p>
</body>
</html>
Now create another html file name as index.html and add the following code.
<!DOCTYPE html>
<html>
<body>
<h1>This is my second index file</h1>
{% include 'first.html '%}
<p>Once again thanks for visiting my site, revisit again .</p>
</body>
</html>
Explanation
In the first.html file, we write simple HTML code and print the message, similar to the second file, but here we call the first.html file by using the include keyword as shown. Another structure of the file is the same. The result is shown in the below screenshot.
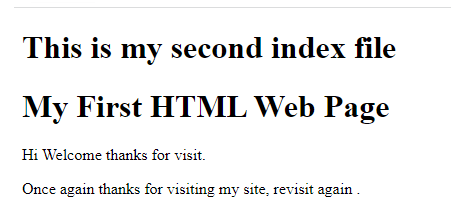
Now let’s see another example with Python programming as follows.
First, we need to create an index.py file and follow the code as follows.
from django.shortcuts import render
def indexview(request):
return render(request, "first.html")
Explanation
First, we need to import the render package. After creating and inside the function, we call another HTML file.
Now create a URL path to map this function as follows.
from django.urls import path
from .index import indexview
urlname= [
path('', indexview),
]
Now everything is ok, create a template to see the result as follows.
Here we created an html file name as home.
<!DOCTYPE html>
<html>
<body>
{% include 'first.html '%}
{% include index.html%}
</body>
</html>
Explanation
Here first.html contains the Hi this “my home page” and index.html contains “Welcome” here. The result is shown in the below screenshot.

Conclusion
With the help of the above article, we try to learn about the Django include template. From this article, we learn basic things about the Django include template, and we also see the features and installation of the Django include template and how we use it in the Django include template.
Django Serializers

Definition of Django Serializers
Basically, Django provides different types of features to the user, in which the serializer is one of the features that is provided by Django. Normally serializer is nothing but the Django REST framework and it provides the functionality to convert objects into different data types. This converted data type is understandable by the front-end framework and JavaScript. On the other hand, it also provides deserialization functionality to the user which means it allows us to parse the data and convert it back into complex data types whenever required. The serializer REST framework works similarly to the Django model classes.
What is a Django serializers?
Serializers permit complex information, for example, querysets and model cases to be changed over completely to local Python data types that can then be effortlessly delivered into JSON, XML, or other substance types. Serializers likewise give deserialization, permitting parsed information to be changed over once more into complex sorts, after first approving the approaching information.
The serializers in the REST system work much the same way as Django’s Form and ModelForm classes. We give a Serializer class which gives you a strong, conventional method for controlling the result of your reactions, as well as a ModelSerializer class which gives a valuable easy route to making serializers that arrange with model cases and querysets. In another word, we can say that Serialization is the most common way of changing information into a configuration that can be put away or sent and afterward remade. It’s pre-owned constantly while creating applications or putting away information in data sets, in memory, or changing it into records.
How to use Django serializers?
Now let’s see how we can use the Django serializer as follows.
First, we need to set up the new environment with the help of venu as follows.
venu env
After that we need to install all required packages with the help of the below commands as follows.
pip install django
pip install djangorestframework
Now everything is ok we can start the project with the help of the below command as follows.
cd ~
django-admin startproject sampledemo
cd sampledemo
We enter inside the project; here we can create a new application for web API as follows.
python manage.py startapp demo
After starting the app we can check setting.py as follows.
INSTALLED_APPS = [
...
'rest_framework',
' demo ',
]
In the next step, we need to create the model which means we need to write code inside the models.py file as follows.
from django.db import models
class student(models.Model):
studname = models.CharField(max_length=100, blank=False, default='')
studcity = models.CharField(max_length=100, blank=False, default='')
studclass = models.CharField(max_length=100, blank=False, default='')
class Meta:
ordering =['created']
Now we need to create a serializer class as follows.
First, we need to start the Web API that provides the serializing and deserializing instances that is json.
from rest_framework import serializers
from studdent.models import Studnet
class StudentSerializer(serializers.Serializer):
studname = serializers.CharField(max_length=100, blank=False, default='')
studcity = serializers.CharField(max_length=100, blank=False,
default='Mumbai')
studclass = serializers.CharField(max_length=100, blank=False, default='')
def create(self, valid_data):
return Student.object.create(valid_data)
def update(self, instance, valid_data):
instance.studname = valid_data.get(‘studname’, instance.studname)
instance.studcity = valid_data.get(‘studcity’, instance.studcity)
instance.studclass = valid_data.get(‘studclass’, instance.studclass)
instance.save()
return instance
Explanation
In the above code first, we define the different fields that are serialized or deserialized. After that, we created two different methods for creating and updating instances as shown.
Now let’s see how we can use serializers as follows.
from students.models import Student
from studnets.serializers import StudnetSerializer
from rest_framework.renderers import JSONRenderer
from rest_framework.parsers import JSONParser
student = Student(code='studname= "Jenny"\n')
student.save()
student = Student(code=' studclass= "second"\n')
student.save()
Now let’s see the instance of the serializer as follows.
Serializer = StudentSerializer(student)
Serializer.data
{'studname': Jenny, 'studcity': 'Mumbai', 'studclass': 'second'}
So in this way, we can add more instances.
Django serializers REST Framework
Now let’s see the serializers REST framework as follows.
Serializers in Django REST Framework is liable for changing over objects into information types justifiable by javascript and front-end systems. Serializers likewise give deserialization, permitting parsed information to be changed over once more into complex kinds, after first approving the approaching information. The serializers in the REST system work in much the same way as Django’s Form and ModelForm classes. The two significant serializers that are most prominently utilized are ModelSerializer and HyperLinkedModelSerialzer.
This article rotates around how to involve serializers without any preparation in Django REST Framework to cutting-edge serializer fields and contentions.
First, we need to create serializers as follows.
For creating a serializers first we need to import the serializers class from rest_framework and need to define the required field as follows.
from rest_framework import serializers
class StudentSerializer(serializers.Serializer):
studname = serializers.CharField(max_length = 100)
email = serializers.EmailField()
city= serializers.CharField(max_length = 100)
This is the first way to create a serializer for a specific substance or item founded on the fields required. Serializers can be utilized to serialize as well as deserialize the information.
Now let’s see how we can use the serializer as follows.
from datetime import datetime
class Remark(object)
def _init_(self, studname, email, city):
self.studname =studname
self.email = email
self.city= city
self.date = datetime,now()
remark = remark(studname= 'Jenny', email='sample@gmail.com', remark='bar')
Now our serializer object is ready we can run the above code and after the execution of the above code, we can see the result in the below screenshot as follows.

Now let’s see what ModelSerializer is as follows.
The ModelSerializer class gives an easy route that allows you consequently to make a Serializer class with fields that relate to the Model fields.
The ModelSerializer class is equivalent to a customary Serializer class, then again, actually:
- It will consequently produce a bunch of fields for you, in light of the model.
- It will consequently produce validators for the serializer, for example, unique_together validators.
- It incorporates straightforward default executions of .create() and .update().
Conclusion
With the help of the above article, we try to learn about the Django Serializer. From this article, we learn basic things about the Django Serializer and we also see the features and examples of the Django Serializer and how we use it in the Django Serializer.
Django ORM
Introduction to Django ORM
We know that Django provides different features to the user, in which ORM is one of the essential features that Django provides. ORM is nothing but the Object Relational Mapper, and it is a compelling feature of Django. With the help of ORM, we can interact with the database, which means we may need to execute the SQL queries. In Django, ORM uses a Pythonic structure to create SQL queries and manipulate them to our specified database. We can get the desired result in the Pythonic structure per our requirement.

What is Django ORM?
ORM is an abbreviation for the item social mapper. The ORM’s principal objective is communicating information between a social data set and an application model. The ORM robotizes this transmission to such an extent that the designer need not compose any SQL. ORM, as from the name, maps object credits to particular table fields. It can likewise recover information like this. Django’s ORM is only a Pythonic method for making SQL questions, controlling your data set, and obtaining results in a Pythonic style. We say simply away; however, brilliant designing exploits some of the more mind-boggling pieces of Python to simplify engineers’ lives.
Django ORM Prepared
Let’s see how we can prepare ORM as follows:
Before we begin implementation of how the ORM functions, we want a data set to control. Similarly, as with any social information base, we want to characterize a lot of tables and their connections (i.e., how they connect). We should utilize something recognizable. For instance, say we need to show a blog with blog entries and creators. A creator has a name. A creator can have many blog entries. A blog entry can have many creators and has a title, content, and distributed data.
Django manages posts and creators could be called our Blog application. In this unique situation, an application is an independent arrangement of models and perspectives that depicts the way of behaving and the usefulness of our blog. Bundled in the correct manner, numerous Django tasks could utilize our Blog application. In our venture, the blog could be one application. We could likewise have a Forum application, for instance. However, we’ll stay with the first extent of our Blog application.
Code:
from datetime import date
from django.db import models
class Student (models.Model):
studname = models.CharField(max_length=50)
def __str__(self):
return self.studname
class subject(models.Model):
subname = models.CharField(max_length=50)
chapter = models.TextField()
date = models.DateTimeField(blank=True, null=True)
def __str__(self):
return self.subname
Explanation:
- Here we try to prepare the ORM as shown; first, we must import the required packages, such as date and DB. Then, after creating the data model, Django provides the database abstraction API to access the database. We can perform different operations such as creating, updating, retrieving, and deleting objects per our requirements.
Django ORM Objects
Let’s see how we can create ORM objects as follows:
To address data set table information in Python objects, Django utilizes a natural framework: A model class addresses a data set table, and an occurrence of that class addresses a specific record in the data set table.
To make an object, the startup utilizes watchword contentions to the model class, then, at that point, calls save () to save it to the data set.
Let’s consider the above example; here, first, we need an essential model with the help of the below command as follows:

Explanation:
- By using the above commands, we can perform the insert operation, but one crucial thing is that Django does not access the database until the calling of the save () command
Now let’s see how we can save the changes to the object as follows:
- If we have already created an object and we need to save the changes inside the database at that time, we need to use the following command as follows:
Code:
save ()
Explanation:
- First, we need to assign the specified name and save it, as shown below.
Output:

After execution of save(), it performs the update SQL statement behind the execution. Django does not access the database until the save () command calls.
Now let’s see how we can retrieve the single object as follows:
Here we need to pass the parameter with the object like below:
Code:
Queryset = Student.object.get(name = specified name that we want)
Now let’s give an example for better understanding as follows:
Here we use the above example; execute the below command on the command line as follows:
Code:
from student.models import Student
Queryset = Student.objects.get(studname = Jenny)
Queryset
Explanation:
- The end result of the above implementation can be seen in the below screenshot as follows:
Output:

All Object:
Let’s see how we can retrieve all objects as follows:
It is a straightforward way to get all objects; using the all() method, we will get all objects from the specific model.
First, we need essential packages as follows:
Code:
from student.models import Student
After that, we need to call all() methods as follows:
Code:
student.objects.all()
Example:
Here we consider the above example and try to fetch all names of students as shown in the below screenshot as follows:

Now let’s see how we can create objects as follows:
On the command line, we need to execute the following statement as follows:
Code:
student.objects.create(studname =name)
But we can see here first that we need to import the model.
Code:
from student.models import Student
Now everything is ok; let’s see the result on the command line as below screenshot.
Output:

Suppose we need to find whose name is Sachin, then we need to use the following statement.
Code:
name = Student.objects.get(studname = 'Sachin')
End result of the above statement can be seen in the screenshot below.
Output:

So in this way, we can implement all objects, as well as we are also able to implement ordering and filtering of things as per our requirements.
Django ORM Problem Solved
ORMs have specific advantages over the conventional methodology. The fundamental benefit is that ORMs give a quick turn of events. ORMs make projects more convenient. It is simpler to change the data set, assuming we use ORMs. In the earlier days, web engineers also expected to know about data sets. An information base has been a significant part all along. The class is utilized to characterize information structure in web applications. Then a similar data set blueprint is made in the data set. This assignment requires expertise and information on SQL.
Realizing SQL is insufficient since SQL executions vary from each other in various data sets. This turned into a troublesome and tedious errand. Thus, the idea of ORM was presented in web systems to determine this. ORMs consequently make a data set pattern from characterized classes/models. They produce SQL from Python code for a specific data set. ORMs let the engineer assemble the task in one language, which implies Python. This expanded the fame of ORMs and web structures. Different ORMs are accessible in the market, yet one of the most outstanding is Django ORM.
Conclusion
With the help of the above article, we saw about the Django ORM. From this article, we saw basic things about the Django ORM and the features and examples of the Django ORM, and how we use it in the Django ORM.
Django exists
Introduction to Django exists
We know that Django provides many different types of features to the user, which is one of Django’s features. We need to implement advanced methods to get specific results when working with data. Normally exists() is used to search the related object membership inside the query set, showing if any specified object exists in the query set. In other words, we can say that exists () is used for large query sets and is an efficient method to handle data in Django.

Overview of Django exists
Django’s QuerySet API gives an extensive cluster of strategies and capacities for working with information. In this section segment, we will take a gander at the normal QuerySet strategies, field queries, and total capabilities, and how to fabricate more mind-boggling questions with question articulations and Query set() objects. Returns True, assuming the QuerySet contains any outcomes.
While working with Django ORM, we frequently experience the issue regardless of whether the object exists. For instance, there is no API to check to assume that items exist in the object in a one-to-one relationship. Instead, exists is a Subquery subclass that utilizes a SQL EXISTS explanation. It will often perform better than a subquery since the information base can stop assessing the subquery when the first matching line is found.
Why does Django exist?
Now let’s see why we need to use exists as follows:
Usually, when we communicate with a QuerySet, you’ll utilize it by binding channels. To make this work, most QuerySet strategies return new querysets. These strategies are shrouded exhaustively later in this part.
The main thing behind this guidance is because queryset.count() plays out a SQL activity that examines each line in the data set table to ascertain the aggregate. Then again, queryset.exists() essentially peruses a solo record in the most upgraded manner.
- Elimination of ordering
- Elimination of gathering
Clear any dev-characterized select_related and particular from the queryset.
The QuerySet class has two public credits you can use for reflection: Ordered.
Valid assuming the QuerySet is requested — for example, it has an order_by() proviso or a default requesting on the model.
The inquiry boundary to QuerySet exists so that specific question subclasses can reproduce inside the question state. The worth of the boundary is a misty portrayal of that question state and isn’t important for a public API. If you want to check whether the consequence of the QuerySet exists, don’t involve QuerySet as a boolean worth or queryset.count() > 0. Use queryset.exists(), all things considered.
The strategy exists() returns True, assuming the QuerySet contains any outcomes, and False if not. It attempts to solve the question in the least complex and quickest way imaginable but executes almost a similar inquiry as a typical QuerySet question. Exists() helps connect with item participation in a QuerySet and any articles in a QuerySet, especially about a huge QuerySet.
Working of Django exists.
Given below shows how we can work with what exists in Django as follows:
We know that it is used to return the true if one or more objects are present inside the Query set, and it returns false if our query set is empty.
Example:
Let’s see a different example for better understanding as follows:
On the command line, we need to execute the following statement.
Code:
student.objects.create(studname =name)
But we can see here that first, we need to import models.
Code:
from student.models import Student
Now everything is ok; let’s see the result on the command line as below screenshot.
Output:

Suppose we need to find whose name is Sachin, then we need to use the following statement.
Code:
name = Student.objects.get(studname = 'Sachin')
The result of the above statement can be seen in the screenshot below.
Output:

In the above example, we retrieve Sachin from the database; after that, we need to check if this is a single object, making sure he is one of the Sachin presented in the database by using the following statement.
Code:
from student.models import Student
user = Student.objects.filter(studname = 'Sachin')
user.filter(pk=name.pk).exists()
Explanation:
In the above example, first, we need to import the model that we already created after trying to retrieve Sachin from the database by using the second statement. Then, the third statement is used to check if this is a single object or multiple. The above implementation’s result in the screenshot below is as follows.
Output:

Now let’s see for another case: if Johan is not present inside the database, we get what we get as follows.
Code:
from student.models import Student
user = Student.objects.filter(studname = 'Johan').exists()
Explanation:
The above implementation’s result in the screenshot below is as follows.
Output:

How to Check if Django exists?
Now let’s see how we can check if it exists in Django.
It is a conditional statement used to handle the condition; in other words, we can say that if an object is present inside the object, then we print some message. If the object is not present inside the database, it prints the other part.
Example:
Now let’s see an example.
Code:
from student.models import Student
user = Student.objects.filter(studname = 'Johan').exists()
if queryset.contains(user)
print('This object present inside the query set')
Explanation:
- In the above example, we try to implement the if exist () method; here, we import the model we already created. After that, we try to fetch the object from that database using the exits() method. In the end, we use the if statement to verify the result.
- That means if Johan is present inside the database, it shows a message. The above implementation’s end result in the screenshot below is as follows.
Output:

Conclusion
With the help of the above article, we saw Django. From this article, we saw basic things about Django exist, and the features and examples of Django exist, and how we use it in Django.
Django Model Fields
Introduction to Django Model Fields
The following article provides an outline for Django Model Fields. We know that Django offers different functionality to the user, in which model field is one of the functionalities that Django provides. Typically the Django field is nothing but the data types used to store the specified data type as per our requirement. For example, suppose we need to store integer values; then, we can use an integer field to store the integer value. However, Django provides built-in validation for all the specified data types, so we cannot store XYZ’s character value in the integer field. Similarly, we can store different kinds of data whenever required.

Overview of Django Model Fields
The main piece of a model and the main required piece of a model is the rundown of data set fields it characterizes. Fields are determined by class credits. Avoid picking field names that are in contention with the model API, like clean, save, or erase. A model is the single, conclusive wellspring of data about your information. It contains the fundamental fields and ways of behaving with the information you’re putting away. By and large, each model guides to a binary data set table. With all this, Django gives you a naturally created data set admittance API.
It’s critical to comprehend how Django model information types work on two layers: the data set layer and the Django/Python layer. At the point when you characterize a Django model with its information types and make its underlying movement, Django produces and executes a model’s DDL (Data definition language) to make a data set table; this DDL contains decisions that mirror a Django model’s fields (for example a Django IntegerField model field gets converted into an INTEGER DB section to uphold number qualities). That’s what this intends; assuming you change this Django model field (for example, changing a number field to a text field) requires another relocation for the data set table to mirror any new rule.
Notwithstanding this standard implementation made at the beginning by a Django model at the information base layer, Django model fields likewise uphold information rules at the Django/Python layer (for example preceding embedding/refreshing information in the data set). For instance, Django model field boundaries like decisions implement a field’s qualities to adjust to many decisions. This rule is upheld when you endeavor to make, save or update Django model records and is done independently of the information base table standards. This implies you can essentially change a Django model field related to this kind of rule and not need to make another relocation to modify the fundamental data set table for this situation; changing the Python code is sufficient to change approval conduct.
Django Model Fields Methods
Given below are the Django model fields methods:
- to_python() technique on a field is the initial phase in each approval. It forces the worth to the right data and raises ValidationError in the event that that is beyond the realm of possibilities.
- The validate() technique on a Field handles field-explicit approval that isn’t reasonable for a validator. It takes a value pressured to the right data type and raises ValidationError on any blunder.
- The run_validators() technique on a Field runs all of the field’s validators and totals every one of the mistakes into a solitary ValidationError. You may not have to abrogate this strategy.
- The clean() technique on a Field subclass is liable for running to_python(), approve(), and run_validators() all put together, proliferating their blunders. Whenever any techniques raise ValidationError, the approval stops, and that mistake is raised.
Django Model Fields Types
Given below are different field types of models:
- AutoField: This is an IntegerField, and it automatically increments.
- BihAutoField: It is used for 64-bit integer values and its auto-increments.
- BigIntegerField: It is used for 64-bit integer values and its auto-increments.
- BinaryField: It is used to store the raw binary data.
- CharField: It is used to store text values.
- DataField: Basically, it is used in python and used to display DateTime.
- DecimalField: It is used to store fixed precision numbers.
- DurationField: It is used to store periods of time.
- EmailField: It is used to check whether an email is valid or not.
- FileField: It is used to upload files.
- FloatField: It is used to store the floating-point number represented in python.
- ImageField: It is used to upload images and it is also used to validate the uploaded image.
- IntegerField: It is used to store the integer values.
Django Model Fields List
Given below are the model fields listed in Django:
- GenericiPAddressField: It is used to address the IPv4 or IPv6.
- NullBooleanField: It is used to store the Boolean value, but it allows a null value.
- PositiveIntegerField: It only stores the integer value, which means either zero or positive.
- PositiveSmallIntegerField: By using this field, we can store only specific values.
- StugField: It provides a short label for a particular term containing underscores, letters, and numbers.
- TimeField: It is used to display time and date in Python.
- TextField: It is used to store text.
- URLField: It is used to validate the URL with the help of URLValidator.
- UUIDField: It stores the unique identifiers over the universal structure.
Examples of Django Model Fields
Given below are the examples of Django Model Fields:
Suppose we need to create a student model, and inside that model, we have two fields: studname and studcity.
Code:
from django import models
Class Student(models.Model):
Studname = models.CharField(max_length=50)
Studcity = models.CharField(max_length=50)
The above implementation in SQL looks like the one below.
Code:
create table student("id" Not Null Primary Key, "studname" varchar(50) NOT NULL ,"studcity" varchar(50) Not NULL);
Here we consider the above example and try to fetch all students’ names, as shown in the screenshot below.

Let’s see another example; suppose we need to search the student base in the city.

Conclusion
With the help of the above article, we saw the Django model fields. From this article, we saw basic things about the Django model fields and the features and examples of the Django model fields, and how we use them in the Django model fields.
Django Allauth
Introduction to Django Allauth
Django provides different types of features to the user, in which that allauth is one of the features that Django provides. Allauth is an integrated collection of Django applications. In other words, we can say that it is used to provide authentication, registration, and management of accounts over the different integrated applications of Django. It also offers third-party account authentication features. Django accompanies a powerful implicit validation authentication framework for clients, yet it doesn’t provide help for outsider (social) confirmation using administrations like Github, Gmail, or Facebook.

What is Django Allauth?
In the existing Django applications, we already address the social validation center on only that. You usually need to coordinate another application to help with verification using a nearby record.
This approach isolates the universes of nearby and social verification. Be that as it may, there are normal situations to be managed in the two universes. For instance, an email address passed along by an OpenID supplier isn’t destined to be confirmed. This way, the email address should be checked before connecting an OpenID record to a neighborhood account. In this way, email confirmation should be available in the two universes.
Incorporating the two universes is a seriously monotonous interaction. It is certainly not a question of adding one social verification application and one nearby record enrollment application to your INSTALLED_APPS list. This is the explanation for this venture began – to offer a wholly incorporated confirmation application that considers both neighborhood and social validation with streams that work.
Setup Django Allauth
Now let’s see how we can do allauth setup on Django as follows:
Django accompanies a robust underlying verification framework for clients; however, it doesn’t offer help for outsider (social) confirmation through administrations like Github, Gmail, or Facebook. Luckily, the fantastic outsider Django-allauth bundle does this in only a couple of steps.
So first, we need to create a new directory called sampleproject, and inside the directory, we need to install Django with Pipenv. After that, we need to start the new Django project that accesses the top-level directory name. Now, wait for migration; once the process is completed, run the runserver command to start the Django local web server. All the above commands, as shown in the screenshot as follows.
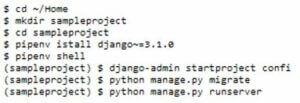
After, we need to hit the request IP to see the default Django webpage, as shown below.

We need to install the Django allauth and configure the newly created project, so installation uses the below command.
Code:
(sampleproject) $ pipenv install django-allauth==0.43.0
After completing the installation, we need to update our setting file, so first, open the setting.py file and add the following line.
Code:
INSTALLED_APPS = [
'django.contrib.admin',
'django.contrib.auth',
'django.contrib.contenttypes',
'django.contrib.sessions',
'django.contrib.messages',
'django.contrib.staticfiles',
'django.contrib.sites',
'allauth',
'allauth.account',
'allauth.socialaccount',
'allauth.socialaccount.providers.github',
]
Now at the bottom of the settings file, we need to mention allauth, so add an Id that uses allauth and configure. After that, we can redirect to the home page.
Code:
AUTHENTICATION_BACKENDS = (
"django.contrib.auth.backends.ModelBackend",
"allauth.account.auth_backends.AuthenticationBackend",
)
ID = 2
ACCOUNT_EMAIL_VERIFICATION = 'none'
LOGIN_REDIRECT_URL = 'index'
So here, we installed all the packages of allauth, so we need to add the required URLs by using the following code.
Code:
from django.contrib import admin
from django.urls import path, include
url = [path]
We need to migrate all changes to the existing database with the help of the below command.
Code:
(sampleproject) $ python manage.py migrate
Github OAuth
OAuth is an open norm for verification between frameworks. When clients sign into our site with their Github account, we will divert them to Github, which then sends us a symbol that addresses the client.
We need to visit the official URL below for a configuration with the new OAuth.
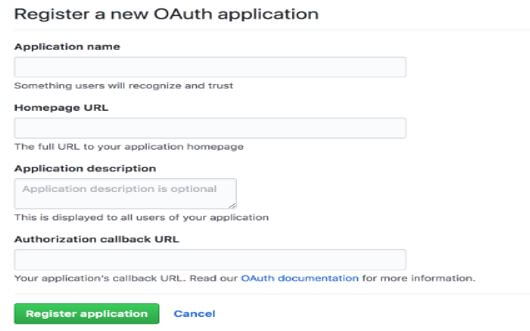
So here, we need to fill in all the details and click on the register application button.
Django Allauth Admin
In the next step, we need to configure the Django admin file, so first, we need to create a new super admin user with the help of the below command so that we can log in.
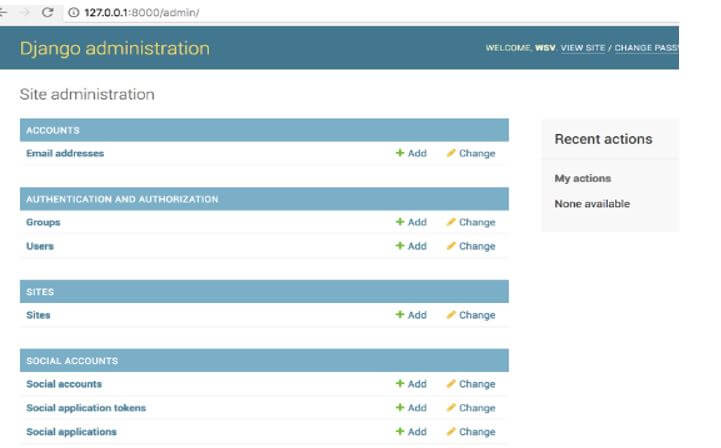
Here we need to update allauth with the specified domain name, which is visible for admin, as shown in the below screenshot.
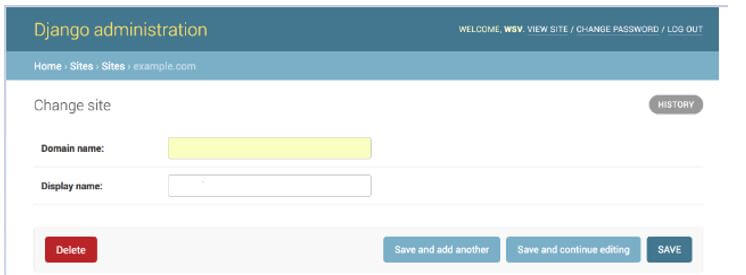
Now go to the home page, click on Social Application for configuration, make necessary changes, and return to the home page.
Django Allauth Configuration
Now let’s see how we can configure the allauth in Django as follows:
Most Django-allauth highlights can be arranged utilizing the underlying connectors and factors by putting them in settings.py. document. Although the documentation has many choices with great clarifications, it features a few significant ones underneath.
- Email affirmation expiry: Sets the number of days inside which a record should be actuated.
Eg: ACCOUNT_EMAIL_CONFIRMATION_EXPIRE_DAYS=6
- Email expected for enactment: This choice permits you to set whether the email address should be expected to enroll. Set False to handicap email necessity.
Eg: ACCOUNT_EMAIL_REQUIRED = True
- Account email confirmation: This choice can be utilized to set whether an email check is essential for a client to log in after enrolling in a record.
- Login Attempt Limit: This setting needs to be utilized with the ACCOUNT_LOGIN_ATTEMPTS_LIMIT setting.
- Login and Logout URL: When the client signs in or logs out, you should divert the client to a specific URL or page; the underneath settings can be used to set those qualities. Of course, allauth diverts login to/accounts/profile/URL and log out to the localhost:8000 or any localhost landing page.
As shown in the below screenshot.

Conclusion
With the help of the above article, we saw Django allauth. From this article, we saw basic things about the Django allauth, the features and installation of the Django allauth, and how we use it in the Django allauth.
Django include
Introduction to Django include
The following article provides an outline for Django include. We know that Django offers different types of features to the user, including one of Django’s features. Typically include is one of the tags we can use inside the template; by using the include tag, we can load the template and render it with the currently available context. That means we can include another template within the specified template per our requirement. For example, for the naming convention, we can use a variable name as a template name, or we can also use a hard-coded string as per our requirement, the hard-coded string either in single or double quotes.

What is Django include?
A Django layout is a text record, or a Python string increased utilizing the Django format language. Django being a strong Battery included structure, gives comfort to delivering information in a format. In addition, Django layouts permit passing information from view to layout and provide a few restricted programming elements like factors for circles, remarks, expands, incorporate, and so on.
Here we attempt to investigate how to utilize a remember tag for Templates. Incorporate label stacks in a layout and renders them with the ongoing setting. This is an approach to “counting” different layouts inside a format. The layout name can either be a variable or a hard-coded (cited) string in one or the other single or twofold statements.
Sentence structure:
{% incorporate "Specified template_name.html" %}
A capacity that takes a full Python import way to one more URLconf module ought to be “included” here. Alternatively, the application namespace and case namespace where the passages will be incorporated can likewise be determined. Typically, the application namespace ought to be indicated by the included module. However, in the event that an application namespace is set, the namespace contention can be utilized to set an alternate occurrence namespace. incorporate() likewise acknowledges as a contention either an iterable that profits URL designs or a 2-tuple containing such iterable in addition to the names of the application namespaces.
Different parameters:
- Module: URLconf module (or module name).
- Namespace (str): Instance namespace for the URL sections being incorporated.
- pattern_list: Iterable of way() as well as re_path() occurrences.
- app_namespace (str): Application namespace for the URL sections being incorporated.
Django include URLs
Now let’s see include URLs as follows:
We know that a URL is nothing but a web address, and we can see in our web browser that when we try opening any web page, we need an URL to access that web page; in Django, we have different patterns to match specified web pages.
The sample URL in Django is shown in the below screenshot.

Now let’s see how we can work with URLs in Django as follow:
Django already has a URL configuration file; inside the configuration file, we have space to add user-defined functions per our requirements.
Code:
from django.contrib import admin
from django.urls import path, include
urls = [
path('admin/', admin.site.urls),
path('', include('index.urls')),
]
Explanation:
- In the above code, we can see here we added another URL with the help we included, as shown; now, we need to create another Python file inside the index directory and add the following line.
Code:
from django.urls import path
from . import views
Now we need to set the URL pattern that we want:
Code:
url =[path('', views.list of post, name = 'specified name of post')]
After execution, we get the following error message as shown below screenshot.
Output:

Here we have specified URL patterns inside the index.
Django include Tag
Now let’s include the Tag in Django as follows:
We need to include a tag in the template when we want to implement some programming logic like an if statement and for loop. In Django template tag is nothing but if and for a keyword. So we need to use the % symbol surrounding them per our implementation requirement.
We have different types of tag references as follows:
- autoescape: It is used on or off autoescape as per our requirement.
- block: It is used to specify the block section.
- comment: We can provide comments over the section.
- cycle: It is used to determine the content of each cycle of the loop and depends on the user.
- debug: It is used to show debugging information.
- extends: It is used to specify the parent template.
- filter: We can filter all content before the execution.
- for: It is nothing but conditional for a loop.
- if: It is nothing but a conditional if statement. It also provides the other different tags such as firstof, ifchanged, including load, lorem, now, regroup, resetcycle, spaceless, templatetag, etc.
Examples of Django include
Now let’s see different examples of tags as follows:
First, we create a sample html file name first.html as follows:
Code:
<!DOCTYPE html>
<html>
<body>
<h1>My First HTML Web Page</h1>
<p>Hi Welcome thanks for visit.</p>
</body>
</html>
Now create another html file name as index.html and add the following code as follows:
Code:
<!DOCTYPE html>
<html>
<body>
<h1>This is my second index file</h1>
{% include 'first.html '%}
<p>Once again thanks for visiting my site, revisit again .</p>
</body>
</html>
Explanation:
- In the first.html file, we write simple HTML code and print the message, similar to the second file, but here we call the first.html file by using the include keyword as shown.
- Another structure of the file is the same.
Output:
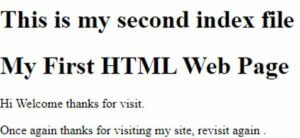
Now let’s see another example with python programming as follows:
First, we need to create an index.py file and follow the code as follows:
Code:
from django.shortcuts import render
def indexview(request):
return render(request, "first.html")
Explanation:
- Here first, we need to import the render package; after creating the function and inside the function, we call another HTML file.
Now create a URL path to map this function as follows:
Code:
from django.urls import path
from .index import indexview
urlname= [
path('', indexview),
]
Now everything is ok, create a template to see the result as follows:
Here we created an html file name as home.
Code:
<!DOCTYPE html>
<html>
<body>
{% include 'first.html '%}
{% include index.html%}
</body>
</html>
Explanation:
- Here first.html contains Hi this, “my home page,” and index.html contains “Welcome” here. The end result is shown in the below screenshot.
Output:

Conclusion
With the help of the above article, we saw Django include. From this article, we saw basic things about Django include, as well as the features and installation of Django include and how we use it in Django include.
Django REST API
Introduction to Django REST API
We know that Django provides different types of features to the user; the rest API is one of the features that Django provides. It is usually a compelling framework to build the web-based API per our requirements. It also provides flexibility for implementation. Mainly it offers different types of authentication features to the developer, such as OAuth 1 and OAuth 2. Django also supports serialization, so developers can work with ORM and non-ORM data. When we talk about support, it provides good community support to the user.
A REST API is a famous way for frameworks to uncover valuable capacities and information. REST, which represents illustrative state move, can consist of at least one asset that can be gotten to at a given URL and returned in different configurations, such as JSON, pictures, HTML, and the sky’s the limit from there. In other words, we can say that REST (Representational State Transfer) is standard engineering for building and speaking with web administrations.
It commonly commands assets on the web that are addressed in a text design (like JSON, HTML, or XML) and can be gotten to or changed by a foreordained arrangement of tasks. Considering that we commonly construct REST APIs to use with HTTP rather than different conventions, these activities compare to HTTP techniques like GET, POST, or PUT. As the name proposes, an API (Application Programming Interface) is a connection point that characterizes the cooperation between various programming parts. Web APIs characterize what solicitations can be made to a part (for instance, an endpoint to get a rundown of shopping basket things), how to make them (for instance, a GET demand), and their normal reactions.

How to Create Django REST API?
Let’s see how we can create a REST API in Django as follows:
First, we need to follow some steps to create the REST API as follows:
In the first step, we need to add the framework.
Then, to initialize the framework into the specified project, we need to open setting.py and add rest_framework as below.
Code:
INSTALLED_APPS = [
'django.contrib.admin',
'django.contrib.auth',
'django.contrib.contenttypes',
'django.contrib.sessions',
'django.contrib.messages',
'django.contrib.staticfiles',
'rest_framework',
]
Now in, next, we need to create an application and model as per our requirement, so To create an application, we can use the following command.
Code:
python manage.py startapp sampleproject
Explanation:
- In the above command, we can see that the sampleproject folder will be registered; after that, we need to add the INSTALLED_APPS and our specified URLs. After executing this command, we can see the changes inside the setting.py file.
Code:
INSTALLED_APPS = [
'django.contrib.admin',
'django.contrib.auth',
'django.contrib.contenttypes',
'django.contrib.sessions',
'django.contrib.messages',
'django.contrib.staticfiles',
'rest_framework',
' sampleproject ',
]
Now we need to add whatever url we have inside the url file as follows.
Code:
from django.contrib import admin
from django.urls import path, include
urls= [
path('admin/', admin.site.urls),
path('', include("sampleproject.urls"))
]
Explanation:
- In the above code, we can see; that first, we need to import all the required libraries; after that, we need to add the URL pattern with the specified url.
- In the third step, we need to create the model; here, we will create a student model inside the model file.
Code:
from django.db import models
class StudentModel(models.Model):
studname = models.CharField(max_length = 50)
description = models.TextField()
def __str__(self):
return self.studname
Explanation:
- In the above, we created StudentModel as shown; inside the model, we have a studname variable with a specified maximum size.
Now our application is ready for execution, and the time to create a serializer is as follows.
Serializers permit complex information, such as query and model occurrences, to be changed entirely to local Python data types that can be effortlessly delivered into JSON, XML, or other substance types. Serializers likewise give deserialization, permitting parsed information to be changed over once more into complex kinds after approving the approaching information, so add the following code inside the serializer file.
Code:
from rest_framework import serializers
from .models import StudentModel
class studentSer(serializers.HyperlinkedModelSerializer):
class Meta:
model = StudentModel
fields = ('studname', 'class')
Explanation:
- In the above code, first, we import the rest_framework and already created model as shown; after creating the serializer model and inside the model, we define fields as shown.
Now we need to create the view to render the data with the frontend, and it can handle user requests. So inside the view file, we need to add the following code.
Code:
from rest_framework import view
from .serializers import StudentSer
from .models import StudentModel
Class studenview(view.ModelView)
Query = StudentModel.object.all()
Ser_class = StudentSer
Explanation:
- In the above code, we import all the required libraries; after that, we create a view to render the data as shown.
The last step is to define the URL for our specified API.
Code:
from django.urls import include, path
from rest_framework import routers
from .views import *
r = routers.DefaultRouter()
r.regi(r'student', StudentView)
or rest_framework
urlpatterns = [
path('', include(r.urls)),
path('api-auth/', include('rest_framework.urls'))
Explanation:
- Now we need to run the server and check the API.
- Now run in the local server; after execution, we can see the result in the screenshot below.
Output:
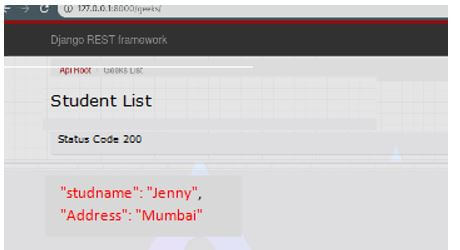
Django REST Framework
- In the above point, we have already discussed how we can create an API with the Django framework. The Django REST Framework (DRF) is a bundle based on top of Django to make web APIs. One of the most momentous highlights of Django is its Object Relational Mapper (ORM), which works with connection with the data set in a Pythonic way.
- You can make exemplary web applications using Django and open their usefulness to the world through REST APIs. This is quite simple to do, as a matter of fact! However, the Django REST Framework is more specific for this undertaking, is based on top of plain Django, and simplifies the cycle.
APIView Class
APIView classes are not the same as ordinary View classes in the accompanying ways:
- Demands passed to the controller strategies will be REST structure’s Request occurrences, not Django’s HttpRequest occasions.
- Overseer strategies might return the REST system’s Response rather than Django’s HttpResponse. The view will oversee content discussion and setting the right renderer on the reaction.
- Any APIException special cases will be gotten and intervened into suitable reactions.
- Approaching solicitations will be confirmed, and suitable consent and choke checks will be run before dispatching the solicitation to the controller technique.
Conclusion
With the help of the above article, we saw the Django rest API. From this article, we saw basic things about the Django rest API and the features and examples of the Django rest API, and how we use it in the Django rest API.
Django Authentication
Introduction to Django Authentication
We know that Django has different features; authentication is one of the features that Django provides. Typically Django itself handles the authentication and authorization at the system level. Authentication means verification of the user, or we can claim for a specific service; on the other hand, we have approval means we determine this authenticated user or not, or we can say that we can provide specific service access to the requested user. One more important thing is that authentication is used for both terms, such as authentication and authorization.

What is Django Authentication?
Django authentication is a client validation framework. It handles authentication, gatherings, authorizations, and treat-based client meetings. This documentation segment explains how the default execution figures out of the crate and how to stretch out and alter it to suit your venture’s necessities.
The Django verification framework handles both validation and approval. Momentarily, validation confirms that a client is who they guarantee to be, and approval determines what a verified client is permitted to do. Here the term verification is utilized to allude to the two assignments.
The auth framework has the following points:
- Clients
- Permission: Binary (yes/no) here; Django uses the flag to determine whether the user has performed any action or not.
- Group: A conventional approach to applying permissions and consents to more than one client.
- A configurable secret key hashing framework.
- Structures and view devices for signing in clients or confining substance.
- A pluggable backend framework.
- Django’s confirmation framework is extremely nonexclusive and doesn’t give a few highlights regularly tracked down in web verification frameworks. Answers for a portion of these normal issues have been carried out in outsider bundles:
- Secret key strength checking.
- Choking of login endeavors.
- Validation against outsiders (OAuth, for instance).
- Object-level authorizations.
The validation framework is adaptable. You can develop your URLs, structures, perspectives, and layouts without any preparation, assuming you like, simply calling the given API to sign in to the client. In any case, in this article, we will utilize Django’s “stock.” Verification perspectives and structures for our login and logout pages. Well, in any case, you have to make a few layouts, yet at the same time, that is quite simple.
Create Use Django Authentication
Let’s see how we can create authentication in Django as follows:
But first, we need to make the virtual environment for our application with the help of the below command as follows.
Code:
mkdir sample_auth
cd sample_auth
python –m venv env
source env/bin/activate
pip install django
We need to create an application inside the project, open the setting .py file, and add the created application to the list.
Code:
INSTALLED_APPS = [
'django.contrib.admin',
'django.contrib.auth',
'django.contrib.contenttypes',
'django.contrib.sessions',
'django.contrib.messages',
'django.contrib.staticfiles',
'sampleproject',
]
Now create the model; if our project is complex, then we need to create a different model inside the project, and it can be handled only by using authentication. So inside the sampleproject, we need to add the model as follows.
Code:
from django.db import models
from django.contrib.auth.models import AbstractUser
Here we need to send the token to Django for mode, so we need to add the following line inside the setting file.
Code:
Student_model= 'sampleproject.student'
After that, we must migrate and register the created model inside the admin dashboard, as shown in the code below.
Code:
from django.contrib.auth.admin import StudentAdmin
from .models import Student
admin.site.register(Student, StudentAdmin)
After that, we must add all the required parameters for the post.
Now the important step is to add authentication.
Now we have applied, and it is running fine; if we already have an account, we can directly log in; otherwise, we need to create an account for Auth0. Now install the required libraries such as python Jose and auth with the help of the below command as follows.
Code:
pip install python-jose social-auth-app-django
In social auth, we have URLs, so that URLs we need to put them inside the URL file of our created application as follows.
Code:
path('', include('socialdjango.urls'))
Now migrate the file and check the setting file; here, we can see the newly added URL below.
Code:
INSTALLED_APPS = [
'django.contrib.admin',
'django.contrib.auth',
'django.contrib.contenttypes',
'django.contrib.sessions',
'django.contrib.messages',
'django.contrib.staticfiles',
'sampleproject',
''socialdjango ']
AUTH_USER_MODEL = 'sampleproject.User'
SOCIAL_AUTH_TRAILING_SLASH = False
SOCIAL_AUTH_AUTH0_DOMAIN = 'specified auth0 domain'
SOCIAL_AUTH_AUTH0_KEY = 'specified required client ID'
SOCIAL_AUTH_AUTH0_SECRET = 'auth0 secret key'
SOCIAL_AUTH_AUTH0_SCOPE = [
'id',
'profile',
'email'
]
Loginurl='login/auth0'
Loginredirectedurl = '/'
Logoutredirectedurl='/'
Explanation:
- So we added auth0; if the user is already logged into the application, we need to show a logout link. This will be handled in HTML pages as below.
Code:
<div class="navbar-end pr-2">
<div class="navbar-item">
<div class="buttons">
<AmpContent>
<a class="button is-primary" href="/logout/">Click here to Logout</a>
</AmpContent>
<NonAmpContent>
<a class="button is-primary" href="/login/auth0">Click here to Login</a>
</NonAmpContent>
</div>
</div>
</div>
Explanation:
- The end results are shown in the below screenshot as follows.

The admin dashboard is shown in the below screenshot as follows.
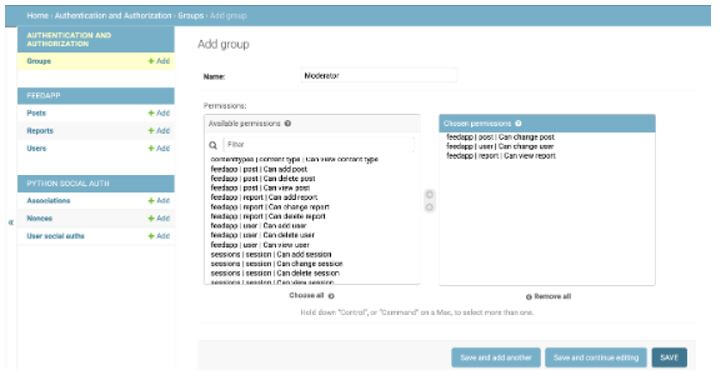
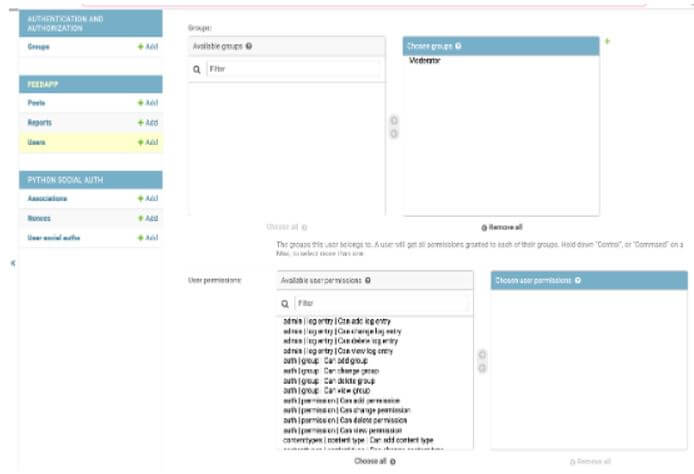
Django Authentication Web App
First, we need to consider the requirement.
First, we need to confirm the installation of Python 3.8 and Django 3.1. After that, we can build the app as follows.
In the above point, we already discussed how to create an application and add authentication; in Django admin, we have a function to add users and groups, as shown in the screenshot below.
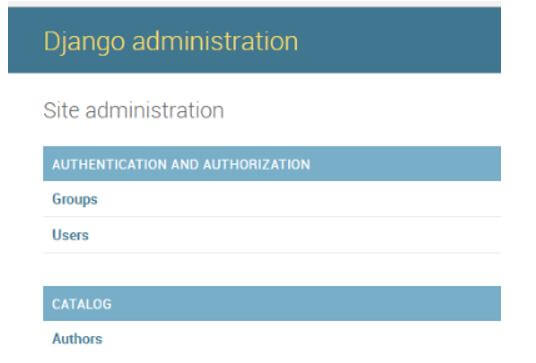
Now suppose we need to add groups, then we need to click on Add button so that we will get a new screen here; put the group name and select the permission that we want to click on the save button as shown below screenshot.
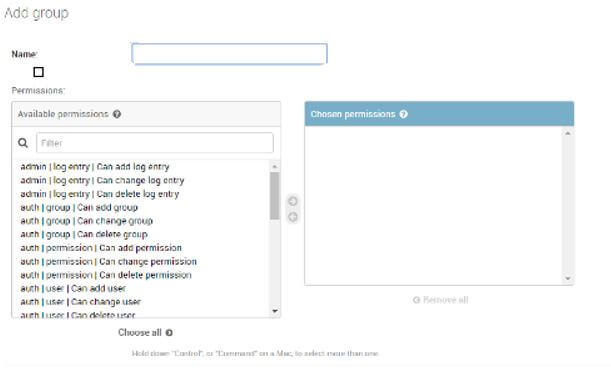
Similarly, we can add users for users; we need to fill in details such as username, password, first name, last name, and email address. Also, we need to select the required permission.
Code:
mkdir sample_auth
cd sample_auth
python –m venv env
source env/bin/activate
pip install django
We need to create an application inside the project, open the setting .py file, and add the created application to the list.
Code:
INSTALLED_APPS = [
'django.contrib.admin',
'django.contrib.auth',
'django.contrib.contenttypes',
'django.contrib.sessions',
'django.contrib.messages',
'django.contrib.staticfiles',
'sampleproject',
]
Other configurations we already cover in the above points, now we need to render the HTML inside the view.py file as follows.
Code:
from django.shortcuts import render
def index(request):
return render(request, 'sampleproject/home.html')
def reports(request):
return render(request, 'sampleproject/about.html')
Now create an html file with the name home and add the following code.
Code:
<!DOCTYPE html>
<html>
<head>
<meta charset="utf-8">
<meta name="viewport" content="width=device-width, initial-scale=1">
<title>specified Title </title>
<link rel="stylesheet" href="link of css file">
</head>
<body style="background-color:powderblue;>
<section class="hero is-info">
<div class="hero-head">
<nav class="navbar" role="navigation" aria-label="main navigation">
<div id="navbarBasicExample" class="navbar-menu">
<div class="navbar-start pl-2">
<a href="/" class="navbar-item">Home</a>
</div>
<div class="navbar-end pr-2">
<div class="navbar-item">
</div>
</div>
</div>
</nav>
<div class="hero-body">
<div class="container has-text-centered">
<p class="title">Specified titel that we want</p>
<p class="subtitle">Specified subtitel that we want</p>
</div>
</div>
</div>
</section>
<section class="section">
<div class="container">
Write here information
</div>
</section>
</body>
</html>
Explanation:
- The end result of the above implementation is shown in the below screenshot.
Output:
Add Authentication
Now let’s assume everything is working fine, so we need to add the authentication in our application; if we have already created an account, we can directly integrate; otherwise, we need to create it. Once our auth account is created, we can see create an application on the dashboard; here, we need to assign a name and select a regular application. But here is one more important thing we need to send a request to Django for connection with Auth.
After successfully configuring the user, we need to navigate to the login page, as shown in the screenshot below.

This way, we can create more screens for logout and resetting passwords per our requirements.
Conclusion
With the help of the above article, we saw Django authentication. From this article, we saw basic things about Django authentication and the features and installation of Django authentication, and how we use it in Django authentication.
Django redirect
Introduction to Django redirect
We know that Django provides different kinds of functionality to the user; here, a redirect is one of the functionalities that Django provides. For example, when we create a python web-based application by using the Django framework, so at some point, we need to redirect one URL to another URL; in another situation, suppose we need to perform a specific action, or any error may occur at that time we need to redirect the page to another page at that time we can use the redirect method to achieve the same. Django provides two types of redirects such as temporary and permanent redirects.

What is Django redirect?
Page redirection is required for some reason in web applications. It would help if you diverted a client to another page when a particular activity happens or in case of a mistake. For instance, when a client signs in to your site, he is frequently diverted to the vital landing page or his dashboard. In Django, redirection is achieved by utilizing the ‘divert’ strategy. Whenever we make a web application using the Django system, we will eventually find where we want to visit from one URL to another. From our view in Django, we can undoubtedly bounce from the current URL to one more URL by returning an occasion of HttpResponseRedirect or HttpResponseRedirect. We want to import the divert work utilizing the Django.shortcuts module in our view.py record.
When you attempt to get to a page of Django administrator without validation, it diverts you to the sign-in page. There, inputting the proper accreditations redirects you to a similar page you need to access before the sign-in page. This redirection cutoff points to the Django Admin and more tasks like adding new articles in models through the administrator, changing passwords, and more. Page Redirection is a significant consideration in giving the client an incredible experience. An engineer will take full advantage of this component of Django.
Why Use Django redirect?
Now let’s see the advantages of redirecting in Django:
- Suppose a user is not logged in, and the requested URL requires authentication to redirect to the login page.
- When the user logs in successfully, Django redirects and transfers user requests to the original request.
- Sometimes we need to change the password; then, we need to show a message that the password was changed successfully, so we need to redirect to this page for that purpose.
- When you attempt to get to a web-based entertainment page where you need to message or like the post, the server diverts you to the login page on the off chance that you haven’t done that.
- Not just that, but a few decent designers have made the framework to reach the page you previously needed to access when you sign in/join.
- When you are playing out some effective procedure on the site, such as changing your secret phrase, the site should divert you to a page showing that the activity was effective.
How to Add Django redirect work?
Now let’s see how we can add redirects into Django as follows:
First, we need to create the virtual environment for our application with the help of the below command as follows:
Code:
mkdir sample_auth
cd sample_auth
python –m venv env
source env/bin/activate
pip install django
We need to create an application inside the project, open the setting .py file, and add the created application to the list.
Code:
INSTALLED_APPS = [
'django.contrib.admin',
'django.contrib.auth',
'django.contrib.contenttypes',
'django.contrib.sessions',
'django.contrib.messages',
'django.contrib.staticfiles',
'samplapp',
]
Now create the model, if our project is complex, then we need to create a different model inside the project, and it can be handled only by using authentication. So inside the samplapp, we need to add the model as follows.
Code:
from django.db import models
Here we need to send the token to Django for mode, so we need to add the following line inside the setting file.
Code:
Student_model= 'samplapp.student'
After that, we must migrate and register the created model inside the admin dashboard, as shown in the code below.
Code:
from .models import Student
admin.site.register(Student, StudentAdmin)
Demands are dependably HTTP Requests, yet there can be various Responses like we returned HttpResponse in our first views.py.
We will return a HttpResponseRedirect case or class object to divert the user. You want to compose divert instead of rendering it in the perspectives document. We should alter views.py documents.
Here we need to add the required packages, but before that, we must ensure that another URL we kept inside the URL file. Inside the view, the file adds the following package as follows.
Code:
from django.shortcuts import render, redirect
from django.http import HttpResponse
After that, we must create the function and write the following code.
Code:
def home(request):
return HttpResponse("<h1>Hi Welcome</h1>Configuration of is done")
def about(request):
return redirect('/about')
Now we need to open the url file and add the following code.
Code:
from django.contrib import admin
from django.urls import path, include
from .views import *
urls = [
path('admin/', admin.site.urls),
path('redirect/', about),
path('about/', home),
]
Django redirect Function
Let’s see what the redirect function is with an example as follows:
This redirect function is equipped for taking something beyond URLs; you can divert your clients to models or divert to a specific URL while likewise passing the critical qualities and other required data. In any case, work-based diverts are generally simple to utilize and are adequate.
Now let’s see an example for better understanding as follows:
Code:
from django.shortcuts import render, redirect
from django.http import HttpResponse
import datetime
def home(request):
day = datetime.datetime.now().date()
return redirect("https://www.sampleproject.com")
def about(request, studId):
return redirect(studdetails, studId = "020", name = "Jenny")
def about (request, syudId, name):
t = "Stduent ID and Name from another URL : %s : %s"%(studId, name)
return HttpResponse(t)
Explanation:
First, we need to import the different packages as per our requirements. First, we redirect to the home page so that the URL we specified in the above code is shown. After accessing our created application, we were redirected to the home page, as shown below.

After accessing the student id, we can see the result in the screenshot below.

In the above example, we can also specify the temporary and permanent URLs as per our requirement, so for that purpose, we need to add this parameter inside the view file. There is likewise a capacity to create URLs; it is utilized similarly as divert, the ‘opposite’ strategy. This capacity doesn’t return a HttpResponseRedirect object; however, just a string containing the URL to the view incorporated with any passed contention.
Conclusion
With the help of the above article, we saw about the Django redirect. From this article, we saw basic things about the Django redirect and the features and installation of the Django redirect, and how we use it in the Django redirect.
Django Extensions
Introduction to Django Extensions
We know that Django provides different types of services to the user, which extends one of the services that Django provides. Django extensions are nothing but the collection of all custom extensions for the framework; Django extensions include different types of management commands and provide the additional field for database, admin extension, and many more. In the Django project, we have various additional commands that can be used per our requirements. For example, suppose we need to enable the admin app to see ForeignKey or any other; then, we need to add the extension.

What are Django Extensions?
Essentially, Django expansions are only the assortment of all traditional augmentations for the framework; Django expansions incorporate various kinds of administration orders; it likewise gives the extra field to the information base, administrator augmentation, and more. Django provides different types of extensions.
Admin Extensions
ForeignKeyAutocompleteAdmin: By using this extension, we can enable the admin app to see the foreignkey whenever we require it. So we need to render this extension with jQuery. With the help of this extension, we overcome the security issues. Autocompletion doesn’t check consent or the mentioned models on the autocompletion view. This can be utilized by clients with admittance to the administrator to uncover information from different models. So if it’s not too much trouble, know and be cautious while utilizing ForeignKeyAutocompleteAdmin. The ongoing adaptation of the ForeignKeyAutocompleteAdmin definitely dislikes late Django forms.
We firmly recommend that the project utilize this expansion refresh to Django 2.0 and the local autocomplete_fields.
Example:
Now let’s see the example of admin extension as follows:
Code:
from django.contrib import admin
from foo.models import sampleaap
from django_extensions.admin import ForeignKeyAutocompleteAdmin
class sampleadmin(ForeignKeyAutocompleteAdmin):
related_search_fields = {
'student': ('stud_name', 'city'),
}
fields = ('student', ' ', 'is_active')
admin.site.register(sampleapp, sampleadmin)
Explanation:
In the above, the student is our foreign key attribute used to search stud_name and city.
Django Extensions Project
Let’s see what the extension of the project is as follows:
Django provides different extensions as follows:
1. Debugger Tags
Using Debugger tags, we can easily debug templates with three types of filters as follows.
- IPDB: It is used to debug the model object.
- PDB: It is a normal debugger to debug a model object.
- WDB: It is a Web Debugger tool.
2. Field Extension
- RandomCharField: If we want to create random characters with a specified length, we can use this extension.
- JSONFiled: It is used to serialize the JSON objects.
3. Model Extension
- ActivatorModel: It is used to check the status of the class. It also provides different extensions to the user, such as validators, command extensions, etc.
Django Extensions Command
Given below are the Django extensions command:
- create_app: By using this command, we can create an application with a specified name. By using this command, we can determine the layout choice where you can show a format catalog construction to use as your default.
- create_command: Create a command expansion registry structure inside the predetermined application. This makes it simple to get everything rolling by adding an order expansion to your application.
- create_jobs: We can create the directory structure as per our specified application.
- create_superuser: We can easily make the super user for Django.
- describe_form: If we need to display any information for the specified model.
- dumpscript: Creates a Python script that will repopulate the information base utilizing objects. The upside of this approach is that it is straightforward and more adaptable than populating the information base or utilizing XML.
- export_emails: As per our requirement, we can export the email address in a different format, and it supports Google, outlook, LinkedIn, etc.
- generate_secret_key: We can easily create a new secret key.
- graph_model: Sometimes, we need to send the output file; at that time, we can use this command to create a graph of our specified model.
- password: As per our requirement, we can reset the user password.
- print_user_for_session: If we want to print the information or any other data for the specified session key, then we can use this command.
- shell_plus: If we enhance the Django shell version, it will auto-load all our models.
- show_urls: If we’re going to see the route of URLs in our project, then we can use this command.
- sqldiff: By using this command, we can perform sanity testing on a specified database whenever required.
Installing Django Extension
Let’s see how we can install an extension in Django as follows:
First, we must ensure the installation of Python; if we have Python, then we can directly use the below command to install Django extensions; if we don’t have Python, then we need to install Python first and then use the below command.
Code:
$pip install django-extensions
Explanation:
- The Django extension is hosted by GitHub; normally, the development version of the Django extension should be stable.
- After installing the extension, if we want to check the version of Django, we need to use the below command as follows.
Output:

Implementing Django Extension
Let’s see how we can implement the Django extension as follows:
In the above point, we have already discussed how to install the Django extension; after successfully installing it, we need to configure it. So first, we need to create a different environment with the help of the below commands.
Code:
mkdir sample_auth
cd sample_auth
python –m venv env
source env/bin/activate
pip install django
We need to create an application inside the project, open the setting .py file, and add the created application to the list.
Code:
INSTALLED_APPS = [
'django.contrib.admin',
'django.contrib.auth',
'django.contrib.contenttypes',
'django.contrib.sessions',
'django.contrib.messages',
'django.contrib.staticfiles',
'samplapp',
'django_extensions'
]
Example of Django Extensions
Let’s consider we have a student model, so add the following code to the model.py.
Code:
from django.db import models
class StudentModel(models.Model):
id = models.IntegerField(primary_key=True)
stud_name = models.CharField(max_length=20)
name = models.TextField()
def __str__(self):
return f"Student: {self.stud_name}"
Now inside the admin.py file, we need to apply for the admin extension.
Code:
from .models import *
from django_extensions.admin import ForeignKeyAutocompleteAdmin
class StudentAdmin(ForeignKeyAutocompleteAdmin):
fields = {
'Student':('stud_name',)
}
fields =('stud_name','remark_text','studnet')
Now run the server and check the admin model as shown below screenshot.
Output:
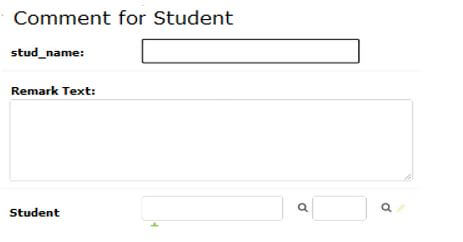
Conclusion
With the help of the above article, we saw about the Django extensions. From this article, we saw basic things about the Django extensions and the features and installation of the Django extensions, and how we use them in the Django extensions.
Django Permissions
Introduction to Django Permissions
Django itself has different features for the user; permission is one of the features provided by Django. Django has additional permissions such as add, delete and update permission to all the specified models. So users can perform the associated operations as per their requirements with the help of the admin portal. As well as, Django provides the facility to add permissions for our specified models and assign them to the selected users. While assigning permission, we need to consider authentication and authorization to assign at the user level as per our requirements.

Overview of Django Permissions
Django authentication is a client validation framework. It handles authentication, gatherings, authorizations, and treat-based client meetings. This documentation segment explains how the default execution figures out of the crate and how to stretch out and alter it to suit your venture’s necessities.
The Django verification framework handles both validation and approval. Momentarily, validation confirms that a client is who they guarantee to be, and authorization determines what a verified client is permitted to do. Here the term verification is utilized to allude to the two assignments.
The auth framework has the following points:
- Clients
- Permission: Binary (yes/no) here; Django uses the flag to determine whether the user has performed any action or not.
- Group: A conventional approach to applying permissions and consents to more than one client.
- A configurable secret key hashing framework.
- Structures and view devices for signing in clients or confining substance.
- A pluggable backend framework.
- Django’s confirmation framework is extremely nonexclusive and doesn’t give a few highlights regularly tracked down in web verification frameworks. Answers for a portion of these normal issues have been carried out in outsider bundles:
- Secret key strength checking.
- Choking of login endeavors.
- Validation against outsiders (OAuth, for instance).
- Object-level authorizations.
The validation framework is adaptable. You can develop your URLs, structures, perspectives, and layouts without any preparation, assuming you like, simply calling the given API to sign in to the client. In any case, in this article, we will utilize Django’s “stock.” Verification perspectives and structures for our login and logout pages. Well, in any case, you have to make a few layouts, yet at the same time, that is quite simple.
How to Use Django Permissions?
We know that Django provides authentication and authorization for security purposes, but usually, it is not sufficient to provide access rights. Authorization checks are constantly run at the beginning of the view before some other code is permitted to continue. Authorization checks will regularly utilize the verification data in the request.user and request.auth properties to decide whether the approaching solicitation ought to be allowed.
Authorizations are utilized to concede or prevent access for various classes from getting clients to multiple pieces of the API. The least complicated authorization style is to permit admittance to any verified client and deny admittance to an unauthenticated client. This compares to the IsAuthenticated class in the REST structure.
A somewhat less severe consent style permits full admittance to confirmed clients; however, it allows read-just admittance to unauthenticated clients. This compares to the IsAuthenticatedOrReadOnly class in the REST system.
Django Permissions Level
Let’s see different levels of permission in Django as follows:
1. User Level Permissions
At the user level, we can set different permissions or say that Django itself creates add, update, view, and delete permission to the developed models. Django provides permission in the below sequence as follows.
Code:
{Specified application name}.{Required permission access}_{Specified Model Name}
Explanation:
- The first block is used in the above syntax to specify application names related to the model.
- Required permission access means which action we need to perform, and finally, we need to provide the model name.
2. Group Level Permission
Django provides the group-level permission functionality to the user, so first, we need to create a group of users, and we can assign permission to each group as per our requirements.
We require a group model with the following roles created a group model.
- Author: Using this role, we can view and add posts per our requirements.
- Editor: Using this role, we can view, edit and add posts per our requirements.
- Publisher: Using this role, we can view, edit, delete and add posts per our requirements.
3. Model Level Permission
Django provides the model-level permission functionality to the user through the model Meta options. In addition, Django allows flexibility to the user meaning whether the user requires permission.
4. Object Level Permission
If we are using the Django REST framework, then it provides object-level permission. It has different classes such as BasePermission, has_permission, and has_object_permission.
Django Permissions Setting
Now let’s see how we can set permission in Django as follows:
Django itself has the default permission that we can set globally as follows.
Code:
FRAMEWORK = {
'DEFAULT_PERMISSION_CLASSES': [
'rest_framework.permissions.IsAuthenticated',
]
}
If not specified, we need to; then we can set it like below.
'DEFAULT_PERMISSION_CLASSES': [
'rest_framework.permissions.AllowAny',
]
In the above point, we already see the different permission levels, and as per our requirement, we can set any level.
Example of Django Permissions
First, we need to create a virtual environment with the help of the below commands as follows.
Code:
mkdir sample_auth
cd sample_auth
python –m venv env
source env/bin/activate
pip install django
We can see the created application list in the setting file.
Code:
INSTALLED_APPS = [
'django.contrib.admin',
'django.contrib.auth',
'django.contrib.contenttypes',
'django.contrib.sessions',
'django.contrib.messages',
'django.contrib.staticfiles',
'sampleproject',
]
If we want to set model-level permission, we must add the following code.
Code:
from django.db import models
class Student(models.Model):
studname = models.CharField(max_length=100)
city = models. CharField(max_length=100)
studname = models.Boolean(default=False)
Now we can set custom permission as follows.
Code:
from django.db import models
class Student(models.Model):
studname = models.CharField(max_length=100)
city = models. CharField(max_length=100)
studname = models.Boolean(default=False)
class Meta:
permission =[( "set_display_flag", "Check name is display or not",)]
So in this way, we can set different permissions at the admin level. So first, we need to log in with the admin, as shown in the screenshot below.
Output:

The admin dashboard is shown in the below screenshot as follows.
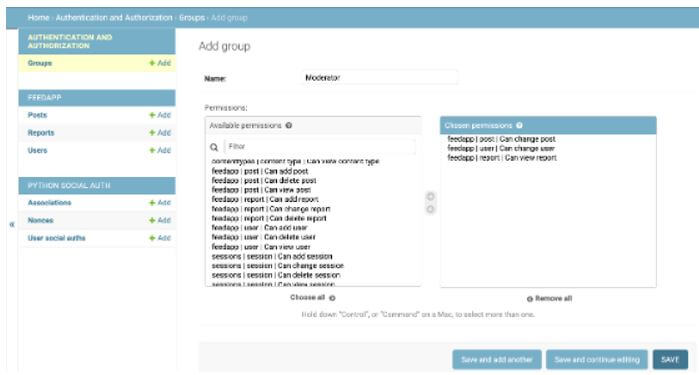
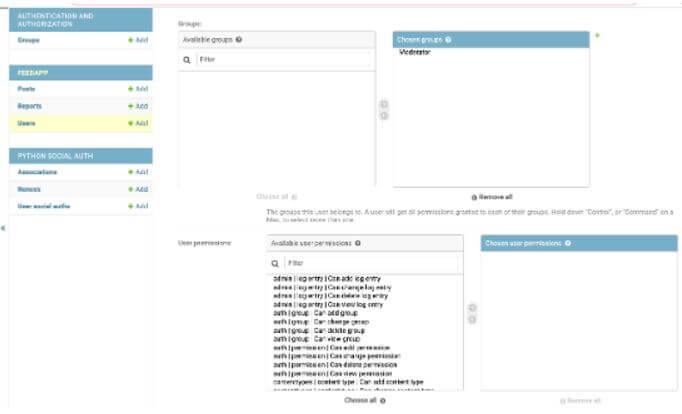
Conclusion
With the help of the above article, we saw Django’s permission. From this article, we saw basic things about Django permission and the features and installation of Django permission, and how we use it in Django permission.
Django Signals
Introduction to Django Signals
The following article provides an outline for Django Signals. Django offers different features to the user, and that signal is one of the features that Django provides. The single strategy allows us to decouple applications to get notifications when an event occurs. For example, sometimes we need to invalidate the webpage every time with the help of a model instance, but there are several places where we need to update the code, so at that time, we can use singles to handle that situation. In another case, when we have extended custom Django users by one-to-one relationships, we usually use a single dispatcher to listen to the user.

What are Django Signals?
While saving information to a data set, there are special-use situations where the business prerequisite of an application might require some handling not long previously or subsequent to saving the information. This implies there ought to be a method for knowing when the information will be saved or has recently been saved in the data set by the Django model strategy save().
One possible way is to supersede each model’s save () technique. A neater and more effective way is to utilize Django signals. These parts work on the idea of shippers and collectors. The sending part is generally the model, and the getting part is typically the handling capability that deals with the information once it notices that it will be saved or has recently been saved. Django Signals permit specific shippers to tell a bunch of beneficiaries that some activity has occurred. A collector can be any Python capability or technique to get signals. A shipper should either be a Python item or none to get occasions from any source.
How to Create Django Signals?
Let’s see how we can create Django signals as follows:
Signals are utilized to play out any activity on the change of a model case. The signs are utilities that assist us with interfacing occasions with activities. For example, we can foster a capability that will run when a sign calls it. As such, Signals are utilized to play out some activity on change/making of a specific passage in the Database. For instance, one would need to make a profile case when another client occasion is made in the Database.
There are three types of signals as follows:
- preserve and postsave: These signals execute before and after the save () method.
- predelete and postdelete: These signals execute before and after the delete () method.
- preinit and postinit: These signals execute before and after instantiating the model.
On the off chance that you know about the observer design pattern, this is fairly how django executes it. Or if nothing else fills a similar need.
The signs machinery has two vital components: the shippers and the collectors. As the name proposes, the shipper is the one liable to dispatch a sign, and the recipient is the person who will get this sign and afterward follow through with something. A collector should be a capability or an occurrence technique to get signals. A shipper should either be a Python item or none to get occasions from any source. The association between the shippers and the recipients is finished through “signal dispatchers,” which are occurrences of signals using the interface technique.
The Django center likewise characterizes a ModelSignal, a subclass of signal that permits the source to be sluggishly indicated as a line of the app_label.ModelName structure. Be that as it may, taking everything into account, we will continuously need to utilize the Signal class to make custom signs. So to get a sign, you want to enroll a collector capability that gets called when the symbol is sent by utilizing the signal.connect() technique.
First, we need to create a project and a model; let’s assume we have already begun a model and other details, so add the code below.
Code:
from django.apps import AppConfig
class StudentConfig(AppConfig):
name = 'student'
def ready(self):
import student.signals
Explanation:
- Now signals are live; we can see in the below screenshot as follow:

At the same time, we can check the admin view, as shown in the below screenshot.

Uses of Django Signals
Let’s see the uses of signals:
1. A Signal is an item relating to a specific occasion. For instance, we could characterize the accompanying sign to address a pizza has finished cooking.
Code:
from django.dispatch import Signal
coffee = Signal(providing_args=["type", "size"])
Signs can send messages. This is accomplished by calling the send() strategy on the sign example (passing in a shipper contention alongside previously determined contentions).
2. Beneficiaries are callables that are associated with a specific sign. When the sign sends its message, each associated beneficiary gets called. Therefore, recipients’ capability marks should match what the sign’s send () technique utilizes.
Code:
from django.dispatch import receiver
from coffee import signals
@receiver(signals.coffee_done)
def off_when_coffee_done(sender, type, size, ****):
3. On the off chance that you have two applications, and one application needs to set off conduct in an application it knows about, don’t utilize signals. The application should import the capability it needs and call it straightforwardly. Signals become possibly the most critical factor assuming the opposite is required: you need an application to set off conduct in an application that relies on that application. For this situation, signals are a great approach to giving a ‘snare’ which the second application can take advantage of by interfacing with a recipient.
Example of Django Signals
Let’s see an example if you want to create a profile of a user using postsave signals as follows:
First, we must create a project per our requirement or create a separate environment that depends on the user. After creating the project inside the model, add the code below.
Code:
from django.db import models
from django.contrib.auth.models import Student
class Profile(models.Model):
student = models.OneToOneField(User, on_delete=models.CASCADE)
studphoto = models.ImageField(default='extension of photo',
uploadto='studentprofilepics')
def __str__(self):
return f'{self.student.studname} Profile'
Now inside the view file, add the below code.
Code:
from django.shortcuts import render, redirect
from django.contrib import msg
from django.contrib.auth.decorators import login
from .forms import StudRegiForm, StudUpdateForm,
def studregister(request):
if request.method == 'POST':
form = StudRegiForm(request.POST)
if form.is_valid():
form.save()
studname = form.claear_data.get('studname')
msg.success(request, f'student added successfully')
return redirect('studlogin')
else:
form = StudRegiForm()
return render(request, 'student/studregi.html', {'form': form})
def profile(request):
if request.method == 'POST':
formu = StudUpdateForm(request.POST, instance=request.student)
formp = ProfileUpdateForm(request.POST,
request.FILES,
instance=request.user.profile)
if formu.is_validu() and formu.is_valid():
formu.save()
formp.save()
msg.success(request, f'Update done')
return redirect('profile')
}
return render(request, 'student/profile.html', context)
Now create a form as per our requirement; after completing the form, we need to add a single; here, we use the receiver method as follows.
Code:
from django.db.models.signals import saves, delete
from django.contrib.auth.models import Student
from django.dispatch import receiver
from .models import StudProfile
@receiver(postsave, sender=Student)
def create_profile(sender, instance, created,):
if created:
StudentProfile.objects.create(student=instance)
@receiver(postsave, sender=Student)
def saveprofile(sender, instance,):
instance.studprofile.save()
Now we need to write code for signal connection as below.
Code:
from django.apps import AppConfig
class StudentConfig(AppConfig):
name = 'student'
def ready(self):
import student.signals
Output:
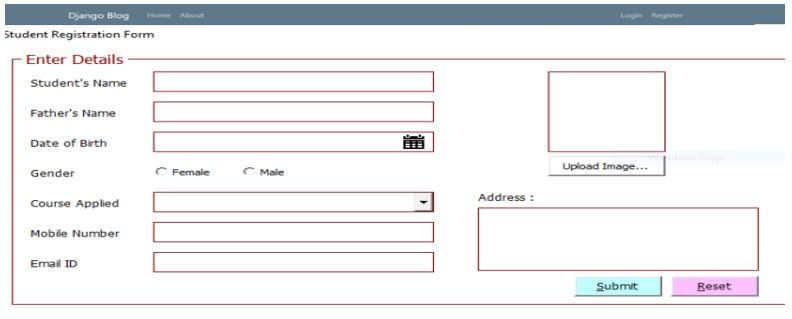
Conclusion
With the help of the above article, we saw about the Django signals. From this article, we saw basic things about the Django signals and the features and installation of the Django signals, and how we use them in the Django signals.
Django GraphQL
Introduction to Django GraphQL
Django provides different types of features to the users; graphql is one of the features that Django provides. Typically graphql is an open-source data query management tool used to manipulate the different languages for APIs and provides the existing data at the runtime to fulfill query requirements. In other, we can say that Django graphql is one of the most powerful tools, and it is also more extensible to the REST API of Django. Django GraphQL is not an API framework like REST; it is just a language that helps us share data in a new fashion or per our requirements.

What is Django GraphQL?
Web APIs are the motors that power many of our applications today. For a long time, REST has been the prevailing engineering for APIs. With REST APIs, you, by and large, make URLs for each open object of information. Suppose we’re fabricating a REST API for motion pictures – we’ll have URLs for the actual films, entertainers, grants, chiefs, and makers. It’s now getting clumsy! This could mean a lot of solicitations for one cluster of related information. Envision you were the client of a low-fueled cell phone over a sluggish web association; this present circumstance isn’t extraordinary.
GraphQL isn’t API engineering like REST, a language that allows us to share related information in a more straightforward design. Instead, we’ll utilize it to plan an API for films. Facebook initially made it, yet presently, it is under graphql; with the help of graphql, we can manage runtime data, which means manipulating data as per our requirements.
We influence GraphQL’s framework to characterize the information we need to access the API. We then, at that point, make a pattern for the API, the arrangement of permitted inquiries to recover and modify information.
Django GraphQL API
Let’s see the graphql API as follows:
There are three basic operations of GraphQL: reading data, writing data, manipulating data, and receiving real-time data whenever required. GraphQL provides some predefined schema and standard schema between client and server.
Given below are the features of GraphQL as follows:
- First, it is static, so there is no need to define the variable.
- It is decoupled from the backend.
- Underflows did not happen here.
- Third, it is based on language and HTTP.
- Therefore, it is not a required cost for documentation.
- By using graphql API, we can save bandwidth.
- A GraphQL blueprint sets a solitary wellspring of truth in a GraphQL application. It offers an association and a method for unifying its whole API.
- Using graphql, we can easily handle a round trip which means request and response.
- Firmly characterized information types decrease miscommunication between the client and the server.
- GraphQL is contemplative. A client can demand a rundown of information types accessible. This is great for auto-creating documentation.
- By using graphql with API, we can easily handle the existing queries.
- In graphql, we have many open-source features unavailable in REST API.
- GraphQL doesn’t direct particular application engineering. However, it very well may be presented on top of a current REST API and can work with existing API the board apparatuses.
Django GraphQL New Project
Let’s create a new project for API as follows:
First, we must have Python and an understanding of Django; here, we try to create a student management project. So first, open the terminal we execute the below command as follows.
Code:
mkdir stud_management
cd stud_management
After that, we need to set the virtual environment for the newly created project, so we need to install the virtual environment using the below command.
Code:
pip install virtualenv
virtualenv env
Now we have a virtual environment, so start the Django project using the below command.
Code:
django-admin startproject stud_management
cd stud_management
django-admin startapp student
Now we can check the setting.py file of our application, as shown below code.
Code:
INSTALLED_APPS = [
'django.contrib.admin',
'django.contrib.auth',
'django.contrib.contenttypes',
'django.contrib.sessions',
'django.contrib.messages',
'django.contrib.staticfiles',
' student ',
]
In the next step, we need to create the models inside the model file, as shown below code.
Code:
from django.db import models
class Stud(models.Model):
stud_name = models.CharField(max_length=255)
class Meta:
verbose_name_plural = 'studnames'
def __str__(self):
return self.stud_name
class studclass(models.Model):
classname = models.CharField(max_length=150)
classteacher = models.CharField(max_length=100')
studcount = models.CharField(max_length=13)
class Meta:
conduct= ['Conducted_Date']
def __str__(self):
return self.stud_name
class subject(models.Model):
subject_name = models.CharField(max_length=10)
topic= models.CharField(max_length=100)
class Meta:
ordering = ['Conducted_Date']
def __str__(self):
return self.subjectname
Explanation:
- In the above code, we created three models as shown; now, we need to register our model in the admin file as shown below code.
Code:
from django.contrib import admin
from .models import Stud, studclass, subject
admin.site.register(Stud)
admin.site.register(studclass)
admin.site.register(subject)
After registration, we need to migrate with the help of the below commands as follows.
Code:
python manage.py makemigrations
python manage.py migrate
Once migration is done, we can start the server using the below command.
Code:
python manage.py runserver
Now we need to add the graphql url inside the url.py file as follows.
Code:
from django.contrib import admin
from django.urls import path
from graphene_django.views import GraphQLView
from student.schema import schema
urls = [
path('admin/', admin.site.urls),
path("graphql", GraphQLView.as_view(graphiql=True, schema=schema)),
]
Now create a schema, and after creating the schema, we need to test graphql API.
Let’s consider the stud.json file below.
Code:
[
{
"model": "studclass",
"classname":"First" ,
"classteache":"Jenny"
"studcount": 34
},
{
"model": "studclass",
"classname":"Second" ,
"classteache":"Jhon"
"studcount": 30
}
}
]
Now we need to run the below command to load data.
Code:
python manage.py loaddata stud.json
After executing the above command, we can see the output on the screen below.
Output:

Conclusion
With the help of the above article, we saw Django graphql. From this article, we saw basic things about Django graphql, and we also saw the features and installation of Django graphql and how we use it in Django graphql.
Django Database
Introduction to Django Database
Django uses SQL, a Structured Query Language, to perform different operation crud operations. Typically SQL contains the complex query for creating, updating, and deleting data. Django supports databases such as Oracle, MySQL, SQLite, PostgreSQL, and MariaDB; we can use anyone per our requirements. On the other hand, Django supports many other features of all types of databases. For example, Django usually has an ORM feature, Object Relational Mapper; it allows the developer to map the data between the Django application model and database without any SQL queries; the ORM uses the model classes to interact with data.

Overview of Django Database
The Django structure is a free, open-source system that fosters web applications. This Python-based structure comprises various parts like verification, content administration, and data set communications that you can use to make any web application.
Django’s most impressive and valuable highlight is its Object-Relational Mapper (ORM). The ORM permits designers to plan information between the application models and the data set without composing any SQL questions. For example, the Object-Relational Mapper will plan object credits characterized in Django model classes to the comparing fields in the data set and communicate with the information as essential from a given data set. This allows engineers to quickly foster their applications, eliminating the need to compose separate SQL questions for information base exchanges.
The Django system Model-View-Template (MVT) engineering is planned so designers can change the frontend visual construction of an application without influencing the fundamental backend rationale. This is particularly valuable while connecting with information bases. When a Django web application is designed, an SQLite information base is naturally made.
How to Connect Django Database?
Now let’s see how we can connect the Django database as follow:
We know that Django supports different types of databases; here, we will see how we can connect Django with MySQL as follows:
First, we need to consider the following prerequisites as follows:
- Installation of MySQL server with 5.7 + version
- Installation of Python 3.0+ version
Here consider we already installed MySQL and Python and follow the below steps as follows:
First, we need to create a virtual environment with the help of the below command as follows:
Code:
mkdir stud_management
cd stud_management
After that, we need to set the virtual environment for the newly created project, so we need to install the virtual environment using the below command.
Code:
pip install virtualenv
virtualenv env
Now we have a virtual environment, so start the Django project using the below command.
Code:
django-admin startproject stud_management
cd stud_management
django-admin startapp student
Now we can check the setting.py file of our application, as shown below code.
Code:
INSTALLED_APPS = [
'django.contrib.admin',
'django.contrib.auth',
'django.contrib.contenttypes',
'django.contrib.sessions',
'django.contrib.messages',
'django.contrib.staticfiles',
' student ',
]
Now we need to run the server with the help of the below command as follows.
Code:
python manage.py runserver
After executing the above command, we get an IP address on the terminal, as shown below screenshot.
Output:

Next, we need to create a new database in MySQL workbench, or we can use the shell for creating a database.
After login into MySQL, we will get the following screen as shown below screenshot as follows.
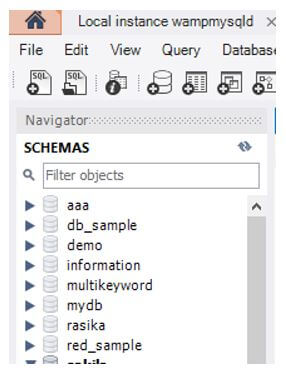
Here we need to create the database using SQL queries per our requirement and update the setting.py file after that.
Creating Django Database
Now let’s see how we can create a database in Django as follows:
Here we will see the MySQL database in different steps as follows:
Of course, when we made our first application and began the server, you probably saw another record in your task registry named ‘db.sqlite3’. The record is an information base document where every one of the information that you will create will be put away as shown below screenshot as follows.

This database file was automatically created when we created the Django application, and it has a default setting of the data set to the SQLite, which is albeit fine for testing and gives loads of highlights; however, if you maintain that your site should be versatile, you want to transform it to some other proficient data set.
First, we need to make some changes in the setting.py file as follows:
Code:
DATABASE = {
'deafult': {
'ENGINE':django.db.backends.sqlite3, 'NAME':os.path.join(DIR,'db,sqlite3'),
}
}
Explanation:
In the above example, we can see how to establish a database connection; here, we have two different terms as follows:
- ENGINE: It determines the library used when associated with a specific site. In the end, we need to put the record, “Django.db.backends.sqlite3”, which is the python library for the sqlite3 data set and will make an interpretation of your python code to the data set language.
- NAME: Here, you will have the name of the information base you are utilizing and the area of your data set. This boundary changes as indicated by the information base you are utilizing. Here you can explore different avenues regarding the information base document.
Now we need to execute the below command as follows:
Code:
python manage.py migrate
python manage.py runserver
Explanation:
- After executing the above command, we see a new database was created, as shown in the screenshot below.
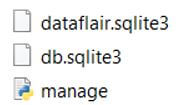
This is the first and straightforward way to create a database; now, let’s see another method for MySQL as follows.
First, we need to open MySQL on the terminal and connect with the server, as shown in the below screenshot.
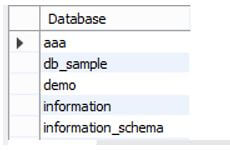
Now here, we need to create a new database with the help of the below screenshot as follows:
Code:
create database dsample;
Explanation:
- After execution of the above query, we can see the newly created database as shown below screenshot as follows:
Now we need to update the setting.py file as follows:
Code:
DATABASES = {
'default': {
'ENGINE': 'django.db.backends.mysql',
'NAME': 'dsample',
'USER': 'root',
'PASSWORD': '******',
'HOST': '127.0.0.1',
'PORT': '8080',
}
}
After that, we need to install mysqlclient packages with the below command as follows:
Code:
pip install mysqlclient
Now run the migration command.
Finally, change the database as per our requirements.
Conclusion
With the help of the above article, we saw about the Django database. From this article, we saw basic things about the Django database and the features and installation of the Django database, and how we use it in the Django database.


