How To Manipulate Your Photos Professionally
Posted by Superadmin on July 11 2021 15:27:58
How to Manipulate your Photos Professionally
Hello Guys!! Today we are going to discuss How to Manipulate your Photos Professionally. Photo manipulations are modifications digitally applied to photos for a certain effect or artistic. These changes are typically done by a photo editing program, such as Photoshop. Photo manipulation assistance involves manipulating and modifying images to improve their features in order to make them look much greater. Photo manipulation assistance makes use of many advanced techniques to improve the quality of an image. Moreover, with the improvements in technology, the scope of photo manipulation services has increased much.
Resources
Images used:
Step 01
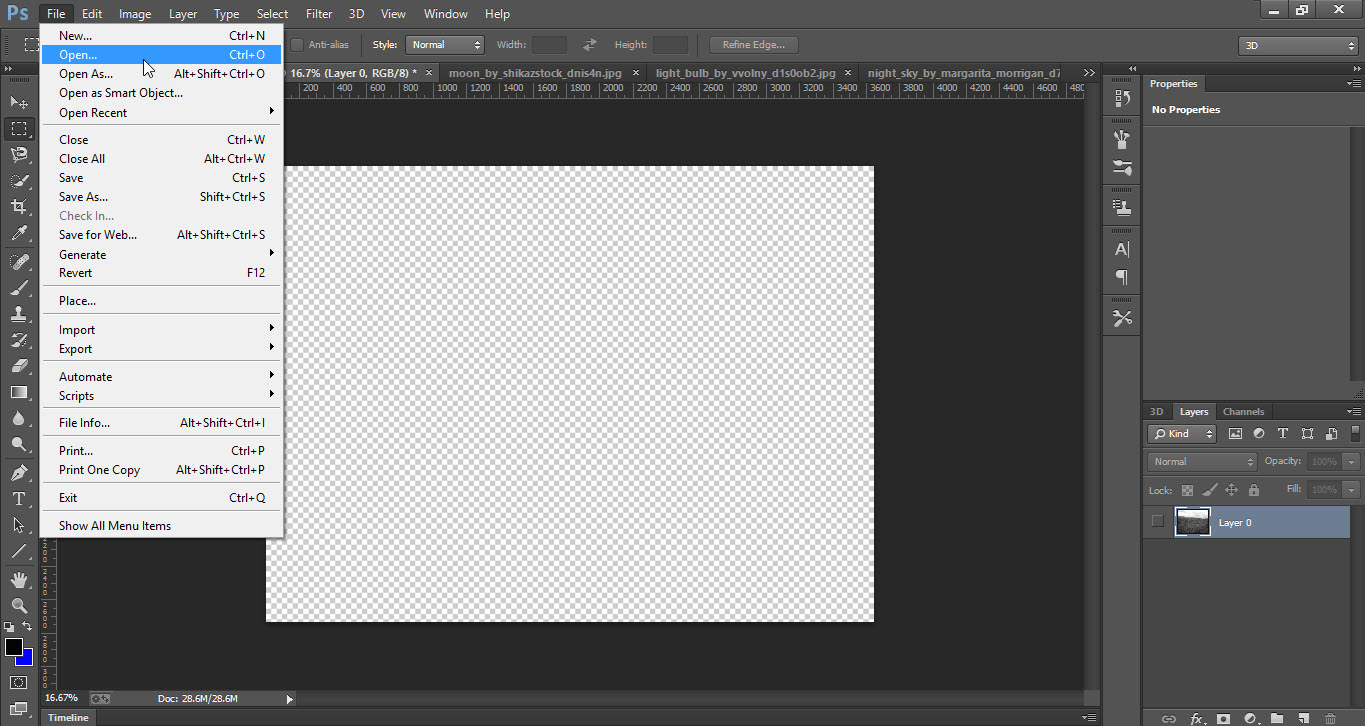
- Open the photoshop software
- Go to the file menu and open all the stock images.
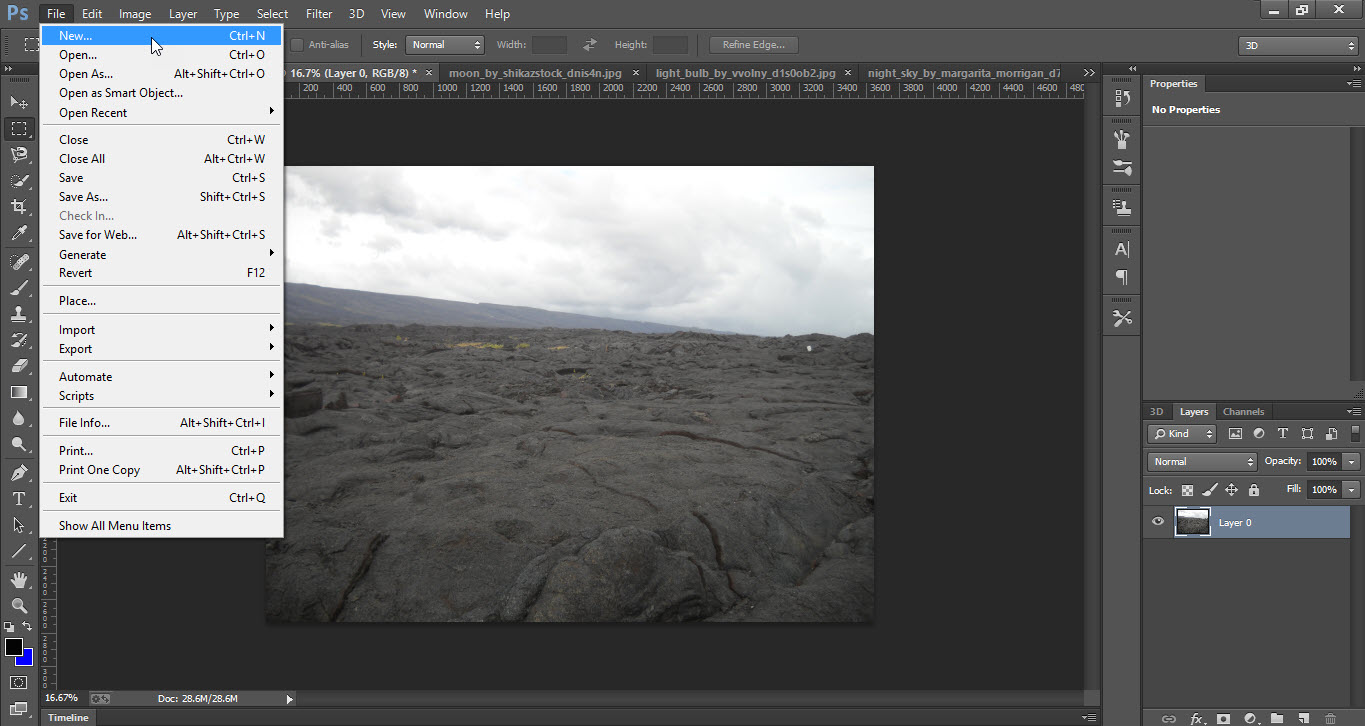
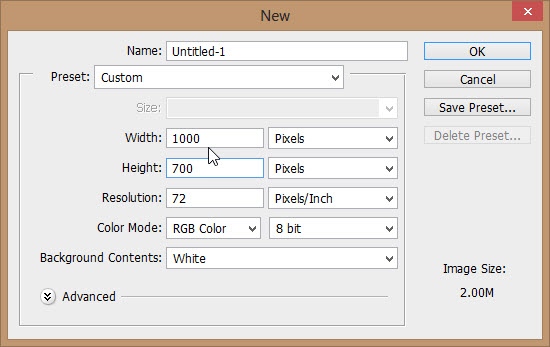
- Now again go to the File menu and open a new document by clicking on the New option.
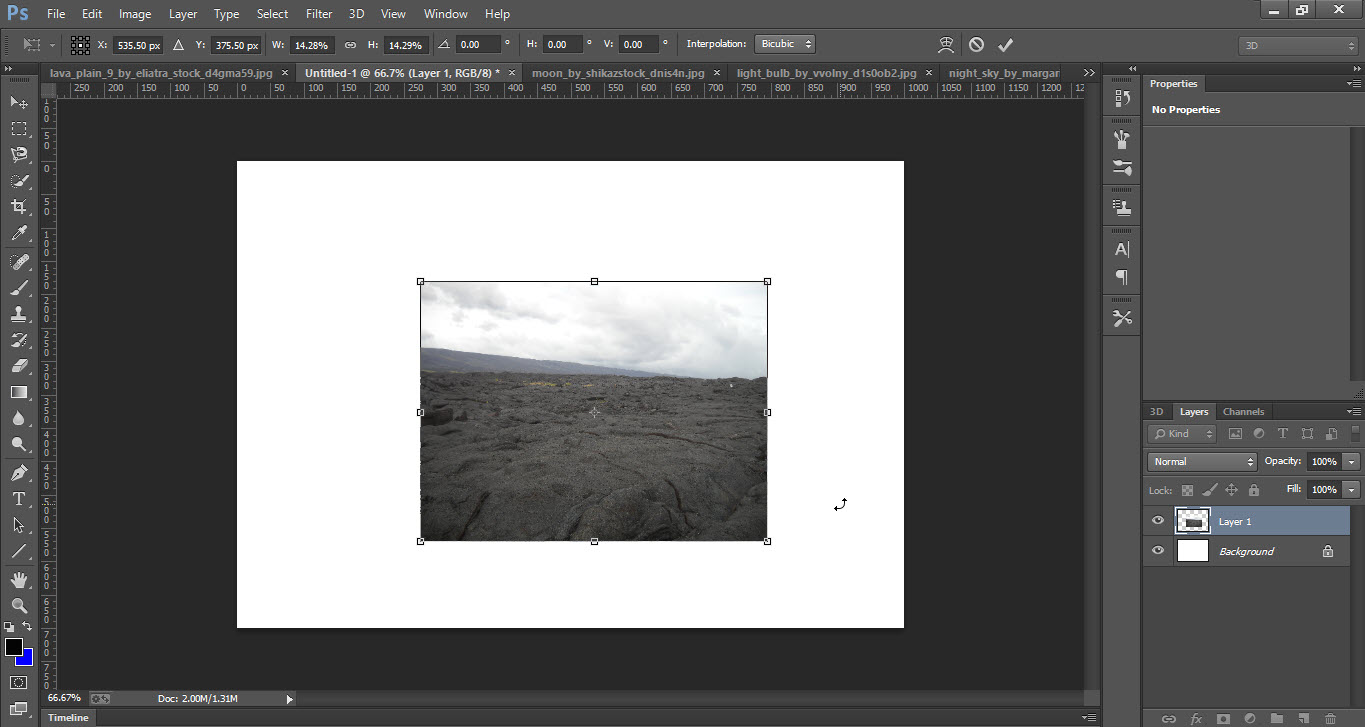
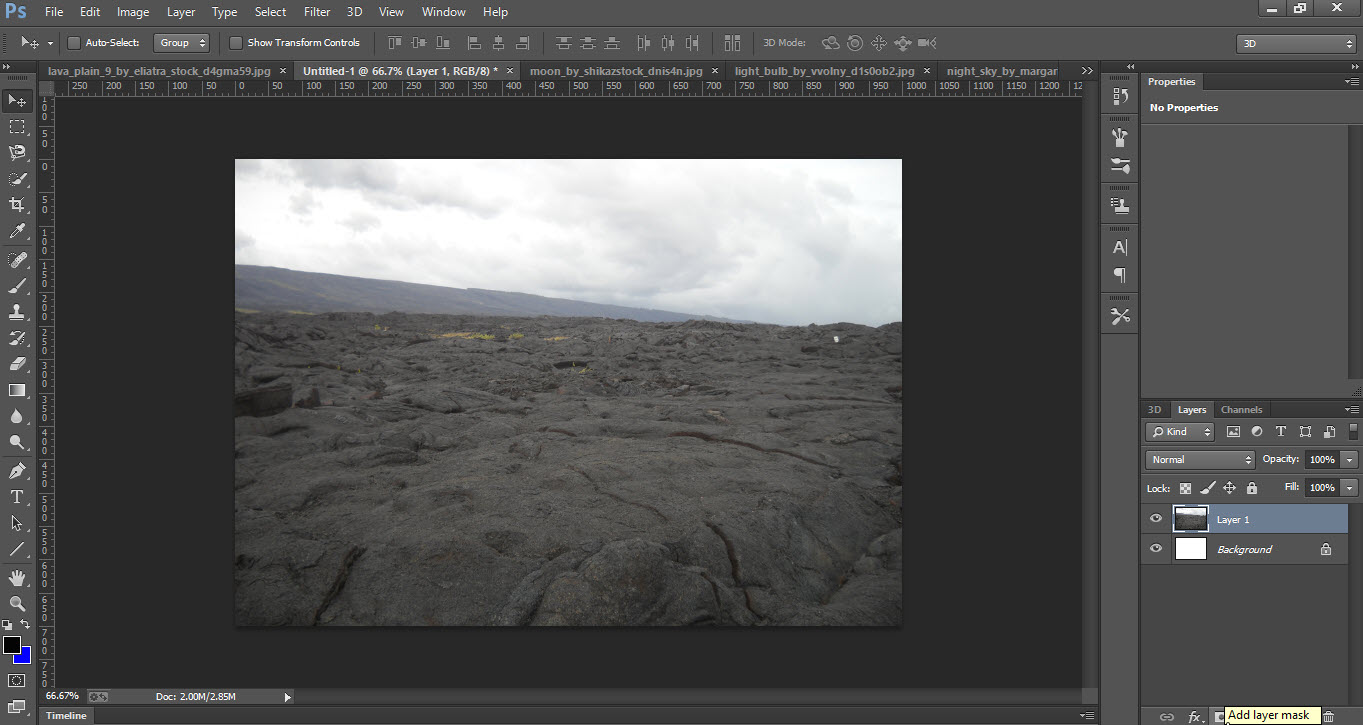
- Go to the Lava-Plain image and unlock the background layer.
- Take the Move Tool and drag the Lava-Plain image to the new document.
- Adjust the Lava-Plain image according to the new document by pressing the Shift+Alt keys and drag from one edge.
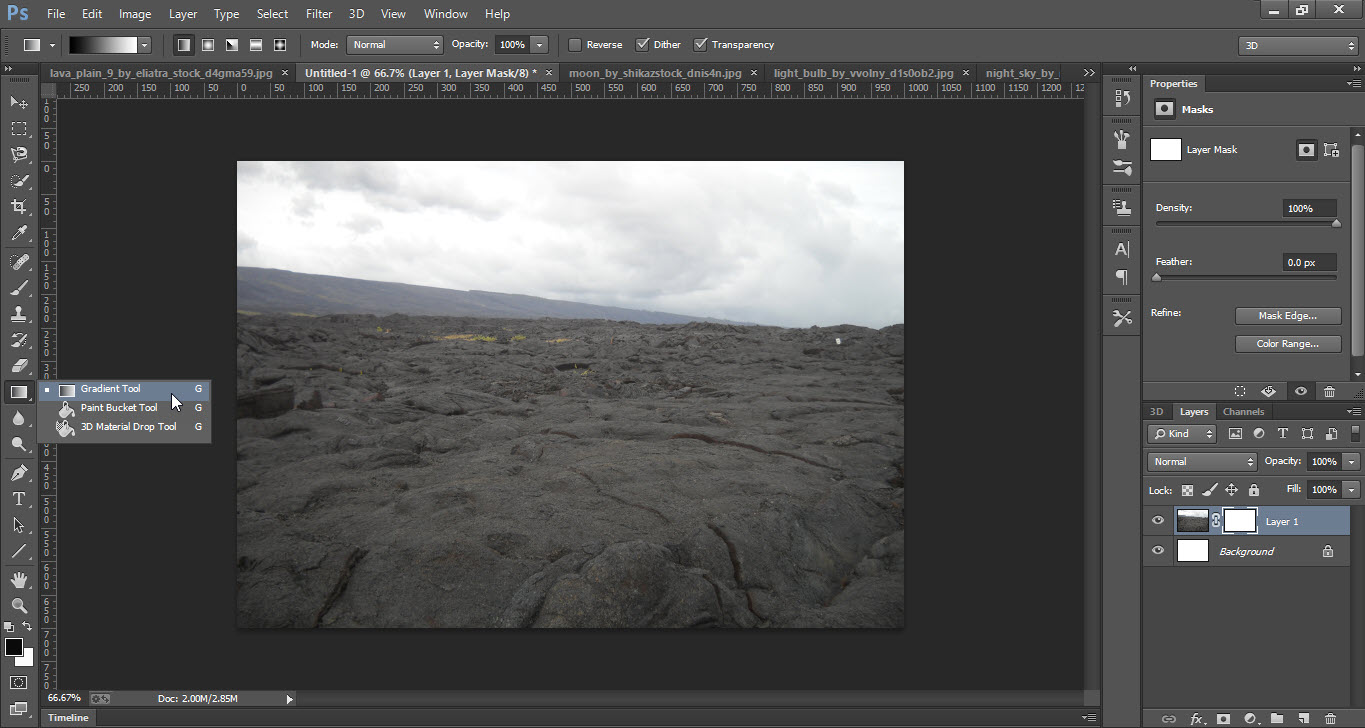
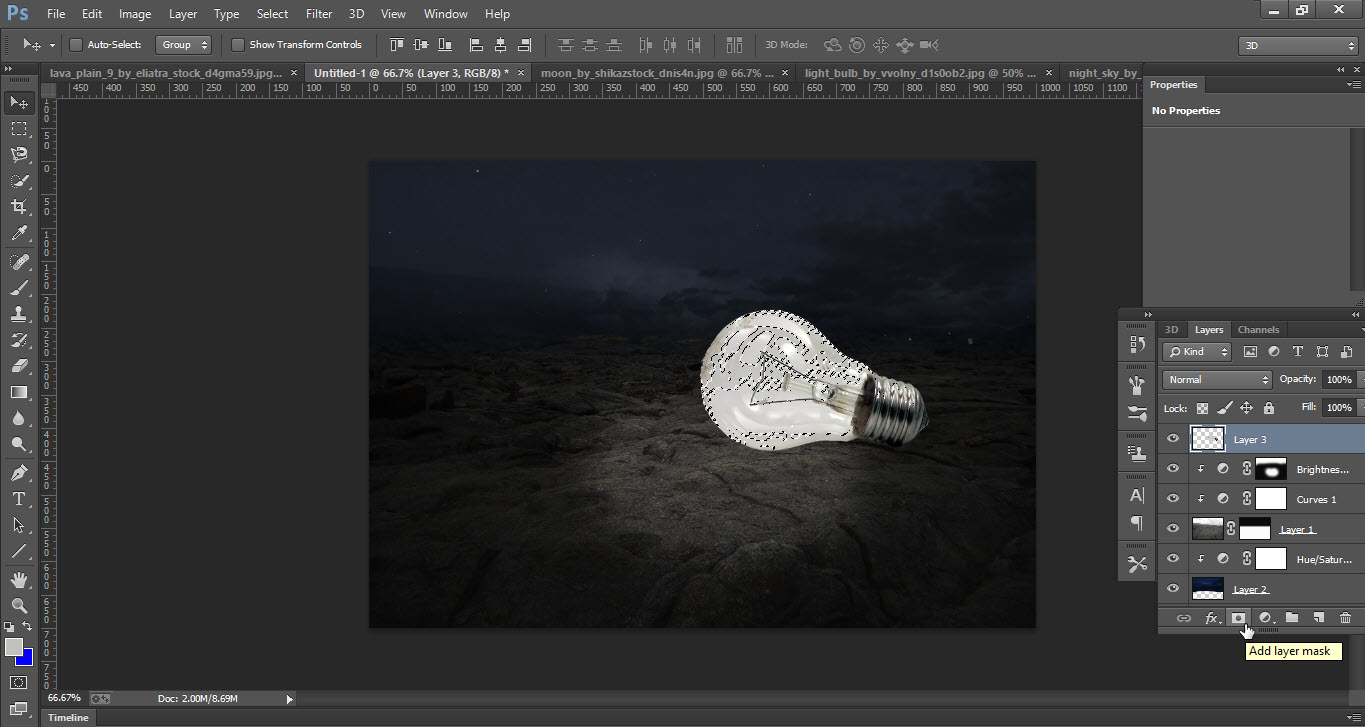
- Now apply Mask by clicking on the Add Layer Mask button.
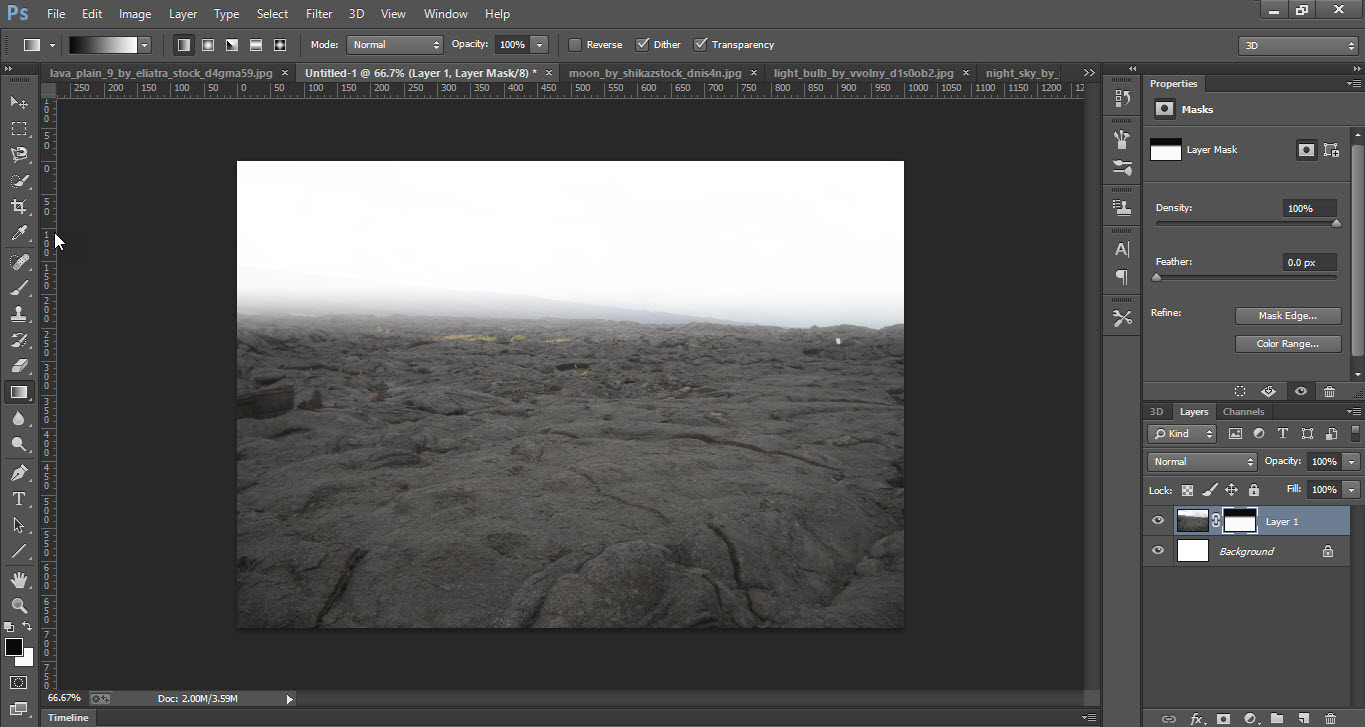
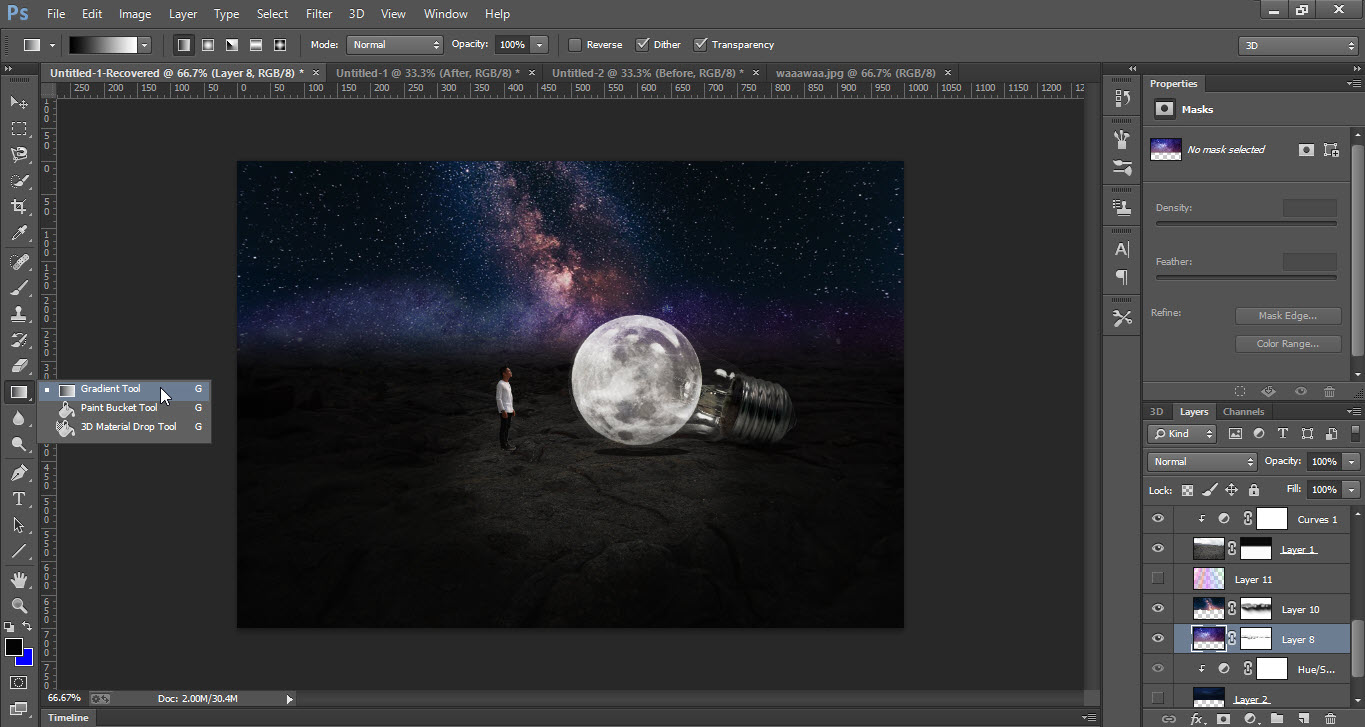
- Then go to the Tool Bar and select Gradient Tool and apply the gradient from top to bottom.
 1.1
1.1
 1.2
1.2
 1.3
1.3
 1.4
1.4
 1.5
1.5
 1.6
1.6
 1.7
1.7
Step 02
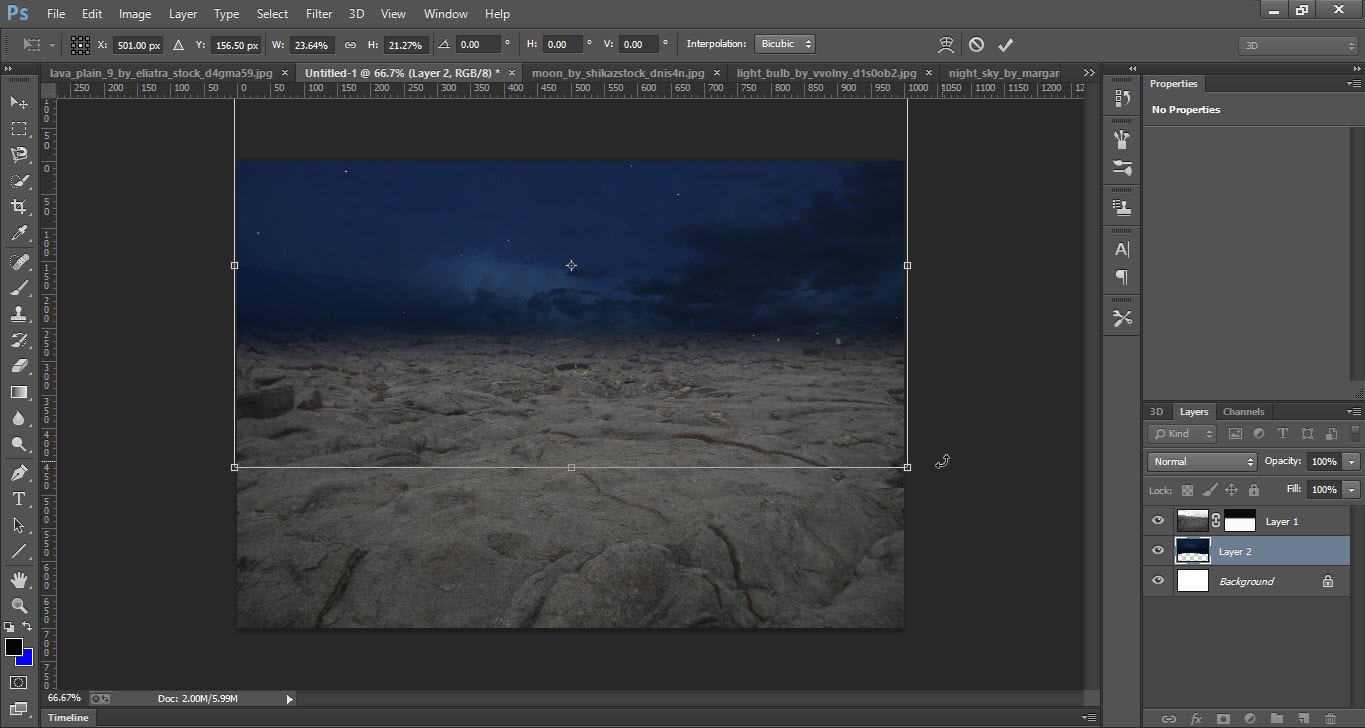
- Now go to the Sky image and unlock the background layer.
- Drage the Sky image to the Lava-Plain image.
- Keep the sky layer below the Lava-Plain image layer and adjust the sky.
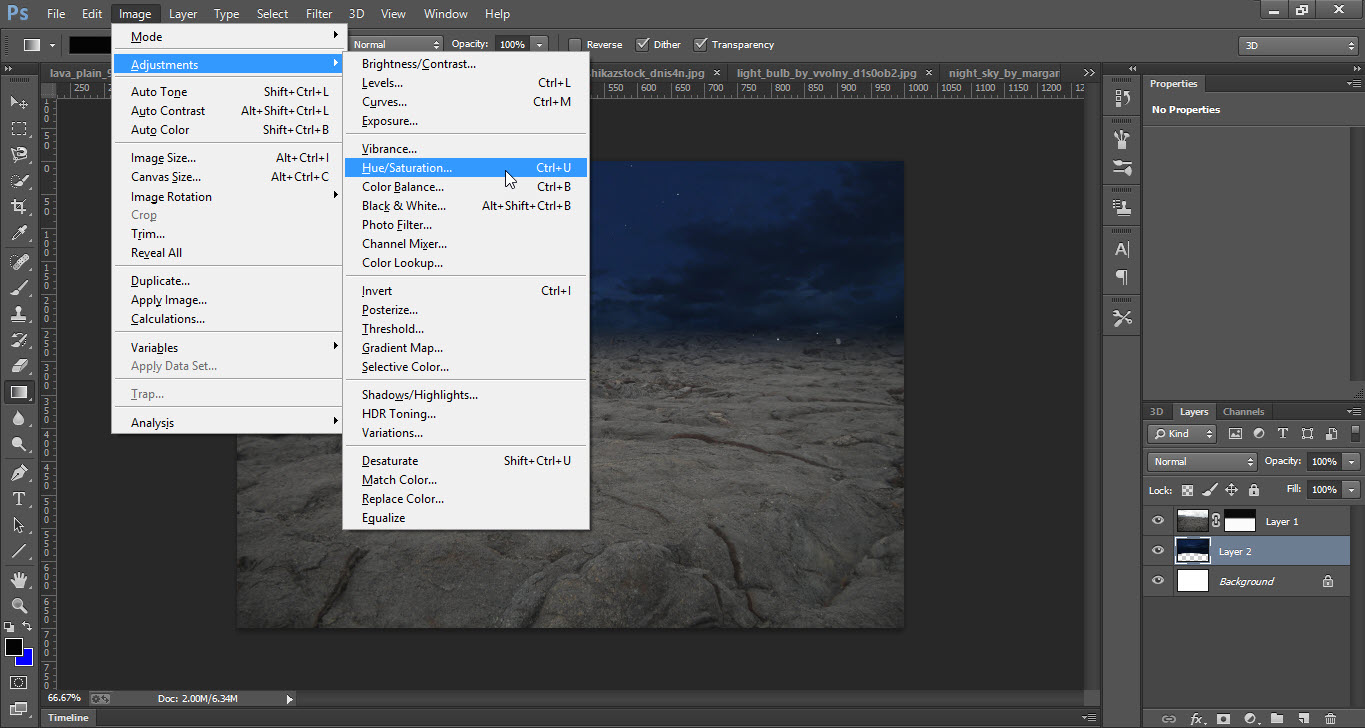
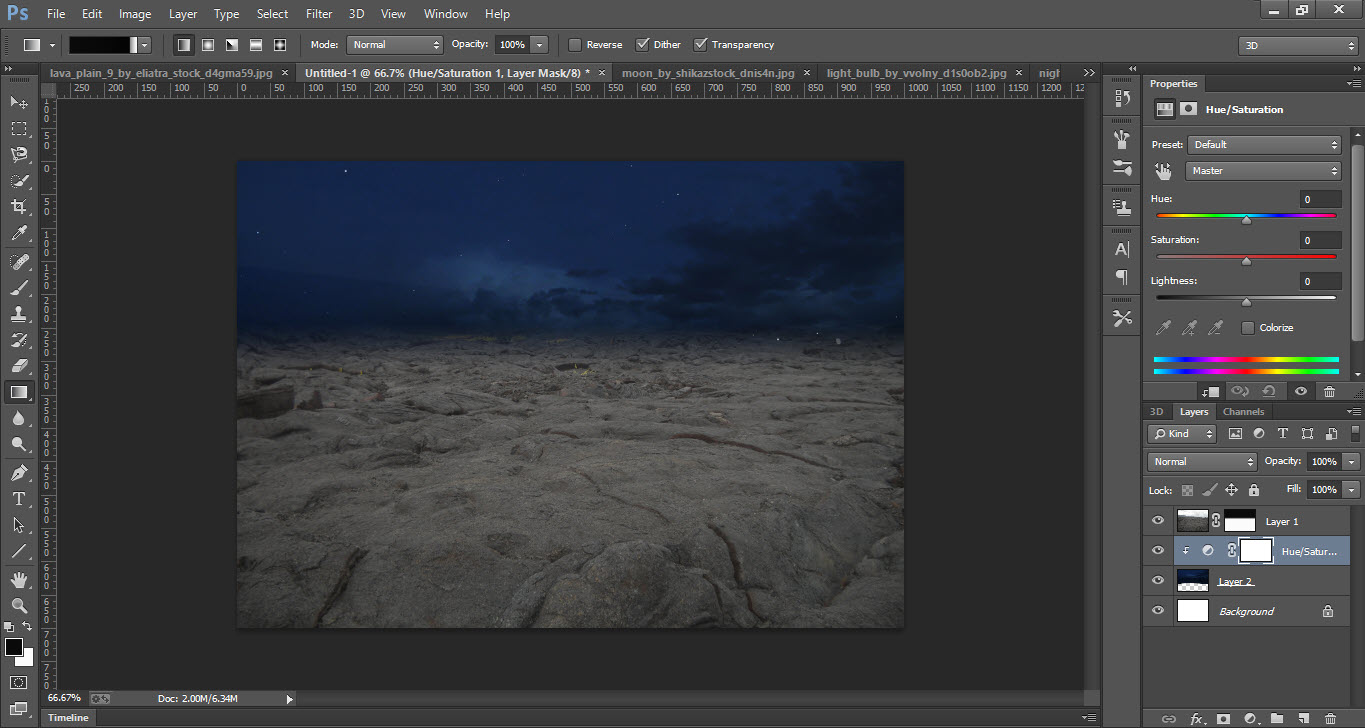
- Now go to the Image menu then to the Adjustments option and click on the Hue/Saturation option.
- Adjust the saturation level by dragging left or right.
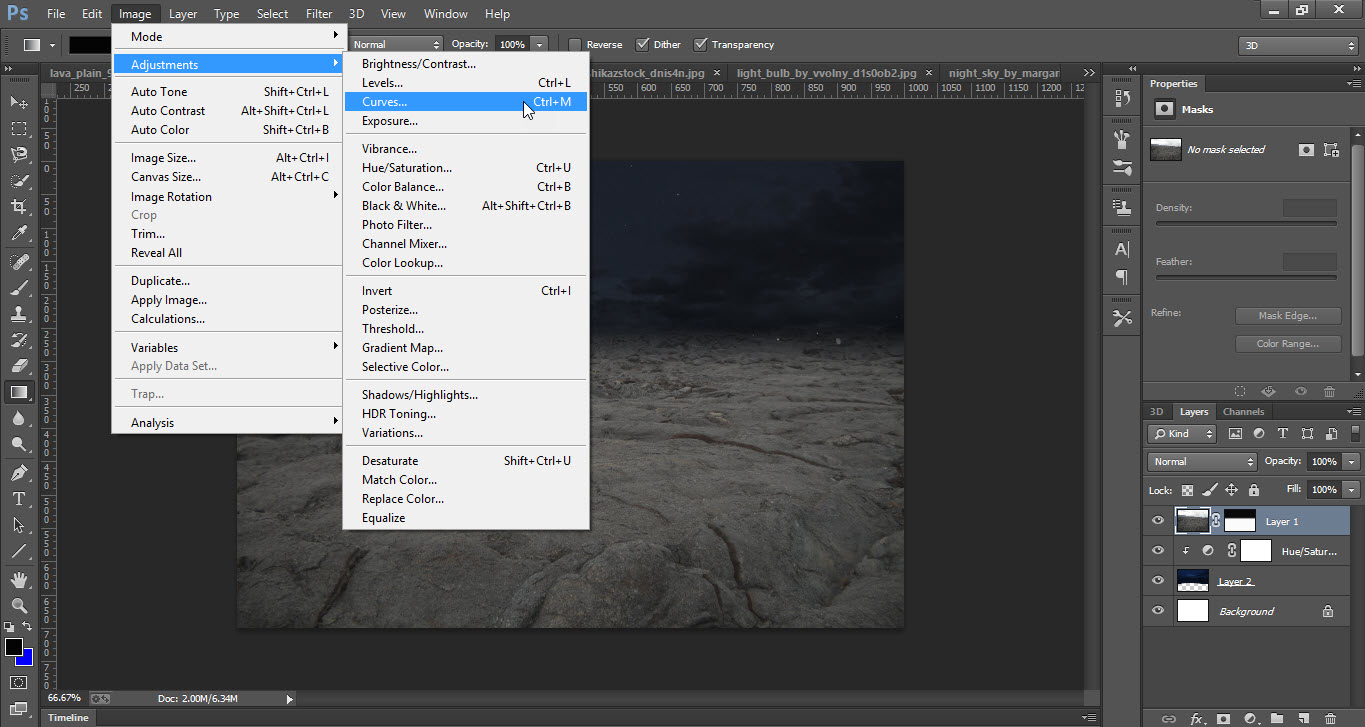
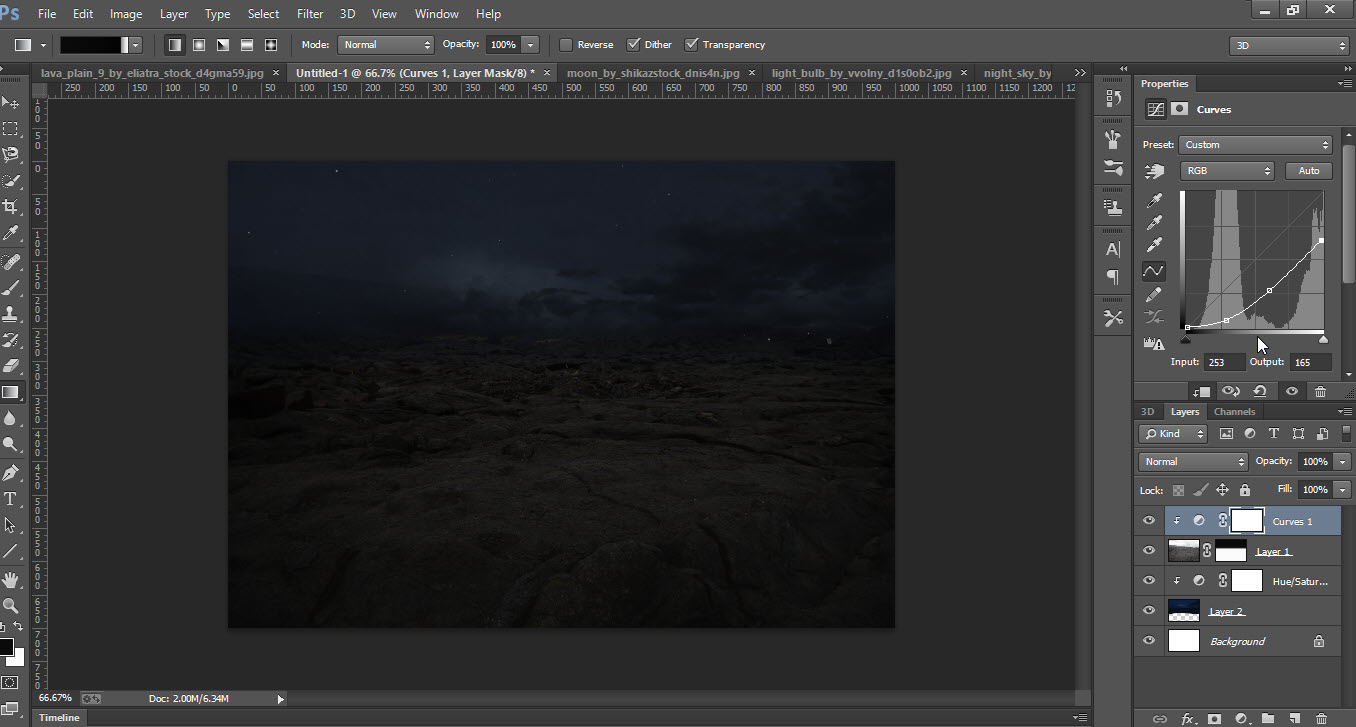
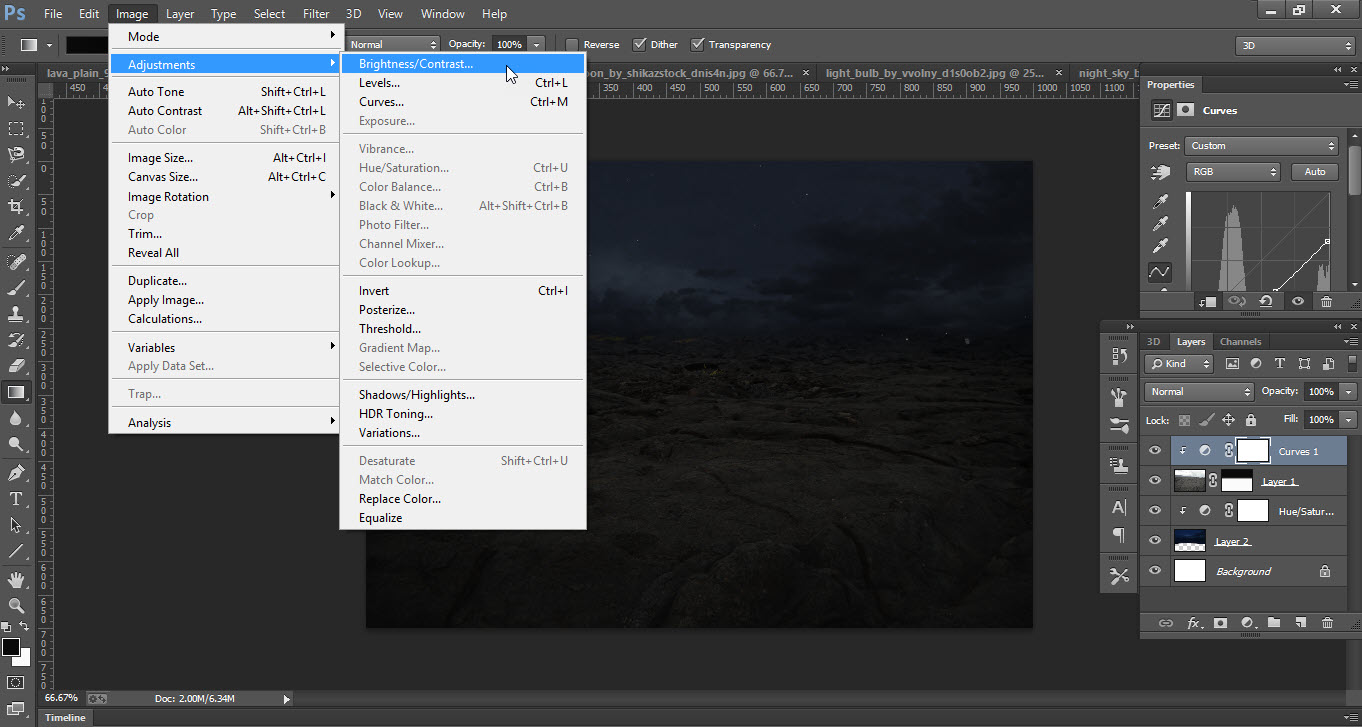
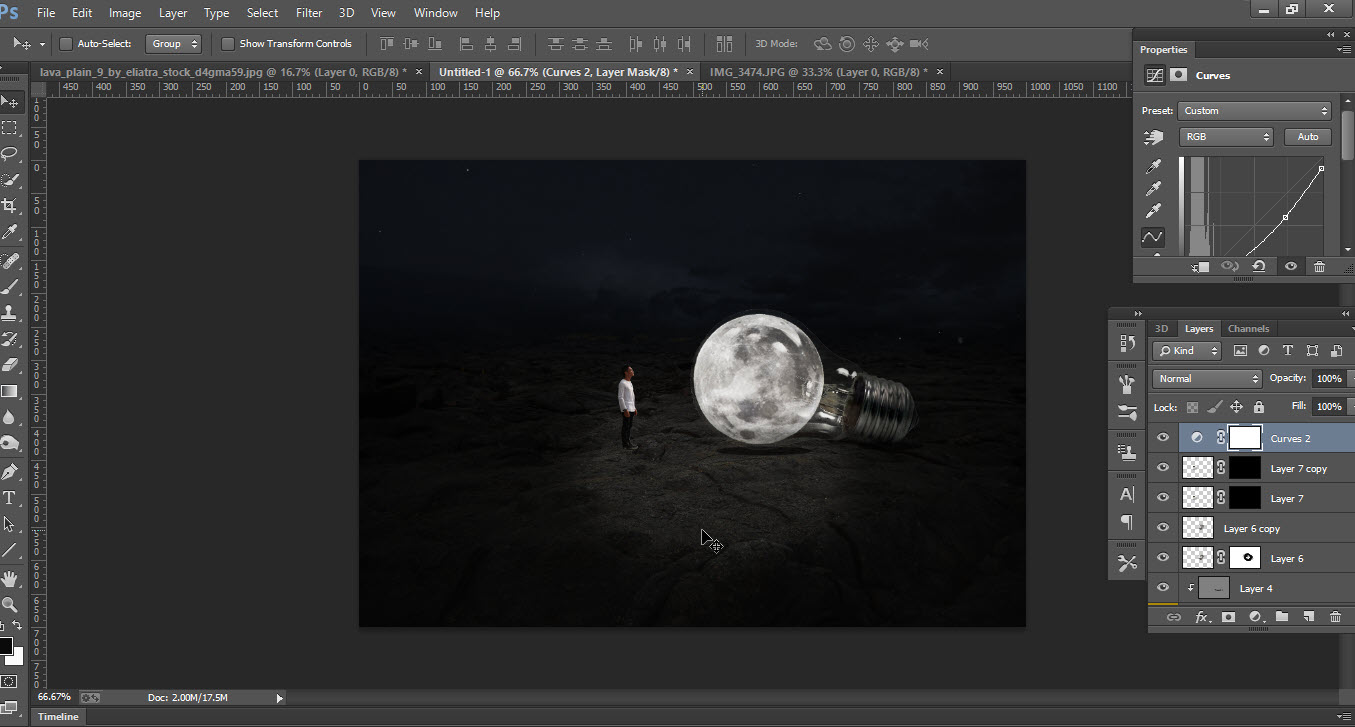
- Now go to the Lava-Plain image layer and again go to the adjustment menu and click on the Curves option(you can also use Ctrl+M) Adjust the level of the Curves.
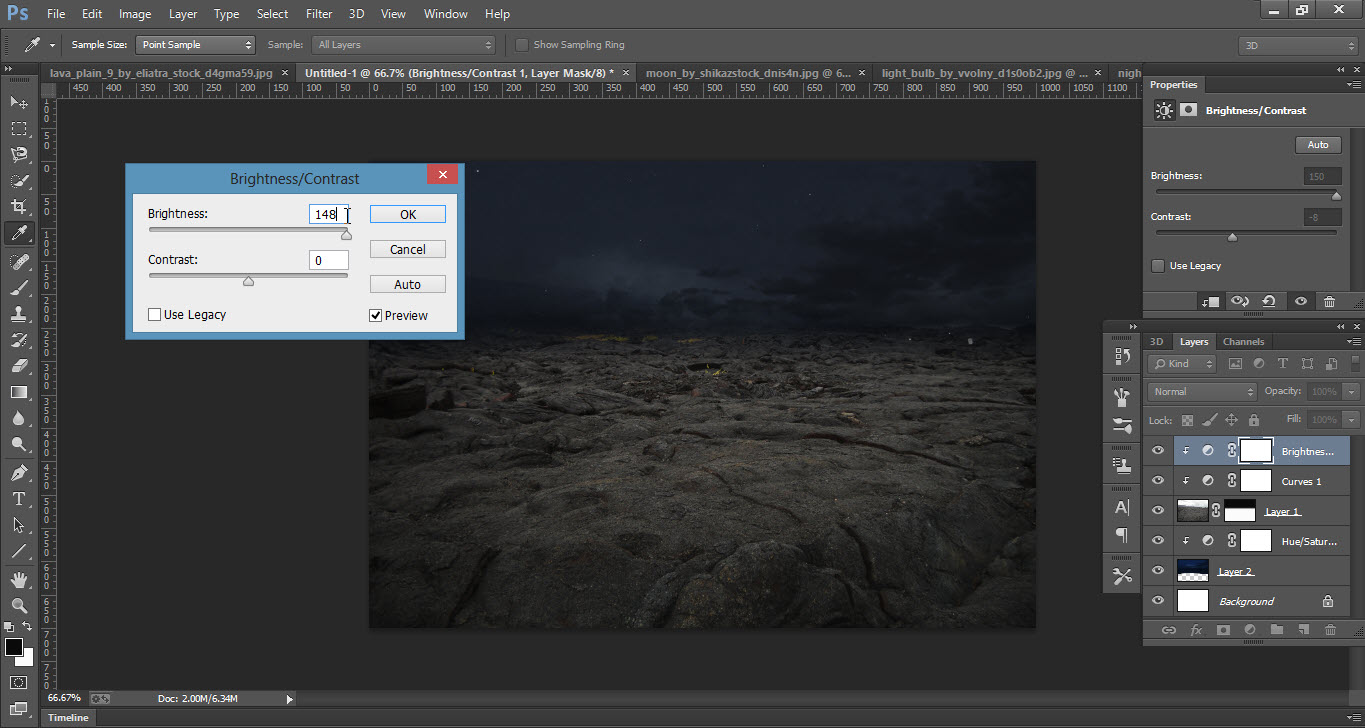
- Again go to the Image menu then to the Adjustment option and click on the Brightness/Contrast option.
- Now increase the brightness up to 100%.
 2.1
2.1
 2.2
2.2
 2.3
2.3
 2.4
2.4
 2.5
2.5
 2.6
2.6
 2.7
2.7
Step 03
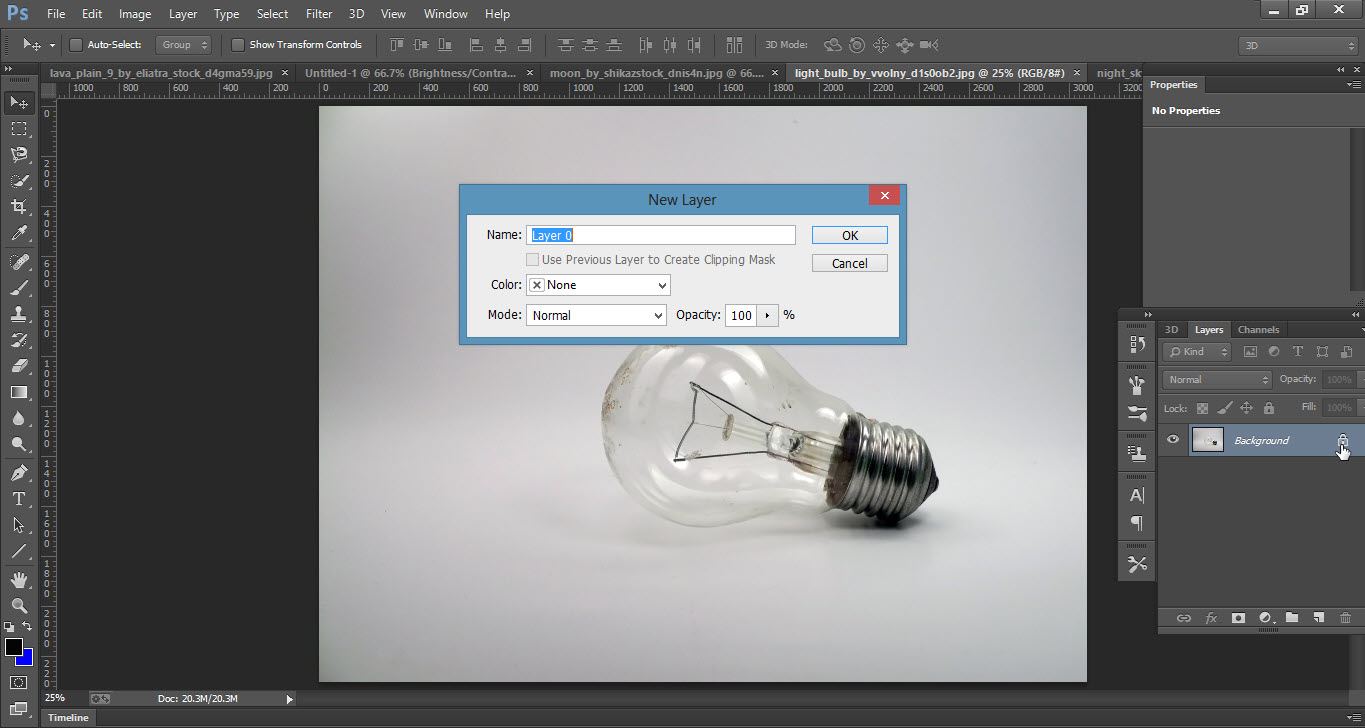
- Now open the Bulb image.
- Unlock the image background layer.
- Take the Pen Tool and make the selection of the Bulb.
- Now drag the Bulb and place it on the Lava-Plain image.
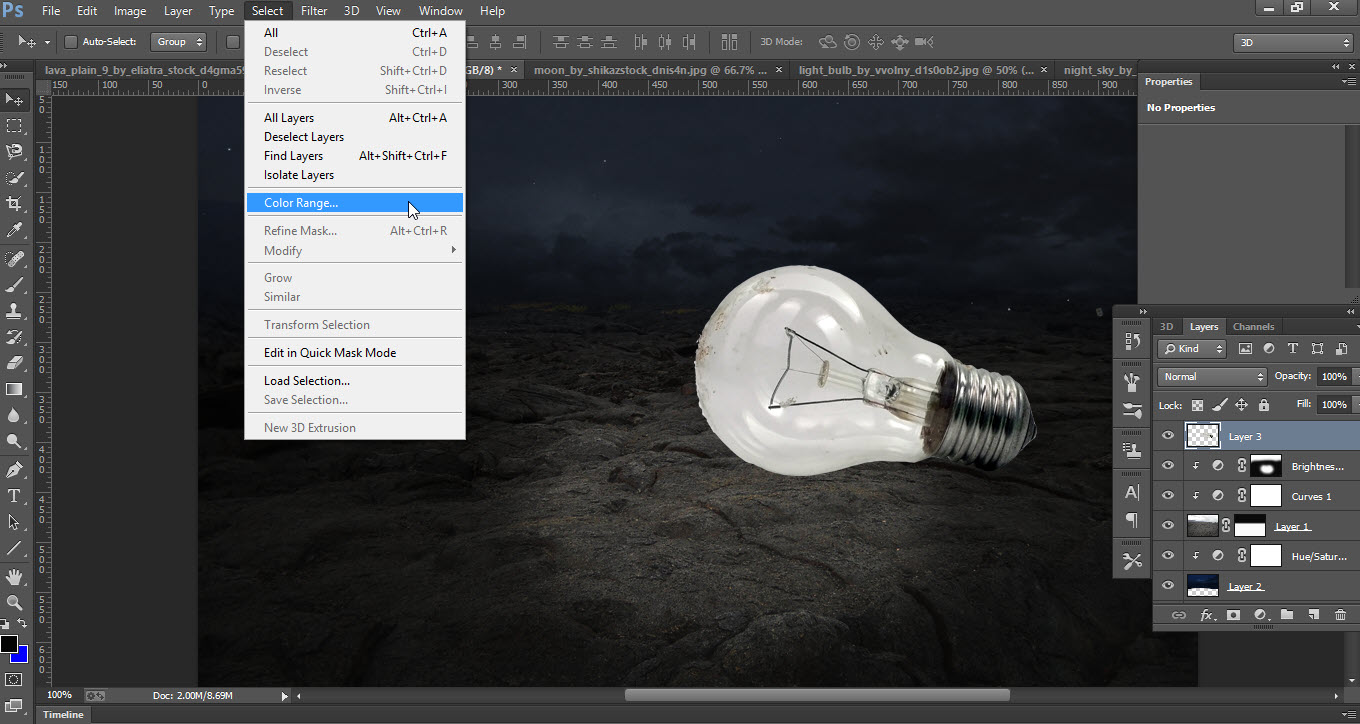
- Go to the Select Menu and click on Color Rang option.
- Now adjust the Fuzziness and also select the Selection Preview as Grayscale.
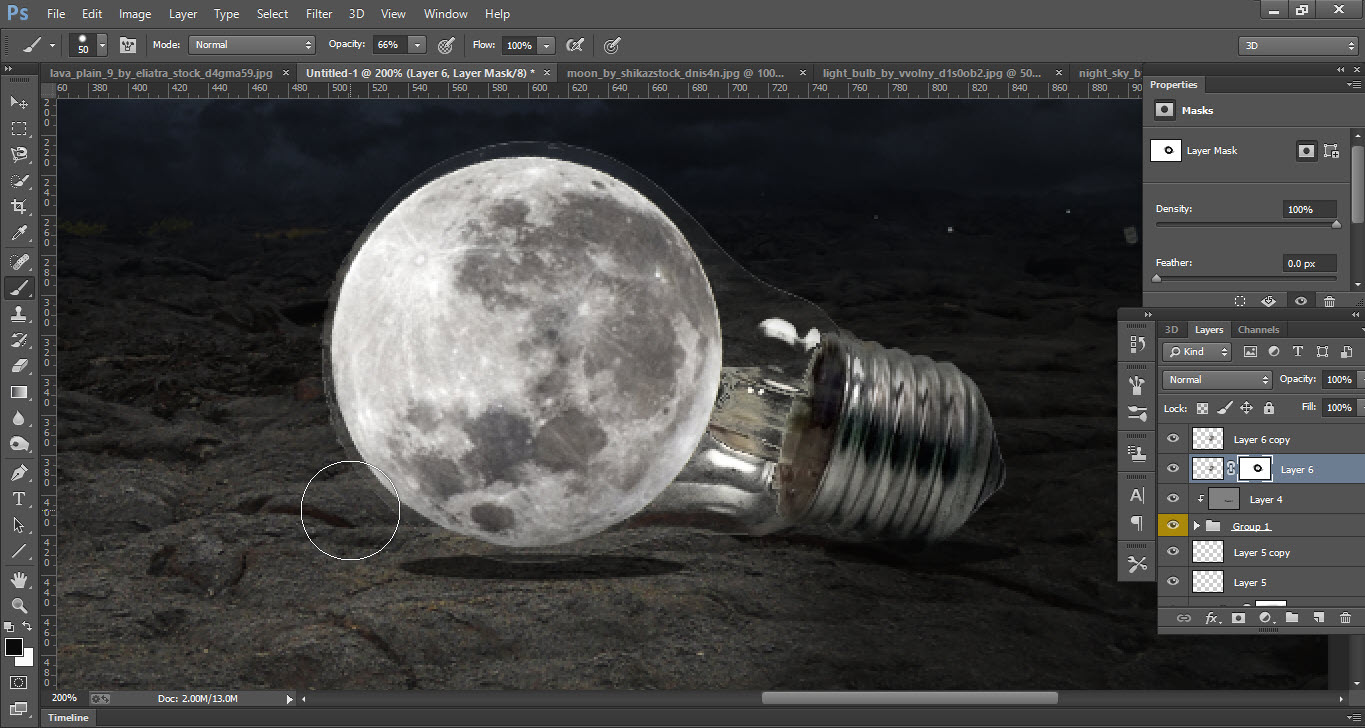
- Open the Moon image and drag it to the Lava-Plain image.
- Now press Ctrl+T and resize the moon size of the bulb according to the Bulb.
- Now apply Mask to the same layer then take the Brush Tool and start brushing around the moon.
 3.1
3.1
 3.2
3.2
 3.3
3.3
 3.4
3.4
Step 04
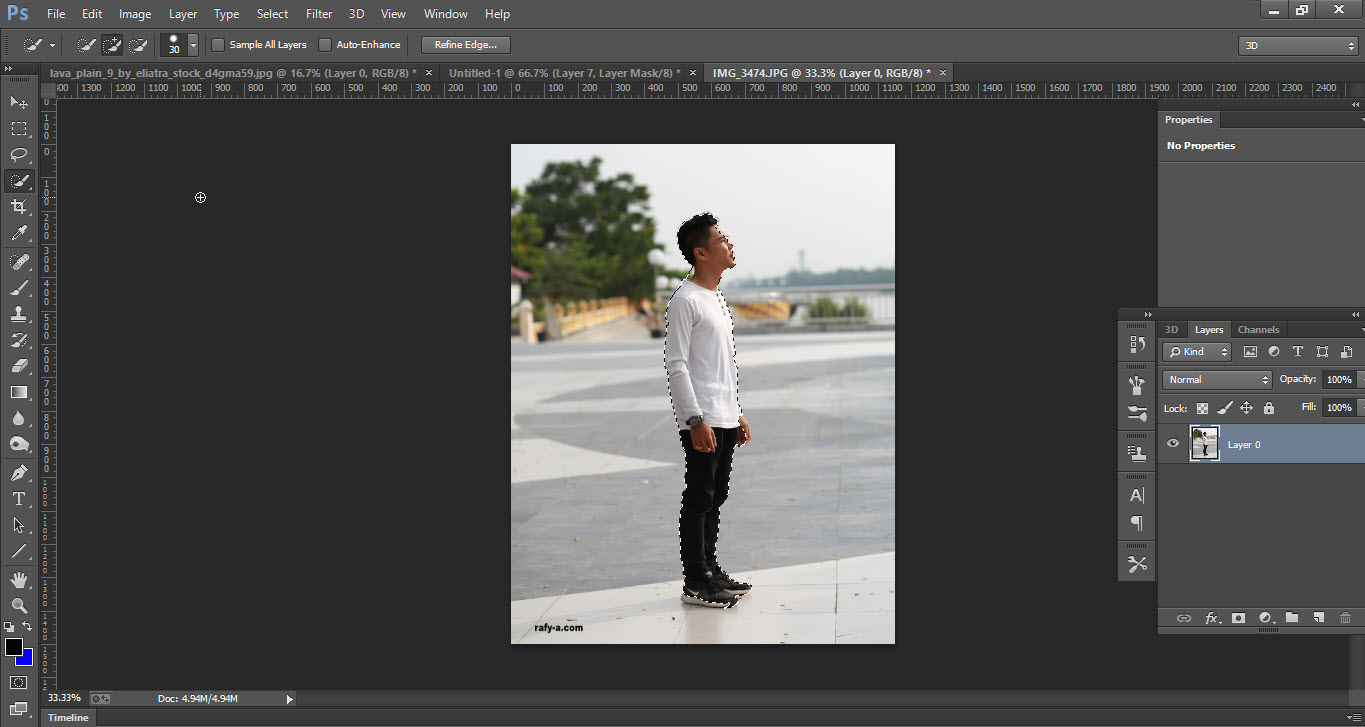
- Now open the Boy image and make a selection(you can use any Selection Tool).
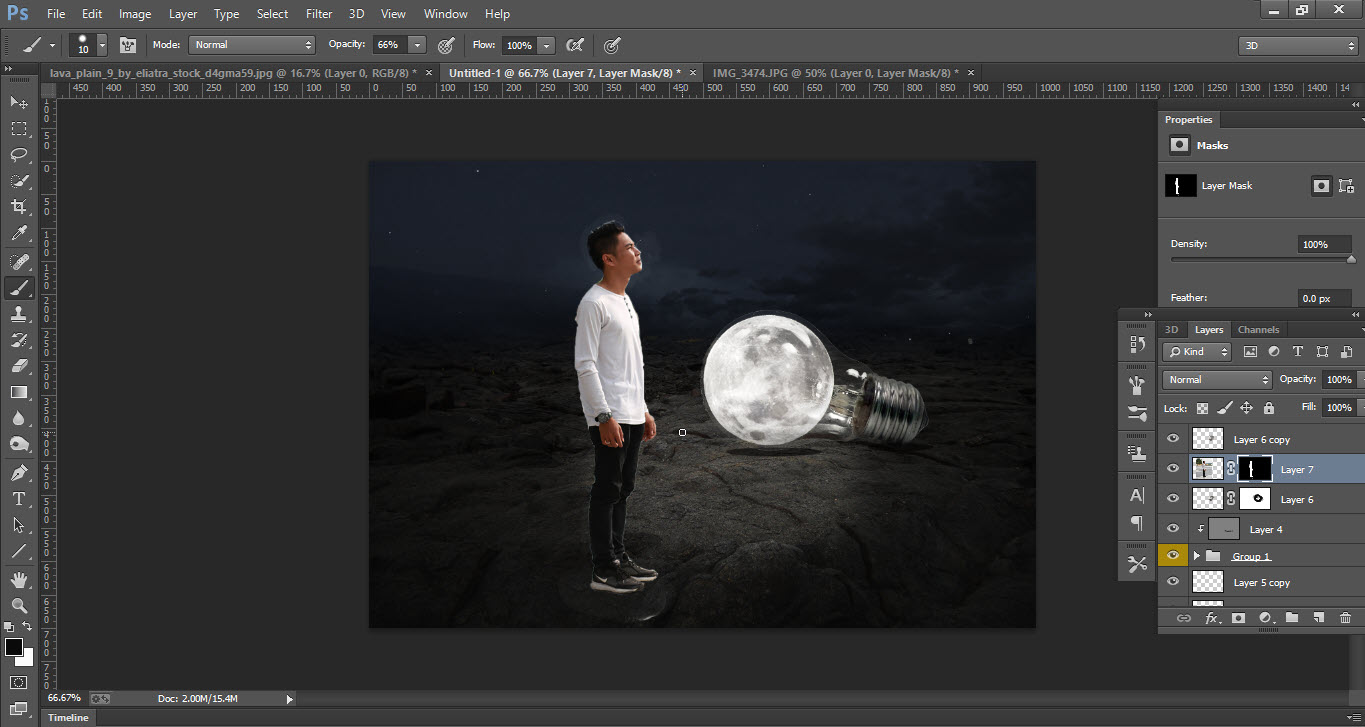
- Drag the boy to the Lava-Plain image.
- The press Ctrl+T and resize the boy.
- Now make a copy of the same layer.
- Go to image the go to the Adjustments and select the option Curves.
- Adjust the curves according to your view.
- And finally, it’s ready.
 4.1
4.1
 4.2
4.2
 4.3
4.3
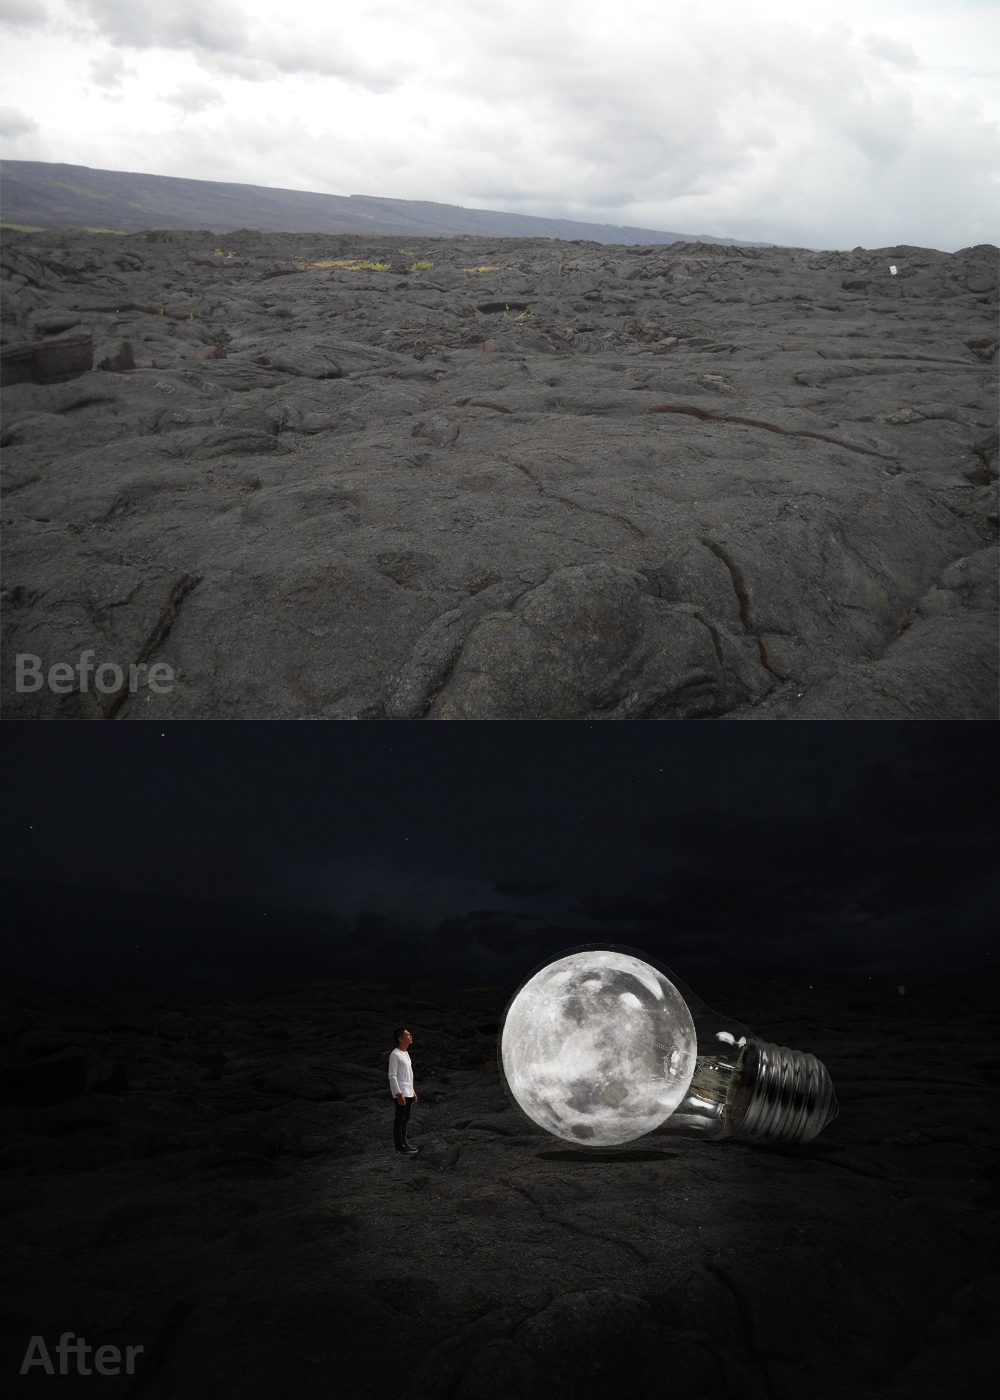
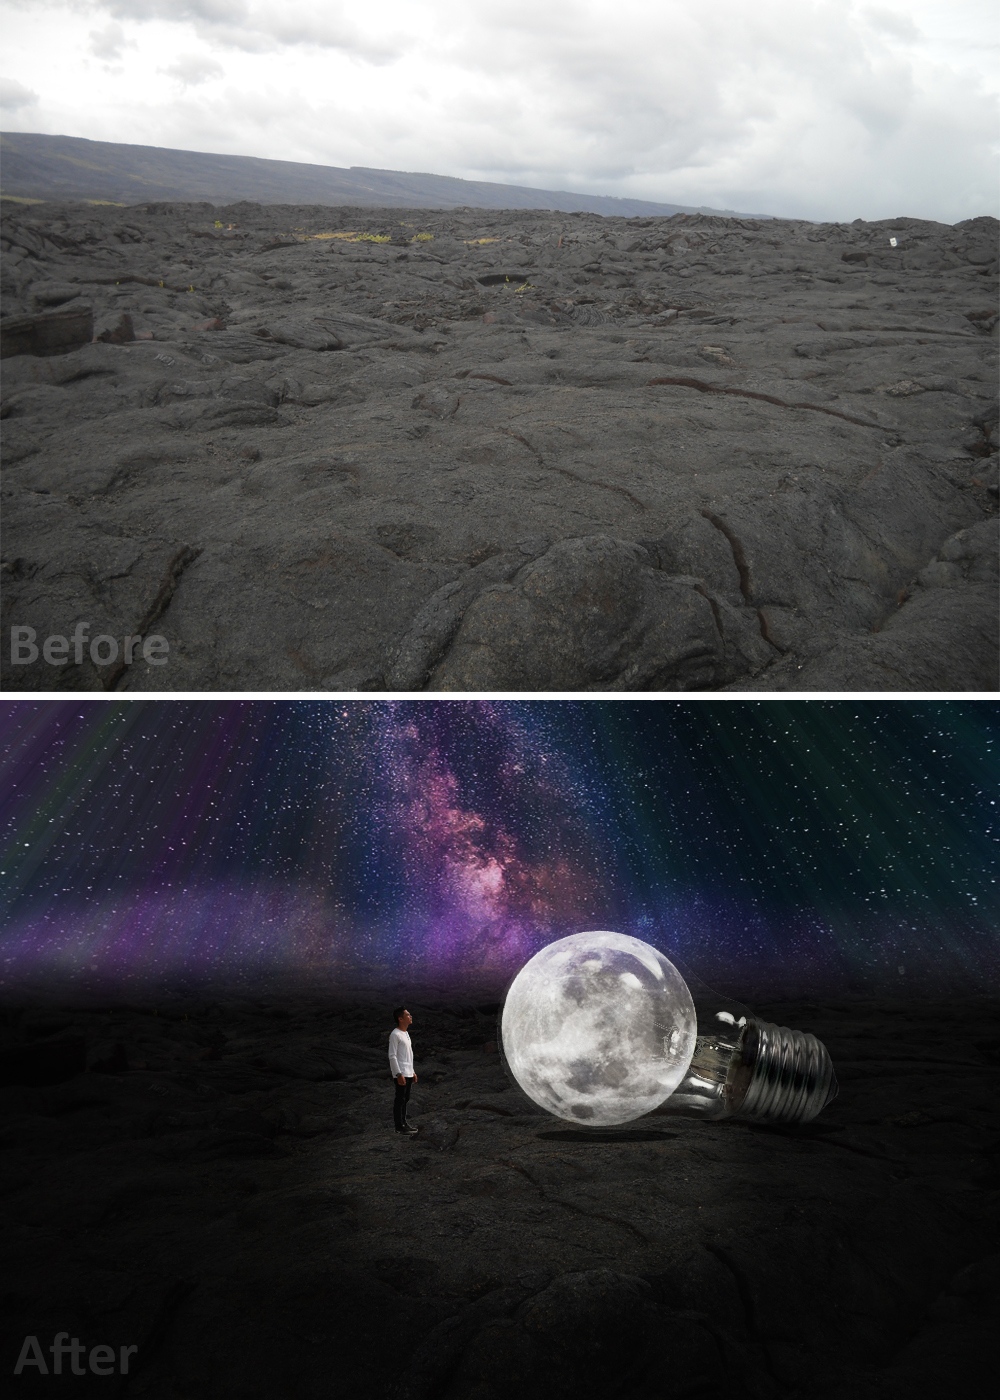
This is how the final result looks like
 Final Out come
If u want to have a different sky you can follow below steps
Step 05
- First, open the sky image which you want to add.
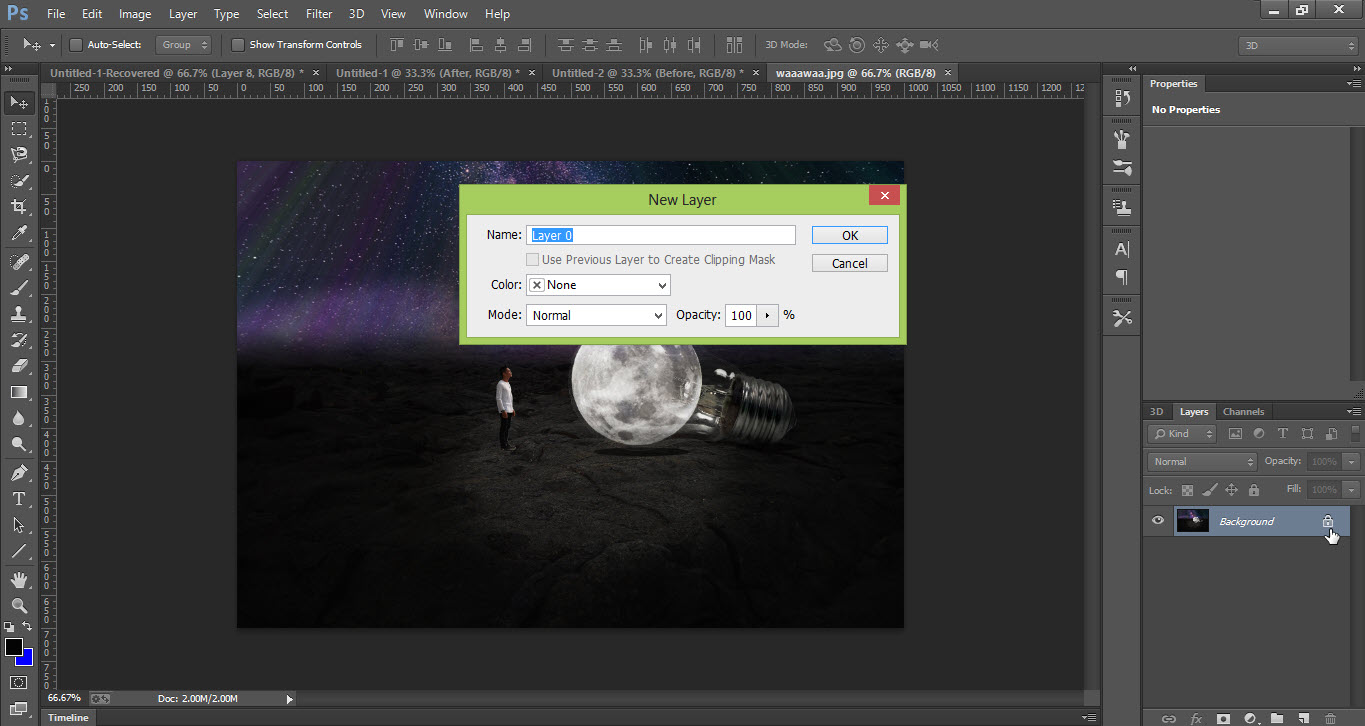
- Unlock the sky background layer by double-clicking on the lock.
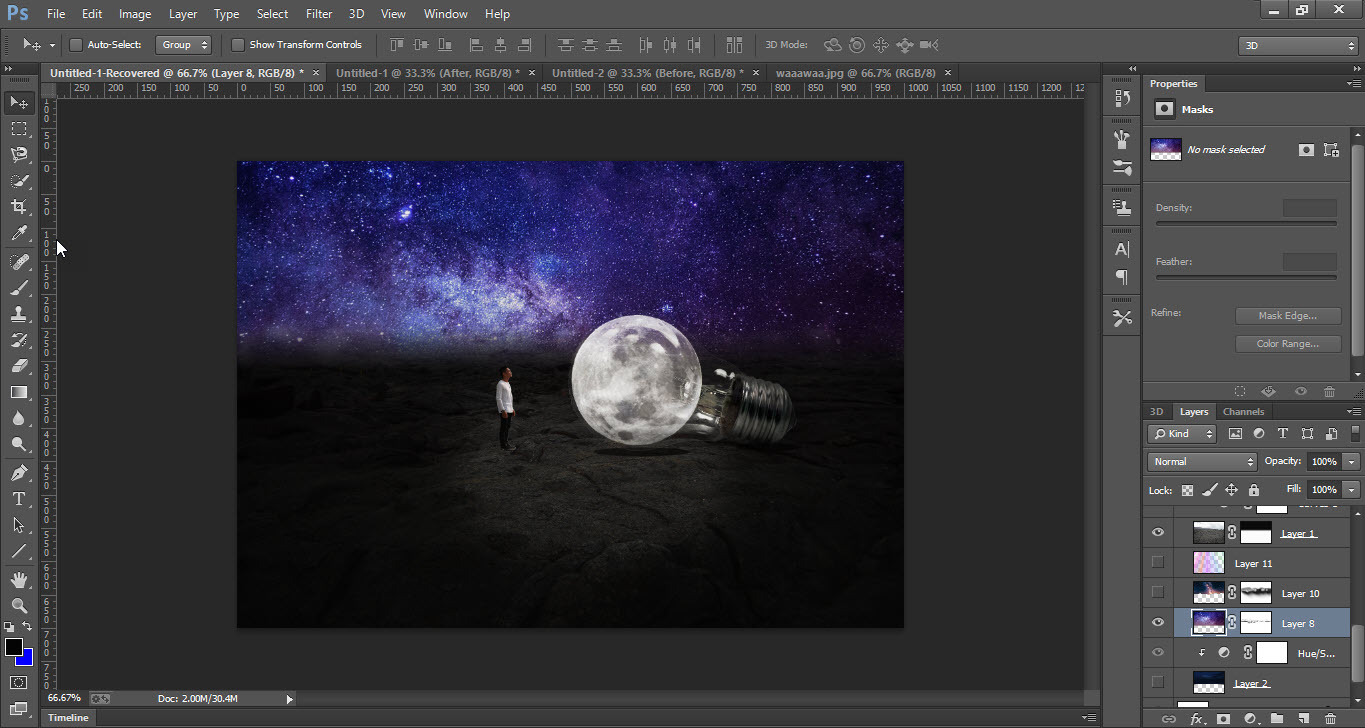
- Now drag the sky image and keep it above the original sky layer.
- Now go to the “Tool Bar” and select the “Gradient Tool”.
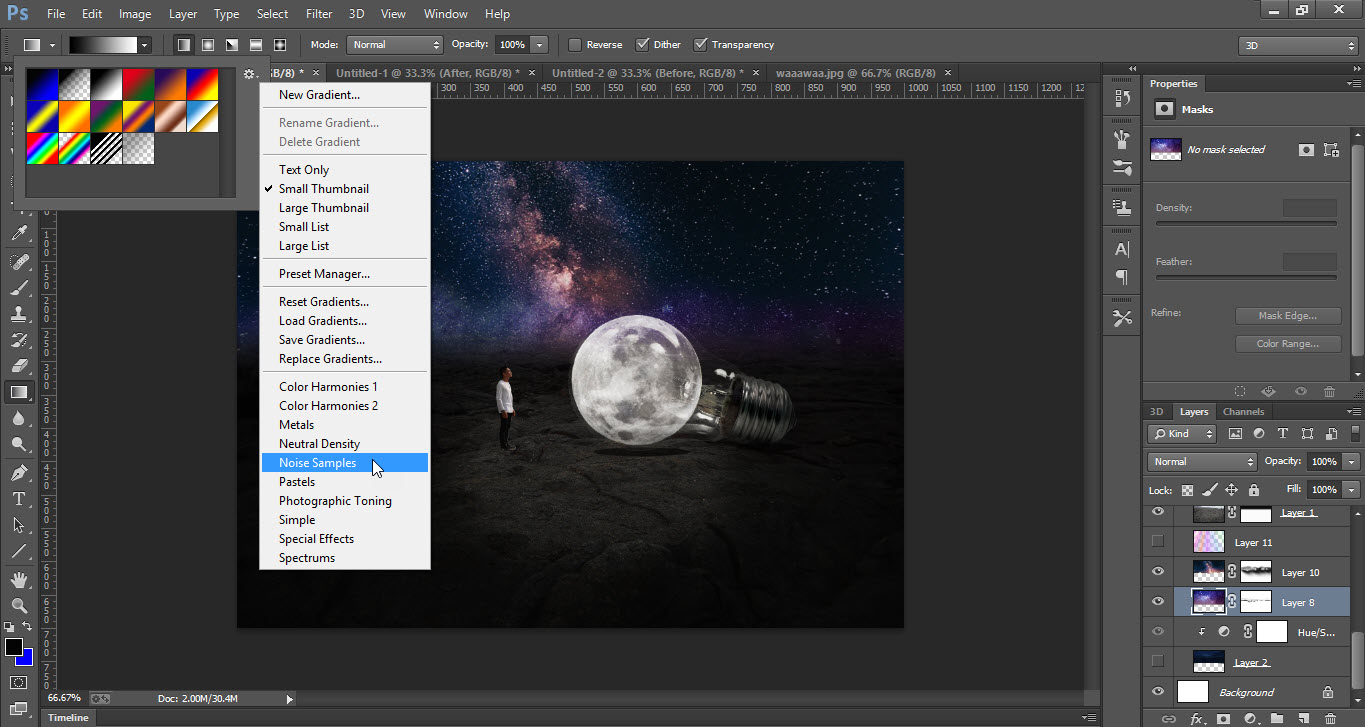
- Go to the gradient menu and select “Noise Samples”.
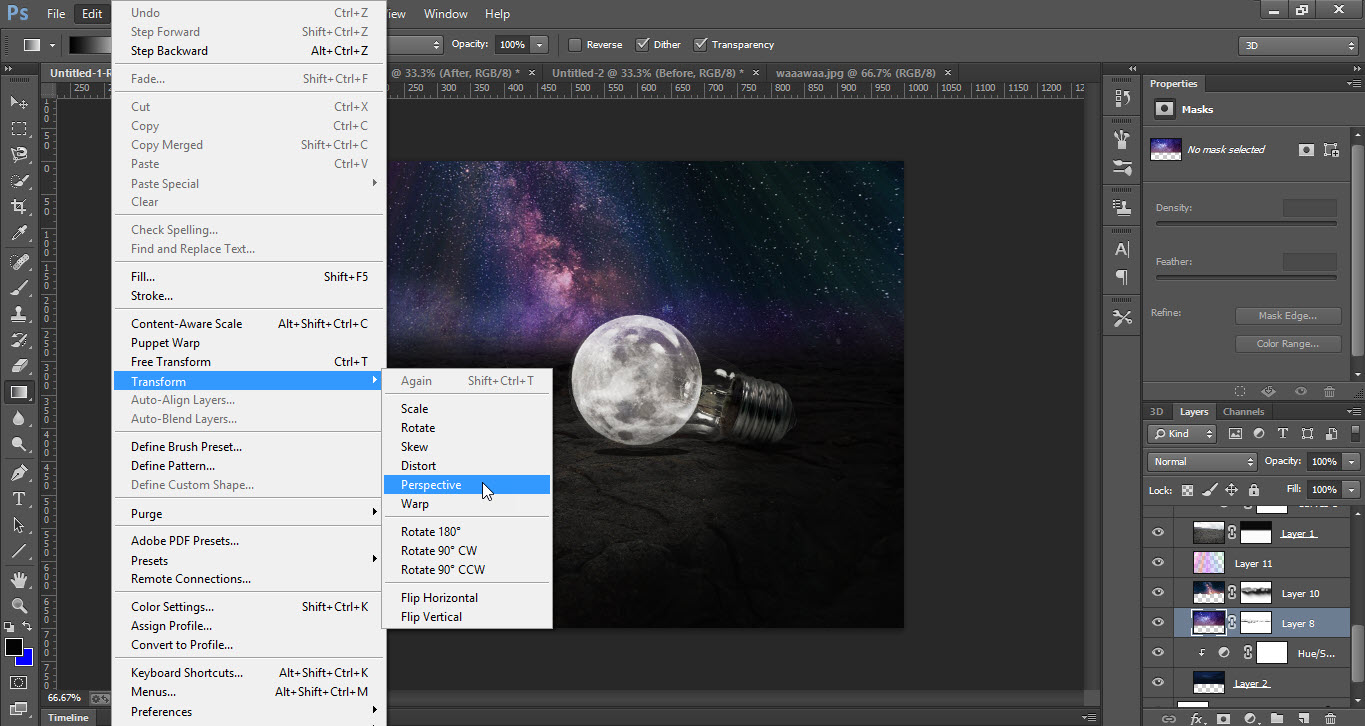
- Now go to the “Edit” menu then open the “Transform” menu and select the “Perspective”.
- Now adjust the light beam as you want.
- Hence new galaxy sky is added to photo.
 5.1
5.1
 5.2
5.2
 5.3
5.3
 5.4
5.4
 5.5
5.5
 5.1
5.1
Here is the final outcome
 Final Out come
