Information is created every second in every industry and thus a tool is needed to take backup of all that important information and data. Netbackup is one of the very useful tool for taking backup of our important data. Symantec Netbackup is one of the most used backup tool in IT industry which provide enterprise level solutions.
Whenever you first install any backup software, you have to configure storage devices so that data can be saved there. Some of the examples of Storage devices are CD, DVD, USB drive, Hard disks, etc.
But in industries we use some special and big capacity storage devices like magnetic tapes and network storage like SAN and NAS. Generally robotic storage is used which is a collection of a large number of magnetic tapes.
Recommended Article: 3 Must have Storage Books for Beginners
So now let’s begin and learn how to configure storage device in Netbackup. Though for this tutorial I will be using my computer hard disk as a storage device.
Steps to Configure Storage Device in Netbackup
1. After installation of your Symantec Netbackup software, open it and you will see start-up/welcome screen and the software will ask you to configure storage devices for the first time.
If you have canceled this step you can again open it through Netbackup administration console.
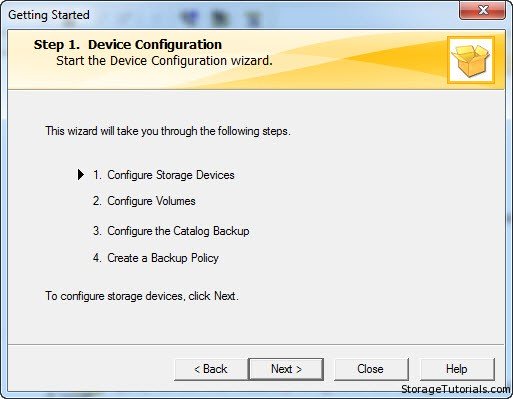
2. Now you will see a device configuration screen and the first step of this wizard will be to configure storage device. Here just click next which will bring you actual device configuration screen, here you also have to click next.
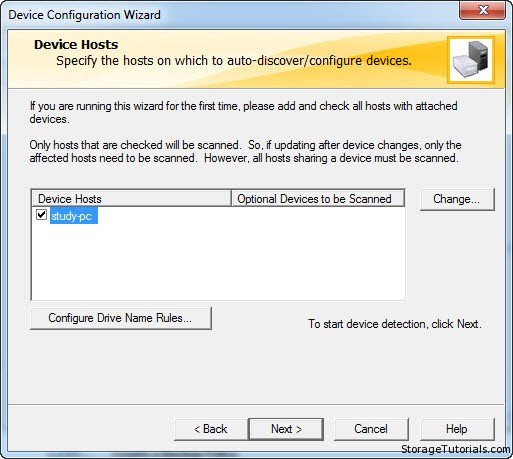
3. Now you have to select the host or server name for which you have to configure the device. Here we are using our laptop name. Click next to proceed.
4. Now Netbackup will scan your host for connected devices, so you should physically attach your storage devices to the server before scanning. And if storage is attached it will show you.
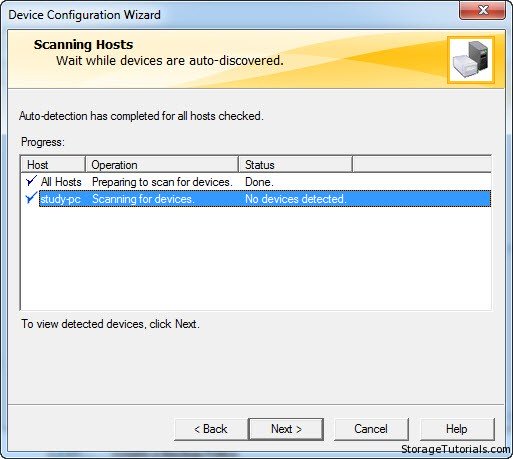
Here as we have not attached any external storage, the scan result will give an error that no devices detected. Not to worry just click next as we have to set our laptop hard disk as a storage device.
5. Now just click on next to proceed to storage configure unit screen where we will select any folder from our disk to store or backup. As shown below check the box which states “create disk storage unit with specified path” and then enter the path.
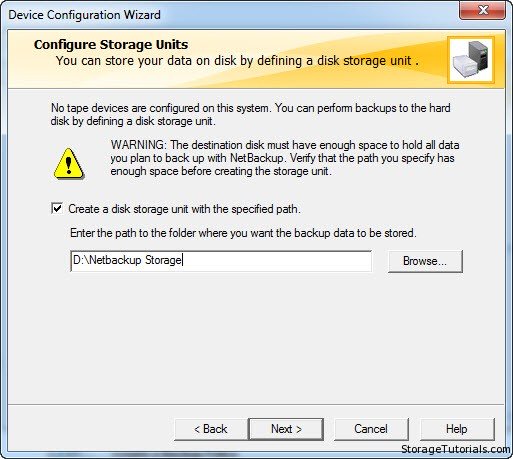
6. After entering your storage path, now Netbackup will add this storage unit to its system and will show you finish screen as below.
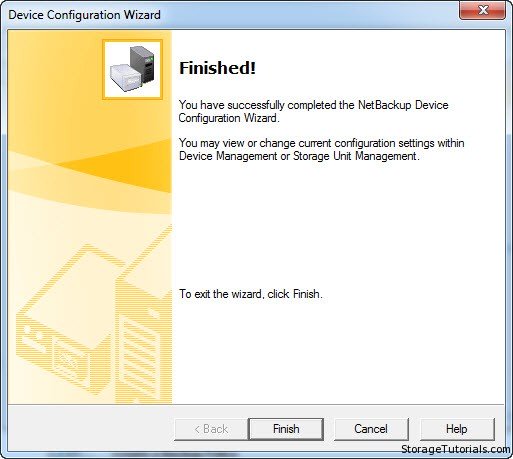
These were some of the simple steps by which you can easily configure storage devices in Netbackup. If you don’t have an actual physical storage device to connect to your host then try using your computer hard disk for test purpose and learning Netbackup tool.
Hope you like this tutorial, if you do, do not forget to subscribe to our blog for more such tutorial and share it with your friends. If you have any doubt, do let us know through your comments.