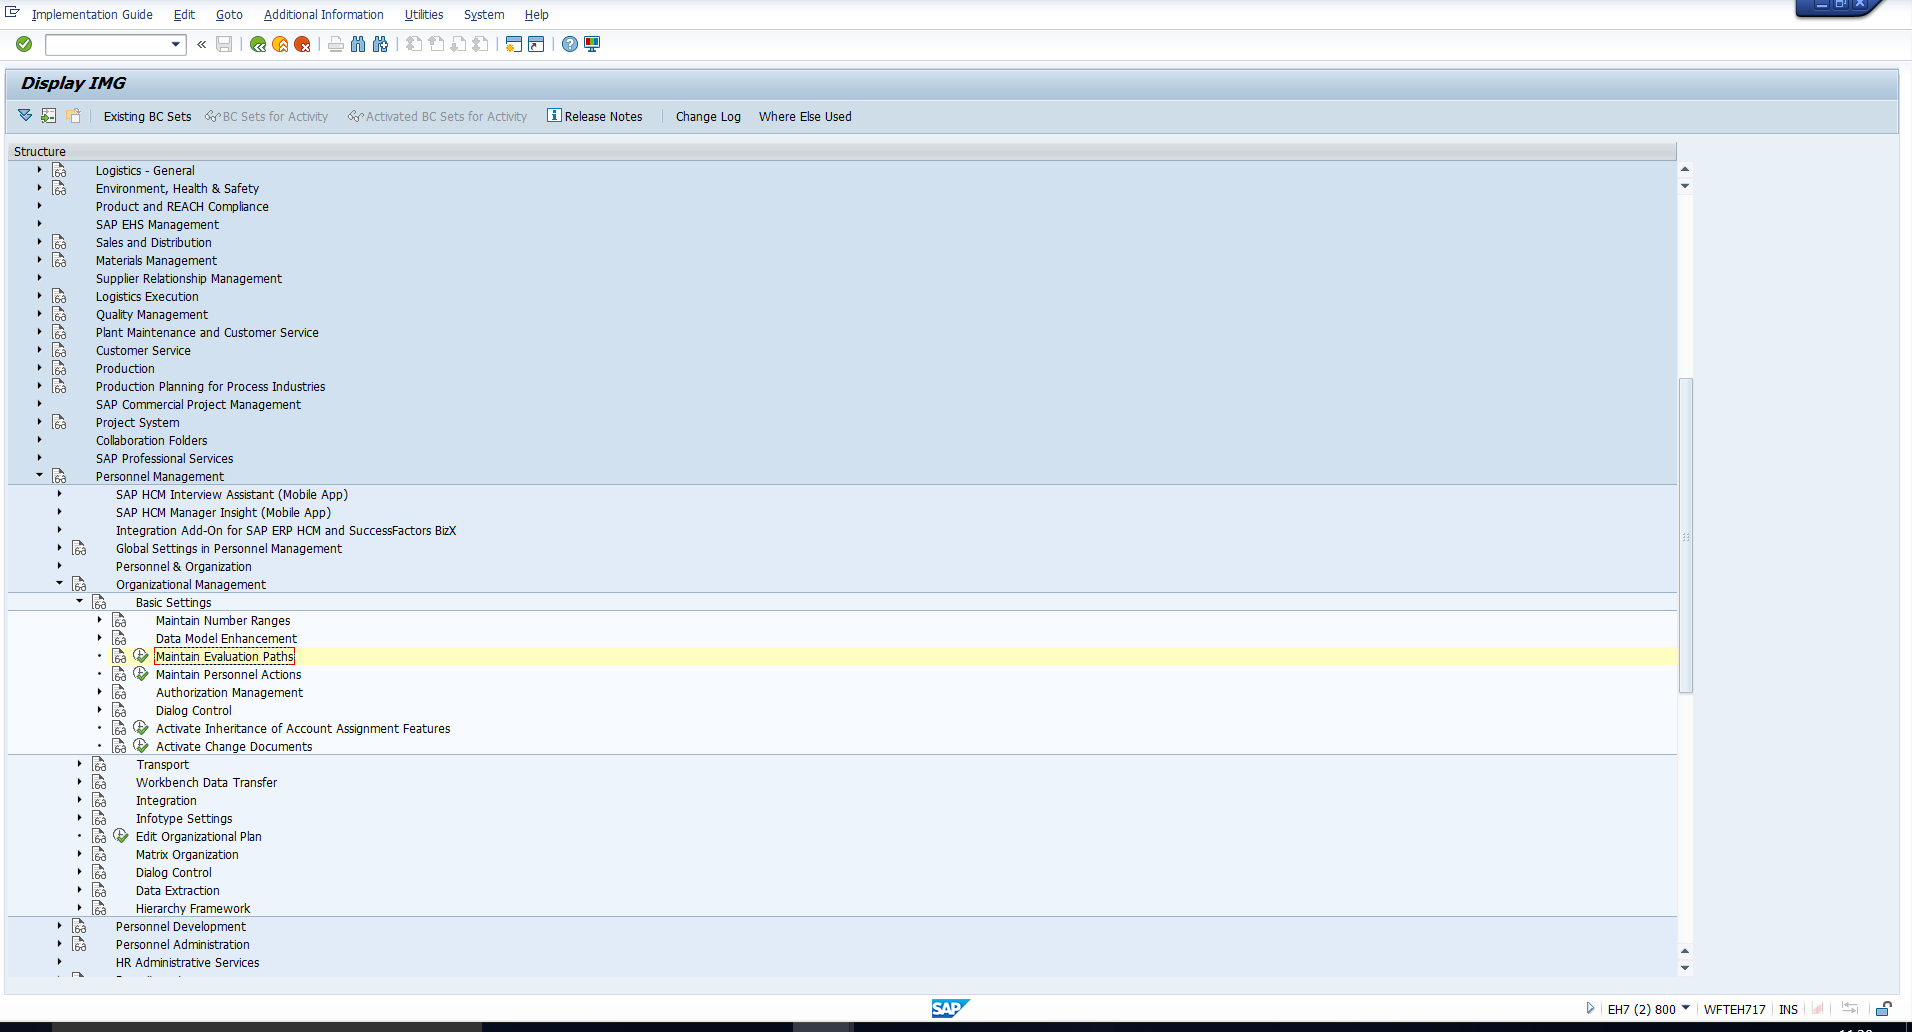
 Figure 1: IMG path for SAP Evaluation Paths
Welcome to the tutorial on SAP Evaluation Paths. As we explained in the tutorial on Structures in Organizational Management, all Organizational Management (OM) structures are built simply through the creation of objects and relationships between these objects. This brings us to the concept of SAP Evaluation Paths. In simple terms, an evaluation path defines the objects and the relationships among objects that must be selected by the system to generate a structure.
For example, consider the Organizational Structure, which was explained in that tutorial. This structure is built by using the standard Evaluation Path ORGEH – Organizational structure. This Evaluation path is standard in the sense that it is preconfigured and delivered by SAP. We can see the configuration of this evaluation path by following the below IMG path:
Personnel Management – Organizational Management – Basic settings – Maintain Evaluation Paths
This path has been depicted in Figure 1 below.
 Figure 1: IMG path for SAP Evaluation Paths
The screen that follows is shown in Figure 2. You can see all the existing SAP Evaluation Paths here.
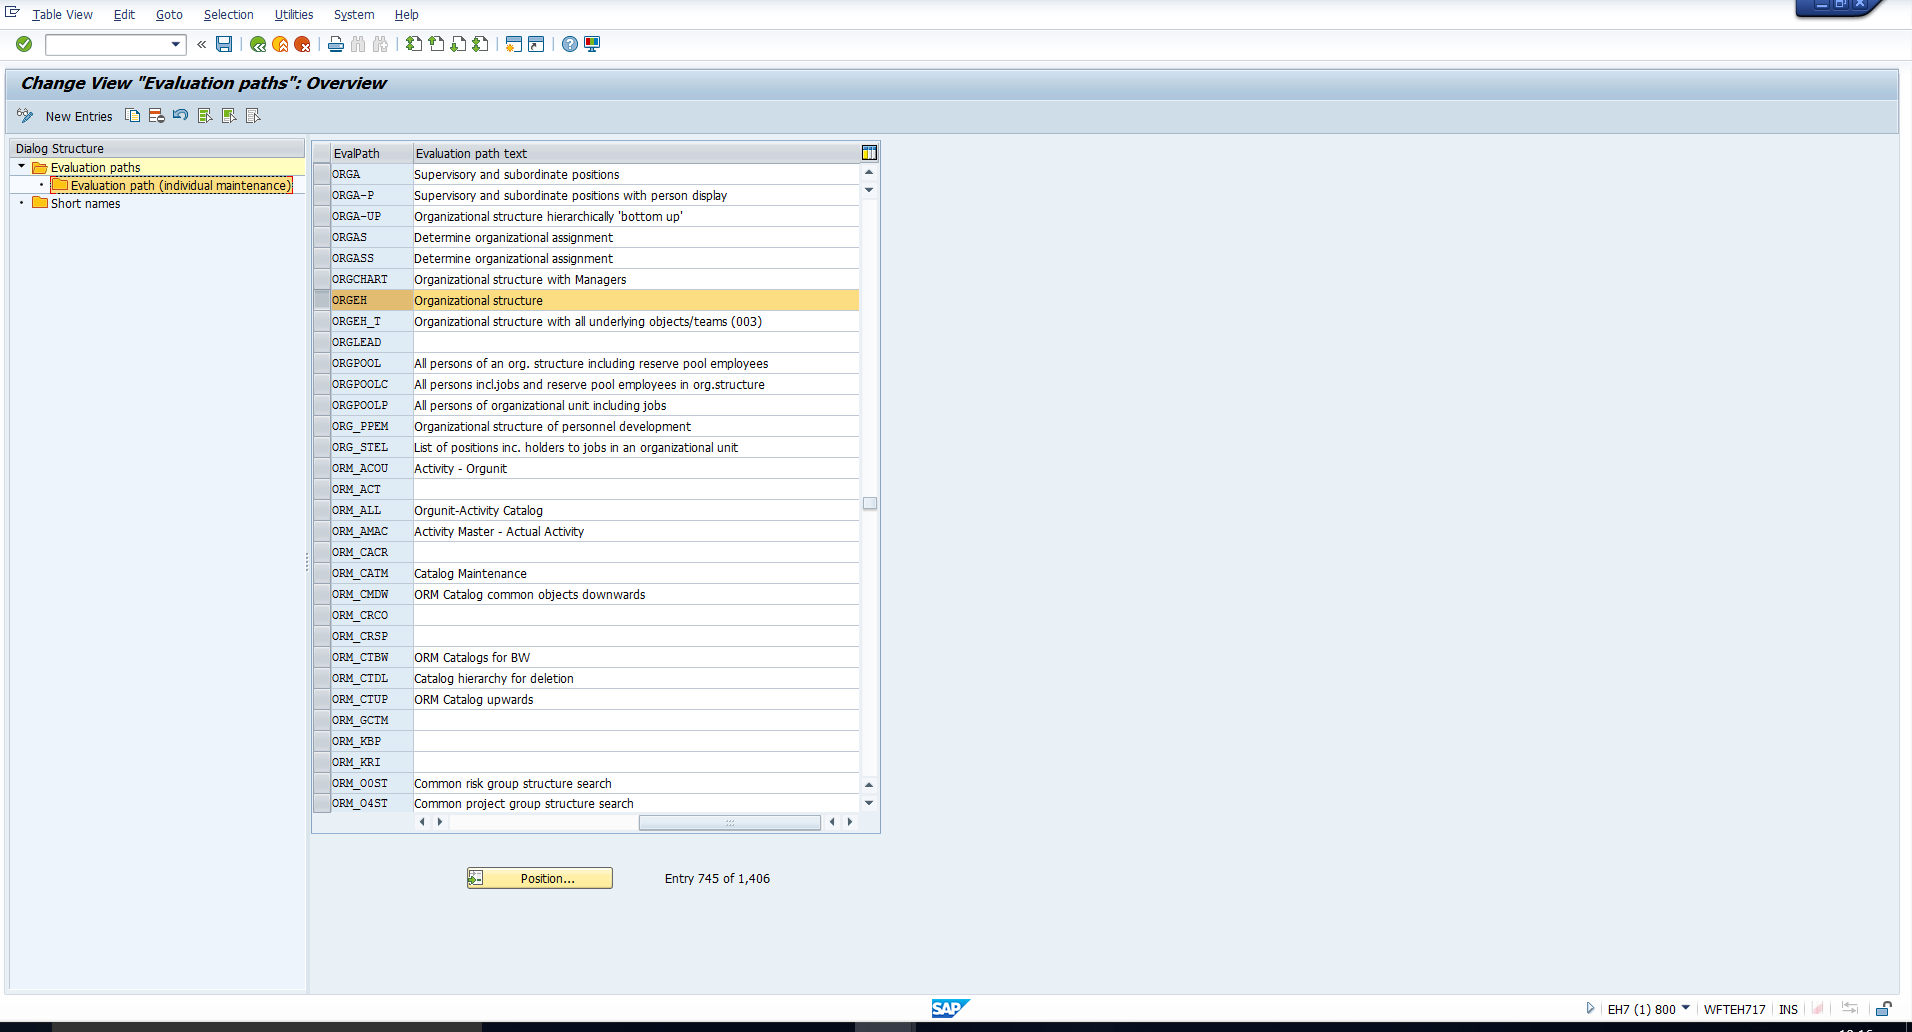 Figure 2: SAP Evaluation Paths
To view the configuration of the evaluation path ORGEH, select this evaluation path and double click on the subfolder ‘Evaluation path (Individual maintenance)’ in the Dialog structure on the left of the screen. This takes you to the screen in Figure 3, which contains the definition of the Evaluation path. Let’s proceed to understand the various columns in this screen.
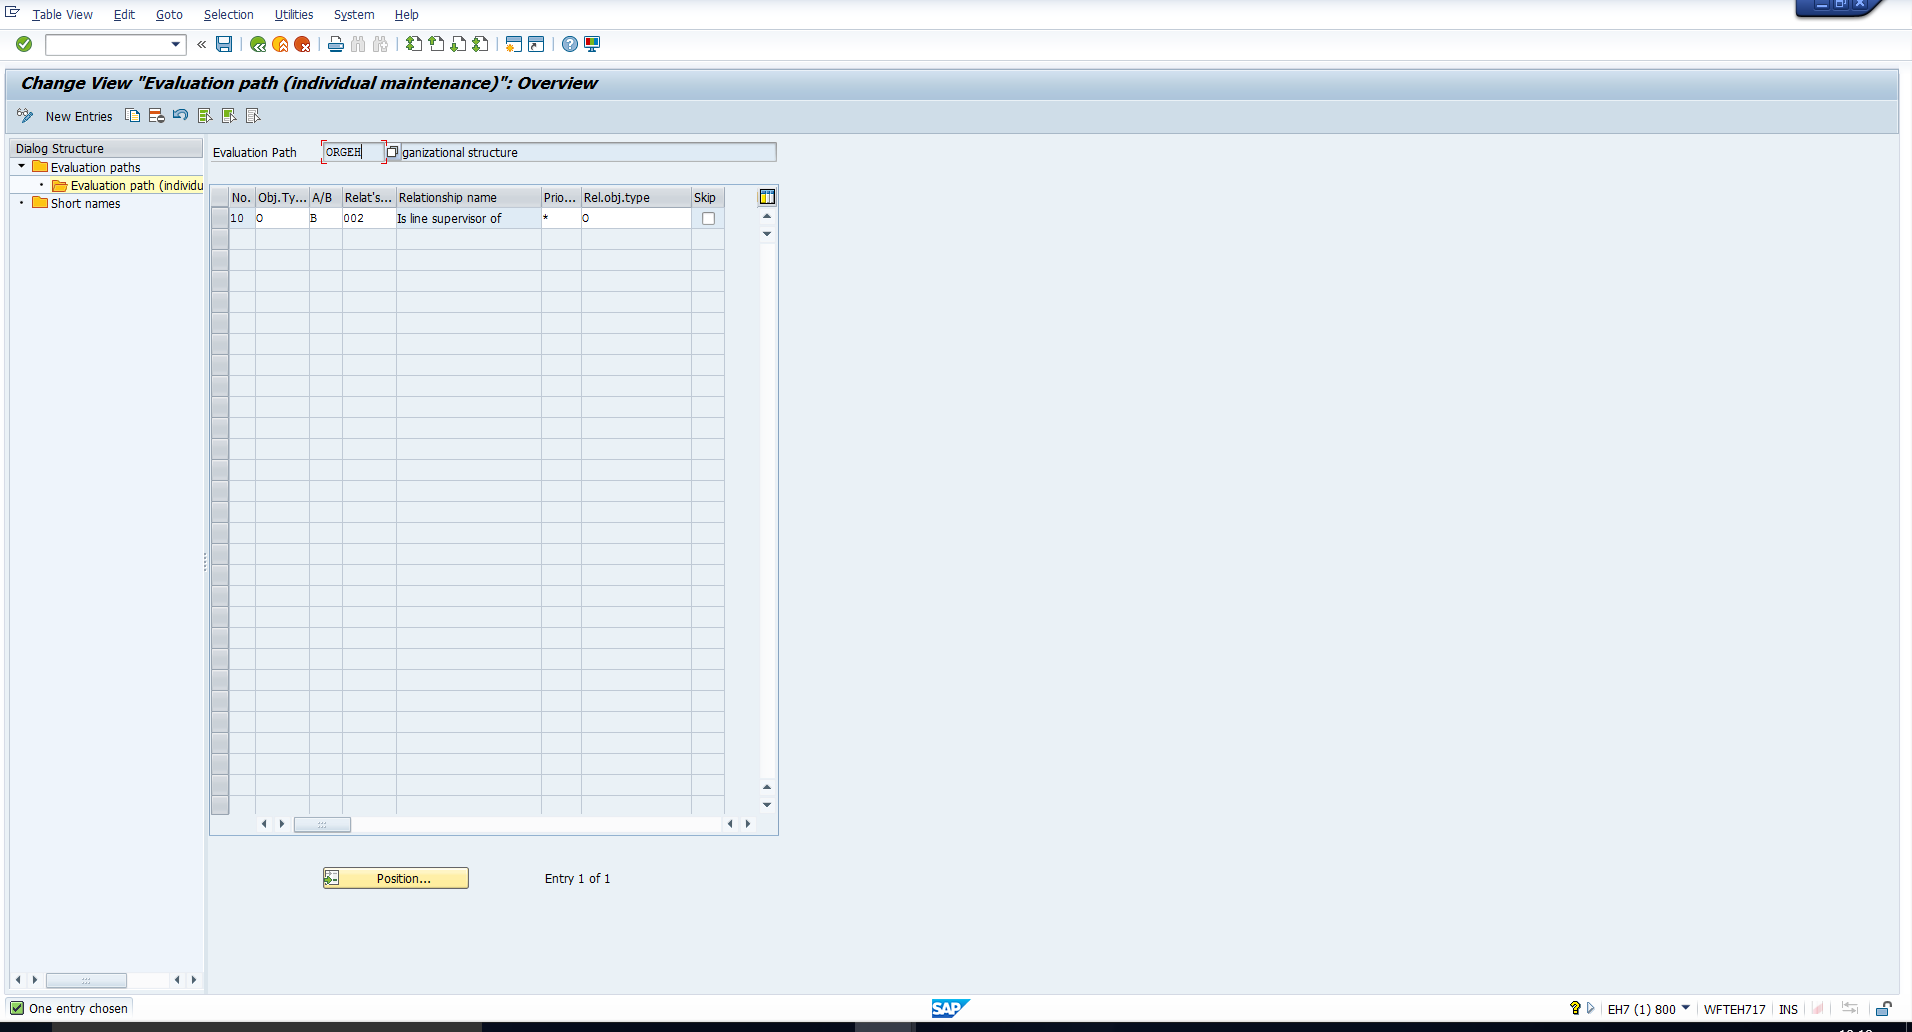 Figure 3: Evaluation Path (Individual Maintenance)
No. – This is the Sequence number of the entry. Note that one evaluation path can have multiple entries, as you will see in the next section.
Object type – The object type code (for example, ‘S’ for position, ‘O’ for organizational unit) must be entered in this field.
A/B – The relationship specification (‘A’ indicates Bottom-up and ‘B’ indicates Top-down) should be entered in this field.
Relationship – This is the relationship code that should be selected by the system to retrieve the next object.
Priority – This field is relevant if only objects which are assigned a certain priority should be considered in an evaluation path. In most cases this is not required, so enter ‘*’ in this field.
Related Object type – The object type code of the Related object type must be entered in this field.
Skip – This flag should be checked to specify that a certain relationship must be included in the evaluation path, however the last object in this relationship should not be displayed in the output.
Now with the above understanding, let’s interpret the behaviour of the ORGEH Evaluation path. It will start with the root organization unit, then select all organizational units that report to this organizational unit. This is done by selecting the relationship B 002 which links the root organizational unit to each subordinate organizational unit. Subsequently, this process will be repeated for every subordinate organizational unit, until no further subordinate organizational units are found. The resulting structure is the organizational structure with the first organizational unit as the root.
SAP provides hundreds of evaluation paths which cover the reporting requirements of most organizations. Assume that you still need to create a new evaluation path for your customer-specific requirement. For example, assume that you have created a customer-specific object type or relationship. In this case, you will need to create a new Evaluation path as these are out of scope of standard SAP.
Let us create a new evaluation path for a simple requirement using standard object types. For example, assume the HR user wants to view an organizational unit, all subordinate organizational units and all employees assigned to each of these organizational units. This means that, for any root organizational unit, we need an evaluation path that will select:
To create a new Evaluation path in accordance with the above requirement, click on the ‘New Entries’ button that has been highlighted in Figure 4.
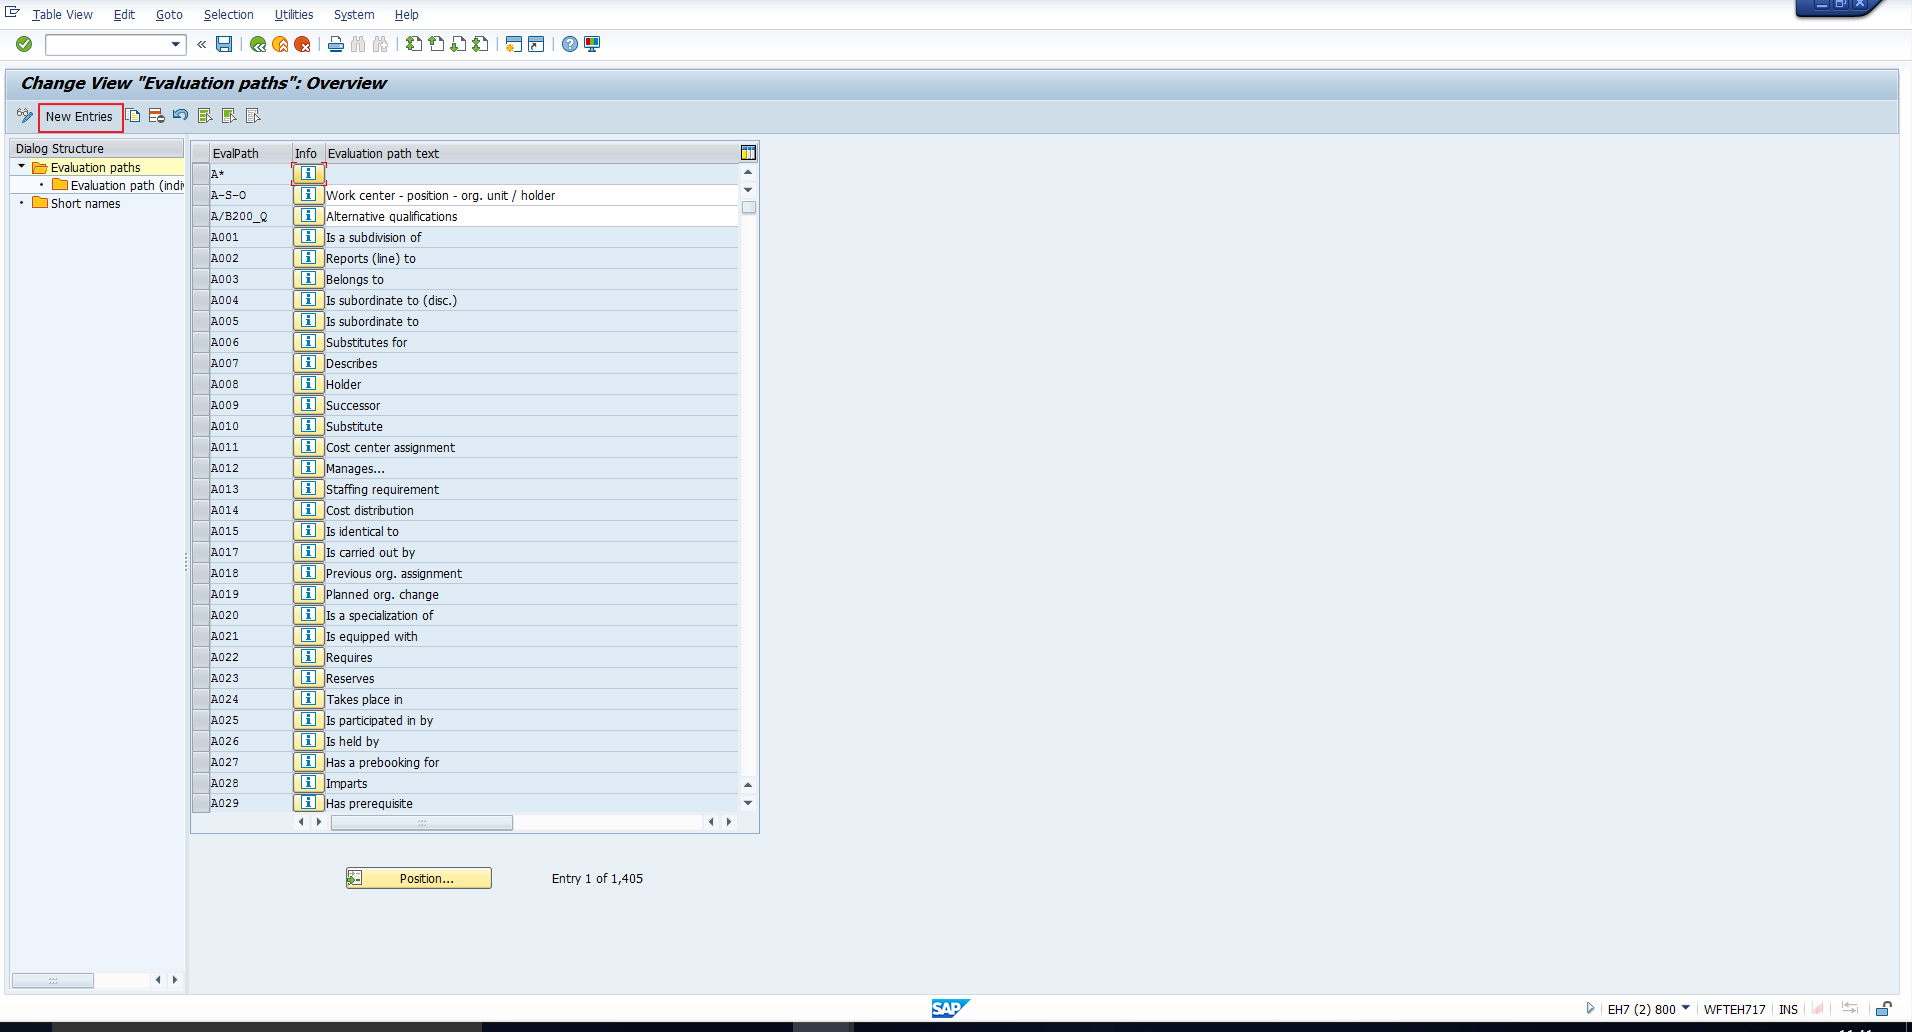 Figure 4: Click on “New Entries” Button
In the blank screen that follows, enter a suitable code and text for the new evaluation path, as illustrated in Figure 5. Note that the code should start with the letter ‘Z’ and can consist of maximum eight characters.
Once you enter suitable values, click on the “Save” icon.
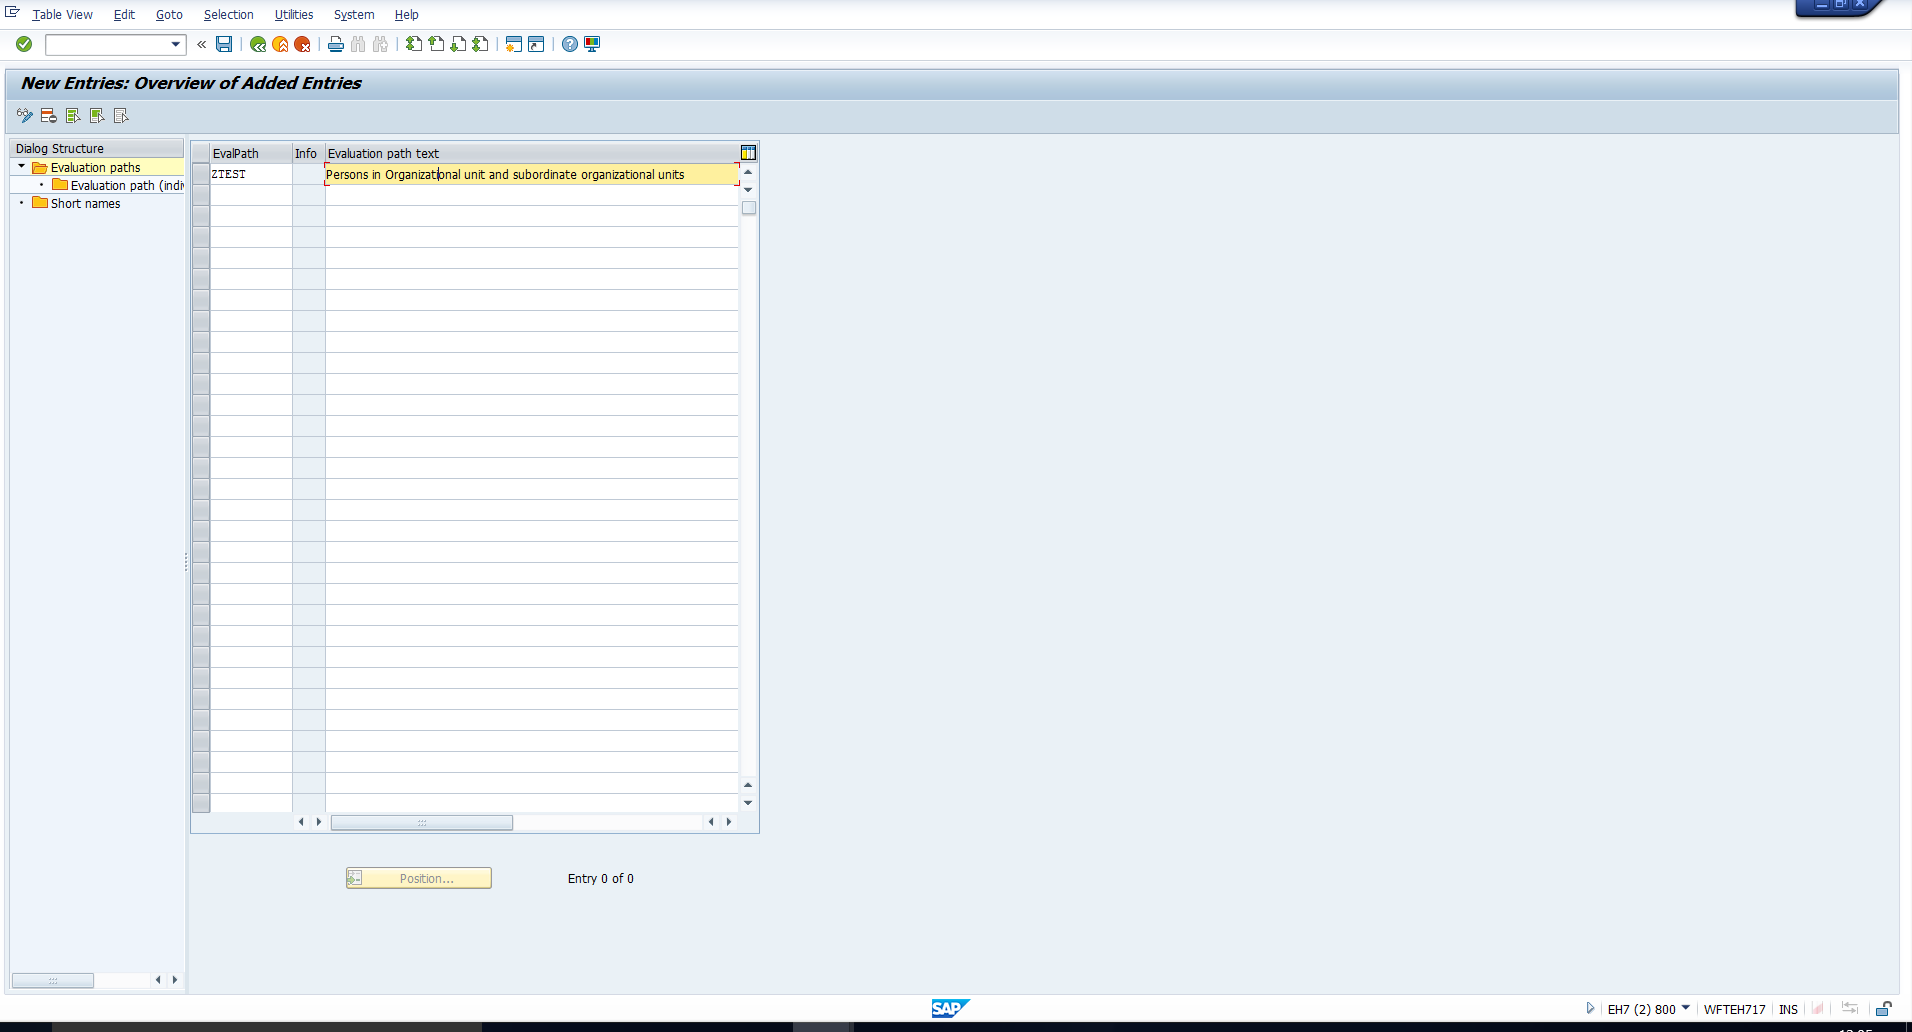 Figure 5: New Evaluation Path ZTEST
Next, select the newly created entry ZTEST and then double click on the subfolder Evaluation path (individual maintenance) that has been highlighted in Figure 6.
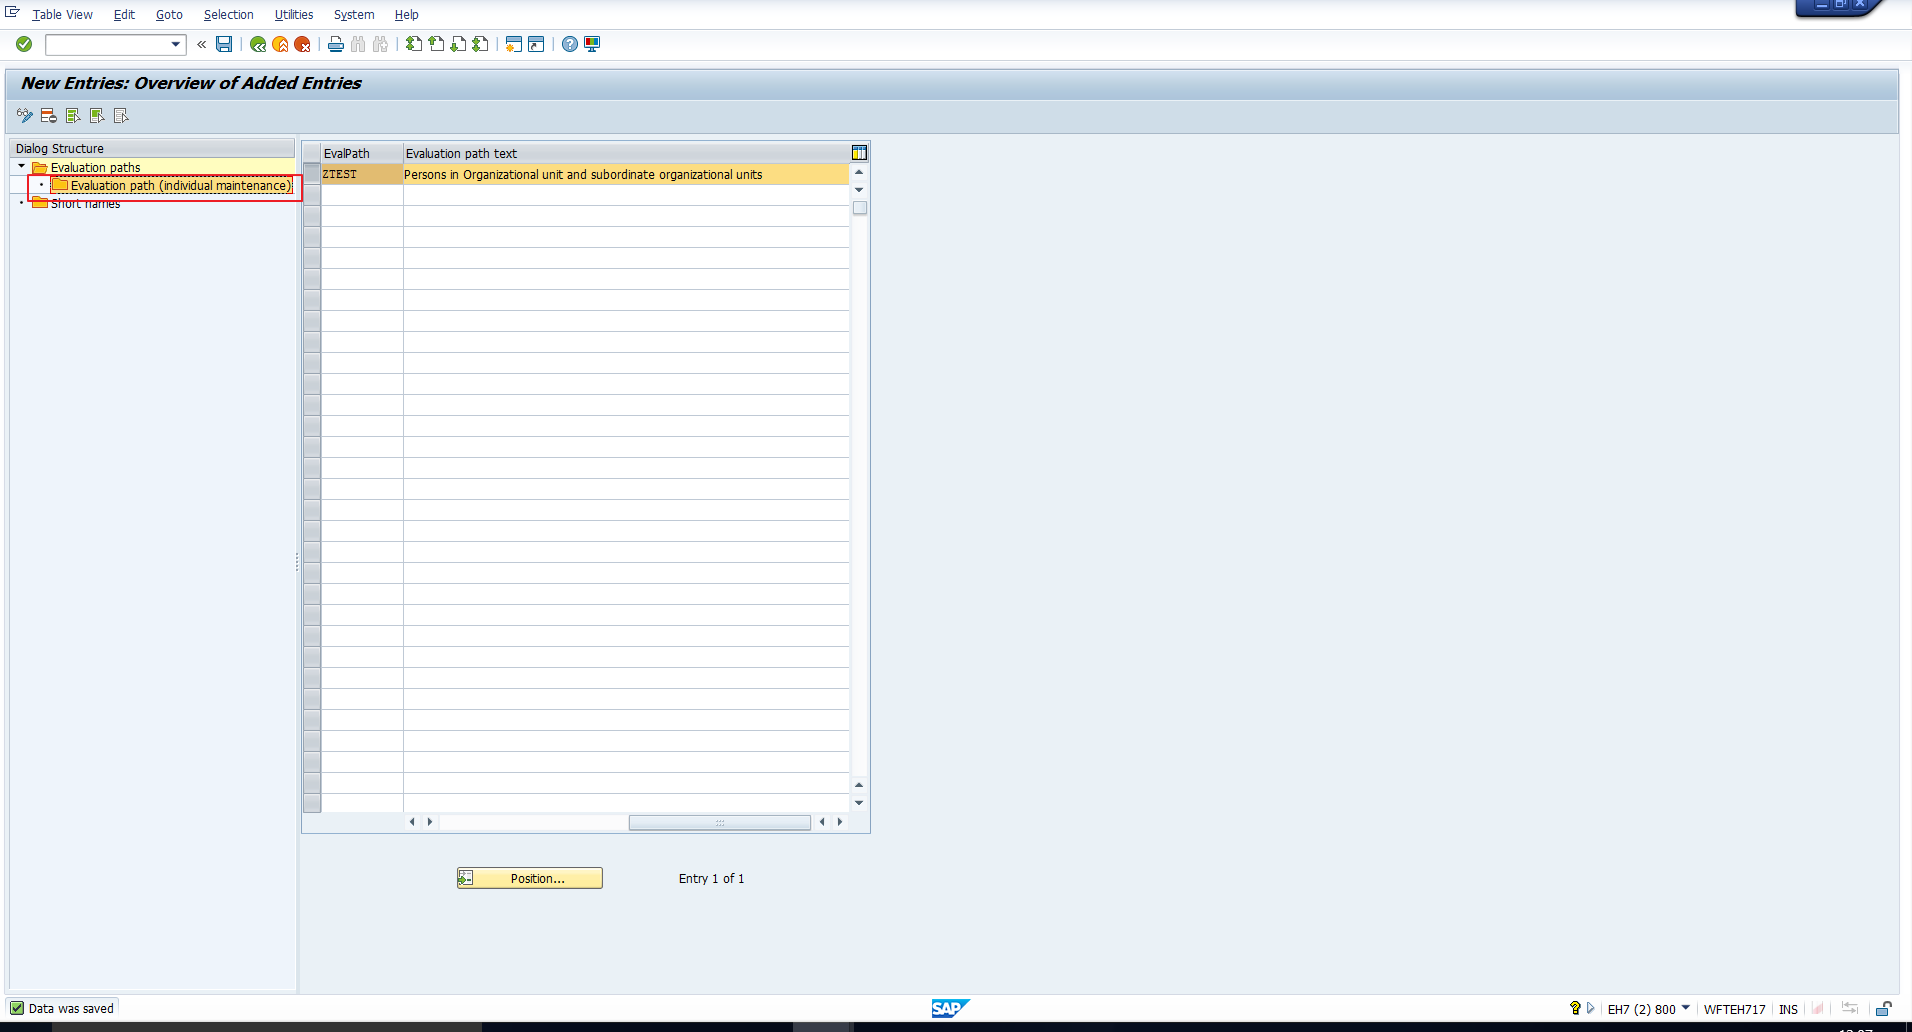 Figure 6:Evaluation Path – Individual Maintenance
This takes you to the blank screen in Figure 7, where you should click on the ‘New Entries’ button again.
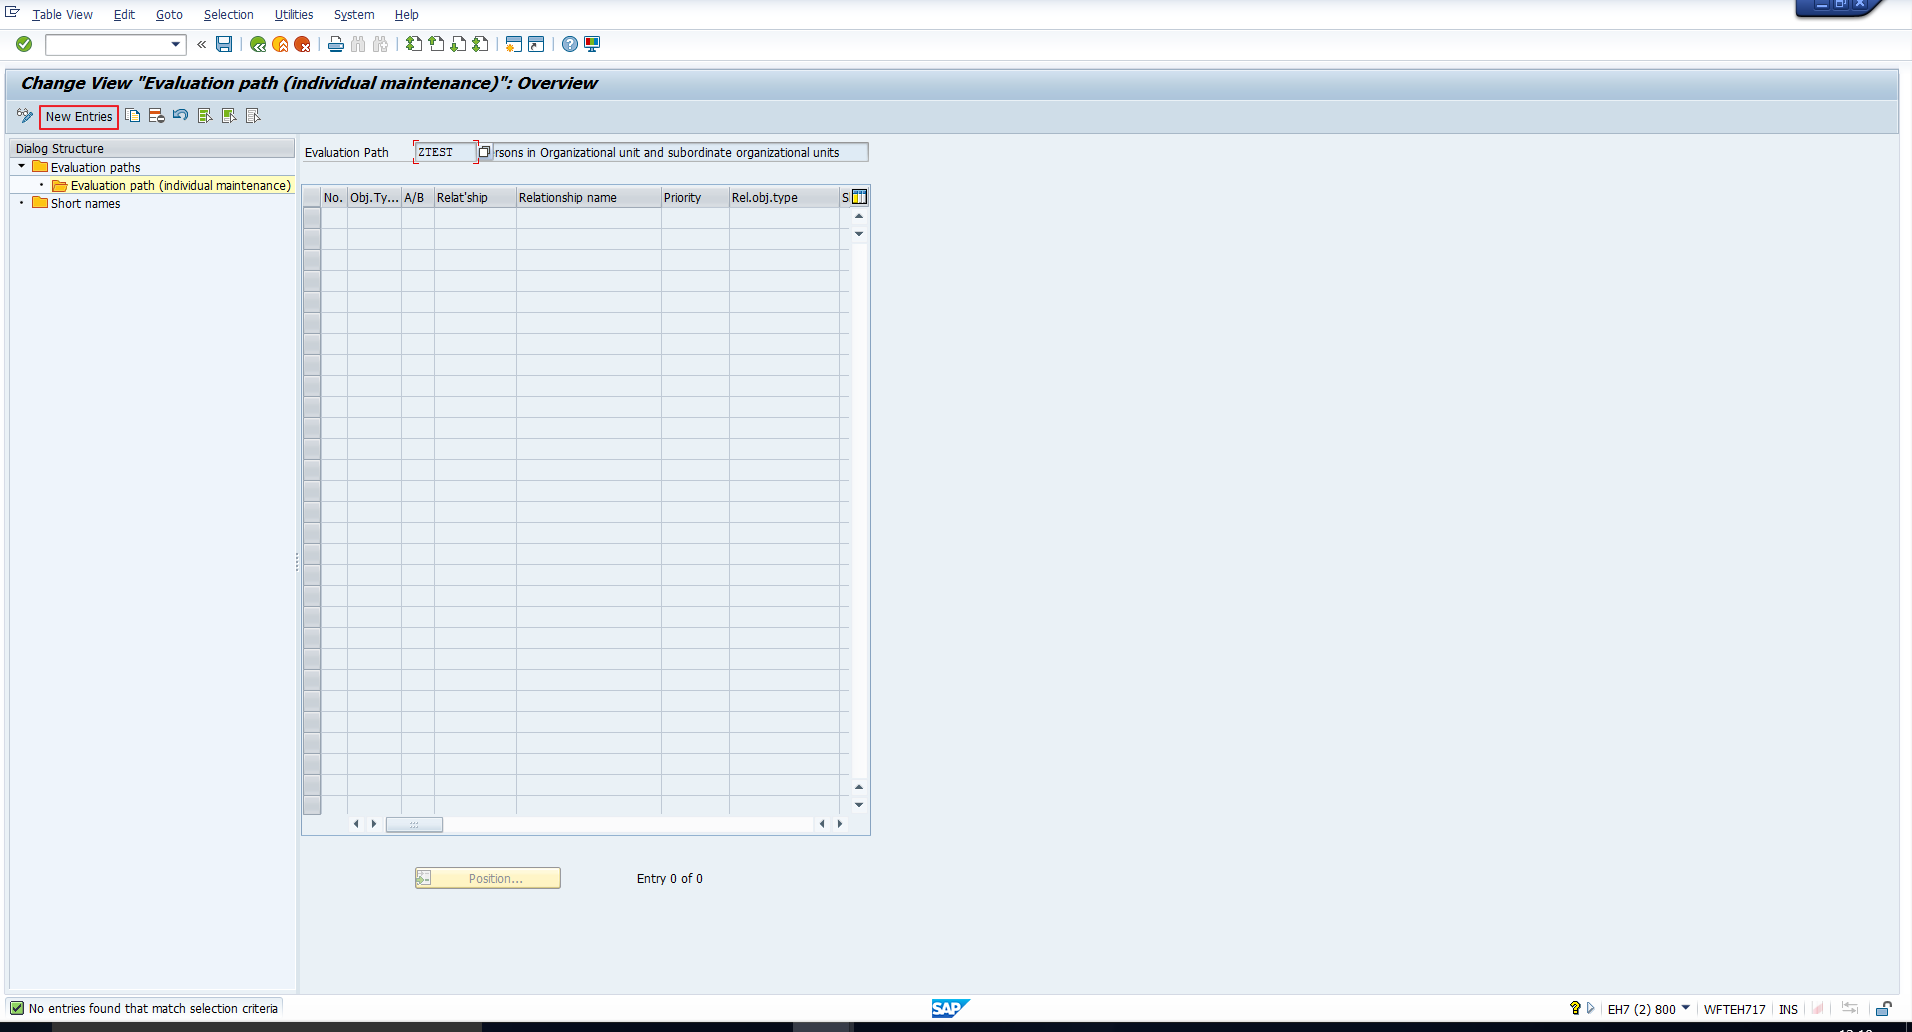 Figure 7: Click on “New Entries” Button
These entries define the Evaluation path in terms of which objects and relationships should be selected to form the resulting structure.
You can refer to the evaluation path details captured in Figure 8.
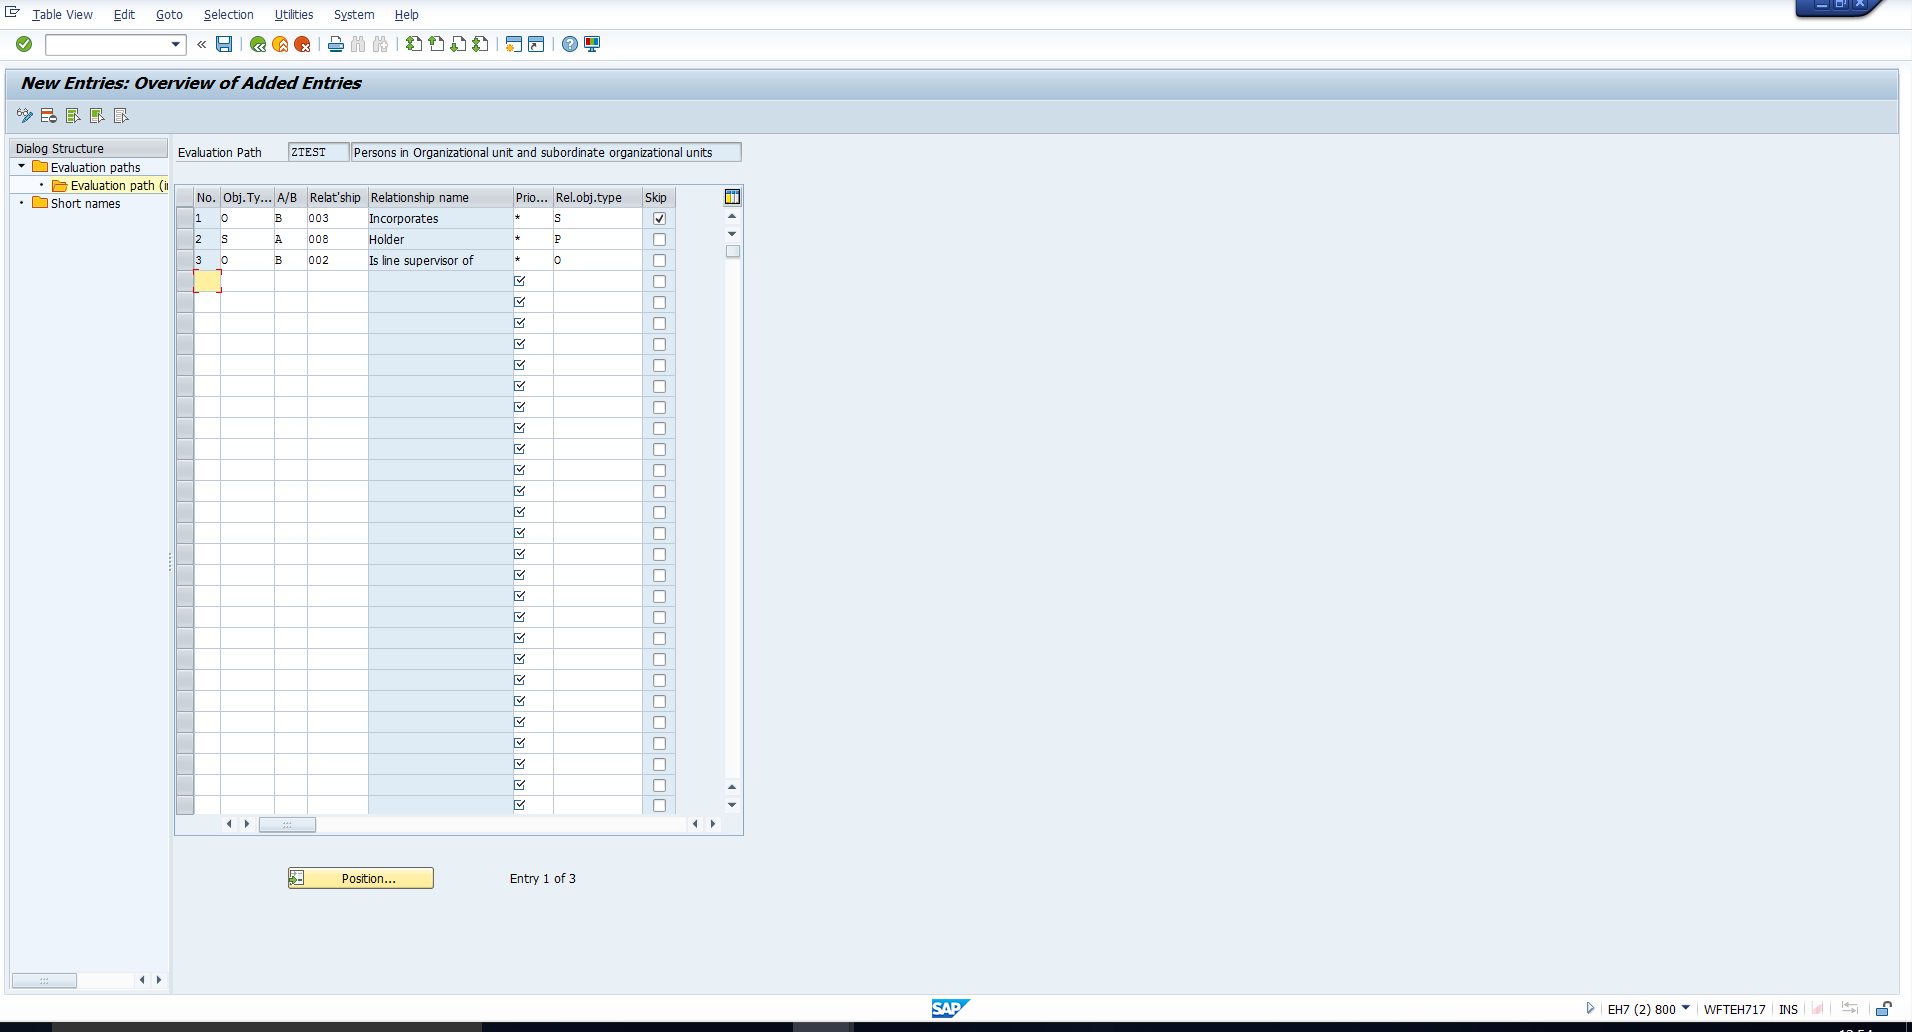 Figure 8: New Entries to Fetch Employees and Subordinate Organizational Units
Here you specify the Object Type, the relationship and the related object type. If you revisit the points a), b) and c) that we listed above, you will see that these three entries correspond to those points. Note that the ‘Skip’ indicator is selected for the first entry as we want the positions to be retrieved but not displayed in the output.
Once you enter the required details, save the data by clicking on the “Save” icon.
You can test any Evaluation path with the help of the Structure Display/Maintenance report with transaction code PPST. This takes you to the selection screen depicted in Figure 9.
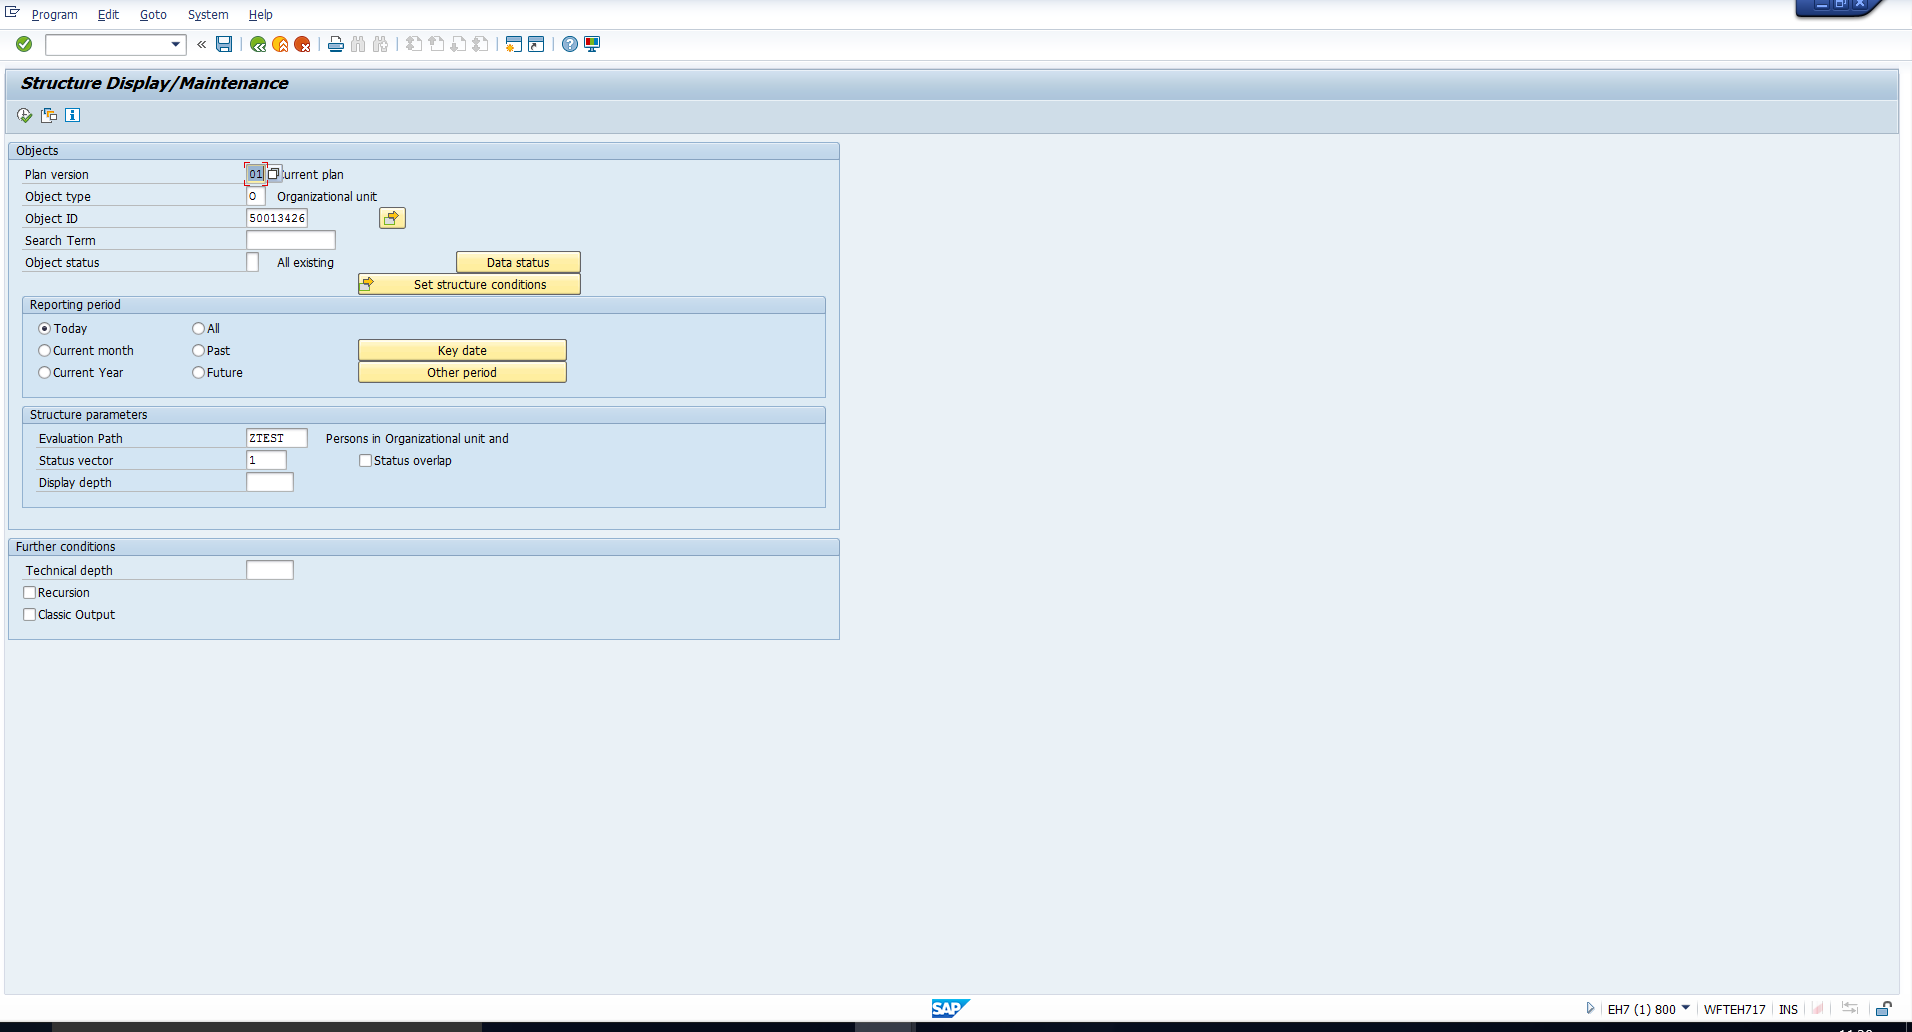 Figure 9: Selection Screen of PPST Transaction
Note the values we have entered in the selection screen. We have entered the object type ‘O’ and the id of the organizational unit for which we want to see all subordinate organizational units as well as employees assigned. Additionally, we have specified the name of the newly configured evaluation path ZTEST.
On executing the report, we get the output as shown in Figure 10. This is in accordance with our requirement.
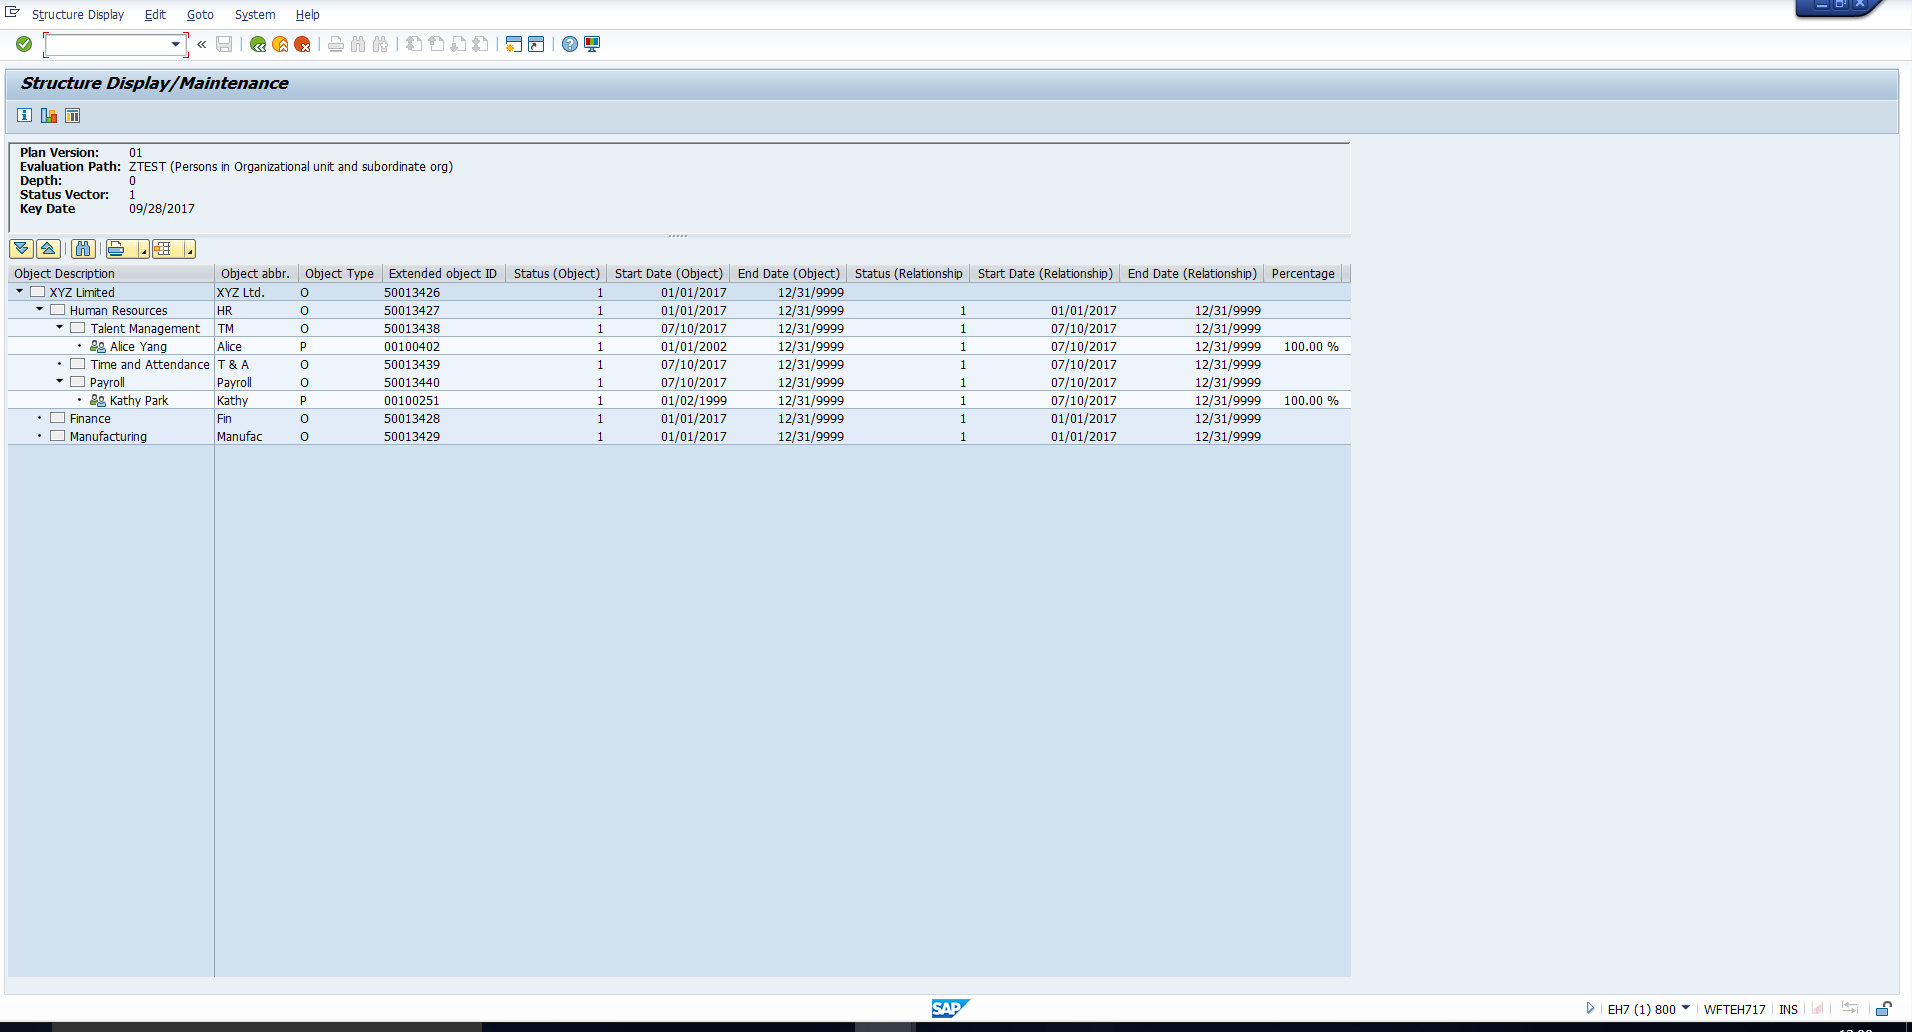 Figure 10: Output Displayed Correctly
—