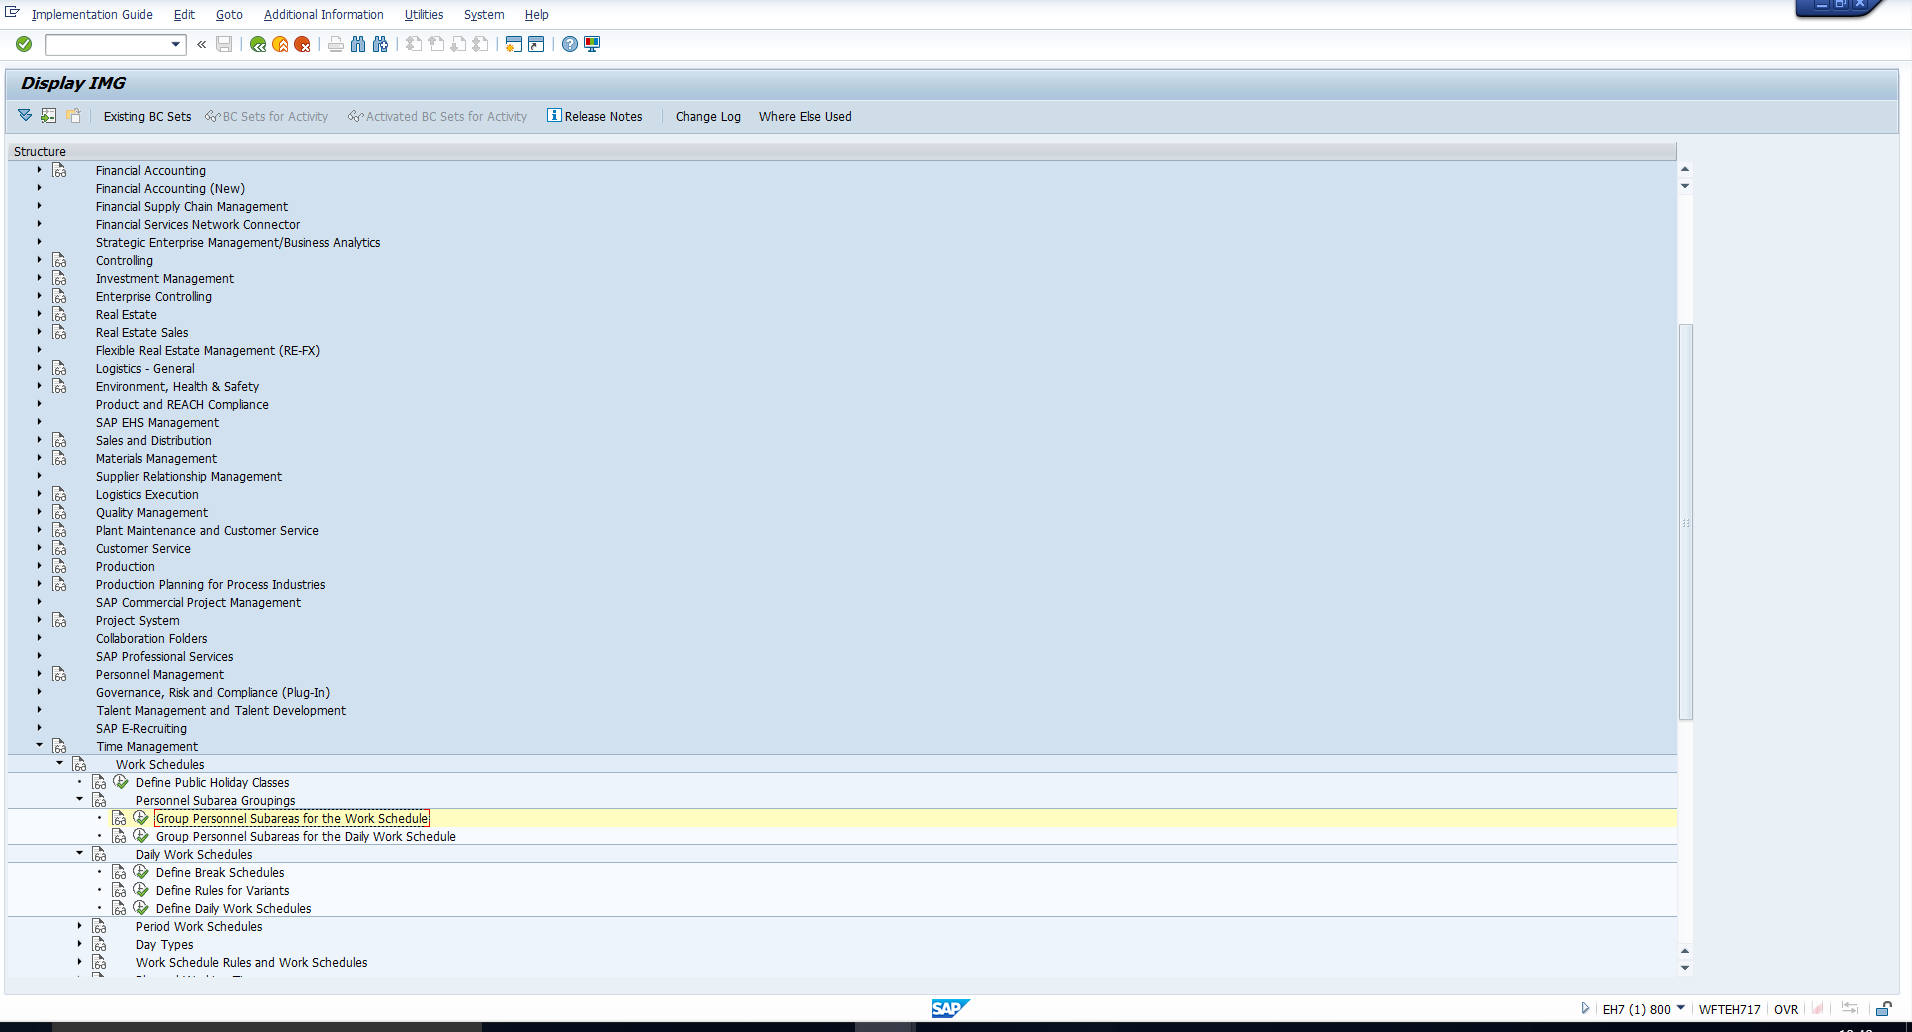
 Figure 1: Group Personnel Subareas for the Work Schedule
Welcome to the tutorial on SAP Break Schedules Configuration. If you have gone through the previous tutorial on SAP Work Schedules and their Elements, then you are familiar with SAP Break Schedules and the various types of breaks that can be defined. In this tutorial, we will demonstrate how to configure SAP Break Schedules. We will also explain the prerequisite assignment of Personnel Subarea groupings.
In SAP HCM, you will come across the concept of Personnel Subarea Groupings (or Employee Subgroup groupings) across the Implementation Guide. It basically means that Personnel subareas (or Employee Subgroups) with similar characteristics should be grouped together. Further configuration steps are then carried out for the groupings, rather than for each individual Personnel Subarea (or Employee Subgroup).
There are various kinds of Personnel Subarea (or Employee Subgroup) groupings. In this tutorial, we will explain two groupings that are a prerequisite for the configuration of SAP Work Schedules.
You must first group Personnel subareas for SAP Work Schedules. This means that all personnel subareas that work according to a common set of work schedule rules must be assigned the same grouping.
For example, assume that an organization has three personnel subareas – Location 1, Location 2 and Location 3. Location 1 and Location 2 follow the same work schedule rule, whereas Location 3 follows a different work schedule rule. In this case, you can assign grouping 01 to Location 1 and Location 2, and grouping 02 to Location 3.
To assign this grouping, use transaction code SPRO to access the Implementation Guide. Then follow the path mentioned below:
Time Management – Work Schedules – Personnel Subarea Groupings – Group Personnel Subareas for the Work Schedule
This path has also been depicted in Figure 1.
 Figure 1: Group Personnel Subareas for the Work Schedule
This takes you to the screen in Figure 2, where you can assign a two-digit grouping to each Personnel Subarea.
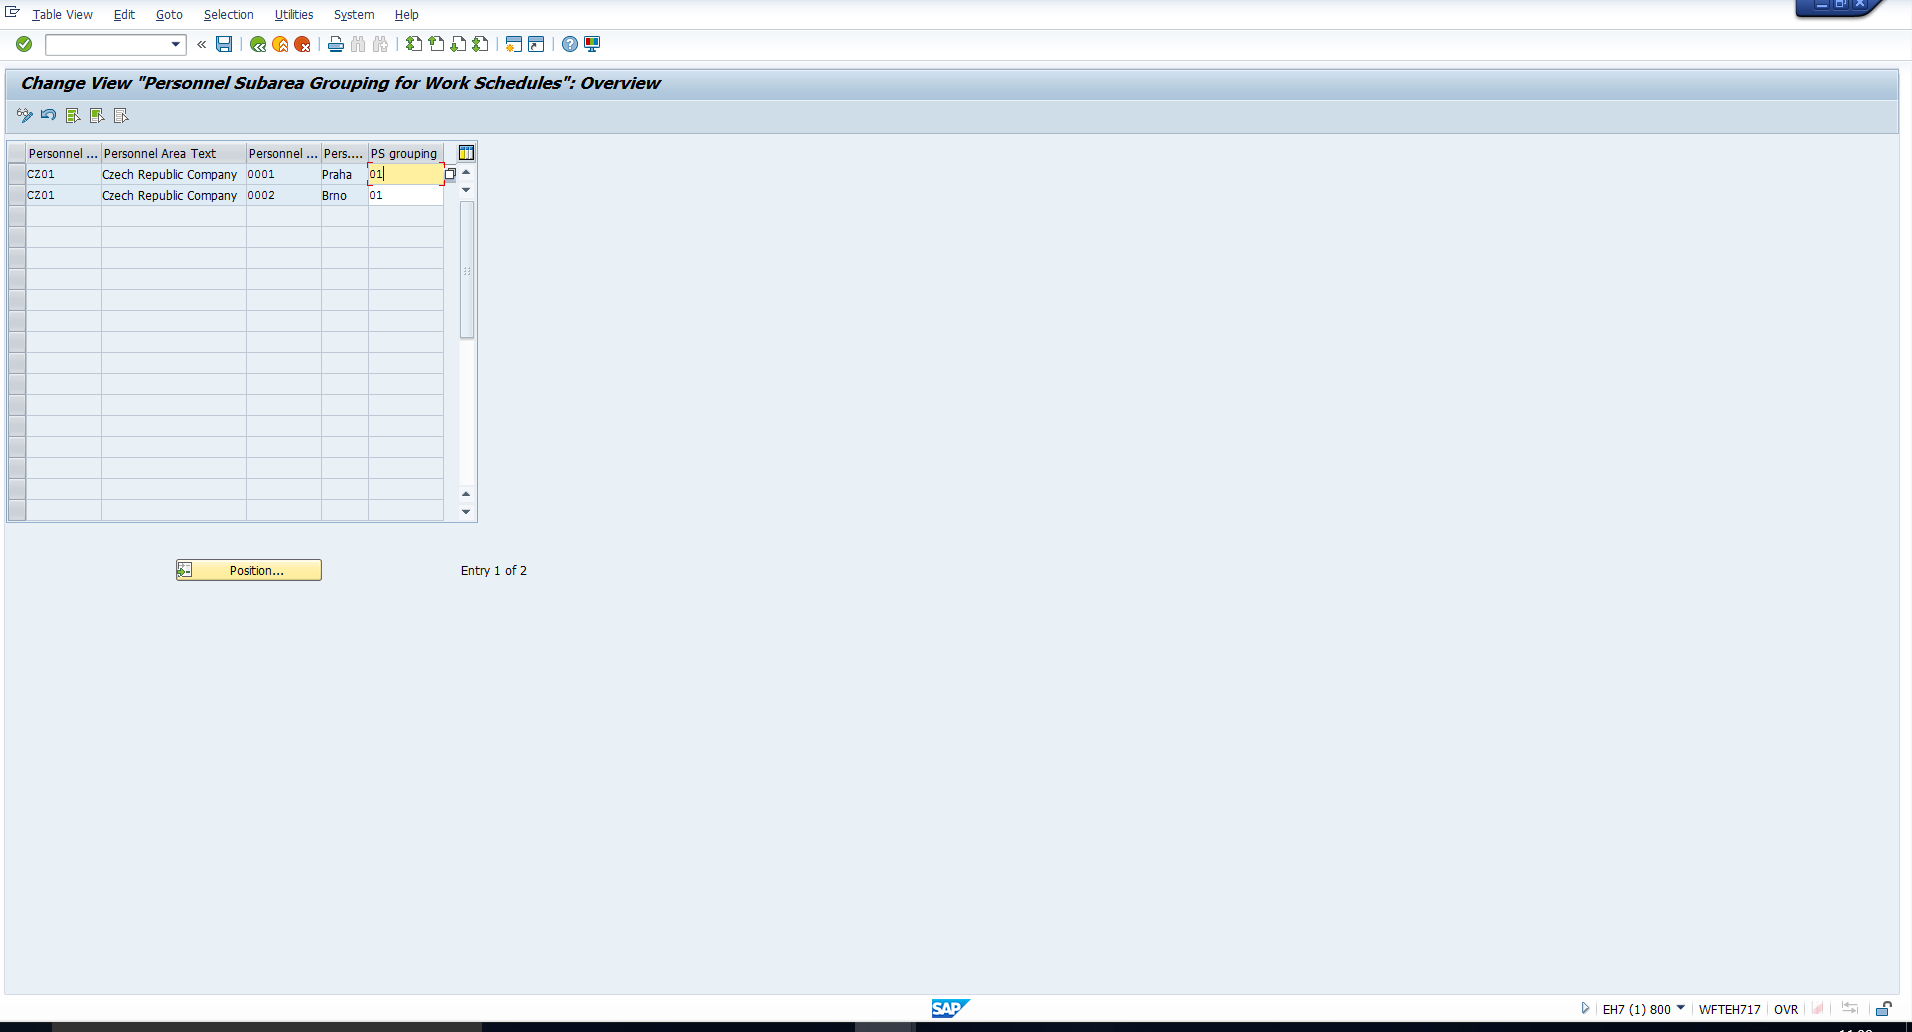 Figure 2: Assign Grouping for Work Schedules
In this step, you do not directly assign groupings to Personnel Subareas. Instead, you assign a Personnel Subarea Grouping for Daily Work Schedules to a Personnel Subarea Grouping for SAP Work Schedules.
Taking the previous example forward, although Location 1 and Location 2 follow a different Work Schedule rule from Location 3, it is possible that both Work Schedule rules use the same Daily Work Schedule.
For example, let’s assume that Location 1 and Location 2 follow a 5-day work week, with Saturday and Sunday off. Let’s call this Work Schedule 1. And let’s assume Location 3 follows a 6-day work week with Sunday off. Let’s call this Work Schedule 2.
However, all 3 locations have a 9 am to 5 pm work day. This means that the same Daily Work Schedule can be utilized for both Work Schedule 1 and Work Schedule 2. Consequently, the Personnel Subarea Groupings for Work Schedules 01 and 02 (assigned in the previous step) will both be assigned the same Personnel Subarea Groupings for Daily Work Schedules, say 01.
To assign this grouping, use transaction code SPRO to access the Implementation Guide. Then follow the path mentioned below:
Time Management – Work Schedules – Personnel Subarea Groupings – Group Personnel Subareas for the Daily Work Schedule
This path has also been depicted in Figure 3.
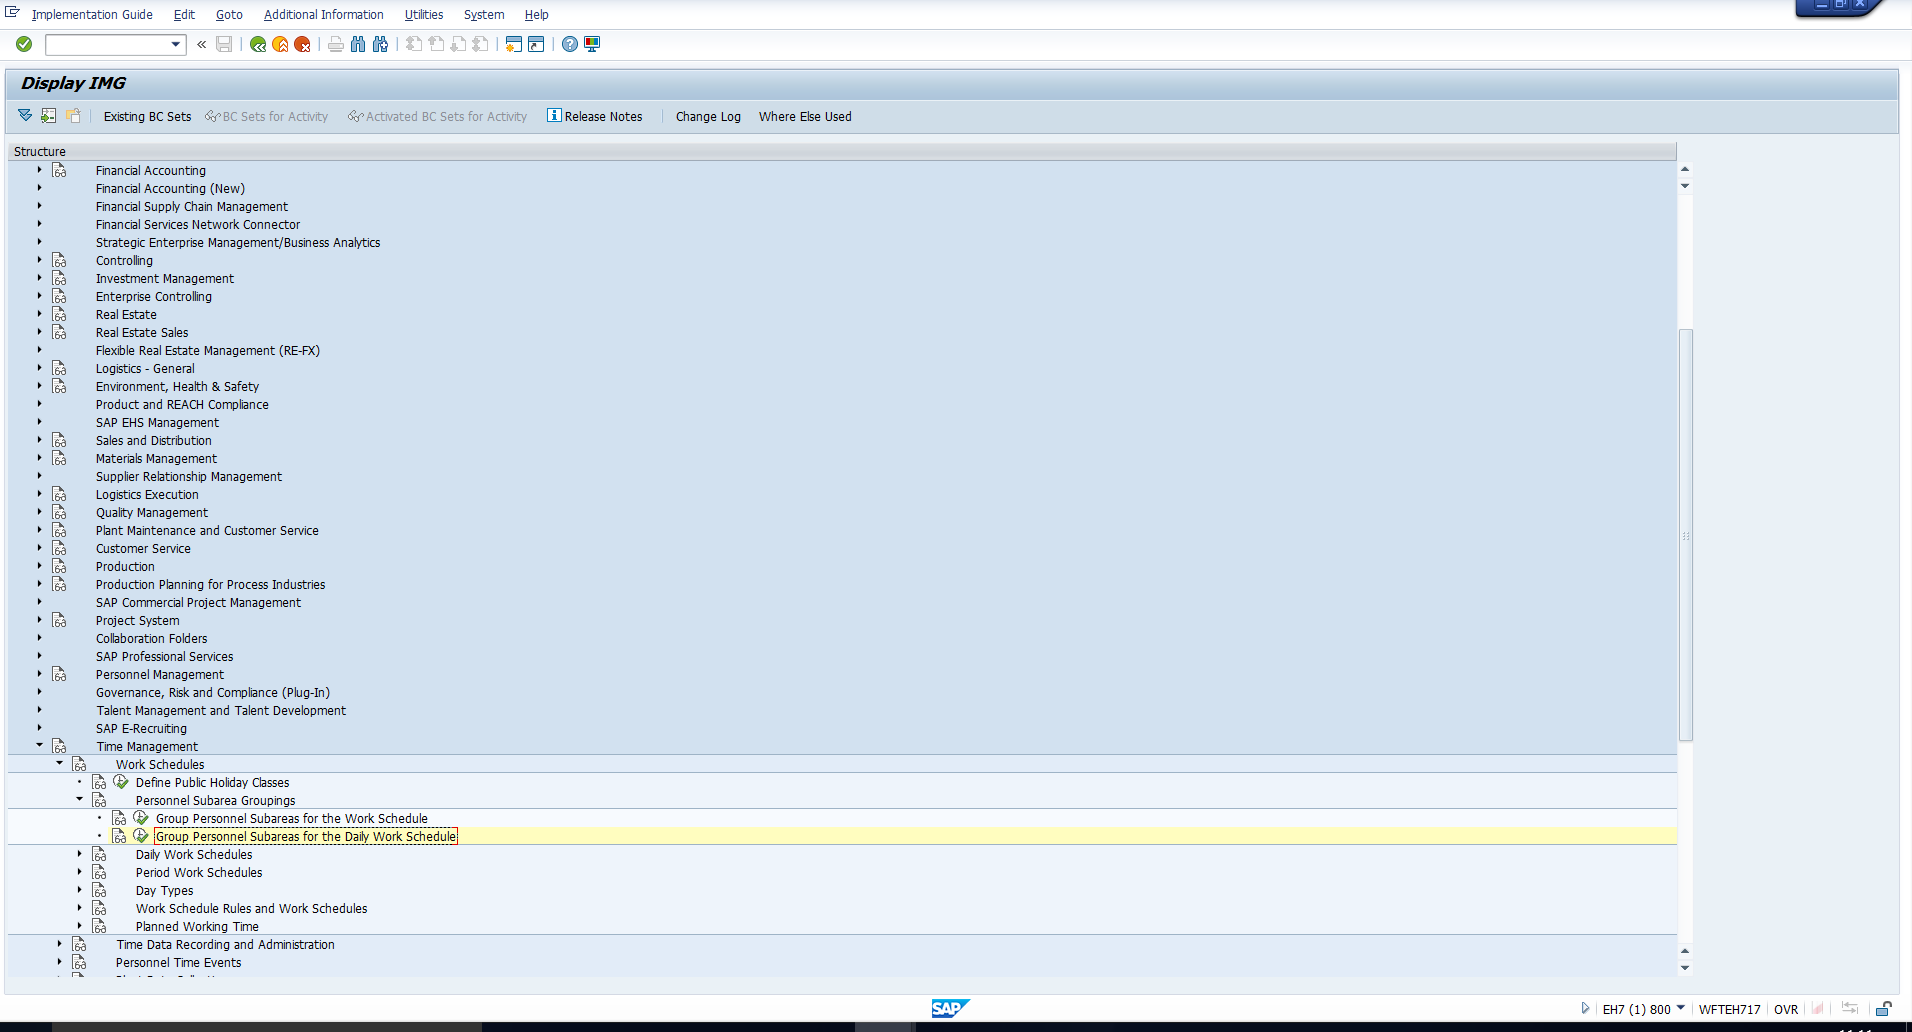 Figure 3: Group Personnel Subareas for the Daily Work Schedule
This takes you to the screen in Figure 4, where you can assign a two-digit grouping.
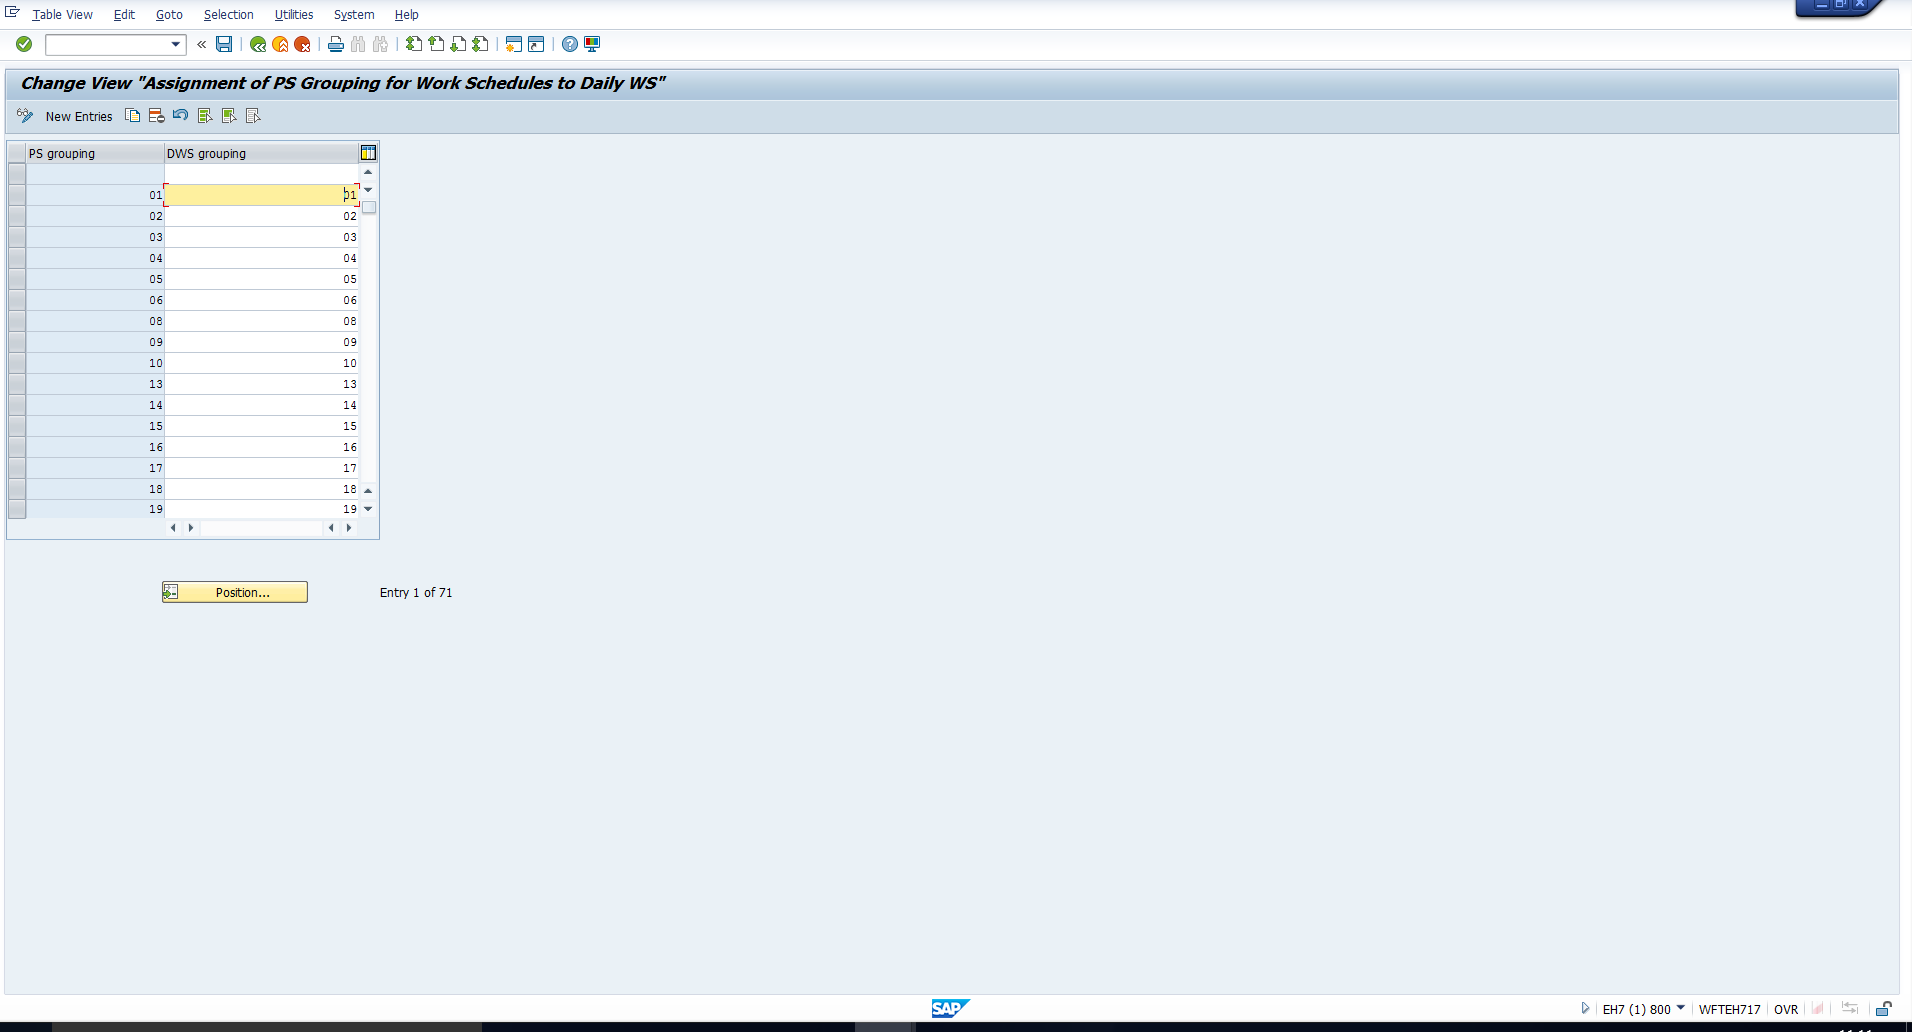 Figure 4: Assign Grouping for Daily Work Schedules
In this section, we will explain how to create a new break schedule based on your organization’s work break policy. To configure a break schedule, follow the path mentioned below:
Time Management – Work Schedules – Daily Work Schedules – Define Break Schedules
This path has been depicted in Figure 5.
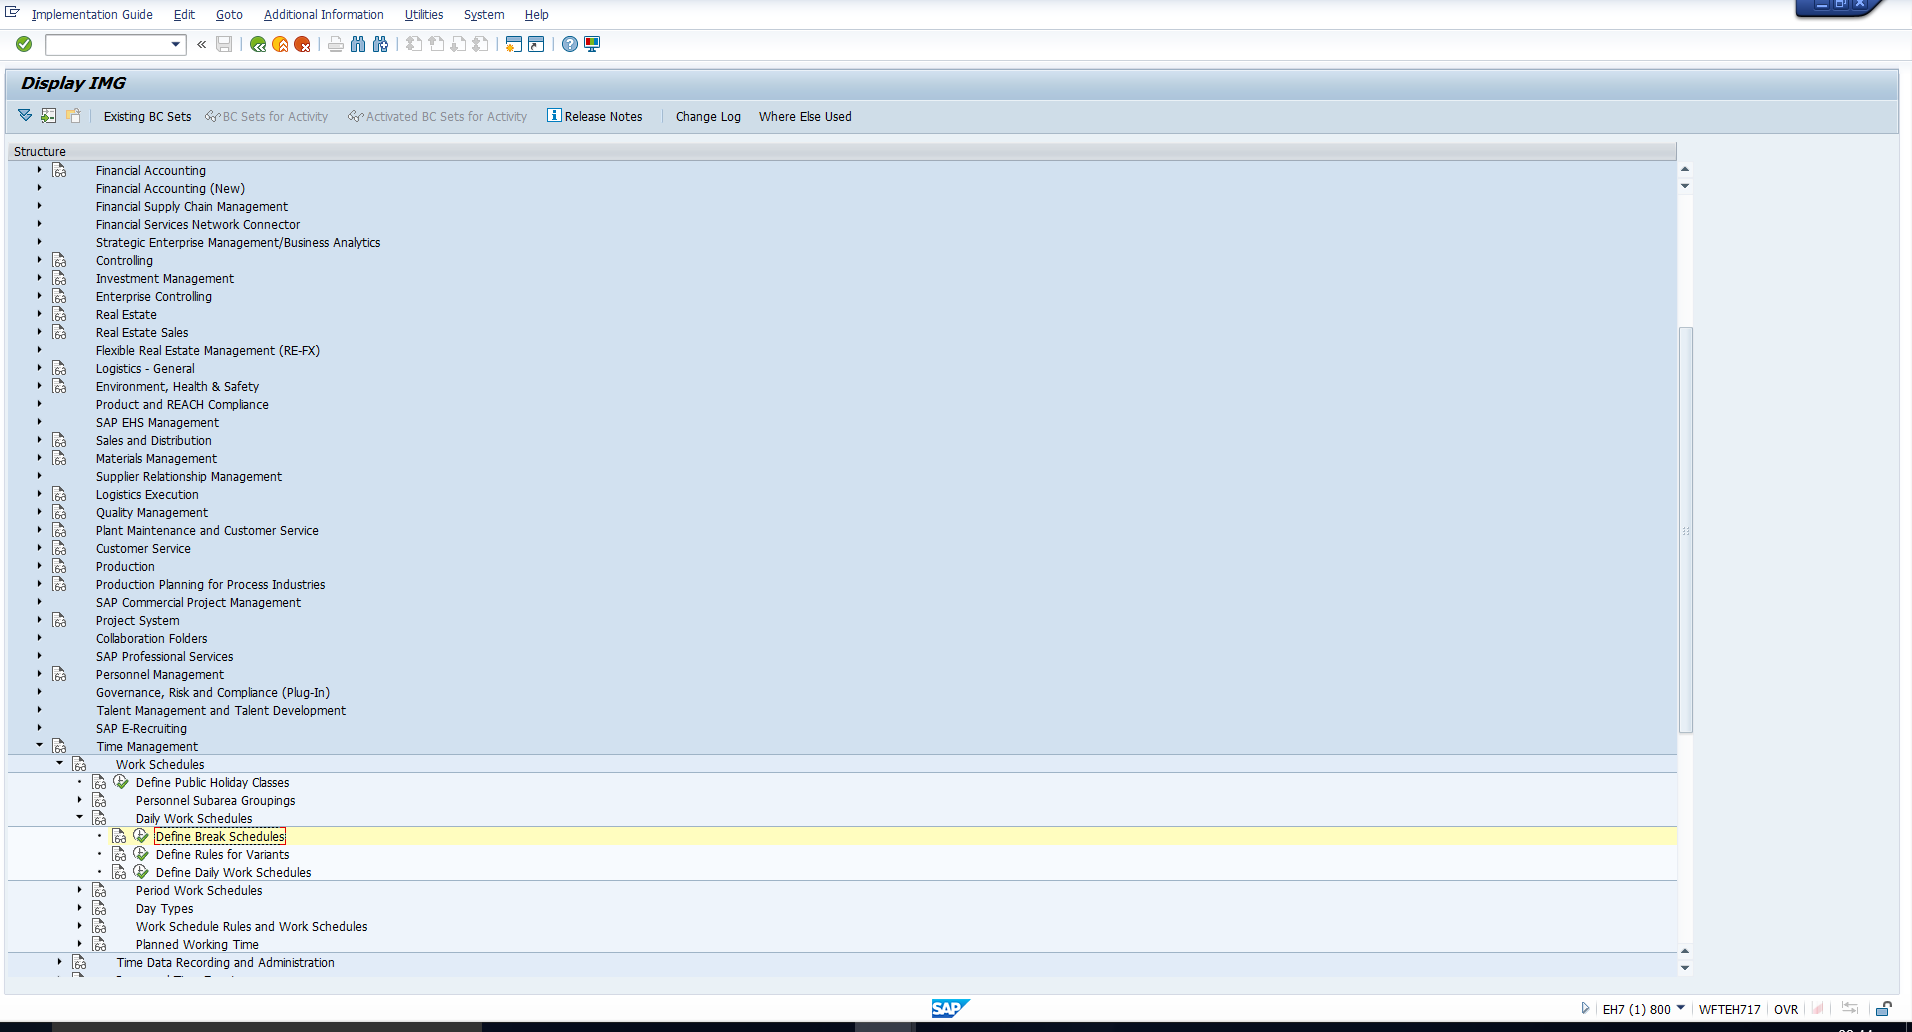 Figure 5: IMG Path to Configure SAP Break Schedules
Executing this activity will take you to the activity list captured in Figure 6.
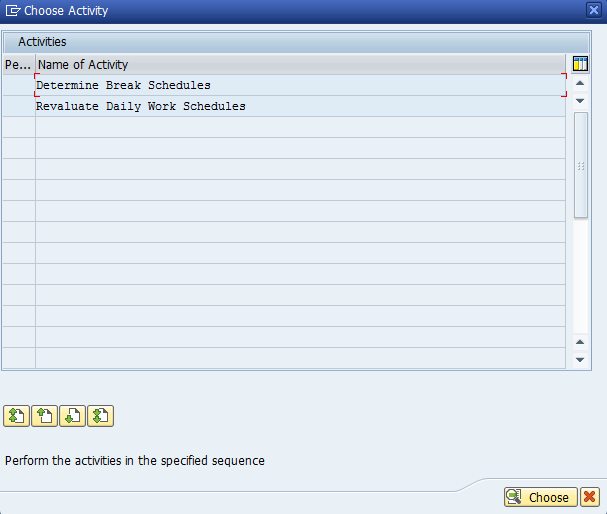 Figure 6: SAP Break Schedules Activity List
Double click on the first activity, ‘Determine Break Schedules’ to get to the screen in Figure 7. You can see the list of existing break schedules.
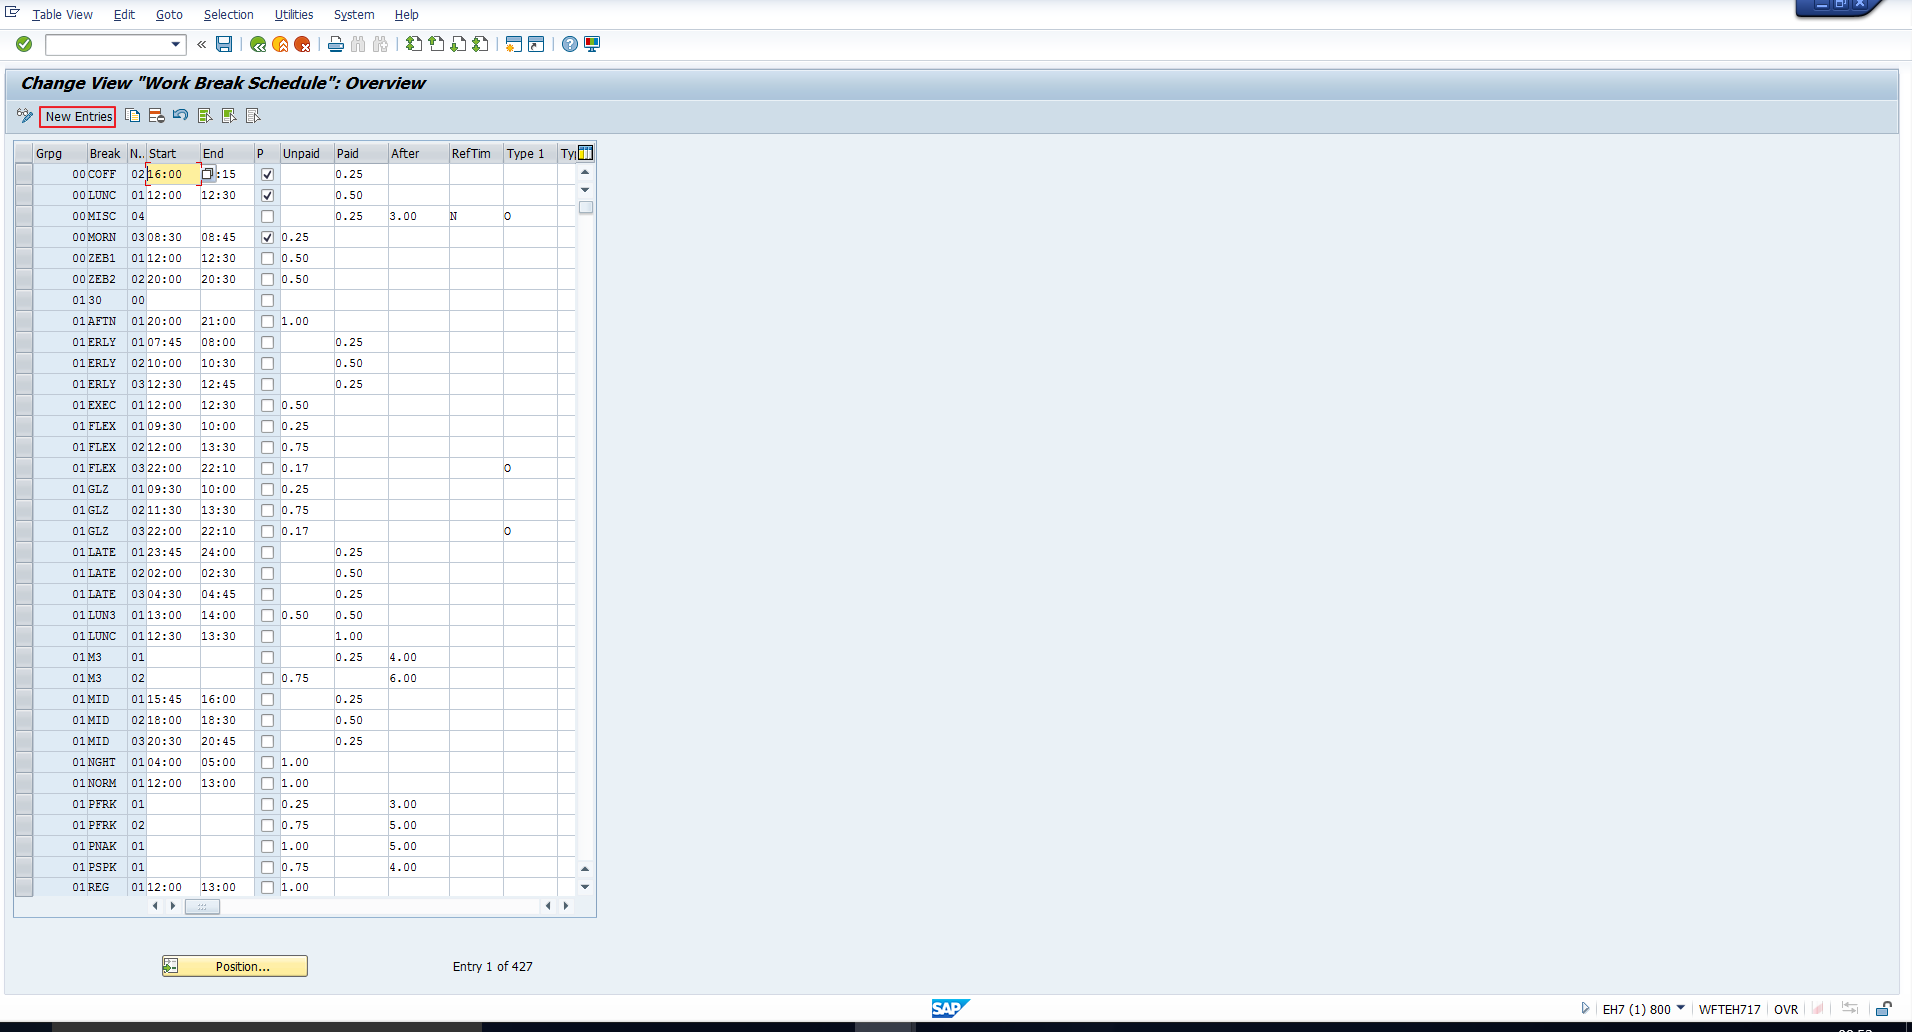 Figure 7: Define Break Schedule
To create a new break schedule, click on the button ‘New Entries’, which has been highlighted in the screenshot above. You will see the blank screen as shown in Figure 8.
We will explain the most useful columns:
Grpg – Enter the 2-digit Personnel Subarea Grouping for Daily Work Schedules (not the Personnel Subarea Grouping for Work Schedules) for which the Break Schedule must be applicable.
Break – Enter a 4-character Break Schedule key.
No. – Enter a Sequence number. This is useful if you want to define two or more breaks in a single Break Schedule.
Start – Indicates the break start time. This field will be blank in the case of Dynamic breaks.
End– Indicates the break end time. This field will be blank in the case of Dynamic breaks.
Unpaid – Enter the break period that is not remunerated. Enter this in hours, as a decimal value.
Paid – Enter the break period that is remunerated. Enter this in hours, as a decimal value.
Please note that if you do not enter either the Unpaid break period or the Paid break period, the system considers the interval between the Start of break and End of break fields as the unpaid break period.
After – Here you enter the number of work hours after which an employee can take a break. This field is mandatory when defining Dynamic breaks.
We will now apply the learnings from the previous section to some practical organizational scenarios.
Consider a paid lunch break from 1:00 pm to 1:45 pm. To configure this, enter the values as illustrated in Figure 9 and save the record. Note that we have explicitly entered the paid period, otherwise the system will consider the interval between the Start of break and the End of break as unpaid hours.
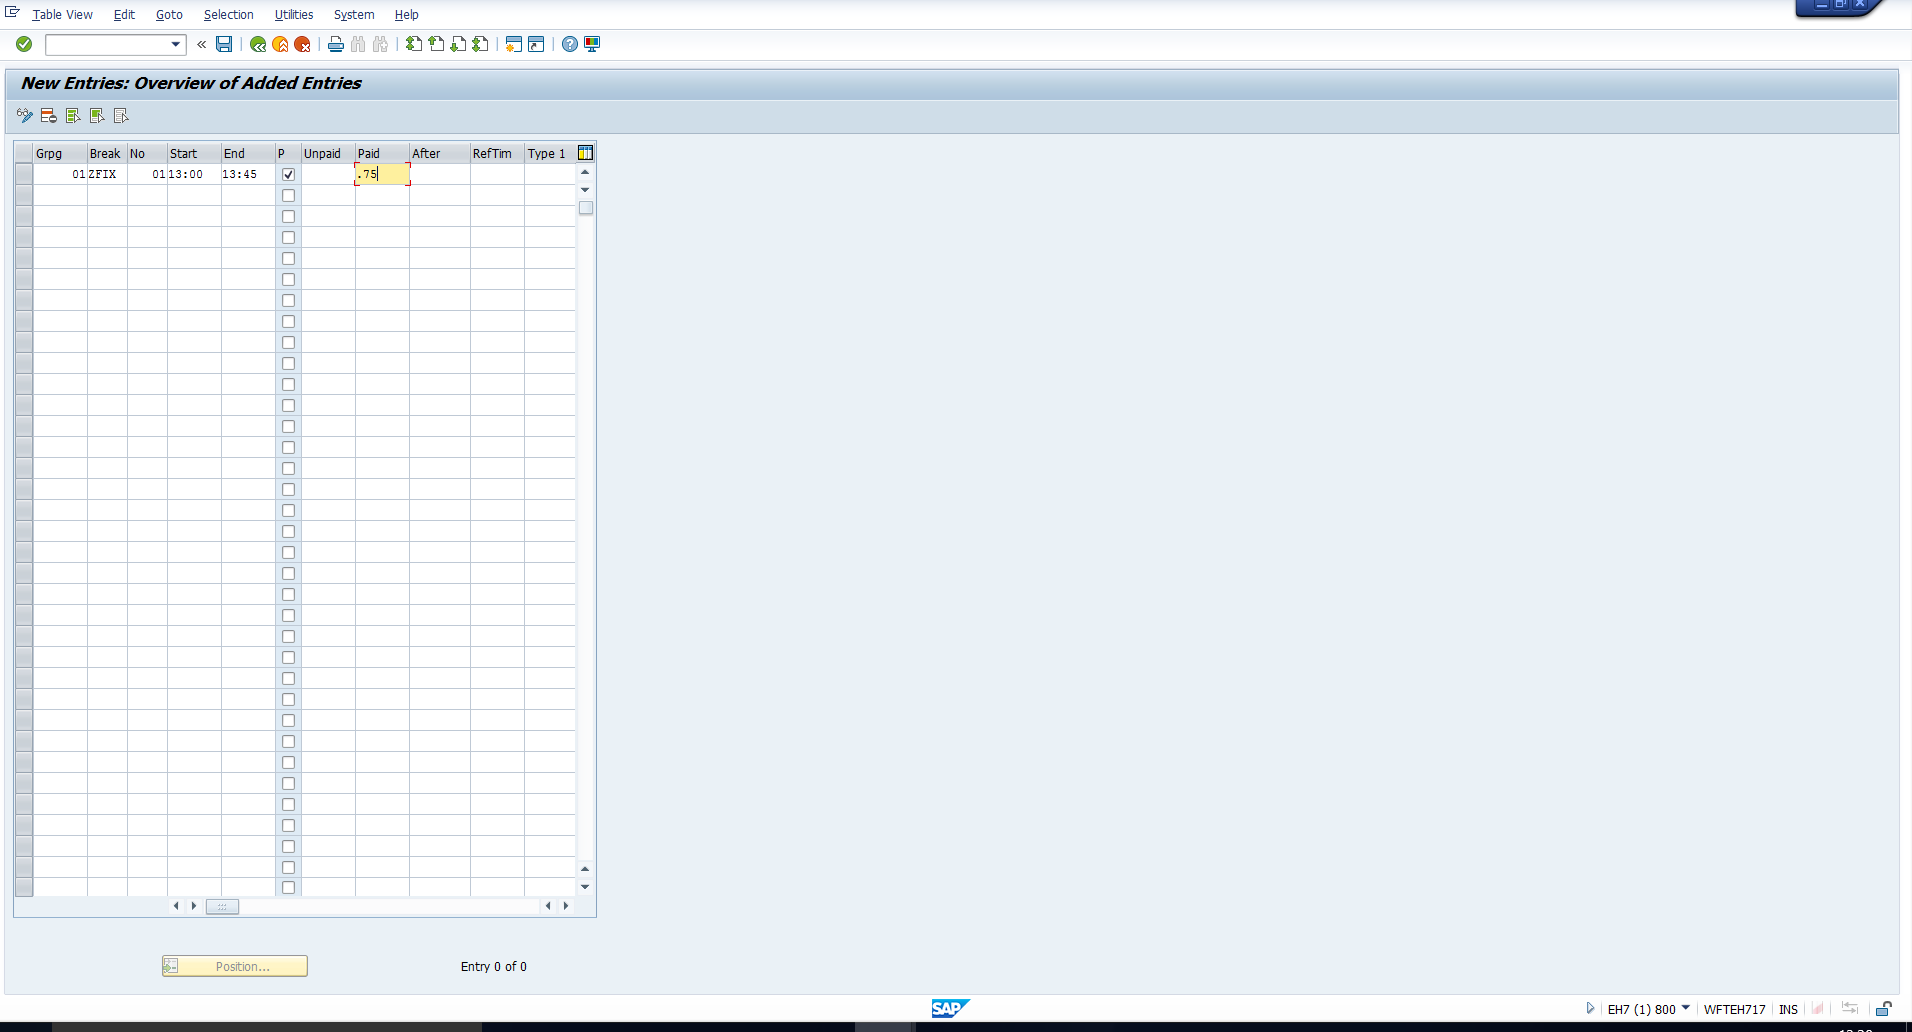 Figure 9: Fixed Break Configuration
Consider that an employee is entitled to a 45 minute paid lunch break anytime between 12 pm and 2 pm. To configure this, enter the values as highlighted in Figure 10 and save the record. Note that since the paid break hours must be indicated as a decimal value, 45 minutes has been denoted as 0.75 hours.
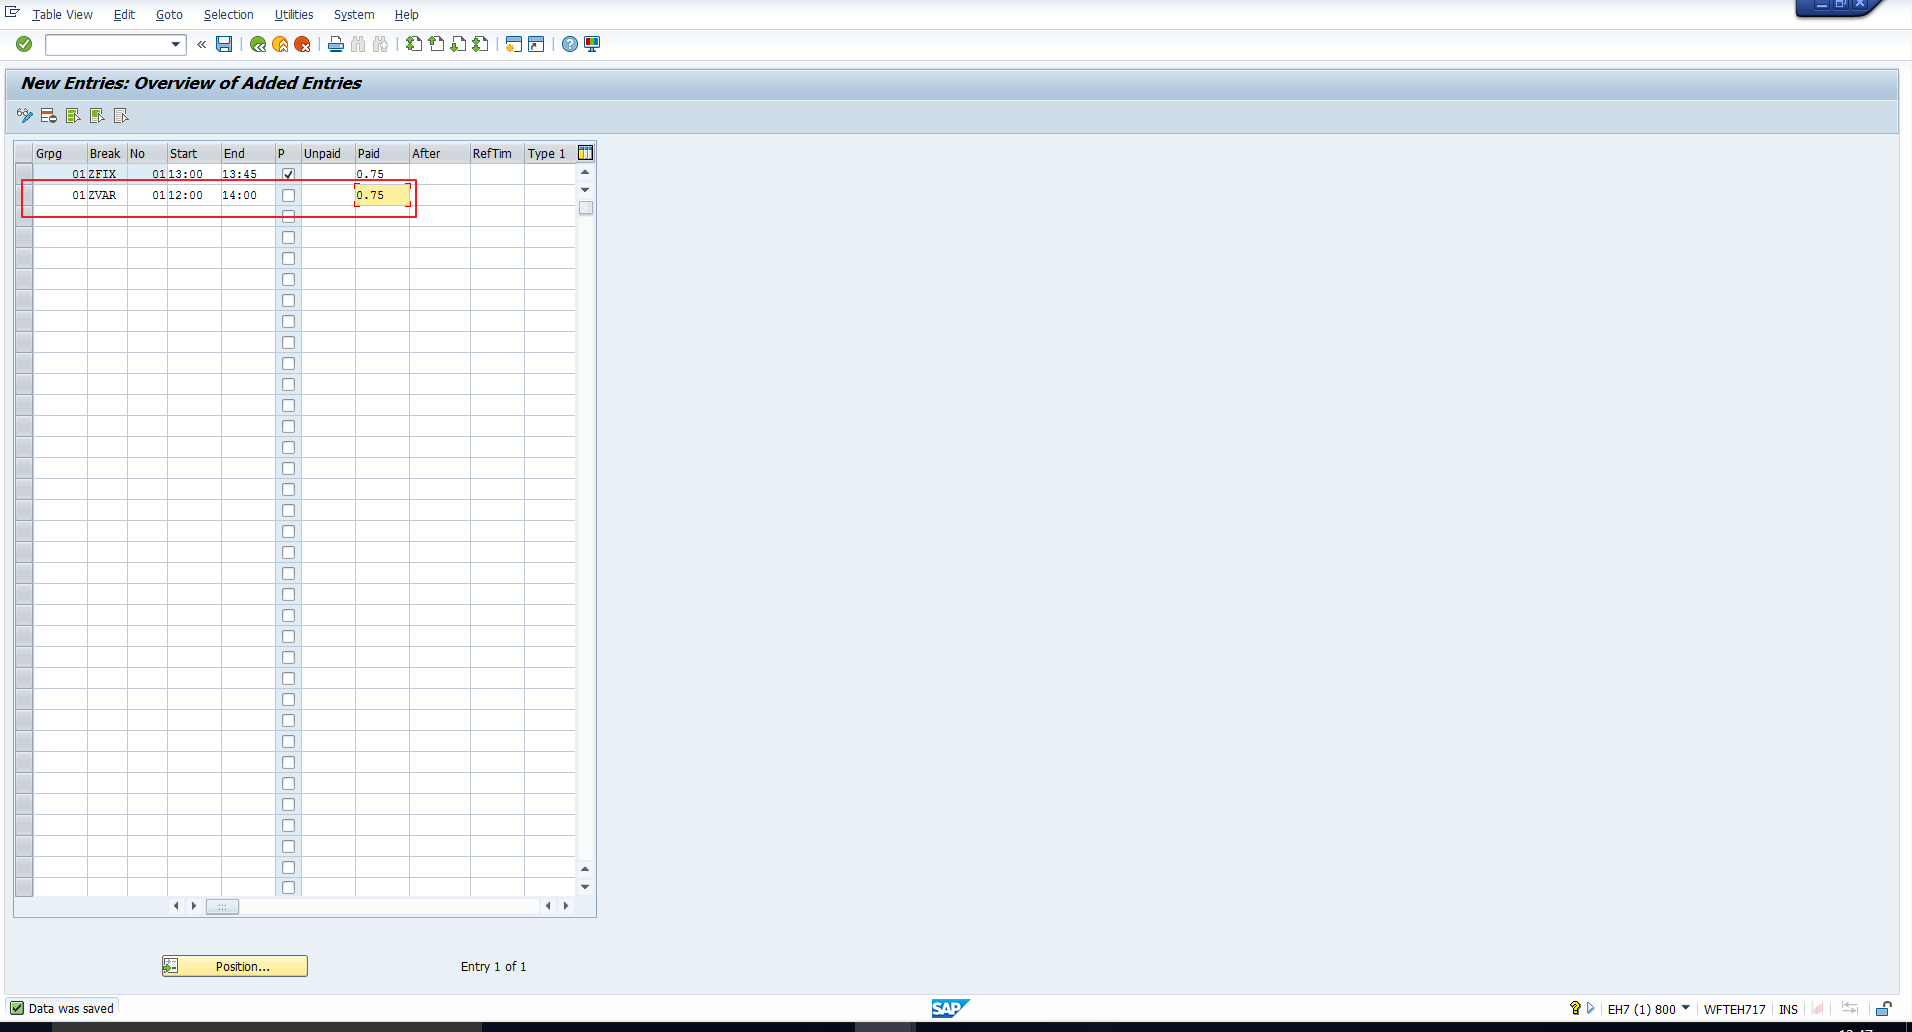 Figure 10: Variable Break Configuration
Assume that an employee can take an unpaid 15 minute break after working for 3 hours. To configure this, enter the values as illustrated in Figure 11 and save the record.
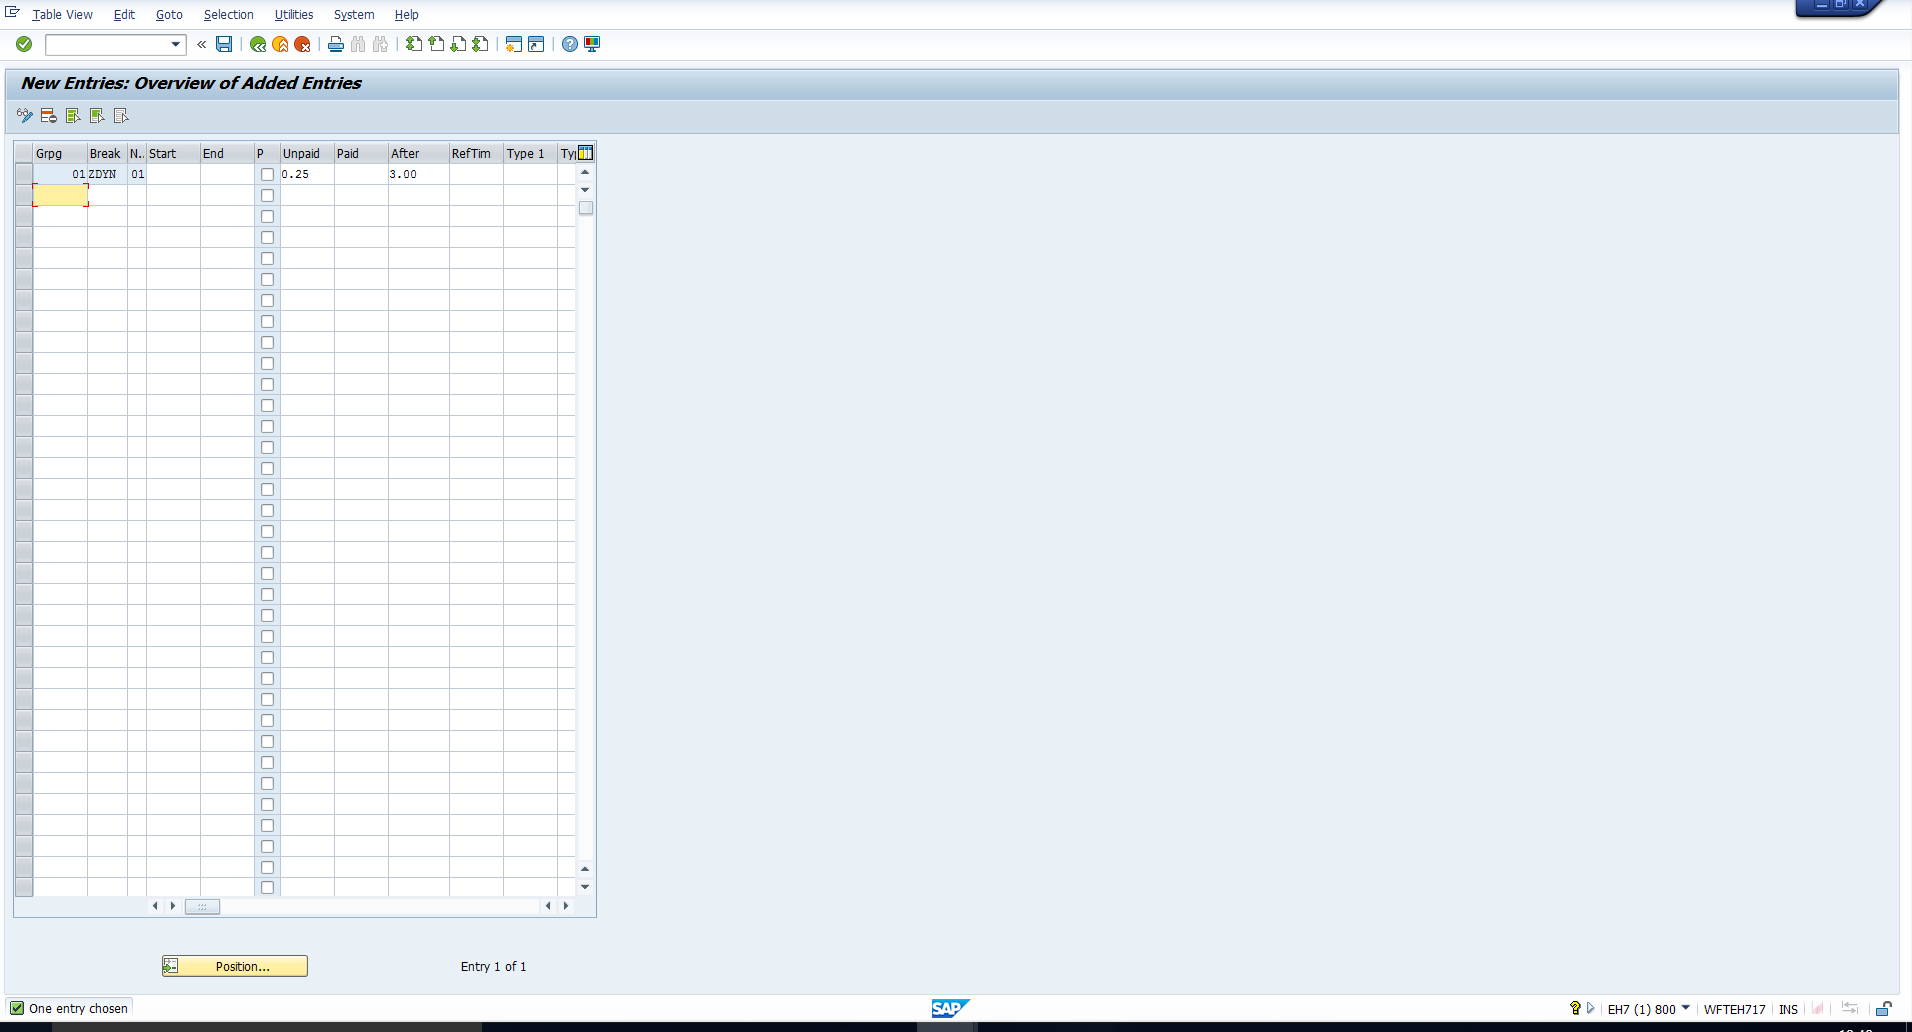 Figure 11: Dynamic Break Configuration
—