Users Online
· Members Online: 0
· Total Members: 188
· Newest Member: meenachowdary055
Forum Threads
Latest Articles
Articles Hierarchy
Jenkins Tutorial for Beginners
How to Create Users & Manage Permissions: Role Strategy Plugin
Generally, in a large organization, there are multiple, separate teams to manage and run jobs in Jenkins. But managing this crowd of users and assigning roles to them can prove troublesome.
By default, Jenkins comes with very basic user creation options. You can create multiple users but can only assign the same roles and privileges to them. This not ideal, especially for a large organization.
The Role Strategy Plugin allows you to assign different roles and privileges to different users.You will first need to install the plugin in your Jenkins environment.
In this tutorial, you will learn
How to Create/Add a User
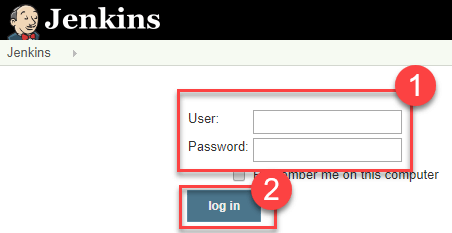
Step 1) Login to your Jenkins dashboard by visiting http://localhost:8080/
If you haven't installed Jenkins in your local server, go to the appropriate URL and access your dashboard by using your login credentials.
Step 2) You will now see options to create new users and manage current users.
Step 3)
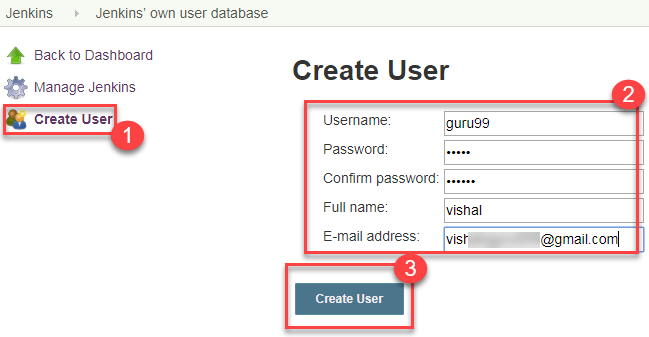
- Under Manage Jenkins, Click Create User
- Enter User details like password, name, email etc.
- Click Create User
Step 4) User is created
Install Role Strategy Plugin
There are two methods for installing plugins in Jenkins:
- Installing it through your Jenkins dashboard
- Downloading the plugin from Jenkins website and installing it manually.
Step 1)
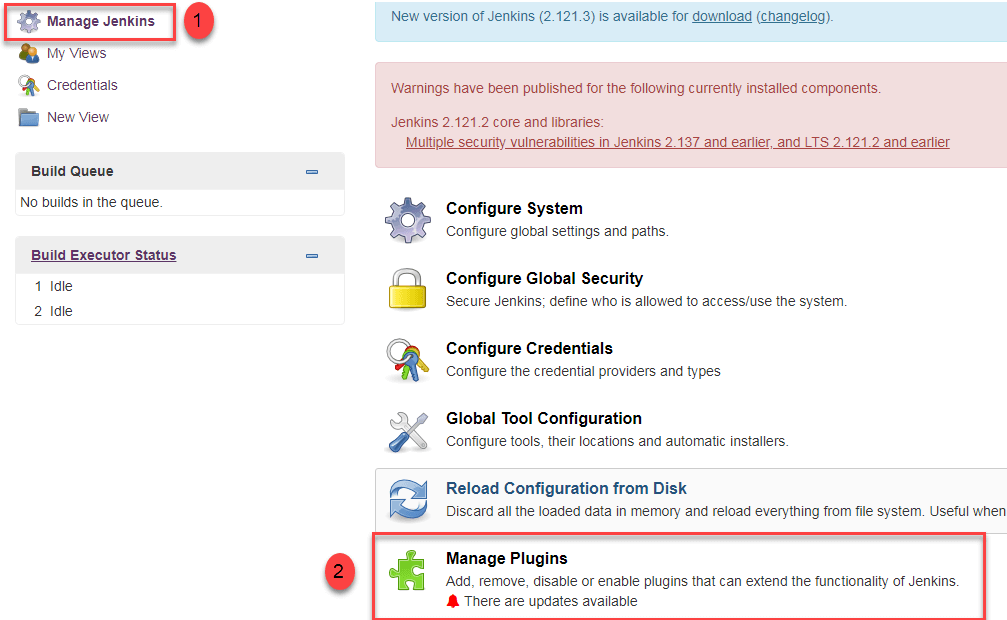
1. Go to Manage Jenkins
2. Click on the Manage Plugins option
Step 2)
- In available section, screen Search for "role".
- Select Role-based Authorization Strategy plugin
- Click on "Install without restart" (make sure you have an active internet connection)
Step 3)
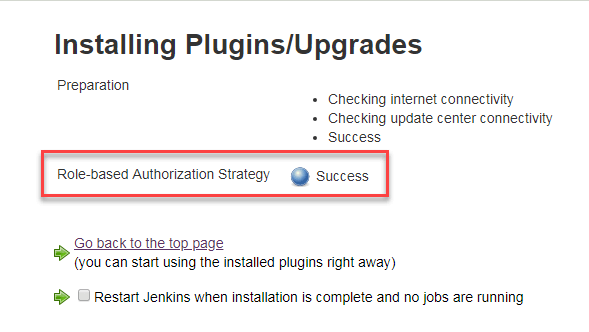
Once the plugin is installed, a "success" status will be displayed.
Click on Go back to the top page.
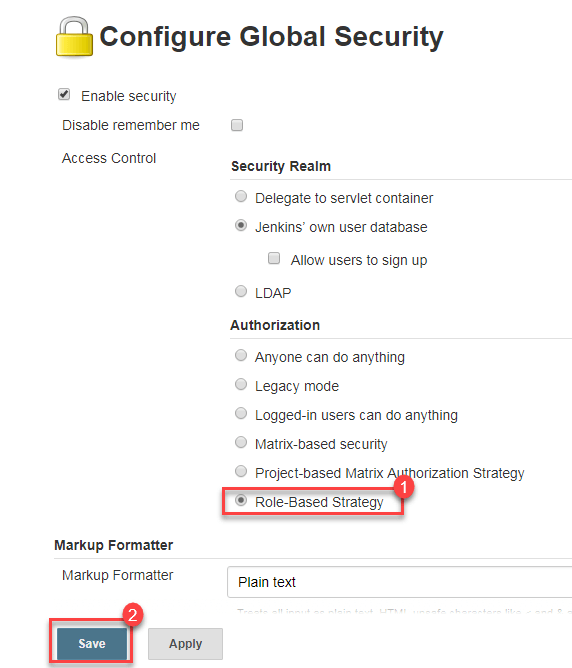
Step 4) Go to Manage Jenkins -> Configure Global Security -> Under Authorization, select Role Based Strategy. Click on Save.
Create Roles
In this step, we shall learn to certain roles to a single user or a group of users.
Step 1)
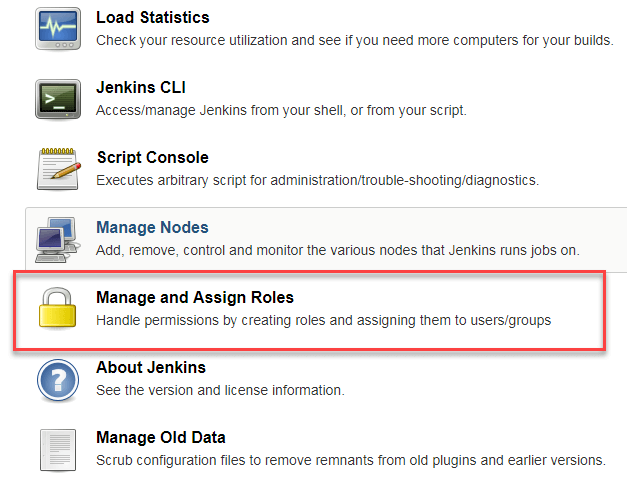
1. Go to Manage Jenkins
2. Select Manage and Assign Roles
Note: that the Manage and Assign Roles option will only be visible if you've installed the role strategy plugin.
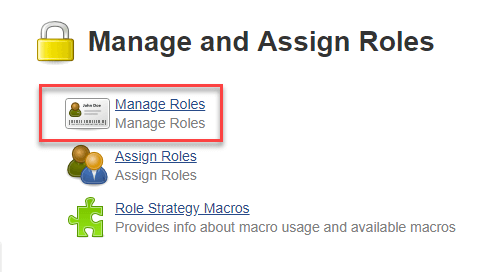
Step 2) Click on Manage Roles to add new roles based on your organization.
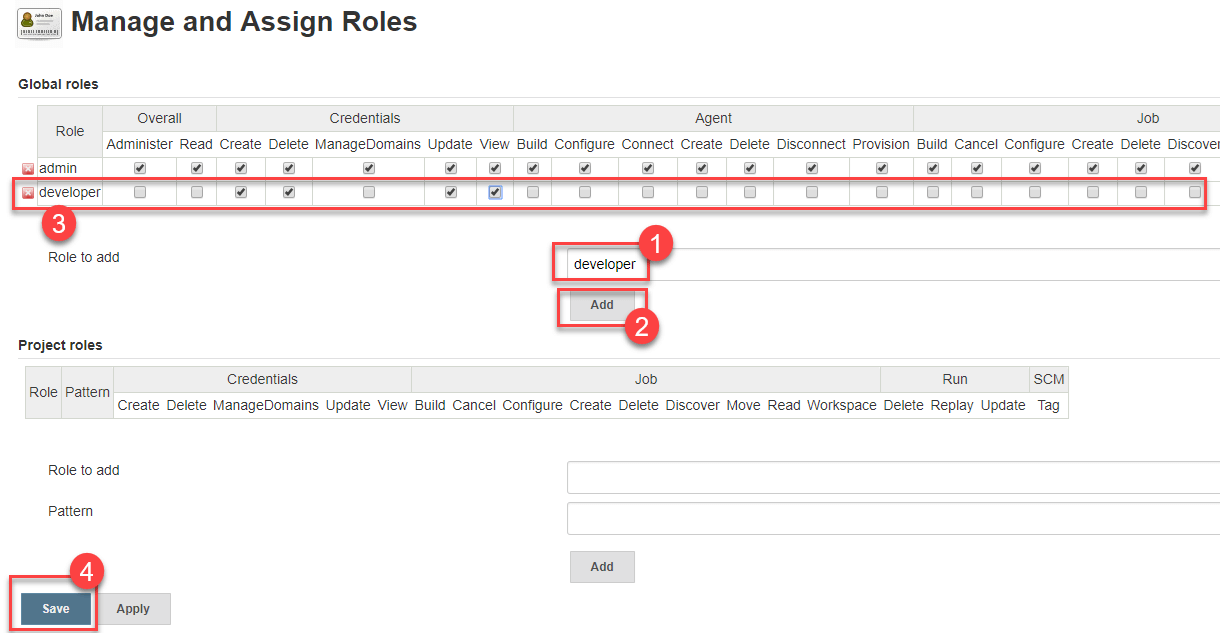
Step 3) To create a new role called "developer",
- Type "developer" under "role".
- Click on "Add" to create a new role.
- Now, select the permissions you want to assign to the "Developer" role.
- Click Save
Assign a Role
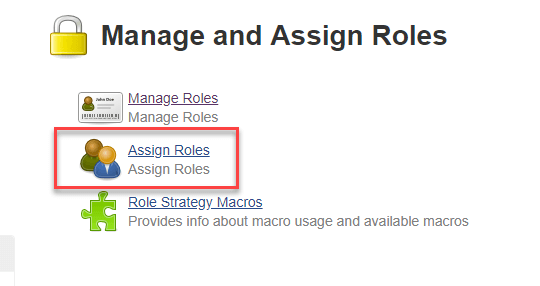
Step 1) Now that you have created roles, let us assign them to specific users.
- Go to Manage Jenkins
- Select Manage and Assign Roles
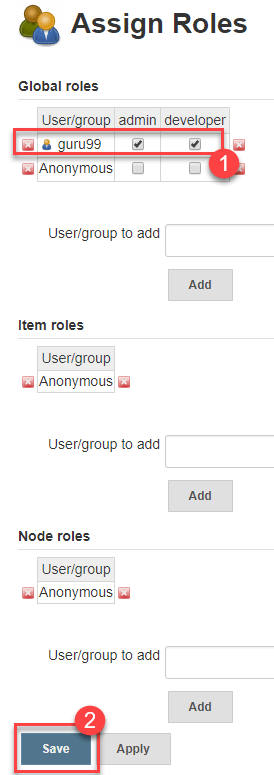
Step 2) We shall add the new role "developer" to user "guru99"
- Selector developer role checkbox
- Click Save
You can assign any role to any user, as per your need.
Project Roles
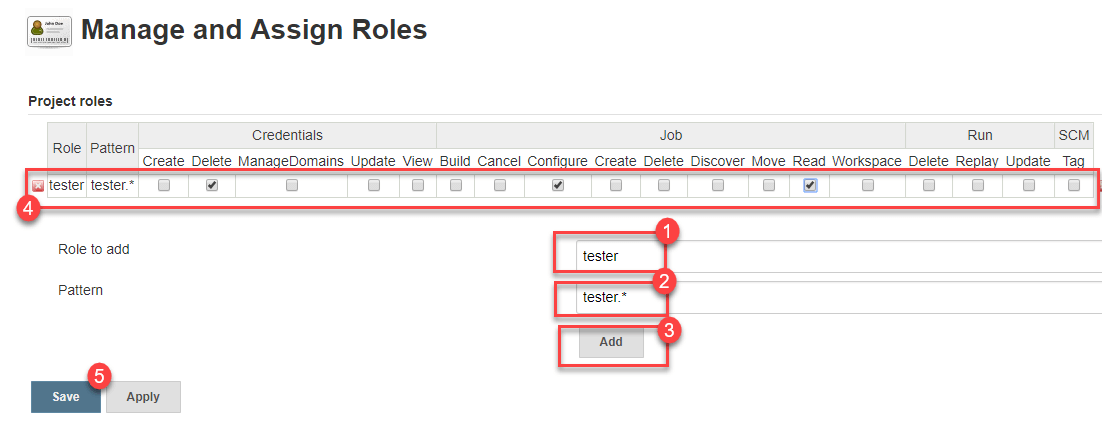
You can create project specific roles under Project Roles.
Step 1) In Manage and Assign Roles
- Enter a role as "tester"
- Add a pattern to this by adding tester.*, so that any username starting with "tester" will be assigned the project roles you specify.
- Click Add
- Select privileges
- Click Save

