Introduction to Django Architecture
The Django is a free and open-source web application framework that is written in Python language. This framework is used in place of servlets, PHP, javascript to build web application backend part. The initial version of Django is released on 15th July 2005, which is developed by Django Software Foundation. The recent release of version 2.2.7 of the Django framework was done on 4th November 2019. Now we will learn about Django architecture with MVT.
The main advantages of Django is to make the creation of complicated database included web applications as easy as possible, it is fast, many components are available implicitly, scalability and good security. Now, getting into the architecture of Django; it follows MVT.
Django Architecture
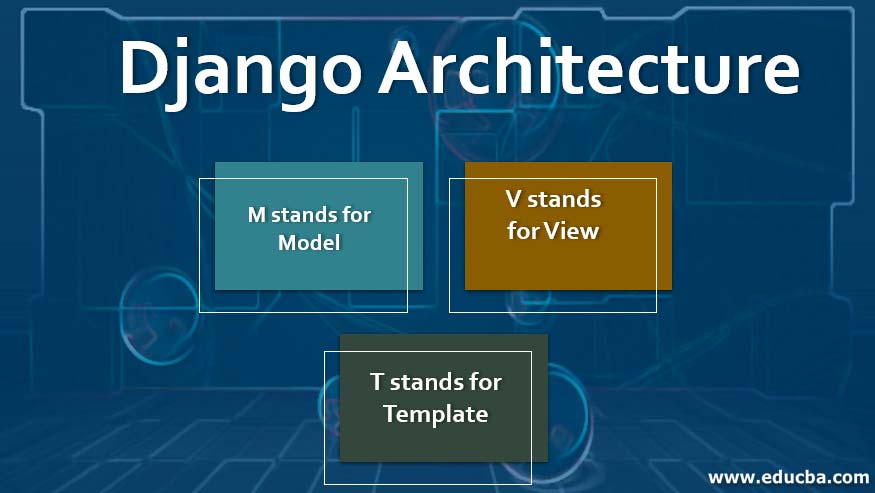
As mentioned, Django follows the MVT framework for architecture.
- M stands for Model
- V stands for View
- T stands for Template
MVT is generally very similar to that of MVC which is a Model, View, and Controller. The difference between MVC and MVT here is the Django itself does the work done by the controller part in the MVC architecture. Django does this work of controller by using templates. Precisely, the template file is a mixture of HTML part and Django Template Language also known as DTL.
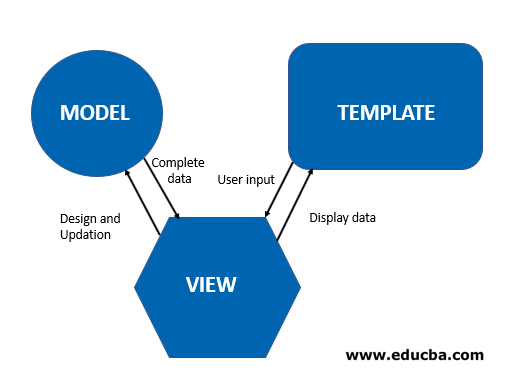
Below is an architecture diagram for MVT.

The Template handles the UI and architecture part of an application. The view does the logical part of the application and interacts with the Model to get the data and in turn modifies the template accordingly. Here as already mentioned, Django works as a controller and gets a URL that is linked to the view part of the application and thus transports the user responses to the application. This complete interaction is dealt with this Django MVT architecture. When we create a project, there would some default files that would be created.
![]()
I used the above command to create a new project in my my_projects folder. Now let me show you the files that got created in the empty folder once the above command has been executed. These are the files that got created under the project first that we created.

There is, in turn, one more folder and a manage.py file that has been created. Now going into the first folder, we can observe the below files.

So the above files are those that got created automatically once a new project has been created.
- urls.py: As we know that our web page has to deal with many links, all the mappings from one page to others can be done here.
- wsgi.py: This is used to deploy our project.
- manage.py: Gives us a URL where the project can be displayed.
![]()
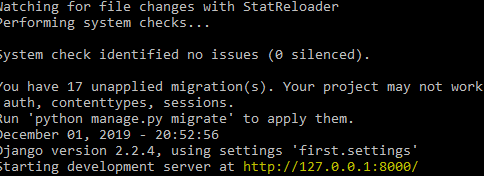
After running this command, the output is as follows.
Output:

Check the output by using the URL in any web browser. We have learned about this, as there should be some start in learning how to create a project on your own and work on it to clearly understand how the MVT architecture runs using Django with Python.
Django Architecture Model
- In Django, the model does the linking to the database and each model gets mapped to a single table in the database. These fields and methods are declared under the file models.py
- With this linking to the database, we can actually each and every record or row from that particular table and can perform the DML operations on the table.
- Django.db.models.The model is the subclass that is used here. We can use the import statement by defining as from django.db import models.
- So after defining our database tables, columns and records; we are going to get the data linked to our application by defining the mapping in settings.py file under the INSTALLED_APPS.
Django View
- This is the part where actually we would be mentioning our logic. This coding is done through the python file views.py
- This view also sends responses to the user when the application is used, to understand briefly, we can say that this view.py can deal with HttpResponse.
- Now, after creating a view, how can we link it to our application? How do you think that the system is going to understand to display a particular view? This can be done by mapping the views.py in urls.py file. As already mentioned, urls.py keeps track of all those different pages that we created and hence map each of them.
Django Template
- This template helps us to create a dynamic website in an easy manner. The dynamic website deals with dynamic data. Dynamic data deals with a scenario where each user is displayed with their personalized data; as Facebook feeds, Instagram feeds, etc.
- The configuration of the template is done in settings.py file under INSTALLED_APPS. So python code would search for the files under the template subdirectory. We can create an HTML file or import any dynamic web page from the browser and place it under the template folder.
- And after that our usual linking of this file in urls.py and views.py to get a response is mandatory.
- In this way after linking all these together and running the server, we can get our web application ready.
Django Template Language
In short, it is called as DTL. Django template has its own syntax in rendering the data on to the web page. For displaying a dynamic variable, the variable name is written inside the curly braces; denoted by “{{variable_name}}”. And to write if conditions, the syntax would be defined as: {% if condition %}. The same would be followed for the end if syntax also. Django uses render function in DTL. This render function takes three parameters.
- Request
- Mentioning the path of template in settings.py
- Parameters that contain all variables and can create as many as possible.
By these render functions we can have our DTL to make dynamic web pages.
Conclusion
So, this is how the it works. The main python files are used to link with each other to display our web page are settings.py, view.py, and urls.py
Once we define our logic here respectively we can have a workflow linking the database, taking user inputs and responses and display dynamic web pages. After installing Django, go through the files and understand the linking between them.

