Introduction to Django Mail
Apart from the smtp mail connectivity offered by python Django also offers the django.core.mail library for handling the email requests. So any email oriented process can be handled by this library in a very flexible manner. We can use this library for sending emails to external users, website admins, website managers, also emails with attachments and even emails to bulk set of mass users can be triggered. It flexibly alterates the email delivery process in the Django based frameworks and the email delivery process is precisely accelerated.
How Django Mail works?
Given below shows how Django Mail works:
1. To connect the email setup to Django the below listed email configurations should be in place at SETTINGS.PY file.
- EMAIL_HOST − SMTP server.
- EMAIL_HOST_USER − SMTP server login credentials.
- EMAIL_HOST_PASSWORD − SMTP server password credentials
- EMAIL_PORT − port of SMTP server.
- EMAIL_USE_TLS or _SSL − True if secure connection.
Code:
#---------- EMAIL HANDELING ----------#
EMAIL_BACKEND = 'django.core.mail.backends.smtp.EmailBackend'
EMAIL_HOST = 'smtp.gmail.com'
EMAIL_PORT = 587
EMAIL_HOST_USER = 'testmysmtpconnection@gmail.com'
EMAIL_HOST_PASSWORD =  '*********'
EMAIL_USE_TLS = True
a. EMAIL_BACKEND
The email backend protocol used is referred in the EMAIL_BACKEND variable. Some among the protocols are SMTP, SMTPS, IMAP etc. By default django uses SMTP protocol, setting the variable to ‘django.core.mail.backends.smtp.EmailBackend’ represents nothing other than SMTP, only thing is it is explicitly mentioned here.
b. EMAIL_HOST
The email host refers the email provider which is expected to reach, it represents the smtp host name of that email provider.
Example:
smtp.mail.yahoo.com
c. EMAIL_PORT
The email port refers the email providers port which is opened for smtp connectivity.
Example:
for yahoo the port number is 465
d. EMAIL_USER
This represents the user name of the email account to be connected.
Example:
user1@gmail.com
e. EMAIL_PASSWORD
This represents the password of the corresponding email account.
f. EMAIL_USE_TLS
This parameter is used to mention whether TLS secure connection need to be turned on or not.
2. The next critical step is the use of django.core.mail.
The django.core.mail library has four methods for handling emails.
- send_mail()
- send_mass_mail()
- mail_admins()
- mail_managers()
a. send_mail()
Syntax:
send_mail(subject, message, from_email, recipient_list, fail_silently=False, auth_user=None, auth_password=None,connection=None, html_message=None)
Description:
This method sends the email and posts the number of messages delivered.
b. send_mass_mail()
Syntax:
send_mass_mail(datatuple, fail_silently=False, auth_user=None, auth_password=None, connection=None)
Description:
Sends mail to a wide set of people, the data tuple is a combination of below elements.
(subject, message, from_email, recipient_list)
c. mail_admins()
Syntax:
mail_admins(subject, message, fail_silently=False, connection=None, html_message=None)
Description:
Sends mail to side admins as the admin names are declared in the ADMIN settings.
d. mail_managers()
Syntax:
mail_managers(subject, message, fail_silently=False, connection=None, html_message=None)
Description:
Sends mail to side Mangers as the Manager names are declared in the MANAGER settings.
Example:
Code:
send_mail(
'Subject',
'Message.',
'from_email@example.com',
['end_email1@example.com', 'end-email2@example.com'],
)
Code:
python -m smtpd -n -c DebuggingServer 127.0.0.1:8001
Output:

Examples of Django Mail
Given below are the examples mentioned :
Example #1
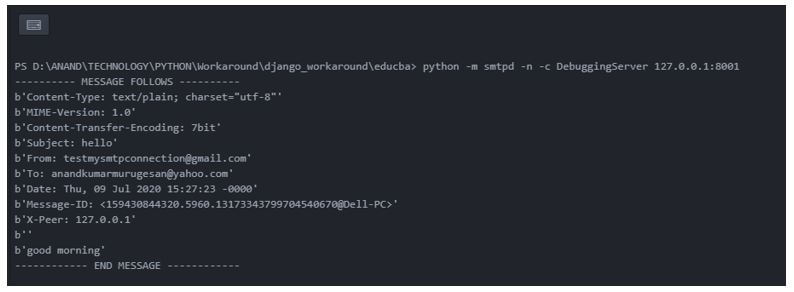
In the first example the email is captured in the temporary smtp server, the server is set up to hear at port 8001. Also the django server localhost id (127.0.0.1) is set as host name here.
a. Make the email configurations in SETTINGS.py file.
SETTINGS.py
Code:
#---------- EMAIL HANDELING ----------#
EMAIL_BACKEND = 'django.core.mail.backends.smtp.EmailBackend'
EMAIL_HOST = '127.0.0.1'
EMAIL_PORT = 8001
EMAIL_HOST_USER = ''
EMAIL_HOST_PASSWORD = ''
EMAIL_USE_TLS = True
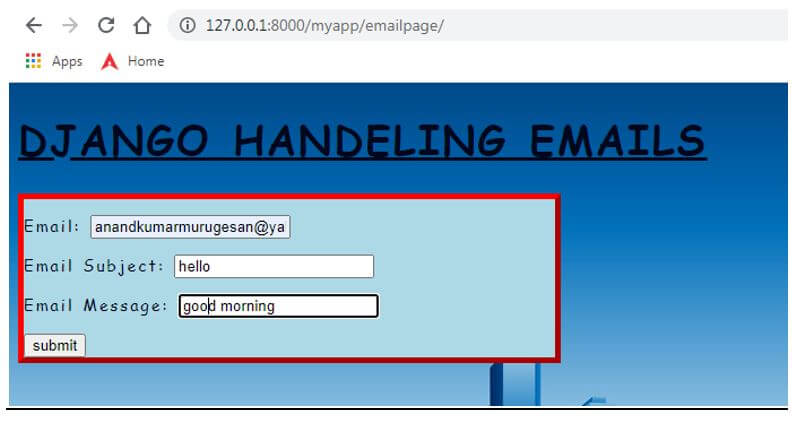
b. Set the view for email processing. This view has three fields passed through the form and the fields are captured from the front end webpage and tagged to the send_email() method for triggering the email.
Views.py
Code:
def email_sending(request):
email = emailform()
if request.method == 'POST':
email_id =  request.POST['email'] email_subject =  request.POST['email_subject'] email_message =  request.POST['email_message'] res = send_mail(email_subject,email_message,'testmysmtpconnection@gmail.com',[email_id],fail_silently = False)
return HttpResponse('%s'%res)
return render(request, 'emailpage.html',{"email":email})
forms.py
Code:
from django import forms
class emailform(forms.Form):
email = forms.EmailField()
email_subject =  forms.CharField()
email_message =  forms.CharField(max_length = 2000)
c. Formulate the template for preparing the webpage.
Code:
<!DOCTYPE html>
<html lang="en" dir="ltr">
<head>
<meta charset="utf-8">
<title>Django App1</title>
{% load static %}
<link href="{% static 'admin/css/font.css' %}" rel="stylesheet">
<style>
body {
background-image: url("{% static 'admin/img/background.jpg' %}");
background-color: #acccbb;
}
.myDiv {
border: 5px outset red;
background-color: lightblue;
text-align: center;
font-family: "Comic Sans MS", cursive, sans-serif;
font-size: 14px;
letter-spacing: 2px;
word-spacing: 1.8px;
text-align: left;
color: #02071C;
font-weight: 200;
text-decoration: none;
font-style: normal;
font-variant: normal;
text-transform: capitalize;
}
</style>
</head>
<body>
<h1> <u> DJANGO HANDELING EMAILS </u> </h1>
<div class="myDiv" style = "max-width:470px;">
<form method =  'POST'>
{{ email.as_p }}
{% csrf_token %}
<input type="submit" class="btn btn-primary" value="submit" style="text-align:center">
</form>
</div>
</body>
</html>
d. Kickstart the email server in debugging mode. Once kickstarted the port of the server will be listening for receiving any messages posted to the port.

Output:
Webpage:

Server port:

Example #2
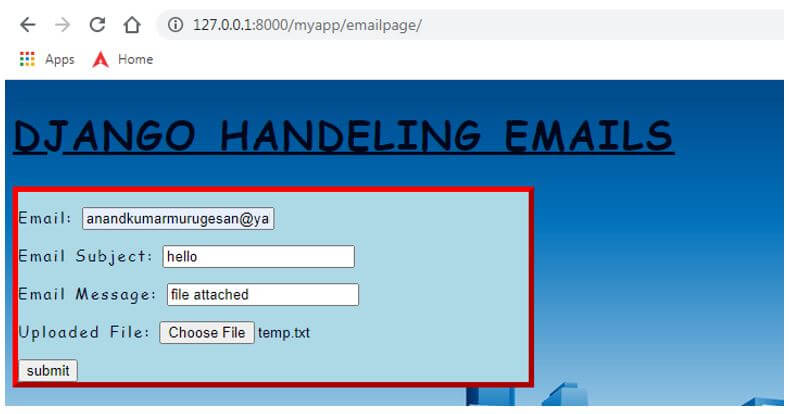
In the Second example the email is triggered using a valid mail account.
a. Make the email configurations in SETTINGS.py file.
SETTINGS.py
Code:
#---------- EMAIL HANDELING ----------#
EMAIL_BACKEND = 'django.core.mail.backends.smtp.EmailBackend'
EMAIL_HOST = 'smtp.gmail.com'
EMAIL_PORT = 587
EMAIL_HOST_USER = 'testmysmtpconnection@gmail.com'
EMAIL_HOST_PASSWORD =  '*********'
EMAIL_USE_TLS = True
b. Formulate the template for preparing the webpage.
Code:
<!DOCTYPE html>
<html lang="en" dir="ltr">
<head>
<meta charset="utf-8">
<title>Django App1</title>
{% load static %}
<link href="{% static 'admin/css/font.css' %}" rel="stylesheet">
<style>
body {
background-image: url("{% static 'admin/img/background.jpg' %}");
background-color: #acccbb;
}
.myDiv {
border: 5px outset red;
background-color: lightblue;
text-align: center;
font-family: "Comic Sans MS", cursive, sans-serif;
font-size: 12px;
letter-spacing: 1px;
word-spacing: 1.7px;
text-align: left;
color: #02061C;
font-weight: 100;
text-decoration: none;
font-style: normal;
font-variant: normal;
}
</style>
</head>
<body>
<h1> <u> DJANGO HANDELING EMAILS </u> </h1>
<div class="myDiv" style = "max-width:470px;">
<form method =  'POST'>
{{ email.as_p }}
{% csrf_token %}
<input type="submit" class="btn btn-primary" value="submit" style="text-align:center">
</form>
</div>
</body>
</html>
Output:
Webpage:

Email snaps:


Conclusion
The process of debugging oriented email setup and trigger email to a real time email SMTP are explained with suitable working examples in the above article.

