In this article, we will show you how to create an Informatica target table using the source definition that exists in the Sources folder. And how to use it as the destination/target table for the transformed data with an example.
For example, If we want to copy or use the source definition as your target definition, this will be the best bet for you.
Create Informatica Target table using Source Definition
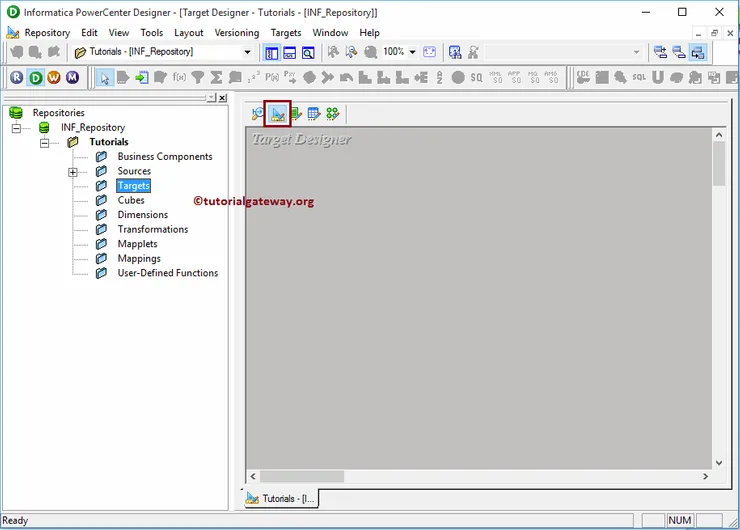
Before we start doing anything, First connect to Informatica repository service with your Admin credentials and then Navigate to Target Designer. Please refer to Target Designer article to understand the Target Designer screen. From the below Informatica screenshot, you can observe that we are in the Target Designer.
TIP: Target Menu in the Menu bar will be available only when you are in the Target Designer section. Otherwise, it won’t show up.
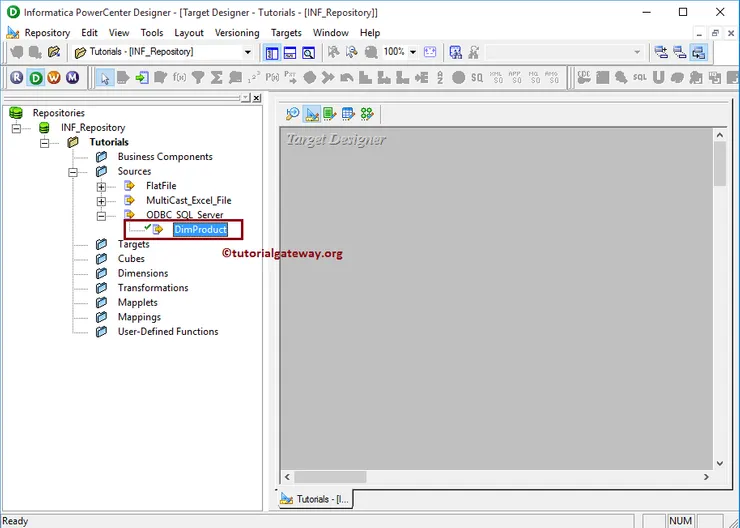
Drag and drop the DimProducts from the Sources subfolder to the Target Designer. The PowerCenter target designer will automatically create an Informatica target table using source definition.
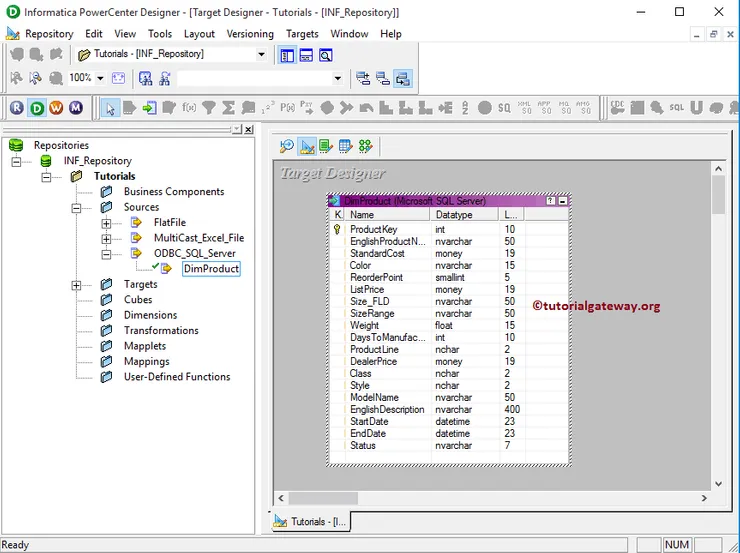
From the below screenshot, under the Targets subfolder, view our newly created target in Informatica and the table definition (Column Names and appropriate data types) inside our workspace.
Although we copied the DimProducts table from source definition, we may not require all the columns present in that table. To resolve this, we can edit the table by Right-click on the table definition and selecting the Edit.. option from the context menu.
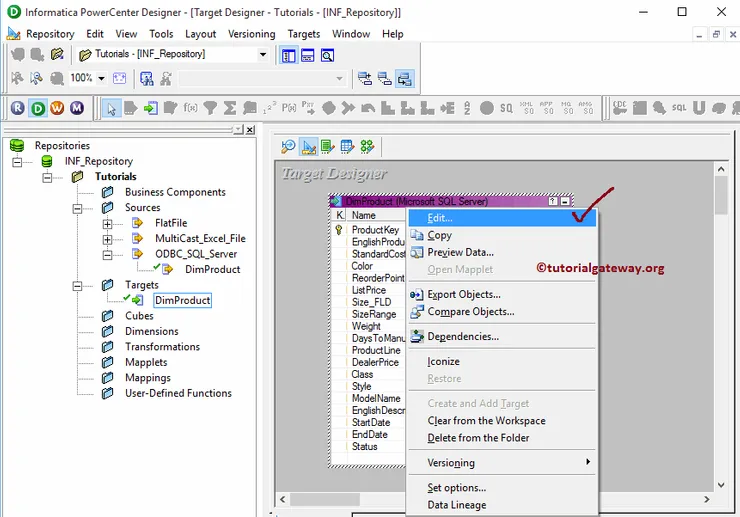
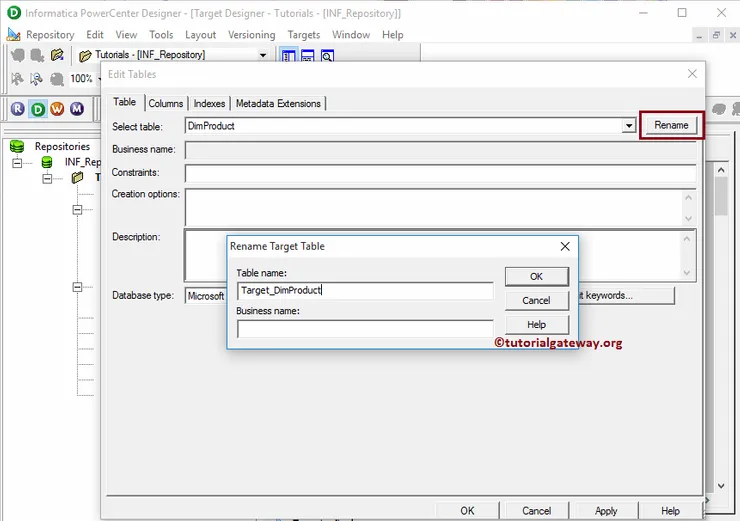
Once you select the Edit.. option, a new window called Edit tables will open. Within the Table tab, we can rename the table name by clicking the Rename button. From the below screenshot, see we are changing the table name from DimProducts to Target_DimProducts
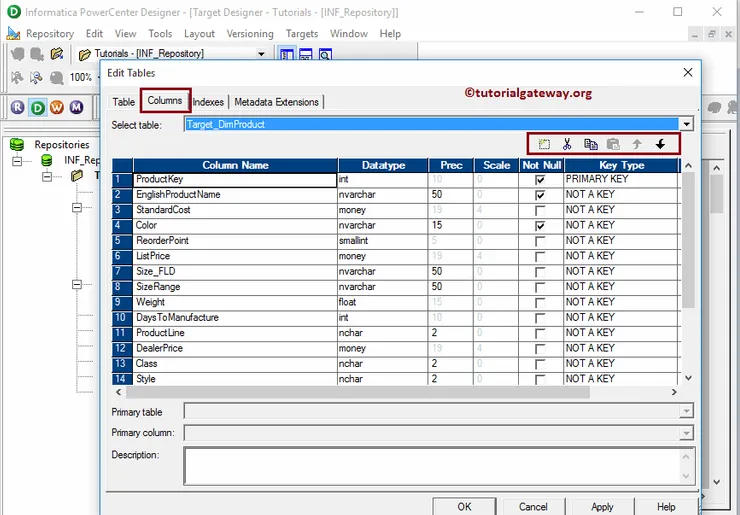
To alter or modify the existing table, we have to navigate to Columns Tab. For example,
- If you want to add new columns then, Please select the first button (before scissors symbol) and add Column Name, Data Type, Precision (if required), Scale (if needed), If it is primary key then change the Key type to primary and checkmark the Not Null option (if your column doesn’t allow null values)
- If you want to delete columns, then select the unwanted columns and click the scissors button.
- You can use the UP and DOWN arrows to move column names up and down
Once editing completed, Click OK to close the Edit tables window
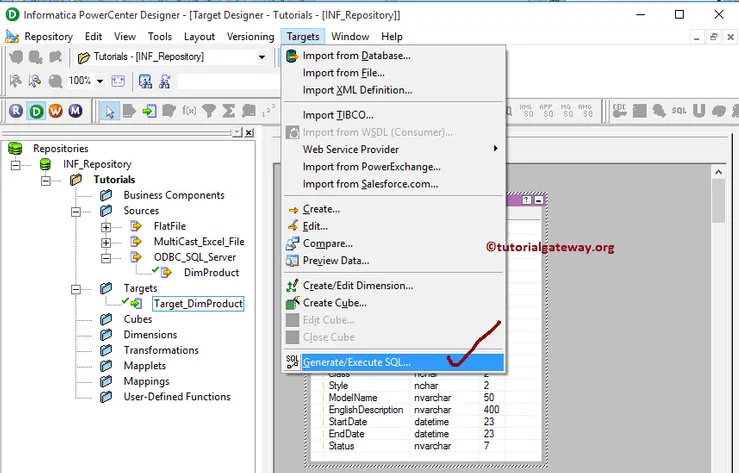
The target tables we created in PowerCenter target designer will exist only in the target designer. If you want to add this table definition to SQL Server, we have to follow the few steps:
Step 1: Please navigate to Targets menu in Menu Bar. From the following screenshot, you can observe the list of available targets inside the PowerCenter Designer. In this example, our task is to create an Informatica target table using source definition. So, we are selecting the Generate/Execute SQL.. option.
Step 2: Once you select the Generate/Execute SQL.. option, a new window called Database Object Generationwindow will open. Before we start using these properties, let us see them in detail:
Generate from: Here we have two options:
- All tables: If you want to generate and execute the SQL file for all the tables that exist in our Target Designer then, you have to select this option.
- Selected tables: If you want to generate and execute the SQL file for the selected table(s) in our Target Designer, you have to choose this option.
Generation options: This section holds multiple options:
- Create Table: If you want to create a new table in our database then, Please check mark this option.
- Create Primary Key: If you want to add a primary key to that table then, Please check this option.
- Foreign Key: If you want to add a Foreign key to that table then, Please checkmark this.
- Create Index: If you want to create a new index on our table then, Please check mark this option.
- Drop Table: If you want to drop the existing table (if there is any with the same name) from our database then, Please check mark this option.
- Drop Index: If you want to drop the index name then, Please check mark this option.
Let us see the action behind each button:
- Connect: This button will help you to connect with a relational database using ODBC Connection
- Generate SQL: This button will generate the SQL query of the target definition.
- Edit SQL File: This button will help you to edit the generated SQL file and allow us to make changes as per our requirements.
- Execute SQL File: This button will execute the generated SQL file.
- Generate and Execute: This button will generate the SQL query of the target definition and execute the generated SQL file.
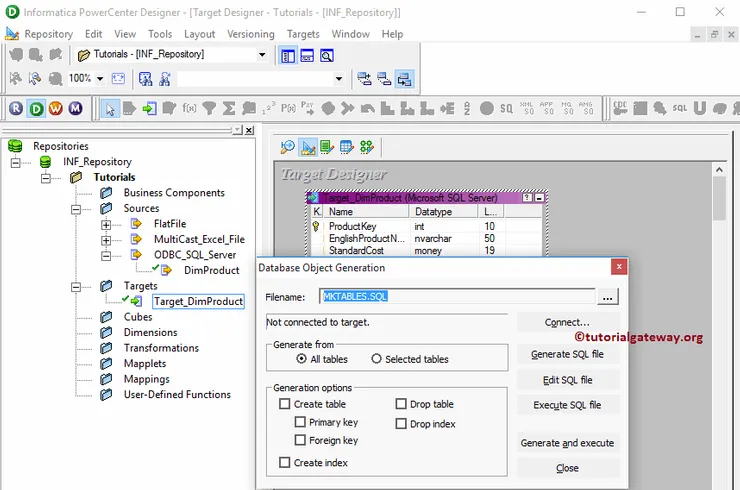
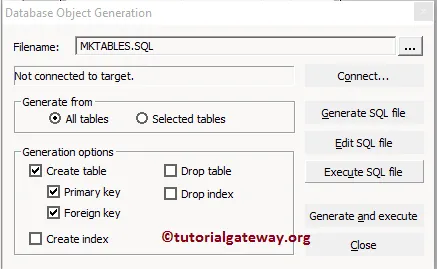
Step 3: From the below screenshot, you can observe that we are selecting Create Table, Create Primary Key, and Create Foreign Key. We are not dropping anything because our database is new and empty.
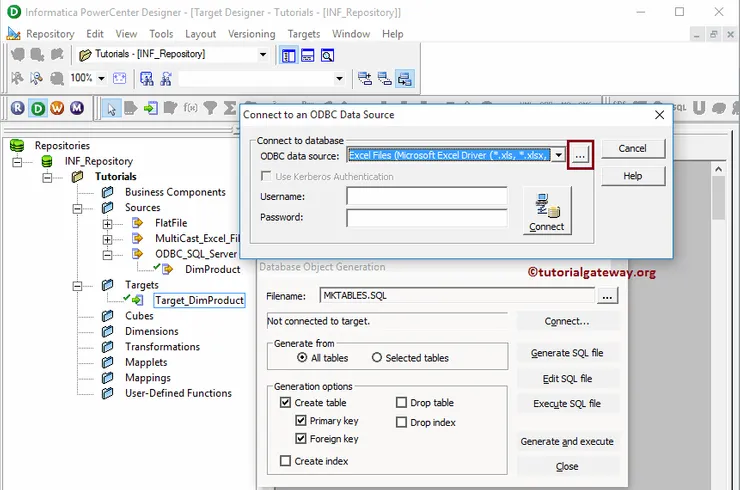
Step 4: Once you click on the connect.. button, Connect to ODBC Data Source window will be opened to select the existing ODBC connection or to create a new one. Currently, we don’t have any so, we are creating a new one by clicking on the … button.
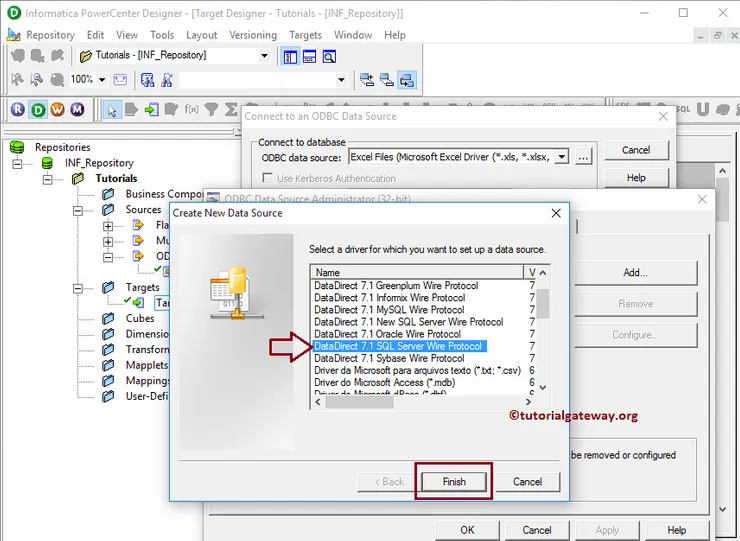
Step 5: Once you click on the … button, ODBC Data Source Administrator Window will be opened to add a new ODBC connection. If you have any, then please select it from the list. In this example, we are adding a new connection so, Click on the Add button. Once you click on the Add button, Create a New Data Source window will open.
Here we have an option to select the required database from the available list. As we said before, we are using SQL Server. So we are choosing the DataDirect 7.1 SQL Server Wire Protocol for this example.
TIP: Please refer to ODBC Connection to understand the steps in detail.
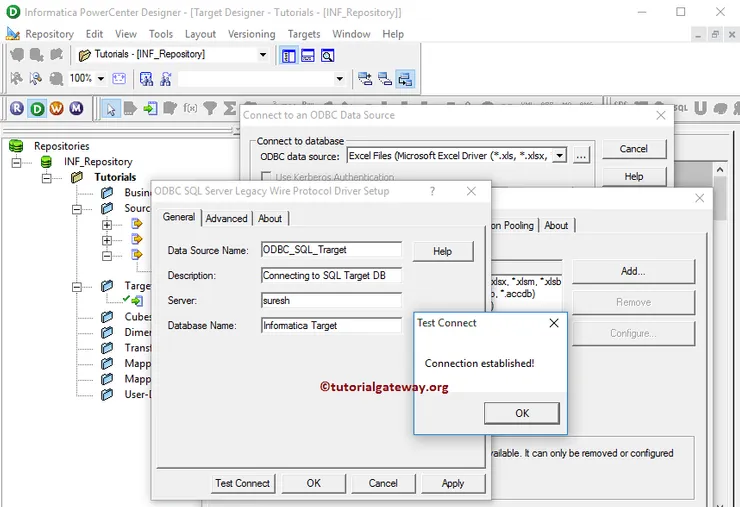
Step 6: It opens a new pop up window called ODBC SQL Server Legacy Wire Protocol Driver Setup. Here we have to fill the required details to connect with our database.
- Data Source Name: Please specify a unique name for this ODBC Connection.
- Description: An accurate description of the connection we are going to establish.
- Server: Please specify the SQL Server instance name.
- Database Name: Here, you have to write the SQL database name from which you want to extract the data. For the time being, we are selecting the below Target.
Once you have done, click the Apply button and then click OK button to close the window
NOTE: Once you fill the required details, It is always advisable to Test your connection using the Test Connection button
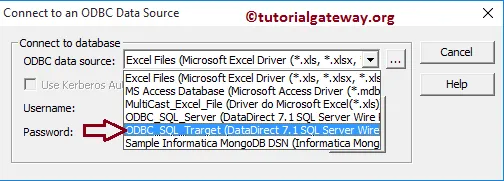
Step 7: From the drop-down list, Please select the ODBC connection that we created now.
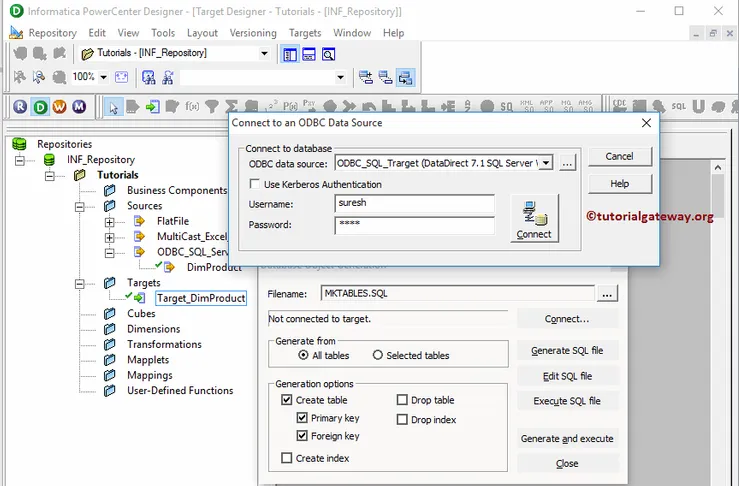
Step 8: Next, We have to provide the credentials required to connect with the respective database. Here we are providing the Username and password of our Microsoft SQL Server 2014 and owner name as dbo.
Once you fill the details, please click on the connect button to connect with the SQL database. After you connected successfully, click on the Generate and Execute button to generate and execute the SQL file
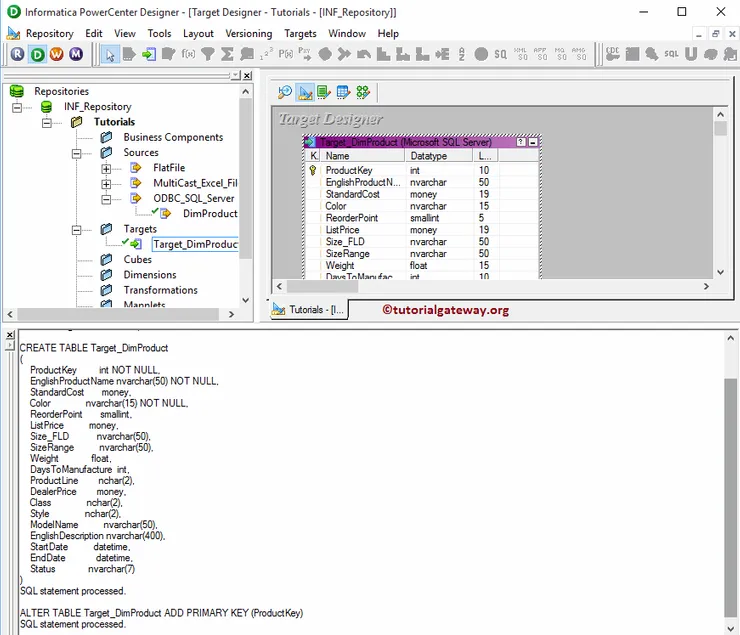
From the below screenshot, you can observe that we successfully created the Target table inside our Microsoft SQL Server 2014.
