Users Online
· Members Online: 0
· Total Members: 188
· Newest Member: meenachowdary055
Forum Threads
Latest Articles
Articles Hierarchy
SketchUp Tutorials
Stop Doing This With Your Sketchup Site Models
In this article, we’re going to be going over what not to do with your Sketchup site models! The 3D warehouse can be a great resource for downloading models, but sometimes topographic models aren’t used in the most effective way. We’ll show you a few different examples and explain how you can turn them into better topographic models. If you’re looking for a more detailed tutorial on typography, check out this one. Otherwise, let’s get started!
Sketchup Site Model Tip #1
In this first example, you can see that the model was created by using survey information from somewhere else and extruding each topographic line up. This can be a good method when physically modeling something, but it can become a bit distracting in a computer model. It’s important to step back and realize that at the end of the day, topographic contours are a tool used to communicate site information. They don’t actually exist. And if the contours were done at a different interval, they’d be completely different. Use them to get what you need and to generally inform your design, but don’t let the literal lines take control.
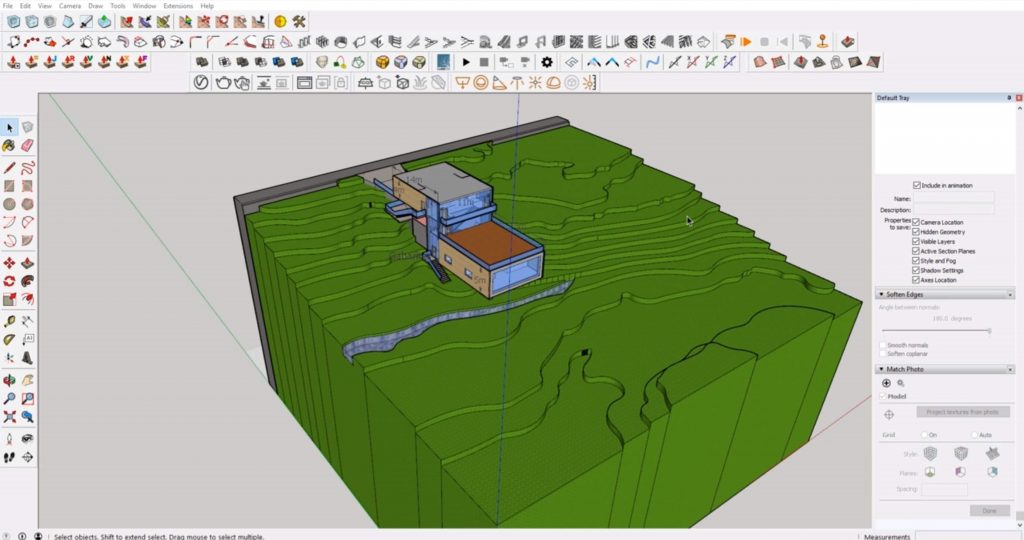
If your site is already like this, how do you fix it?
Delete Faces. Select the top face of the topography and copy it over to another area of your model. Delete the faces. Delete the lines that formed the outline of the extrusion so you are left with just the contour lines.
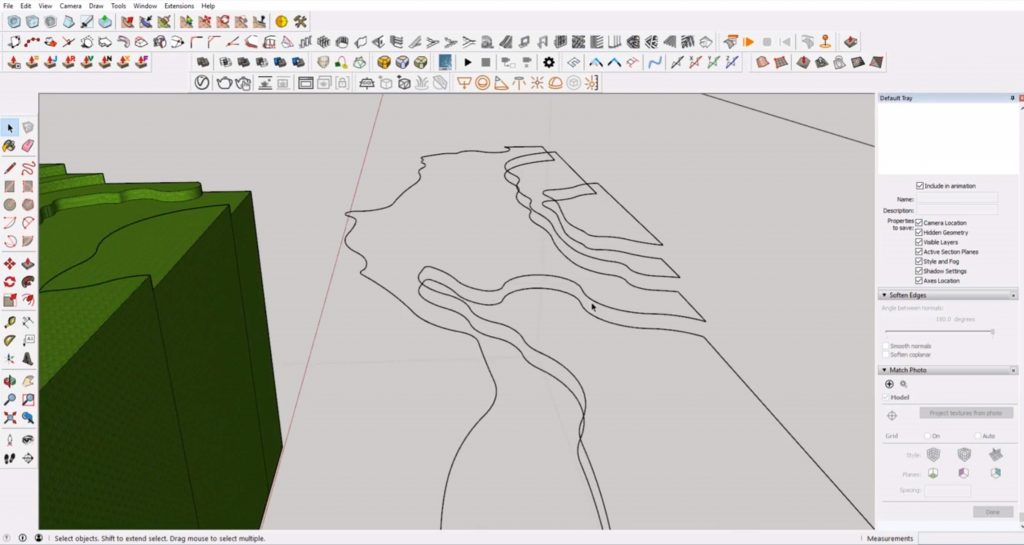
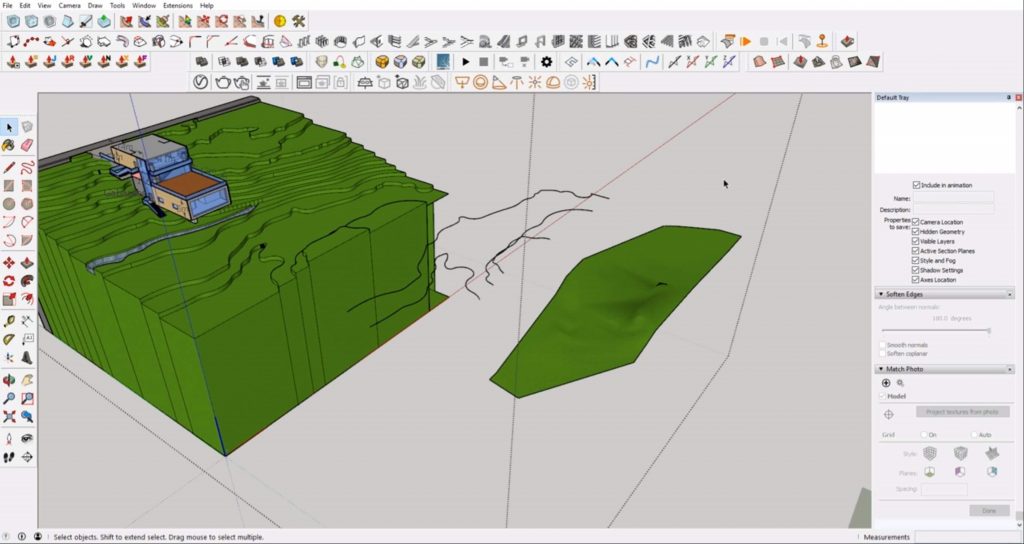
Draw > Sandbox > From Contours. Select the contour lines. Navigate to “draw” in the menu bar. Select “sandbox” > “from contours.” This will create a more realistic representation of the actual topography.
Sketchup Site Model Tip #2
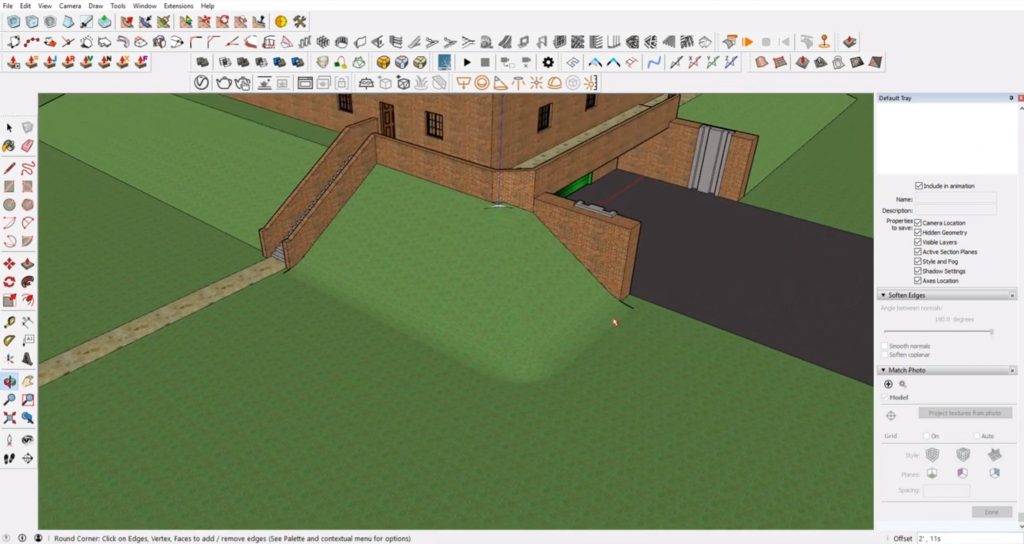
Another example is having the land be too flat. In this model, there are sharp lines with a very geometric slope in the center. To fix this, just soften the edges and corners to make a smoother transition.
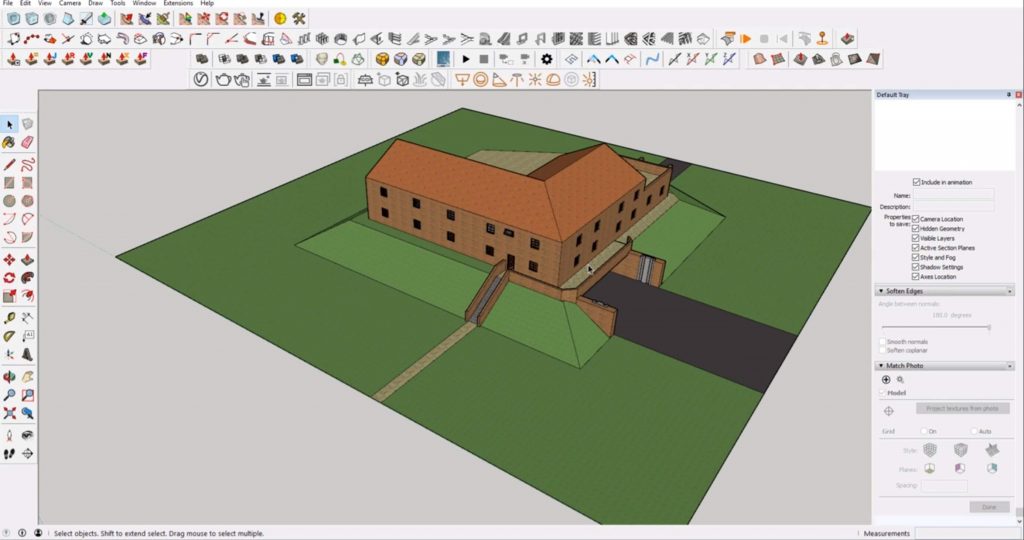
Round Corners. Select the lines where the corners of the slope meet. Click on the “Round Corner” plugin. Change the value of the offset to about 2 feet. Hit enter. Now you have a much smoother transition between the flat land and the slope.
Sketchup Site Model Tip #3
A common modeling method is creating your own topography by triangulation or using a grid. We’re going to show you how to smooth out those lines for either method.
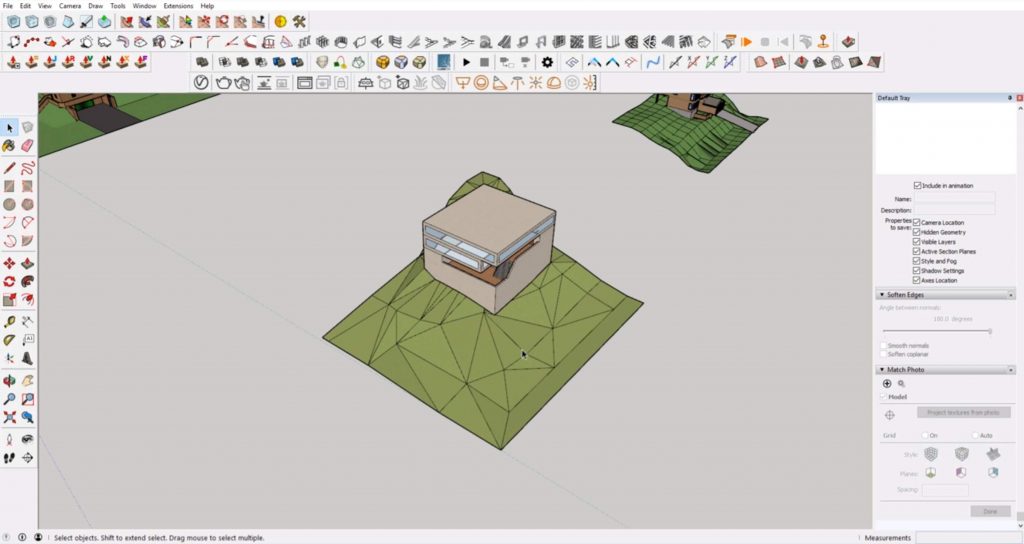
Soften Edges. Select all of the faces. Make sure your default tray is open by going to “window” > “default tray” > “show tray.” Also, make sure “soften edges” is selected. In the “soften edges” section of the “default tray,” use the slider to soften the edges. Most of the lines become dashed lines which means they are now hidden.
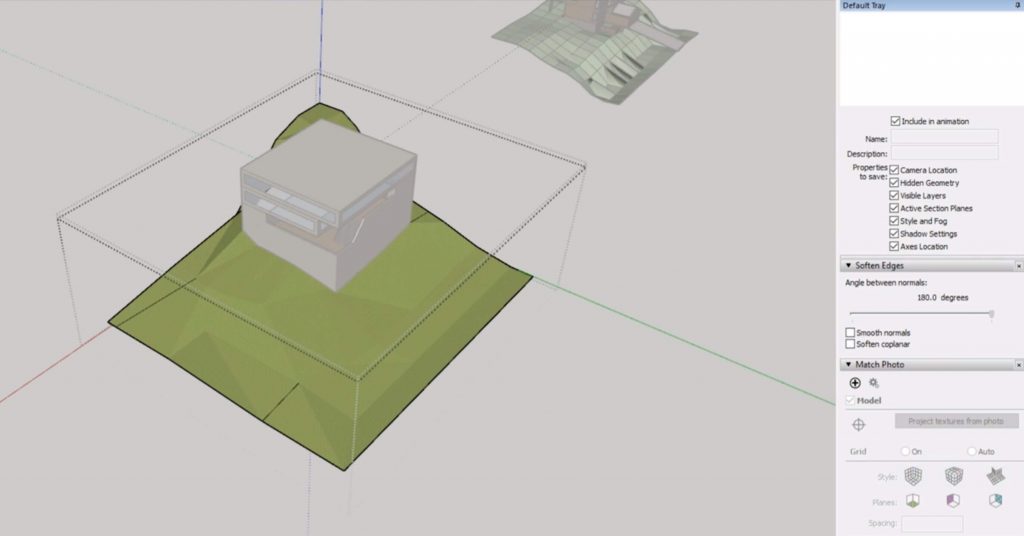
Erase. Hit “E” to open the eraser tool. Hold “ctrl” while scrolling over any additional lines you want to hide.
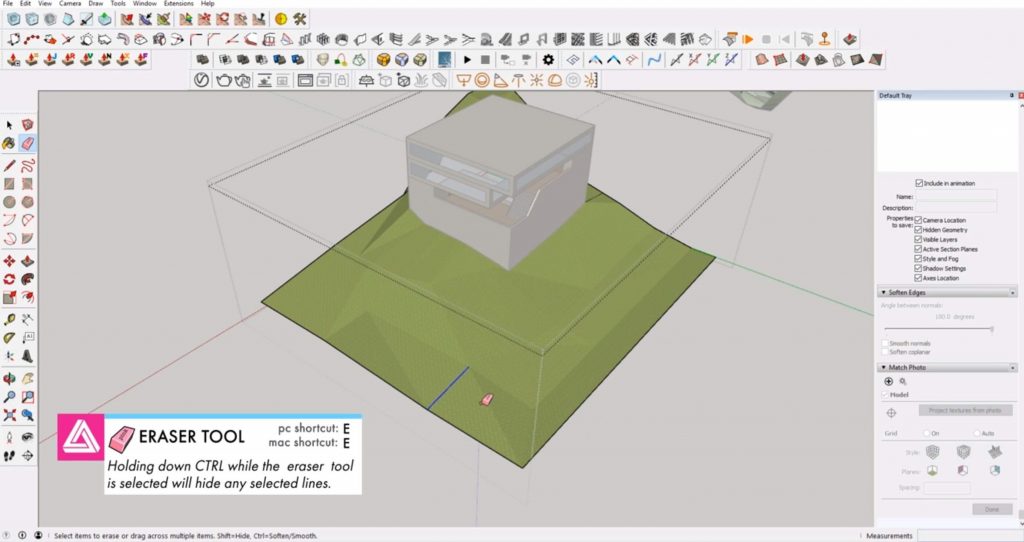
The model looks a lot better already, but we could still smooth out the topography even more.
Copy. Select only the topography from the model and copy it off to the side. You may have to make the topography a “component” if it isn’t already.
Draw Rectangle. Hit “R” to open the rectangle tool. Draw a rectangle underneath the topography, connecting opposite corners.
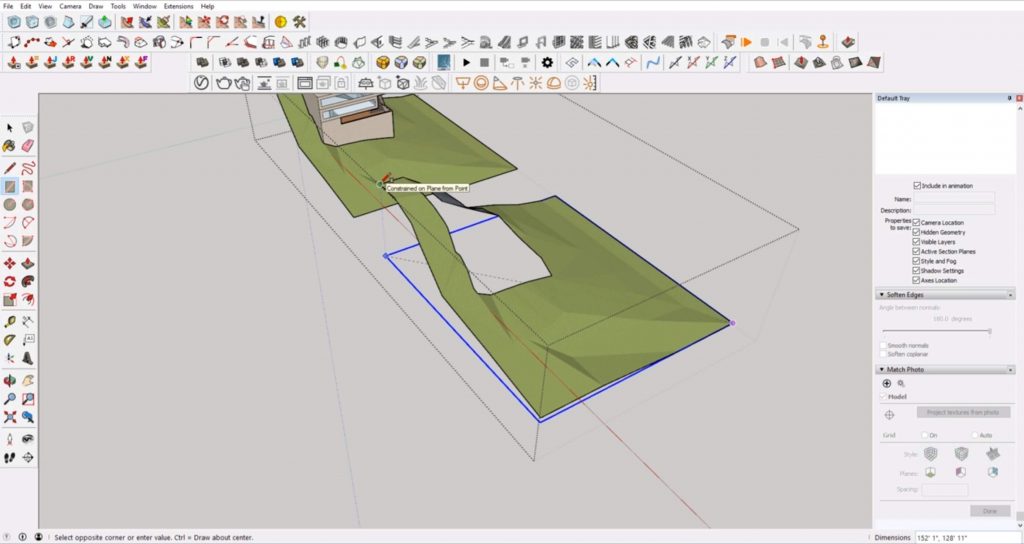
Scale. Select the rectangle. Hit “S” to open the scale tool. Hold “ctrl” and drag the rectangle outward so it is just a bit bigger than the area you are going to cut through. Right-click on the rectangle and select “make group.”
Move. Hit “M” to move and “ctrl” to make a copy. Press the “up” arrow key to lock to the blue axis and type “2*30.” Hit enter. Now you have 30 planes that are equally spaced 2 feet apart over your topographic model.
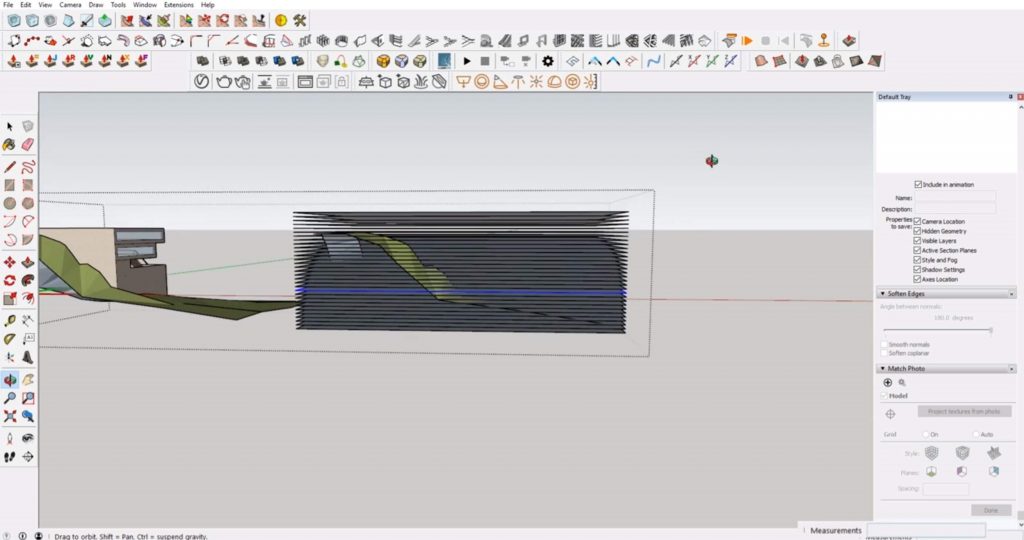
Intersect Faces. Select all of the planes and topography. Right-click and select “intersect faces” > “with selection.” Delete the planes. If there are any strange intersecting points, just use the eraser tool to hide the lines.
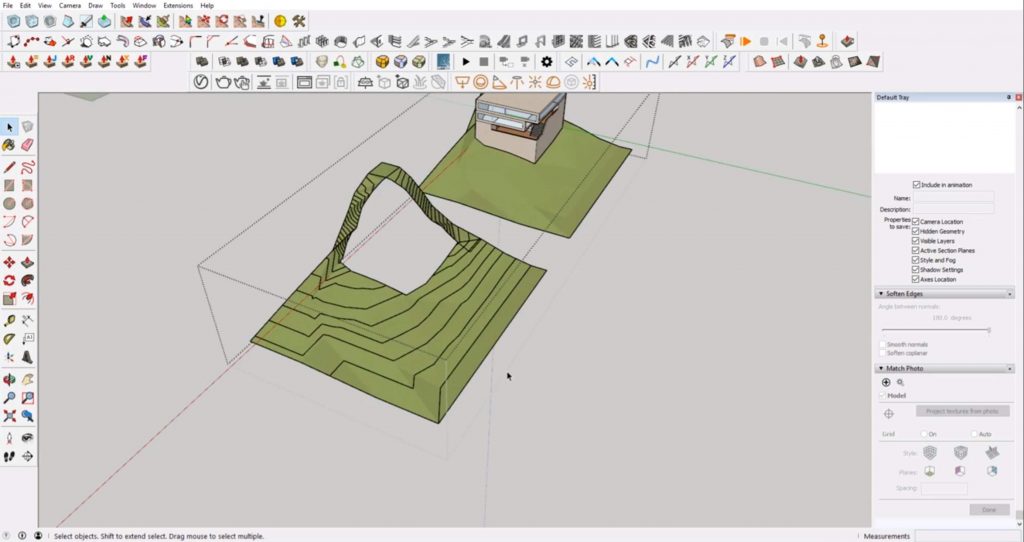
Explode. Right click on the topography and select “explode.” Right-click on a piece of the topography and click “select” > “all with same material.” Hit delete. You may have to do some cleanup and delete a few stray lines.
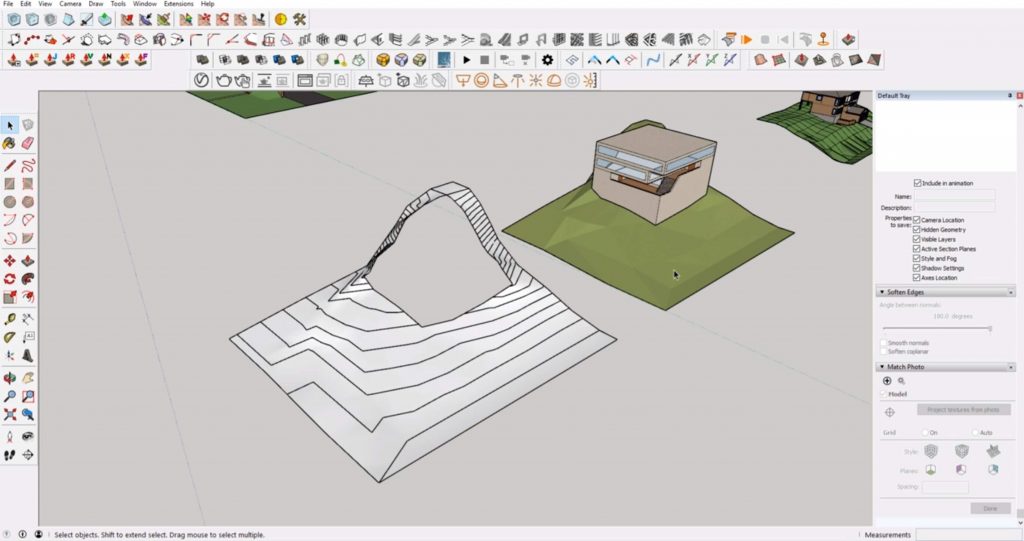
Draw > Sandbox. > From Contours. Just like we did in the first example, you can now create a smoother topography by selecting the contours and going to “draw” > “sandbox” > “from contours.” You can always delete any extra lines that may interfere with your architectural model.
If you’re looking for more tips for your Sketchup site models, check out our full list of tutorials here! What tutorial do you want to see next? Let us know in the comments!


