Power BI Conditional column generates a new column based on the condition that we specify — for example, creating an appraisal column based on employee performance, etc. Let me show you how to add a Conditional Column in Power BI with example.
How to add Conditional Column in Power BI
To demonstrate this Power BI Conditional Column, we are going to use the SQL table that we imported in Enter Data article.
To add a conditional column, please click the Edit Queries option under the Home tab.

Clicking the Edit Queries option opens a new window called Power BI Power Query Editor. In this example, we are going to use the Sales column.

First, go to Add Column Tab. Under this tab, you can see the Conditional Column button. You can use this button to add the conditional column to this table.
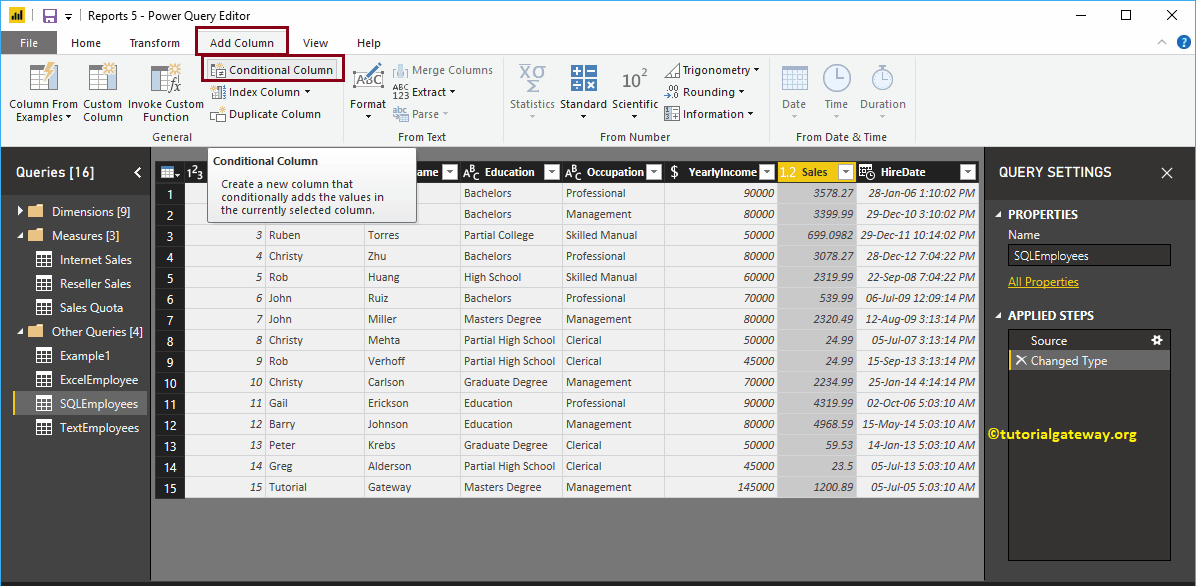
Clicking the Power BI Conditional Column button opens the following window.

We changed the Column name as Rating. Next, we selected the Column name as Sales
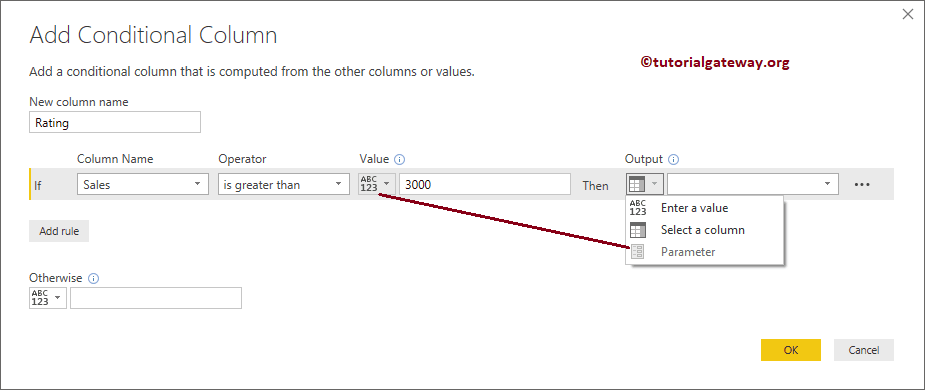
Next, we selected the Operator as greater than, and value as 3000. Within the Values or Output text box, either you can give the static values, or you can select the column.

We added the first Rule – If Sales is greater than 3000, then return Excellent inside the rating Column. Next, click the Add rule button to add a new rule.
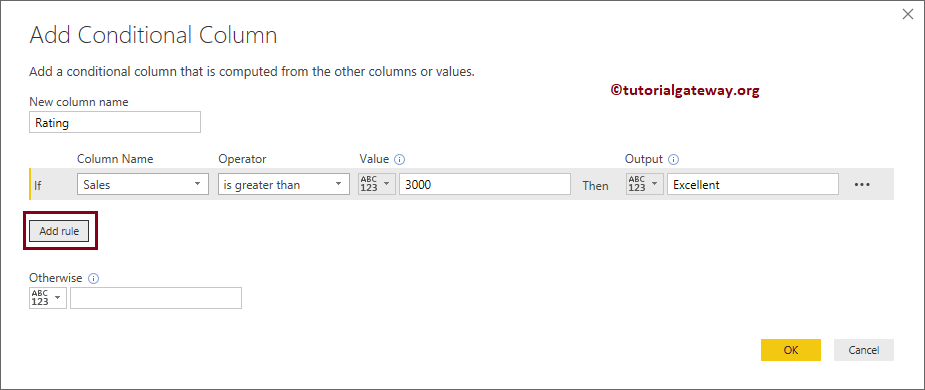
As you can see from the screenshot below, we added two more rules. Remember, this is the same as the Else If Statement in SQL.

You can use the ….. button to move selected Rule to up and down, or you can delete it as well. For now, we are leaving as it is, and click the OK button

From the screenshot below, you can see the new column with the information that we specified in the conditional column. Next, hit the Close & Apply option under the Home tab to apply these changes.
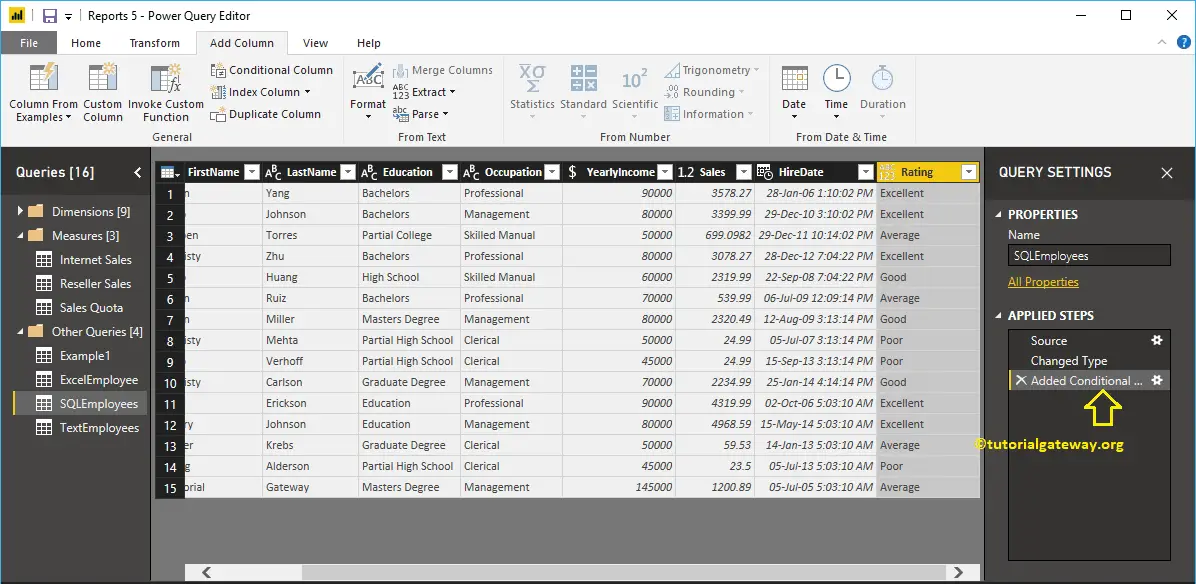
Now you can see the new Power BI Conditional Column called rating under the SQL Employees table.